I'm spending a year at Kyoto University away from Tucson AZ. I have a
simple nostalgia plan. But first, for those unfamiliar with Kyoto, let
me briefly introduce the city:
[This is a horizontally scrollable image. Click for full size.]
A panorama view of Kyoto that I took in summer 2016 looking west from
Daimonji-yama (大文字山) right behind the Ginkaku-ji (銀閣寺) near
Kyoto University. JR Kyoto station is right by Kyoto Tower on the left
of the picture. Way beyond that to the south is Osaka (not visible
here). The Kamo river (Kamogawa; 鴨川) and the Keihan (京阪) line that
runs along its eastern bank goes north-south through the commercial
center of the city (roughly at Shijo (四条) which runs east-west),
about halfway between Kyoto University and Kyoto Tower in the
picture. At Shijo and Kawaramachi (河原町) which runs north-south, we
can find the Hankyu (阪急) terminus. The Keihan Demachiyanagi (出町柳)
terminus is close by the Kyoto University area. Arashiyama (嵐山) by
the hills in the distance (to the right) is served by the Randen (嵐電)
tram from Shijo at Omiya (大宮), website is here. Kurama (鞍馬), up in the
hills to the north, is served by the Kirara (きらら) Eiden (叡電)
train from Demachiyanagi next to the Keihan terminus. There are of
course other lines, but these are the ones I want to collect.
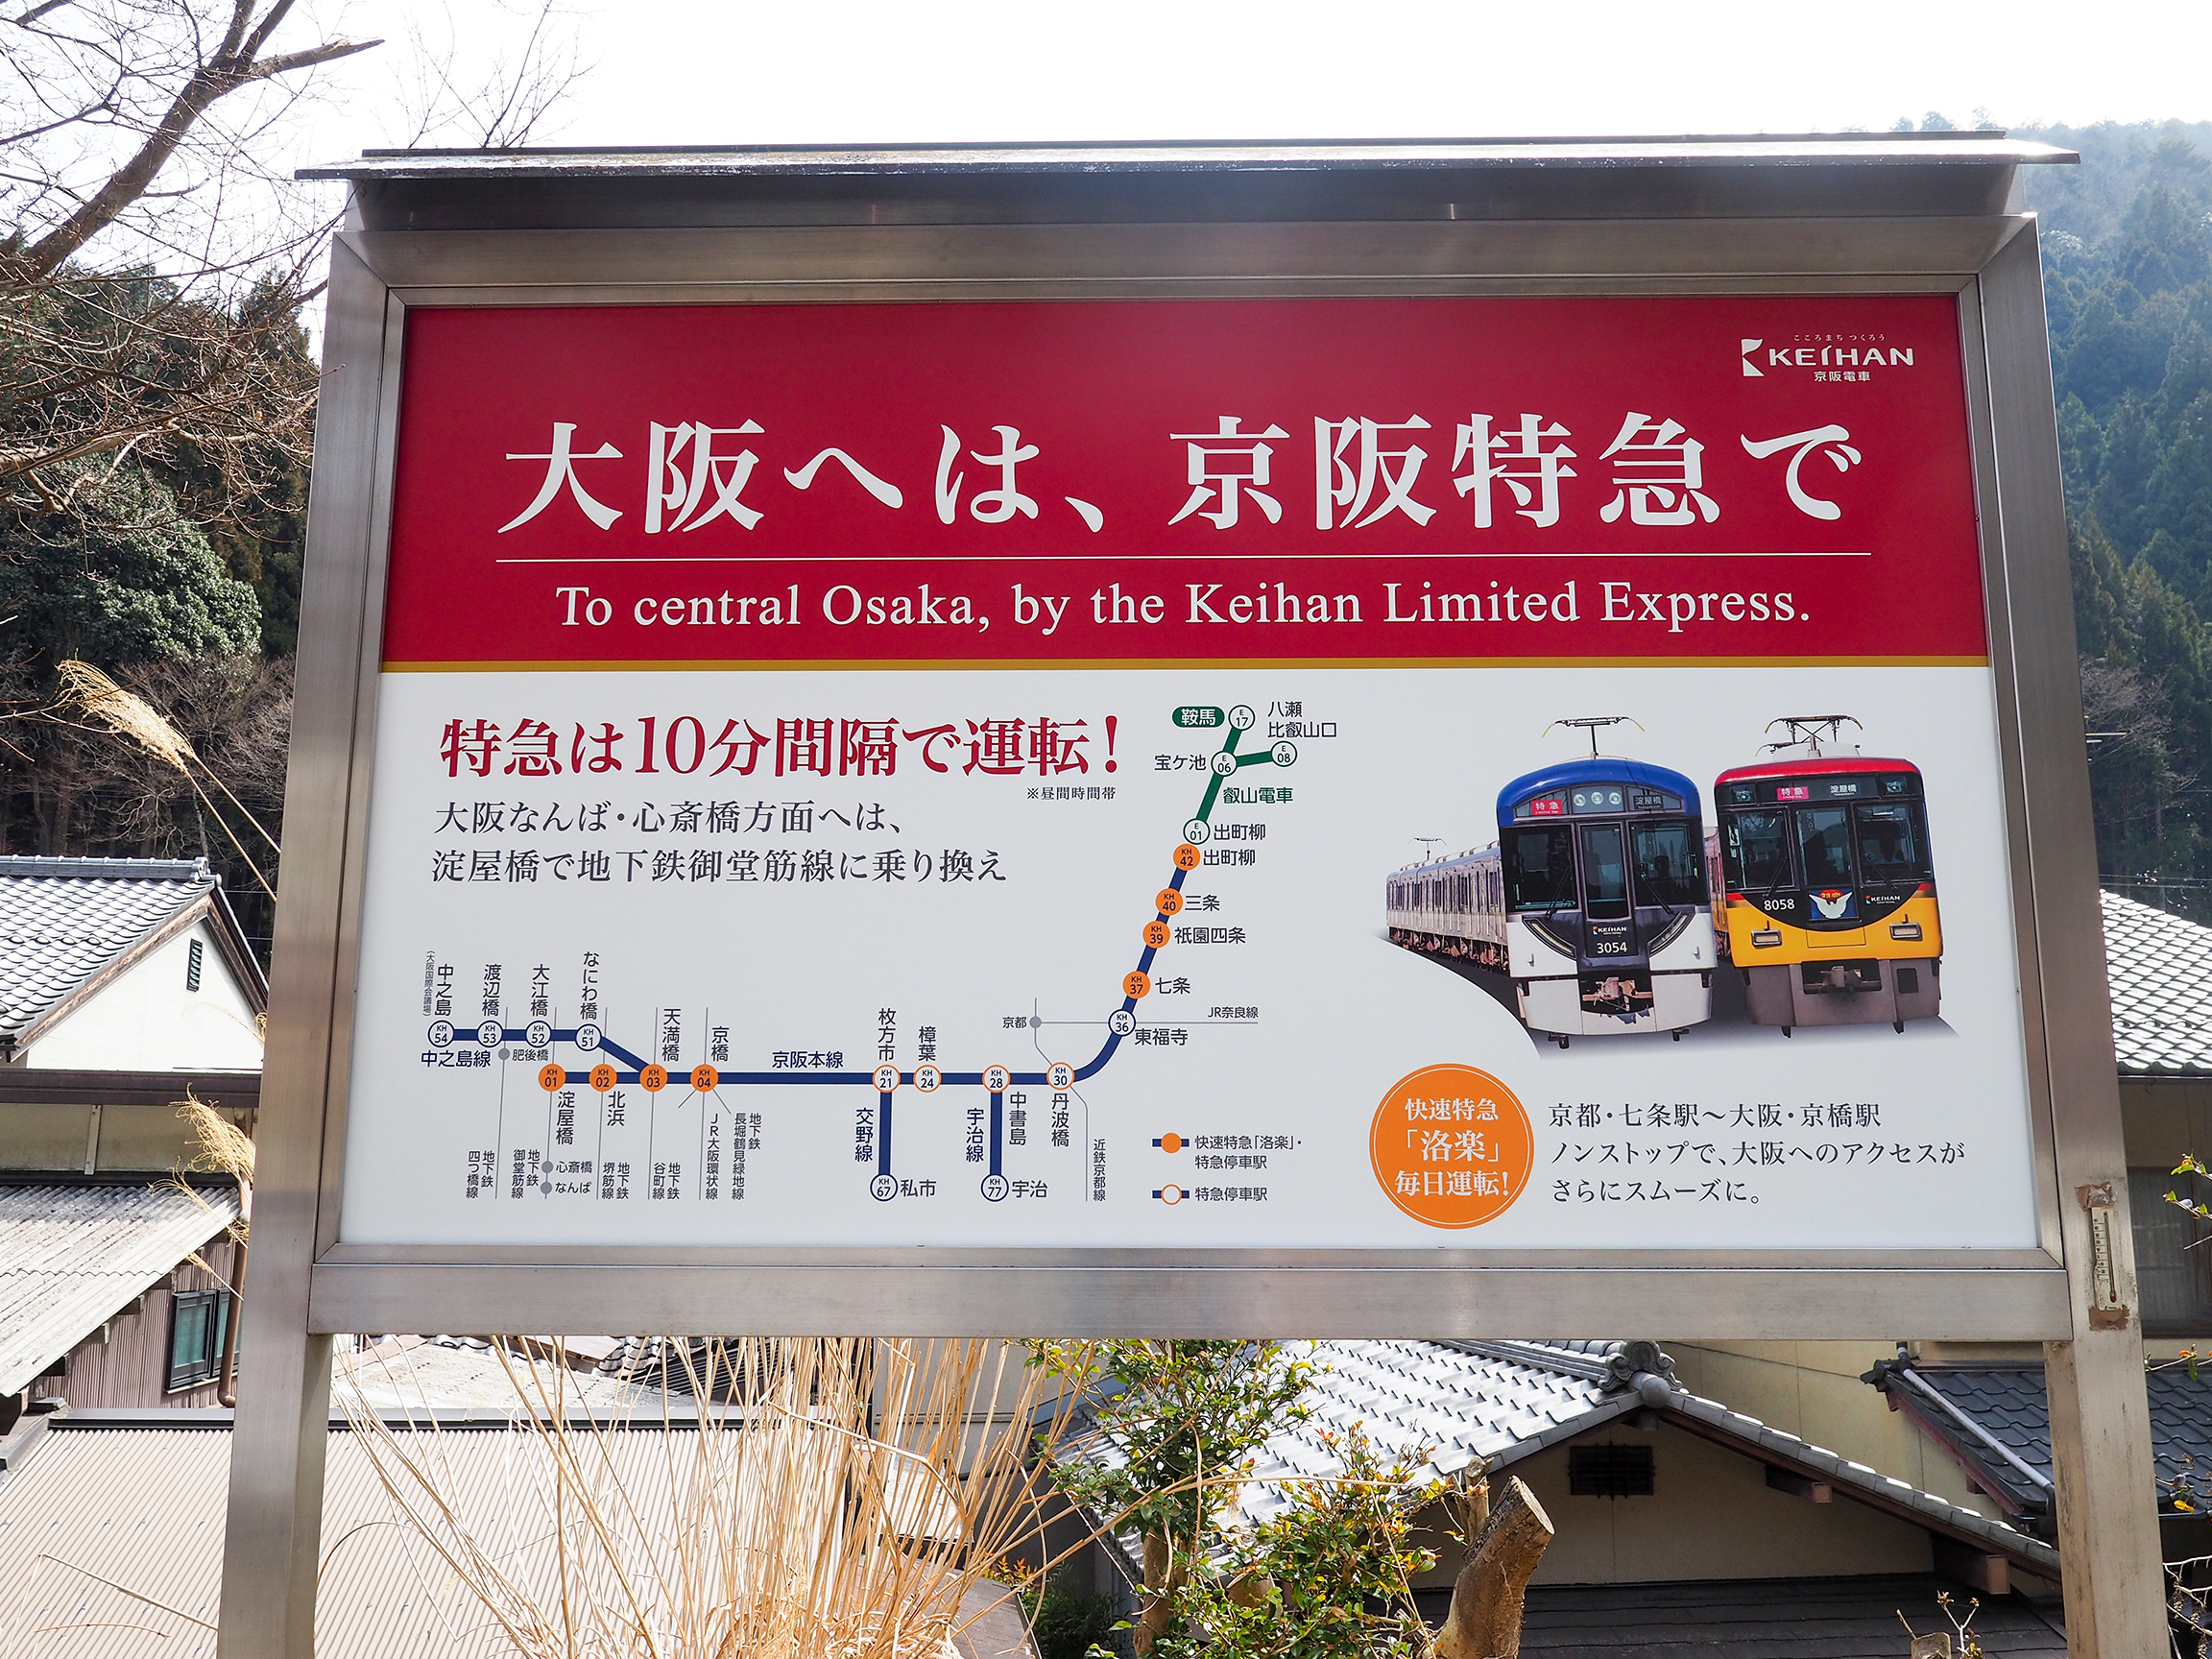
When I return this summer, I'd like to have something
to serve as a reminder of the memorable trains I often took. This
basically means the Hankyu (阪急) and Keihan (京阪) lines from
Kawaramachi (河原町) and Demachiyanagi (出町柳) to Umeda (梅田) and
Yodoyabashi (淀屋橋), respectively.
Update: I am back home from Japan. And here is my
display:
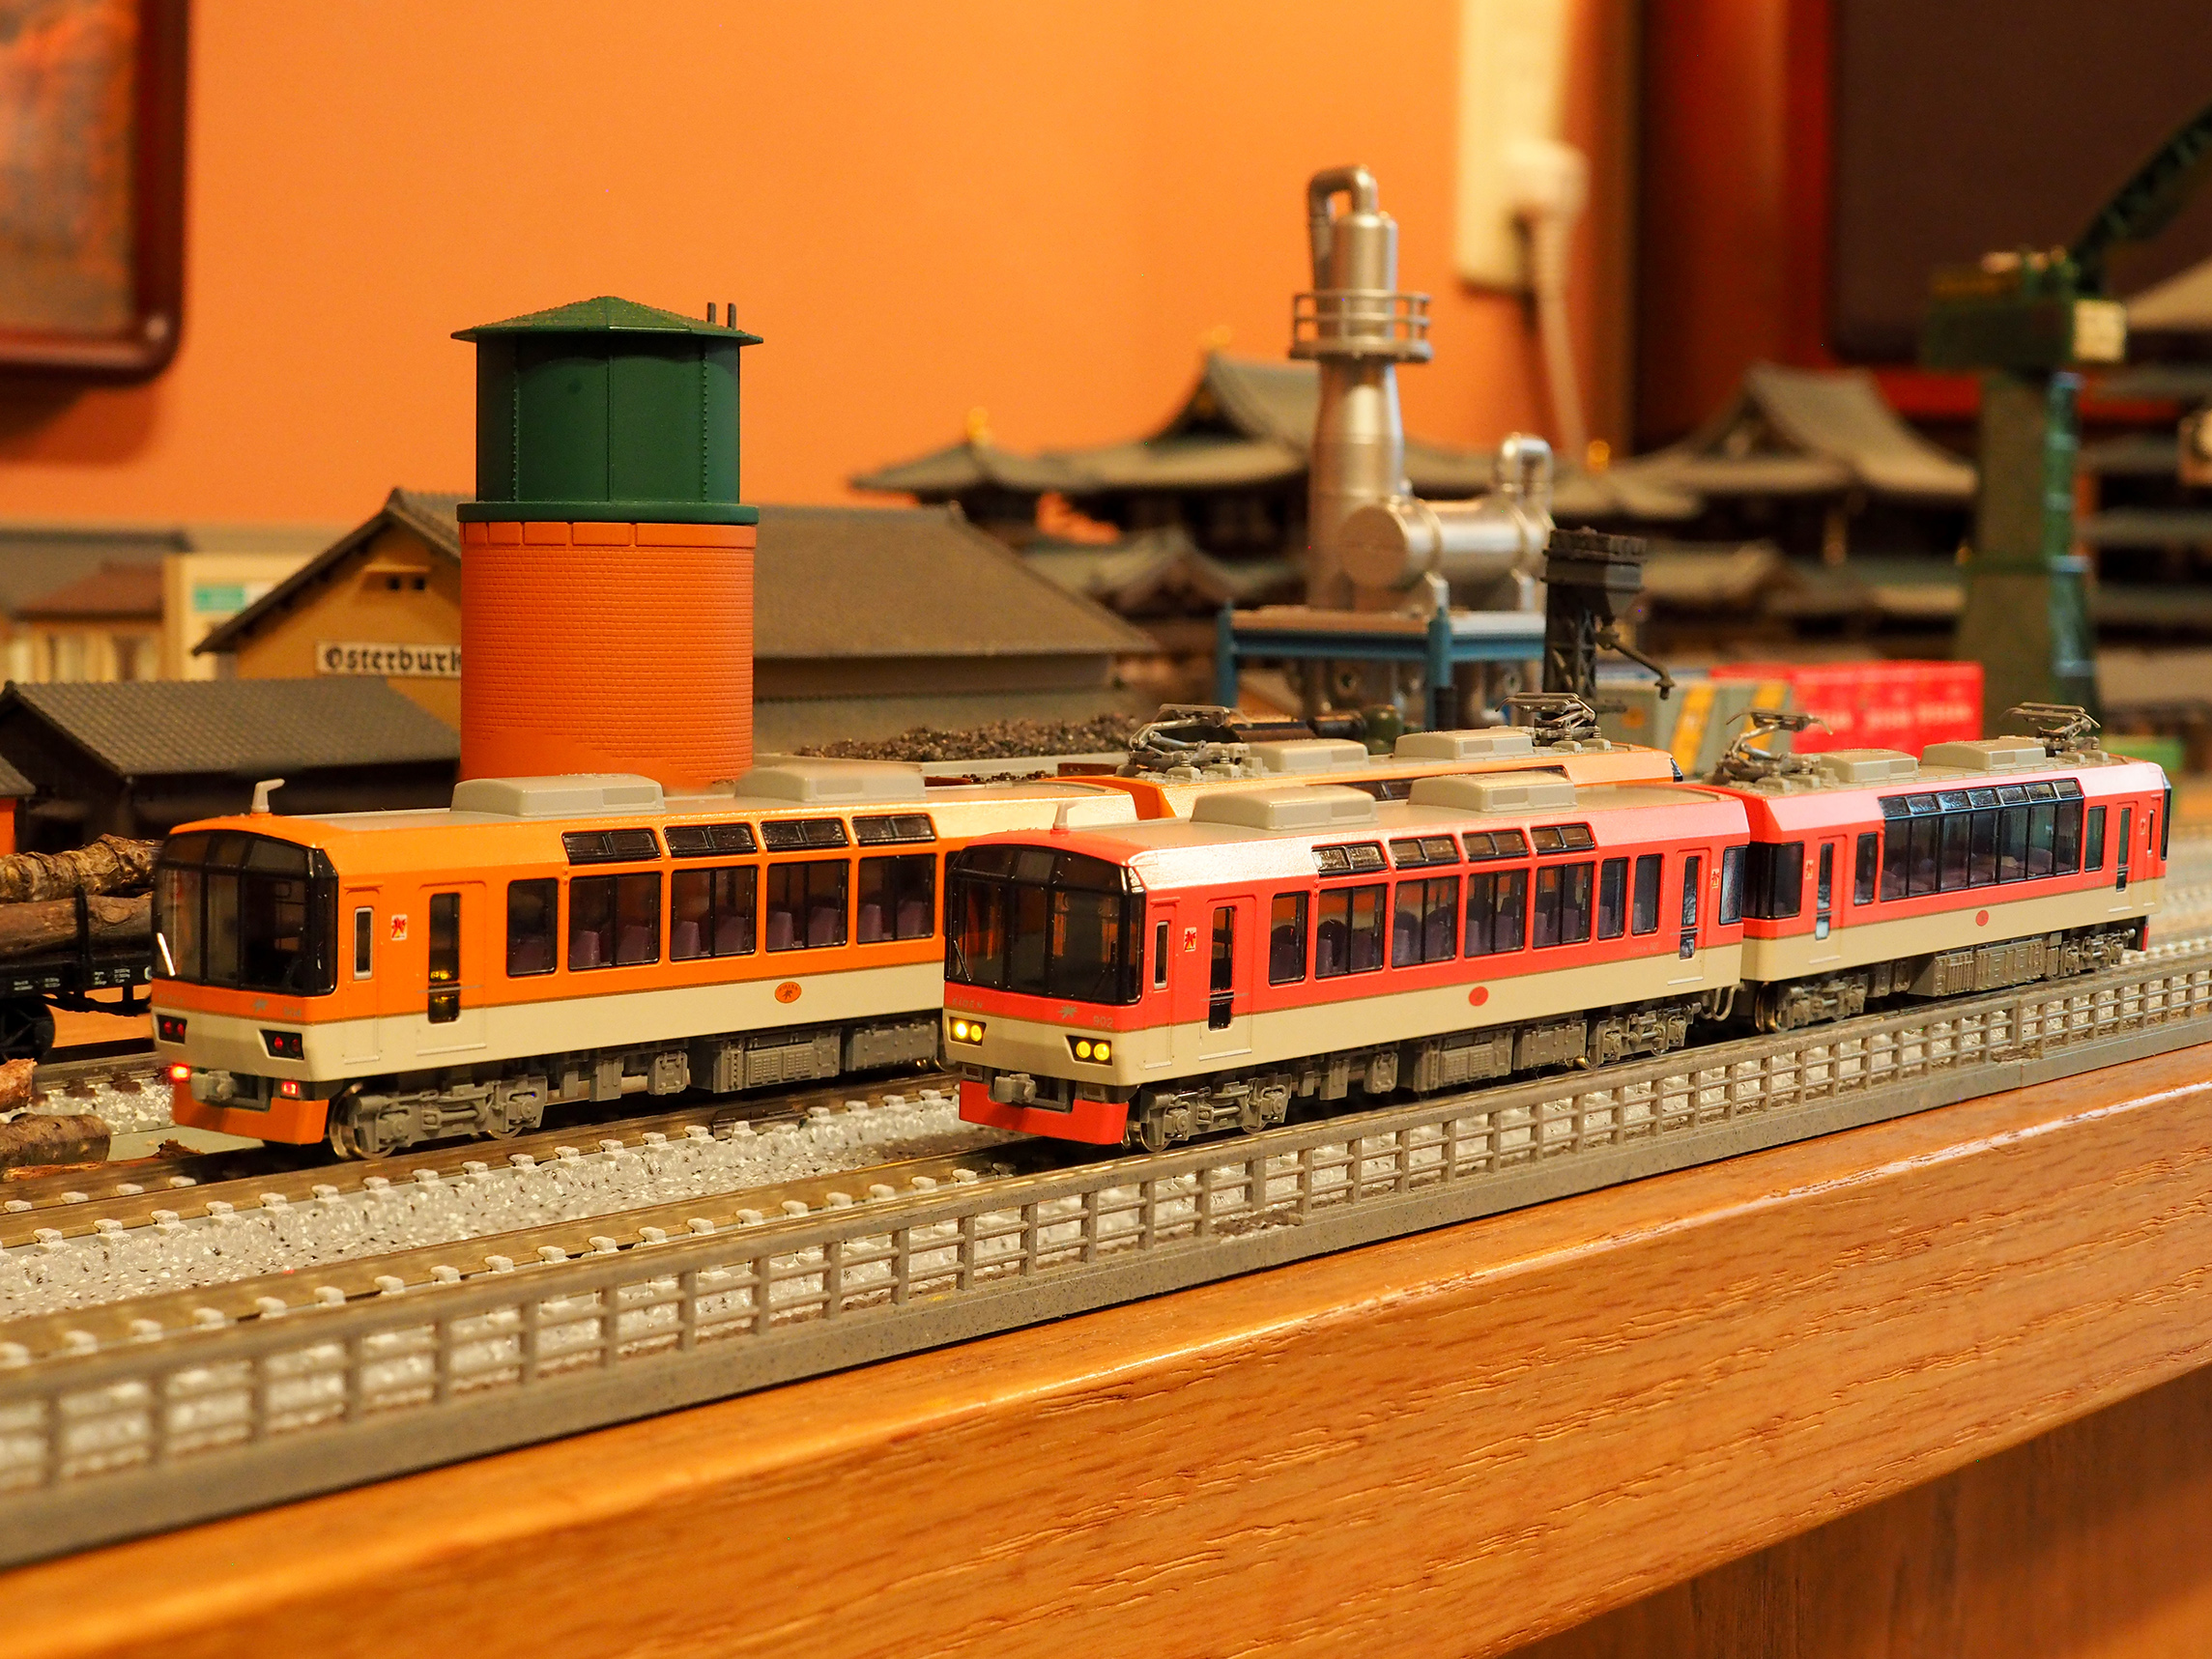
[Keihan poster above (a Japanese friend obtained it for me), trains below.]
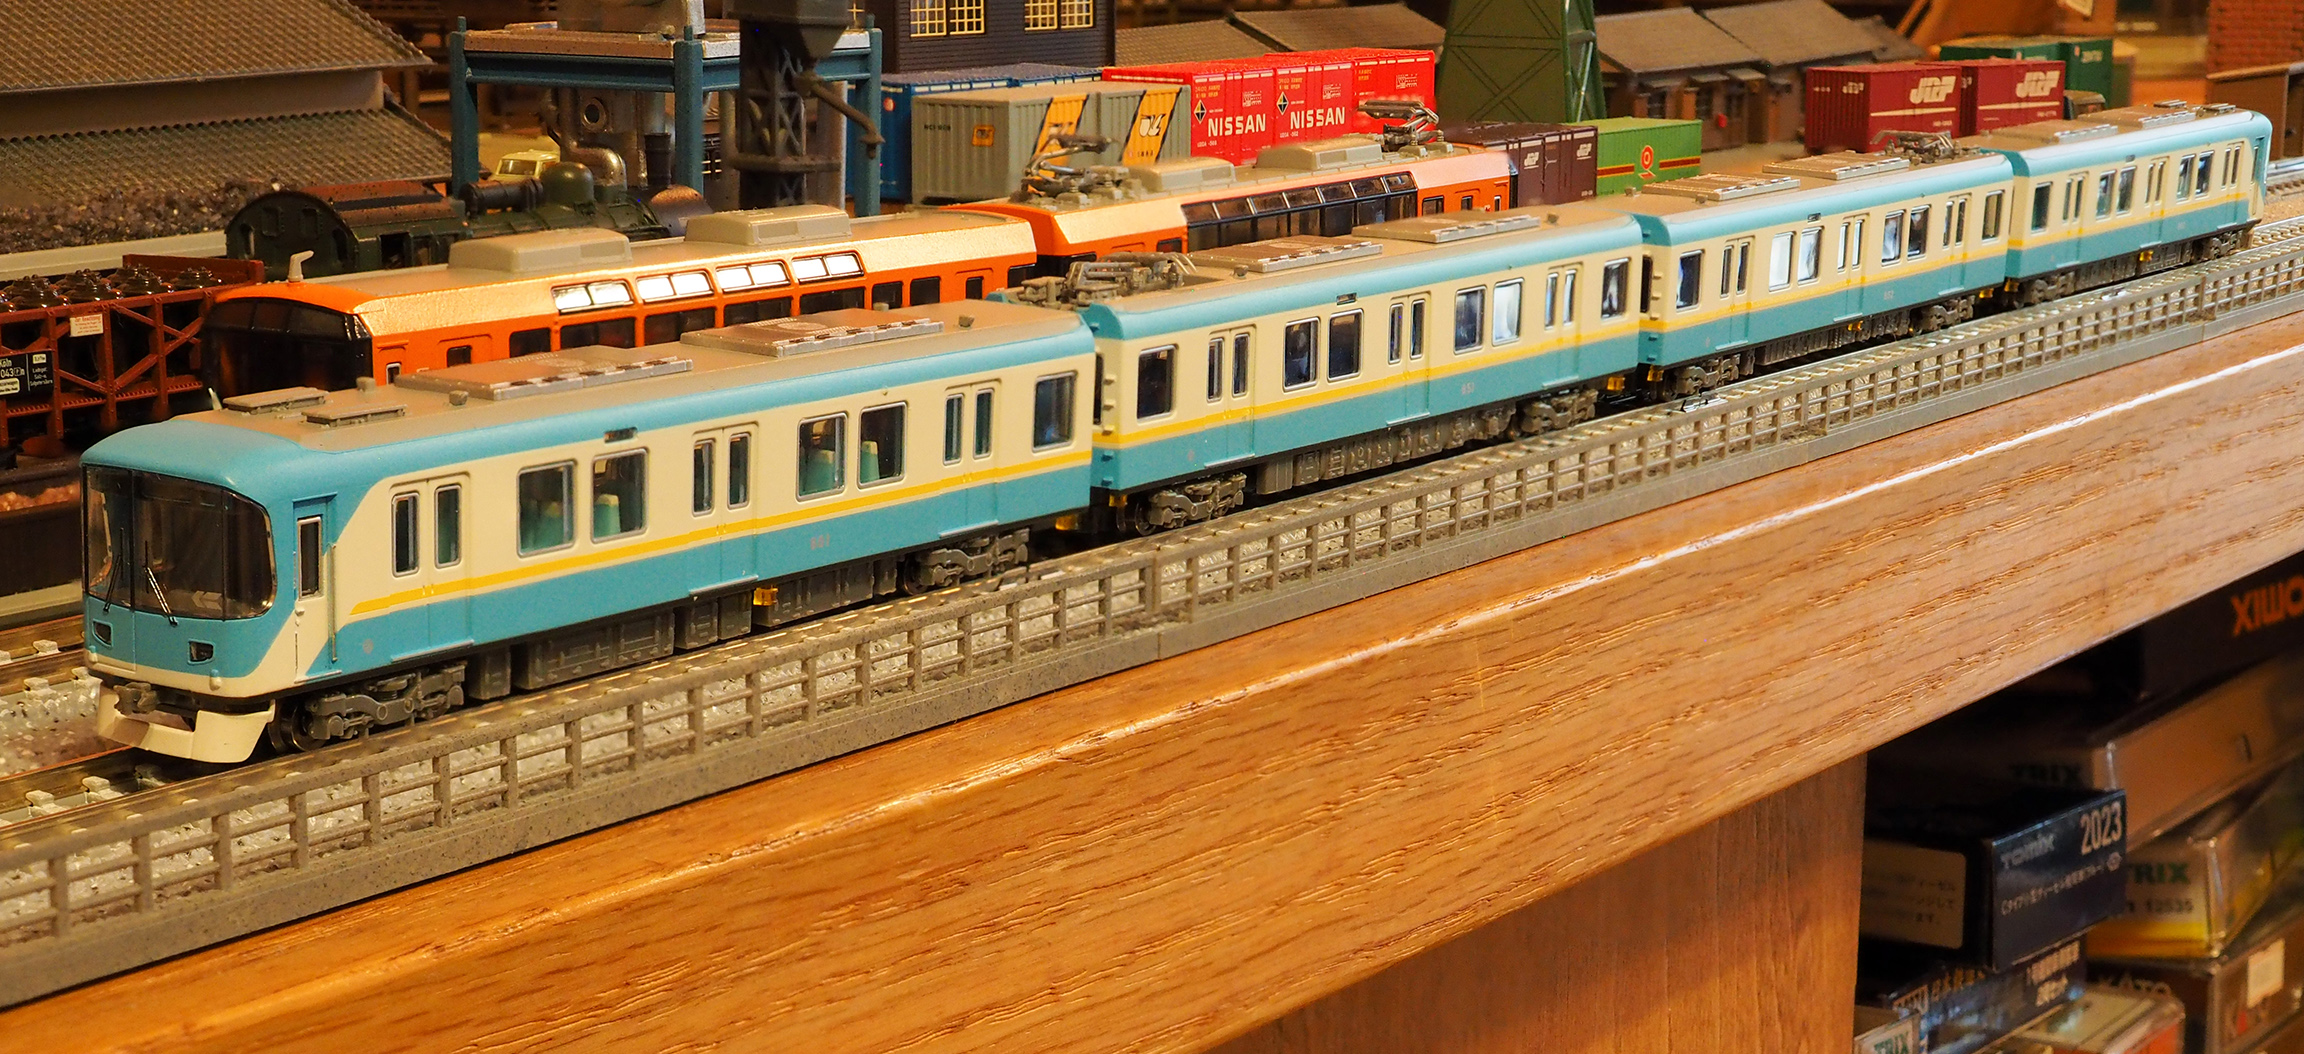
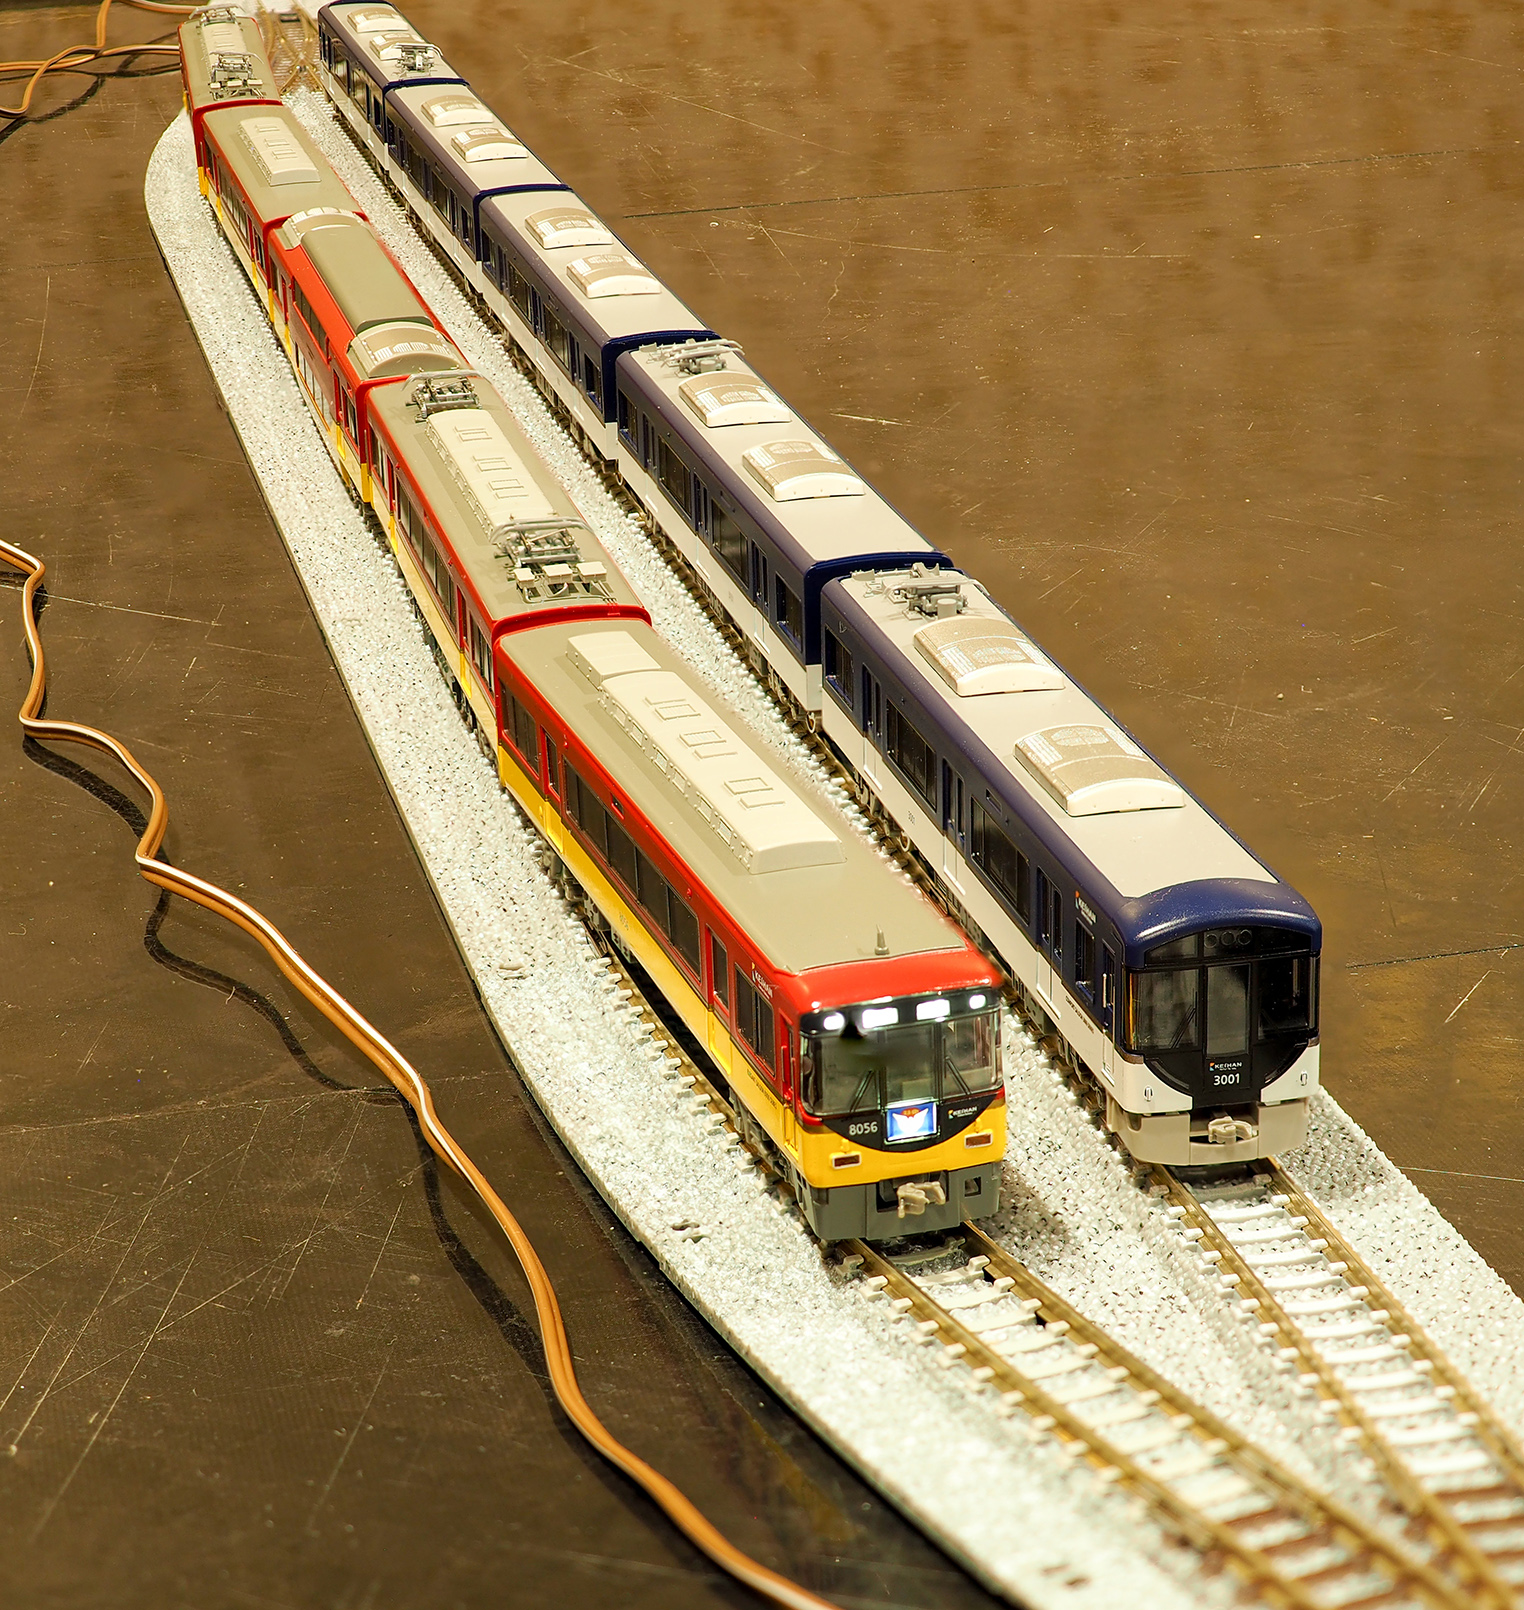
[Left display case contains my Keihan mainline trains, top
to bottom: 1000系; 3000系, and 8000系. If you ride the
(Kyoto) Demachiyanagi (出町柳) <-> (Ōsaka) Yodoyabashi (淀屋橋)
Keihan mainline, you be familiar with all three color schemes
above.
Read on to see how I came up with this collection.
The idea is that visitors to the house will see the poster and the
trains in the display cases. To avoid looking like a train geek's
basement, I decided to hide the layout.
Originally meant for a 70" hdtv. Dimensions: 64.5" by 40"
(approx. 1640mm x 1040mm).
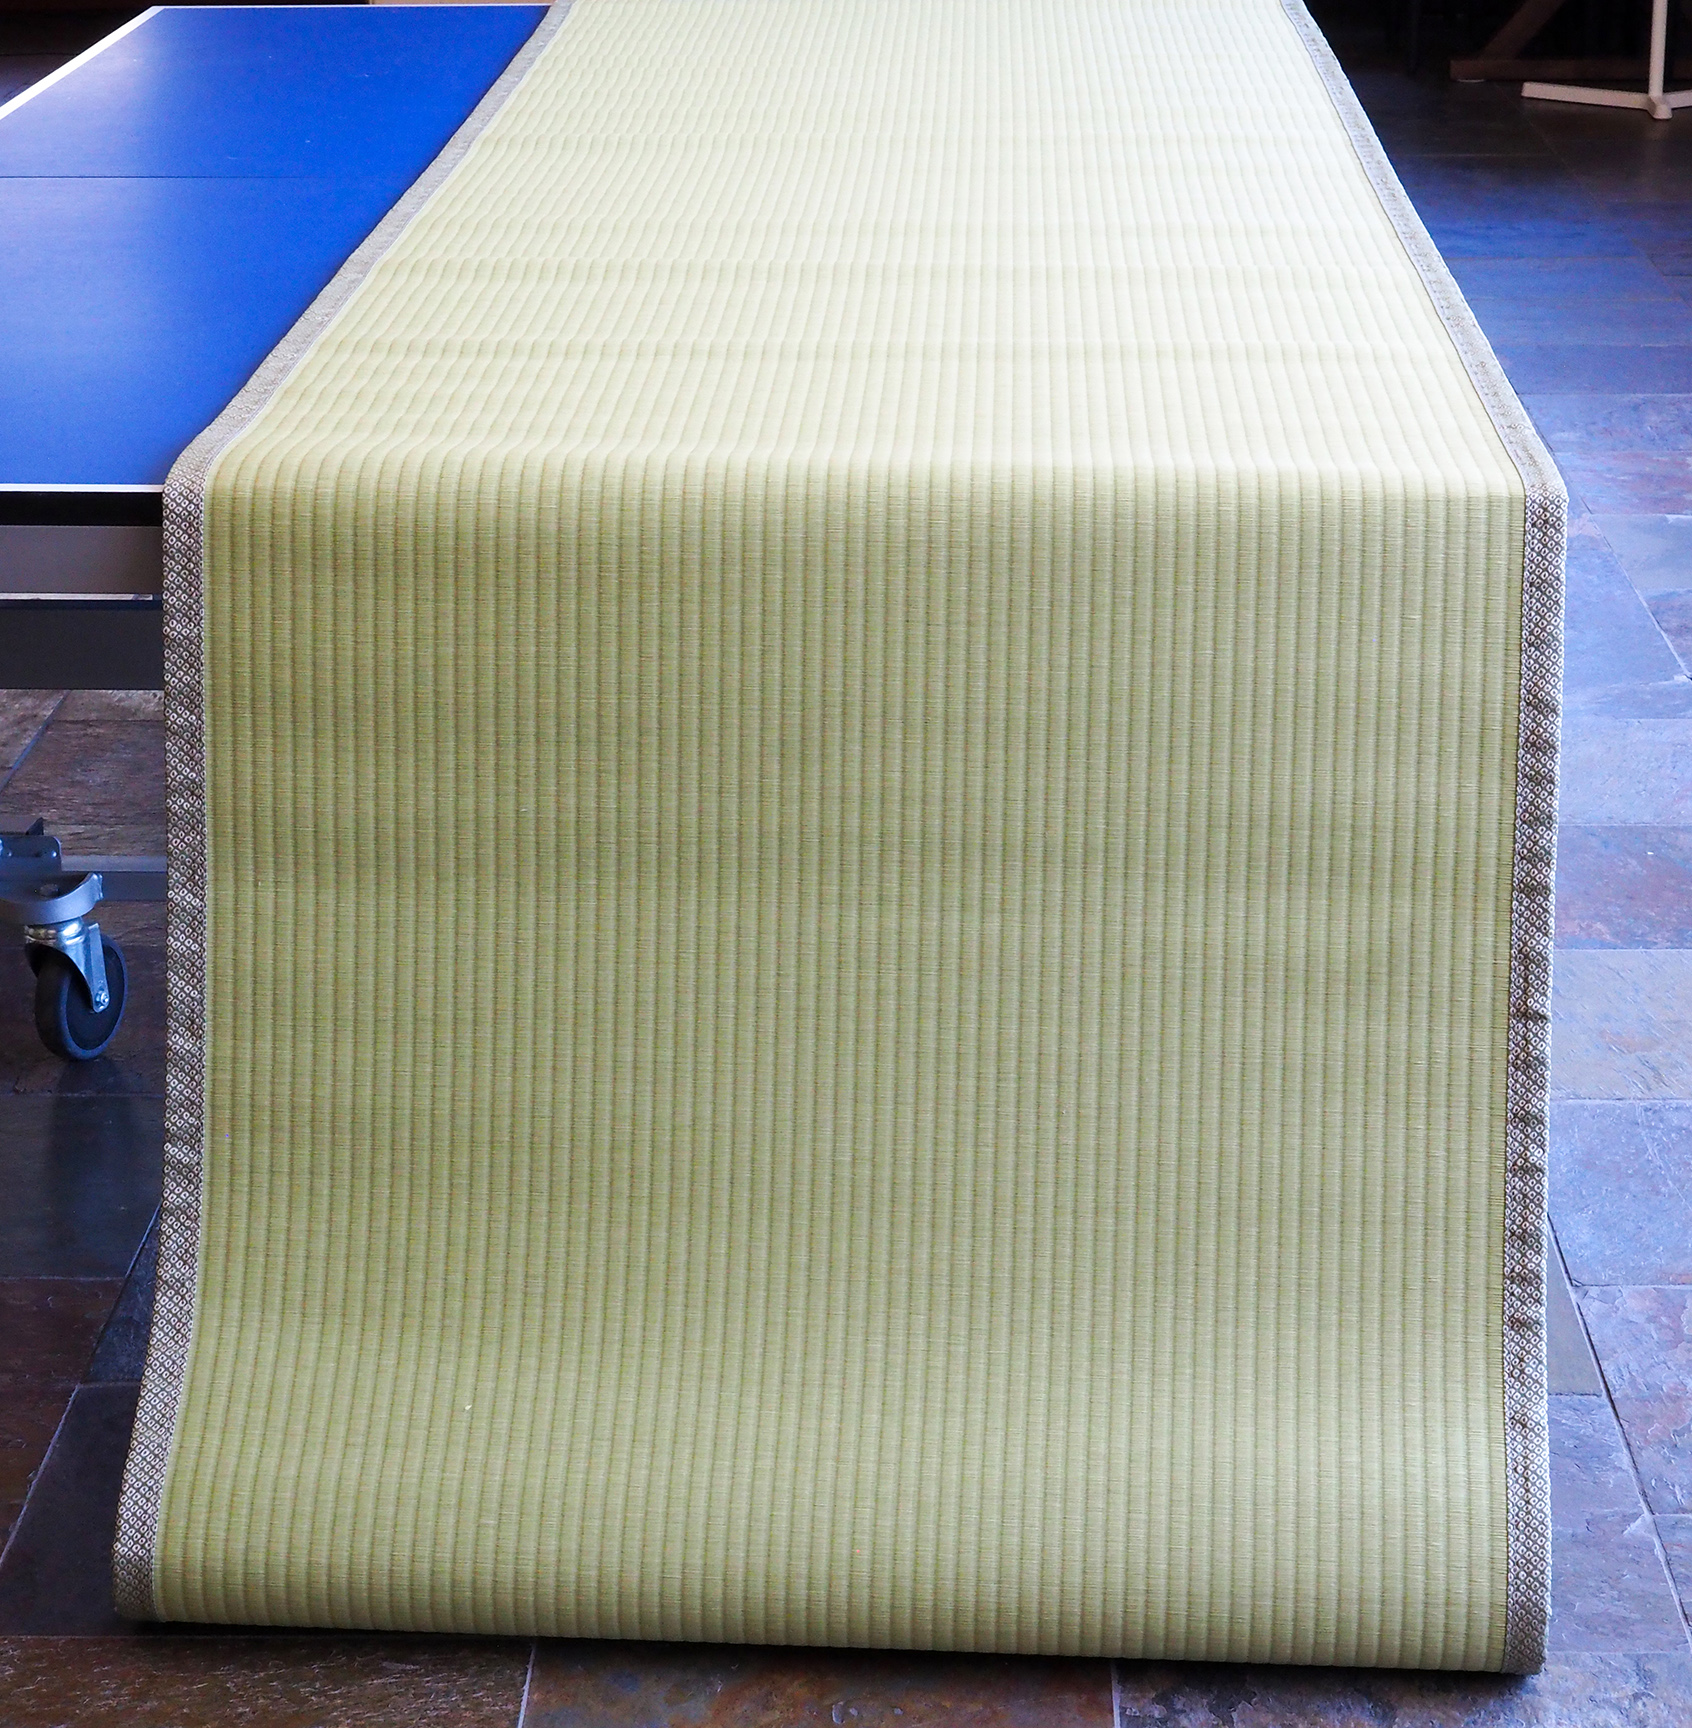
I have space to store a small layout in Tucson, see the tatami mat
in the picture above. The idea is to use a custom-made tatami mat that
is double-sided. (In Japan, tatami mats are single-sided.)
Unfortunately, all tatami mats are under 1m in width, so there is a
small gap visible at the top. One side is purely decorative (as shown
above); the other side will be all track with a simple double
loop. Maybe add a single truss bridge with some embankment. Nothing
complicated. The plan is to buy all track while I'm still in
Japan.
Here's a video summarizing what I ended up with layout-wise:
[2 min video clip of the layout in operation.]
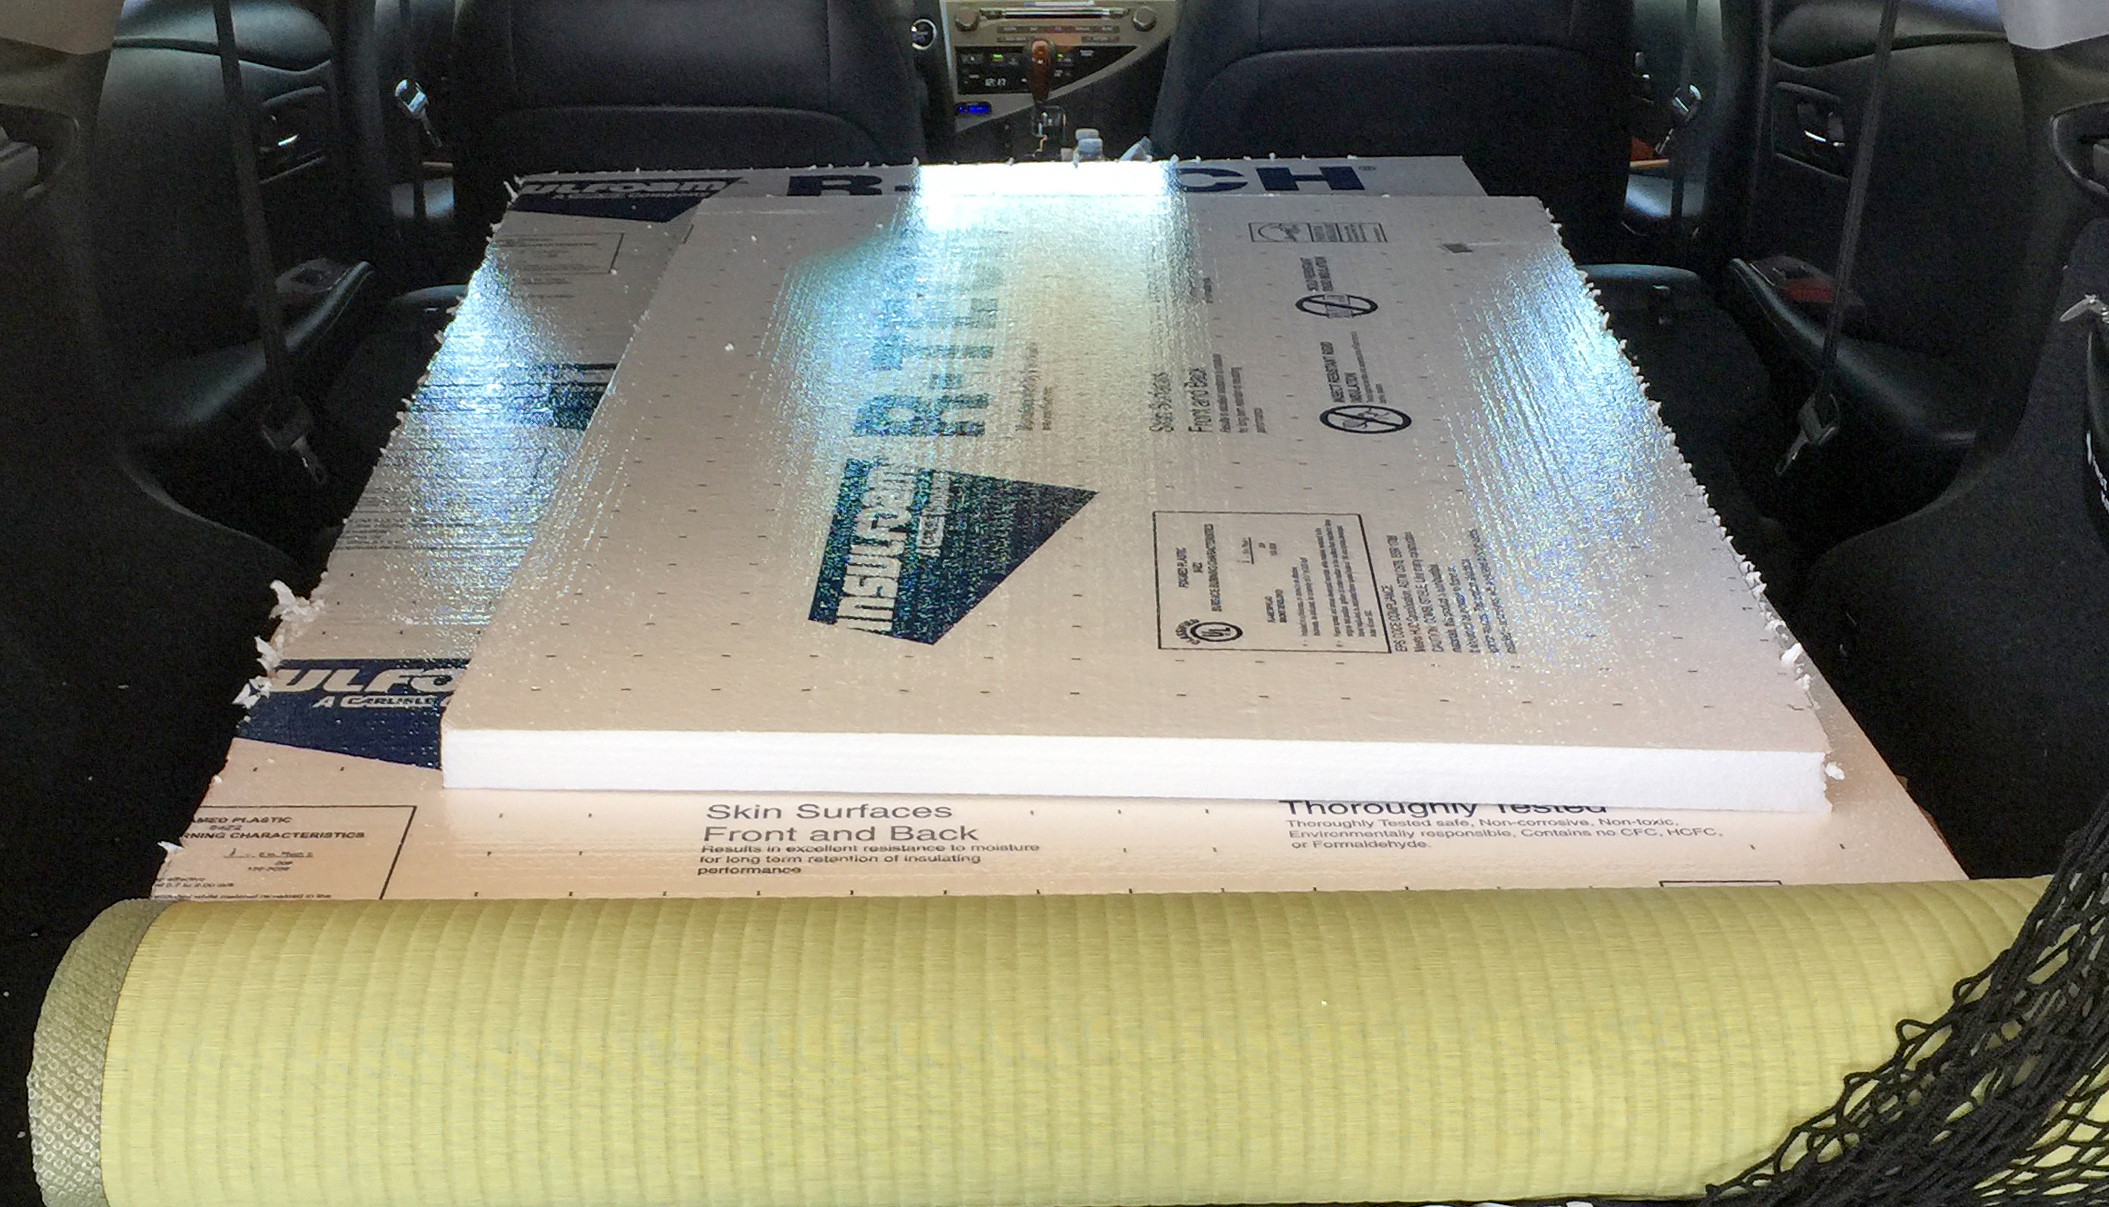
I custom-ordered a roll of natural green Ginpaku (銀白) tatami mat
material while I was in Kyoto. At the end of my stay, I checked it in
as one piece of luggage. It is made of Japanese paper, so (unlike
grass) it can be imported into the USA without trouble. Then in
Tucson, I asked an upholsterer to wrap it as tightly as possible
around a 1" thick foam board insulation. Insulfoam R-TECH 4' x 8' EPS
home insulation boards are available at Lowe's. This makes for a
very lightweight tatami mat. Most importantly, wrapping makes for a
double-sided tatami mat.
[Left: Ginpaku 4m long and 980mm wide (widest
possible). Right: the 1" thick sheet of insulation as the core.]
Being in the Sonoran desert, Tucson is dry and terribly dusty, but
I'd like to be able to glance at the trains to remind me of my time in
Kyoto. Hence the two small display cases. The idea is rather simple and
sentimental. Pour myself a little Hibiki whisky, take a couple of
trains out from the case and watch them run with a smile and perhaps a
tear in the eye. Anyway, I think it beats storing them away in some
drawer.
So with the guidance of an experienced friend in Kyoto who has
several layouts, I began by buying track and rolling stock
locally at Yodobashi Camera (Kyoto and Umeda, Osaka), Volks (Kyoto)
and Joshin (上新) (Nipponbashi, Osaka). There is also a Kato store
inside Isetan (Kyoto JR Station). The Appendix (here) describes these places.
Rolling Stock
This section is divided in Hankyu (阪急), Randen (嵐電), Keihan
(京阪), and Eiden (叡電) sub-sections. I have ended up with Kato,
Micro Ace and Greenmax trains. No Tomix rolling stock (except for
maintenance)! On the other hand, all my track is Tomix (wide PC).
(For completeness, there happens to be an separate Keihan 800系
section, but I didn't mean to collect that one; it just happened.)
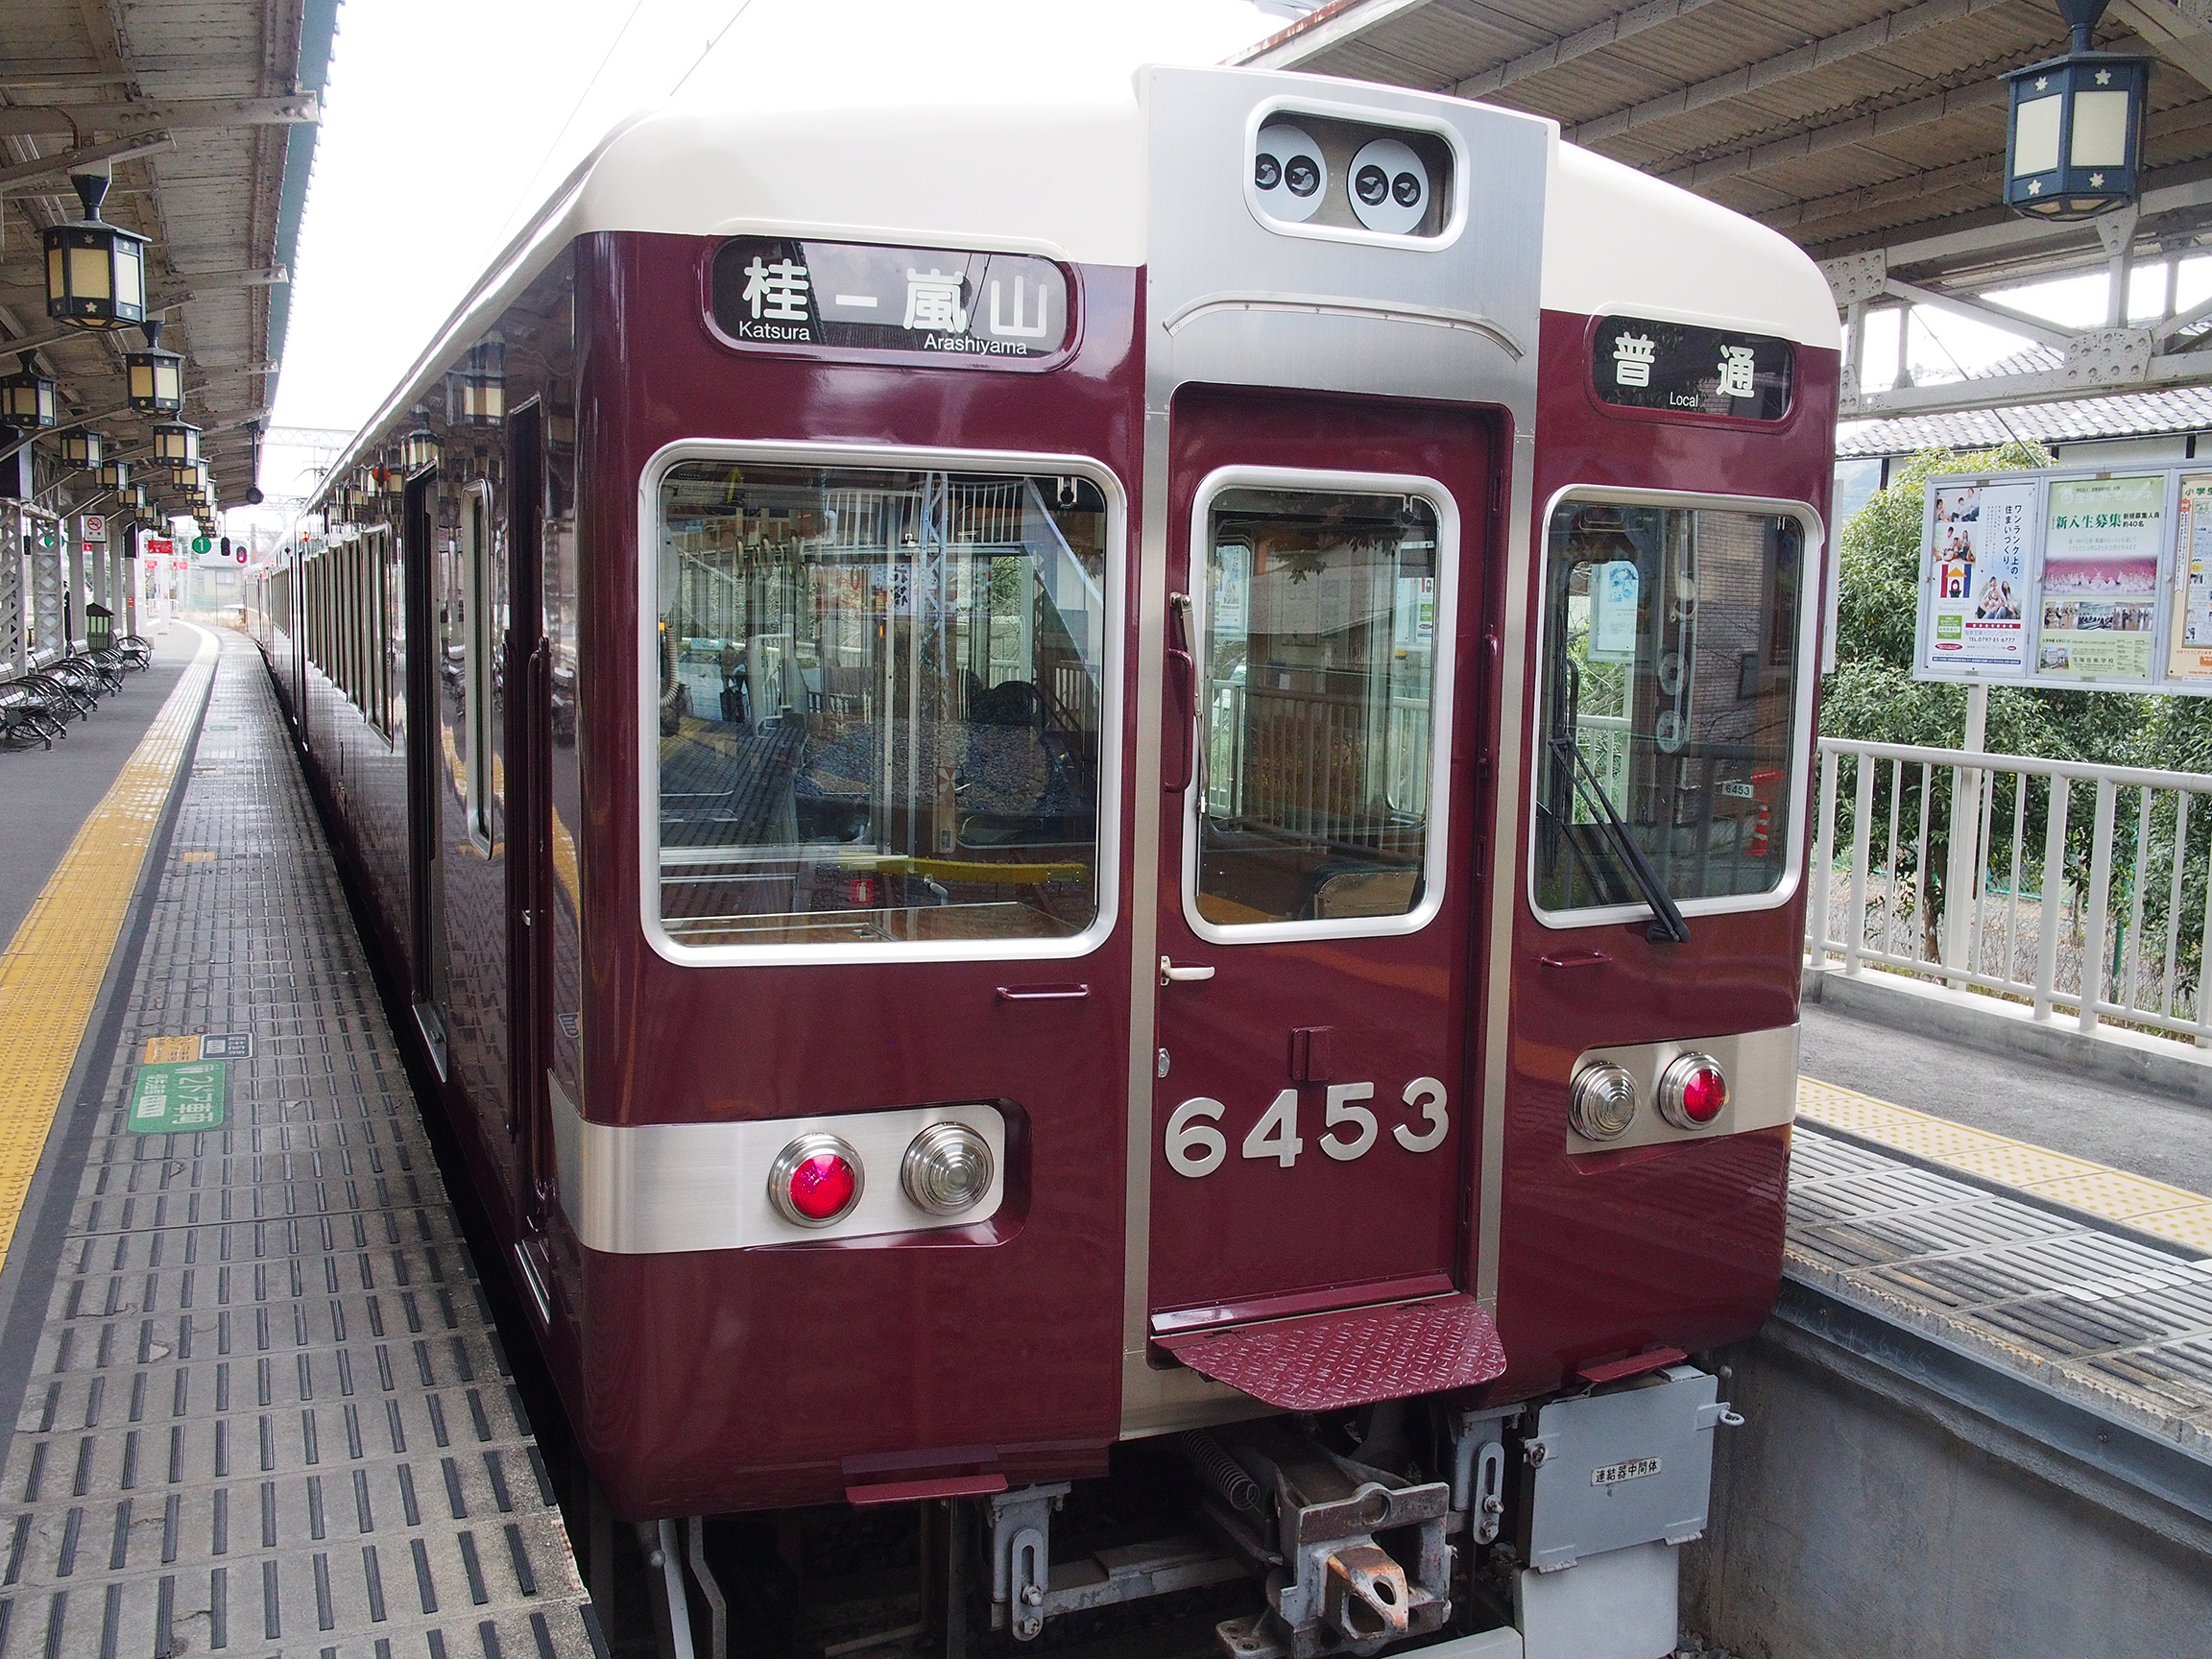
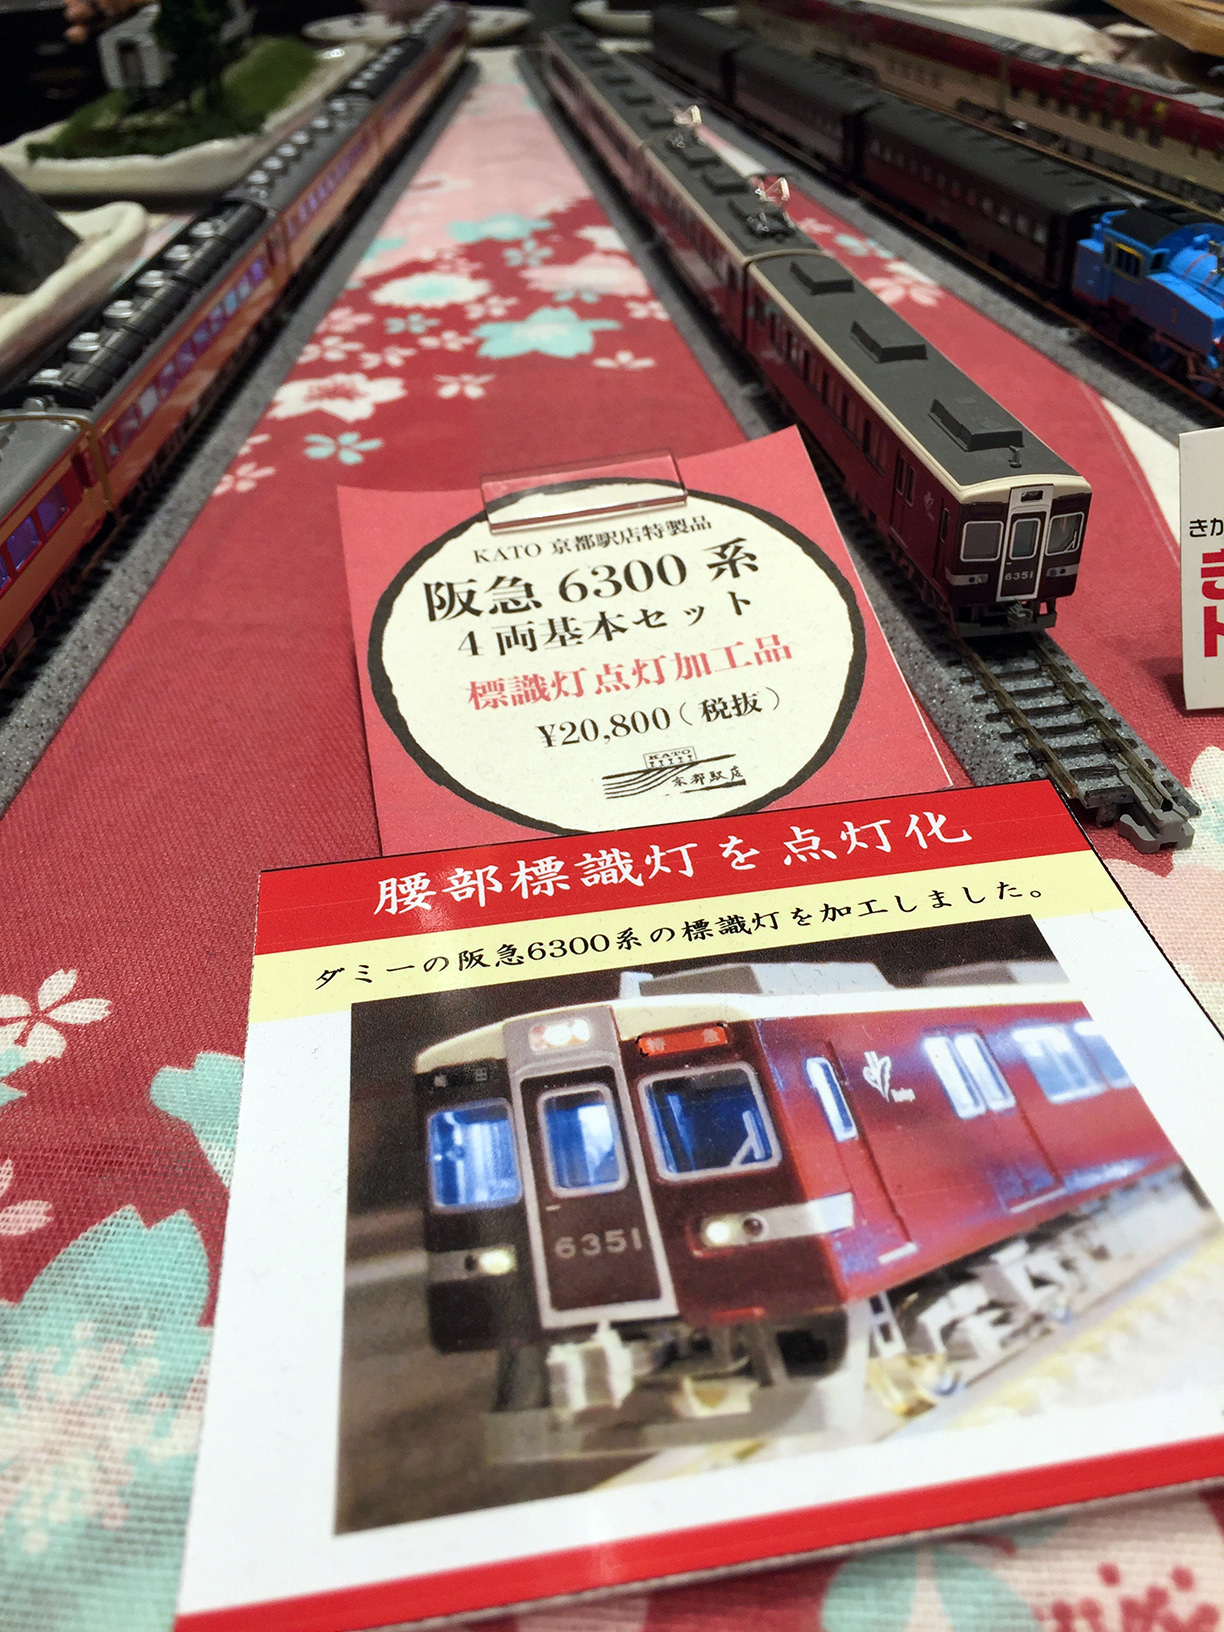
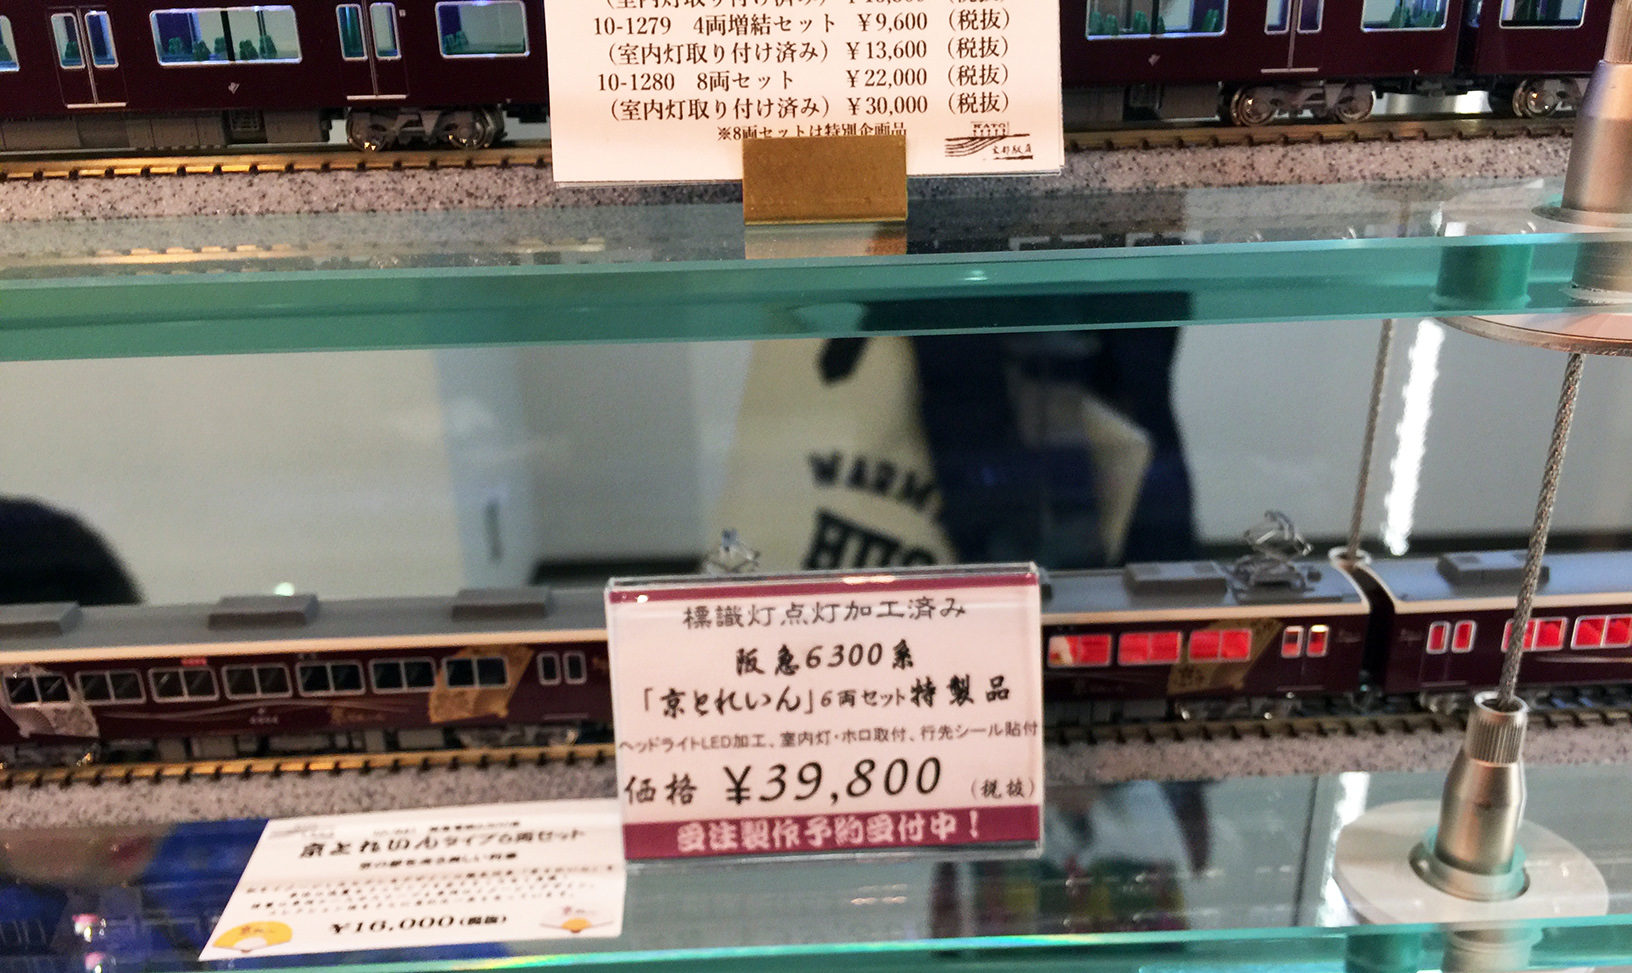
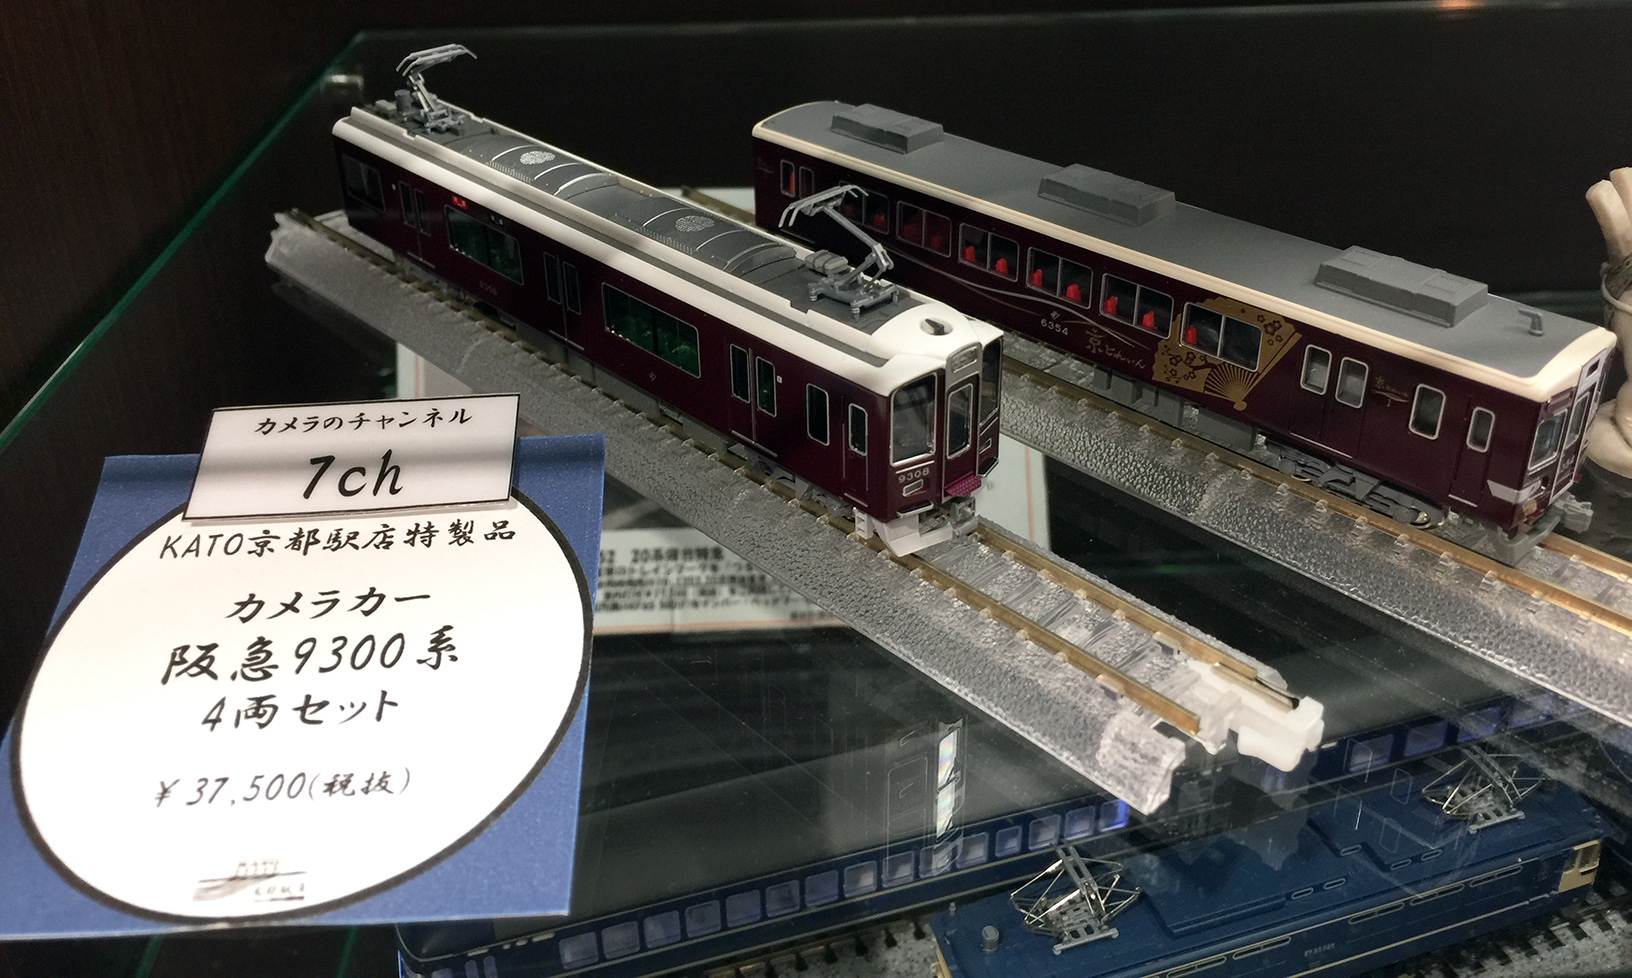
The Hankyu trains to Umeda from the Kawaramachi terminus on Shijo
(四条) are a wonderful and timeless brown. The Kato store inside
Isetan has lots of special ones on display, including one exclusive to
that particular store. I bought the least expensive Kato one, the 6300
系 (4 cars) at Volks (Kyoto) - see picture above. I paid nearly
¥7000 for the 10-1244 set. That was my first foray into collecting
what I wanted.
Update: I splashed out and got the other four cars in the
(non-motorized) Kato set (10-1245). For the day when I have more
room.
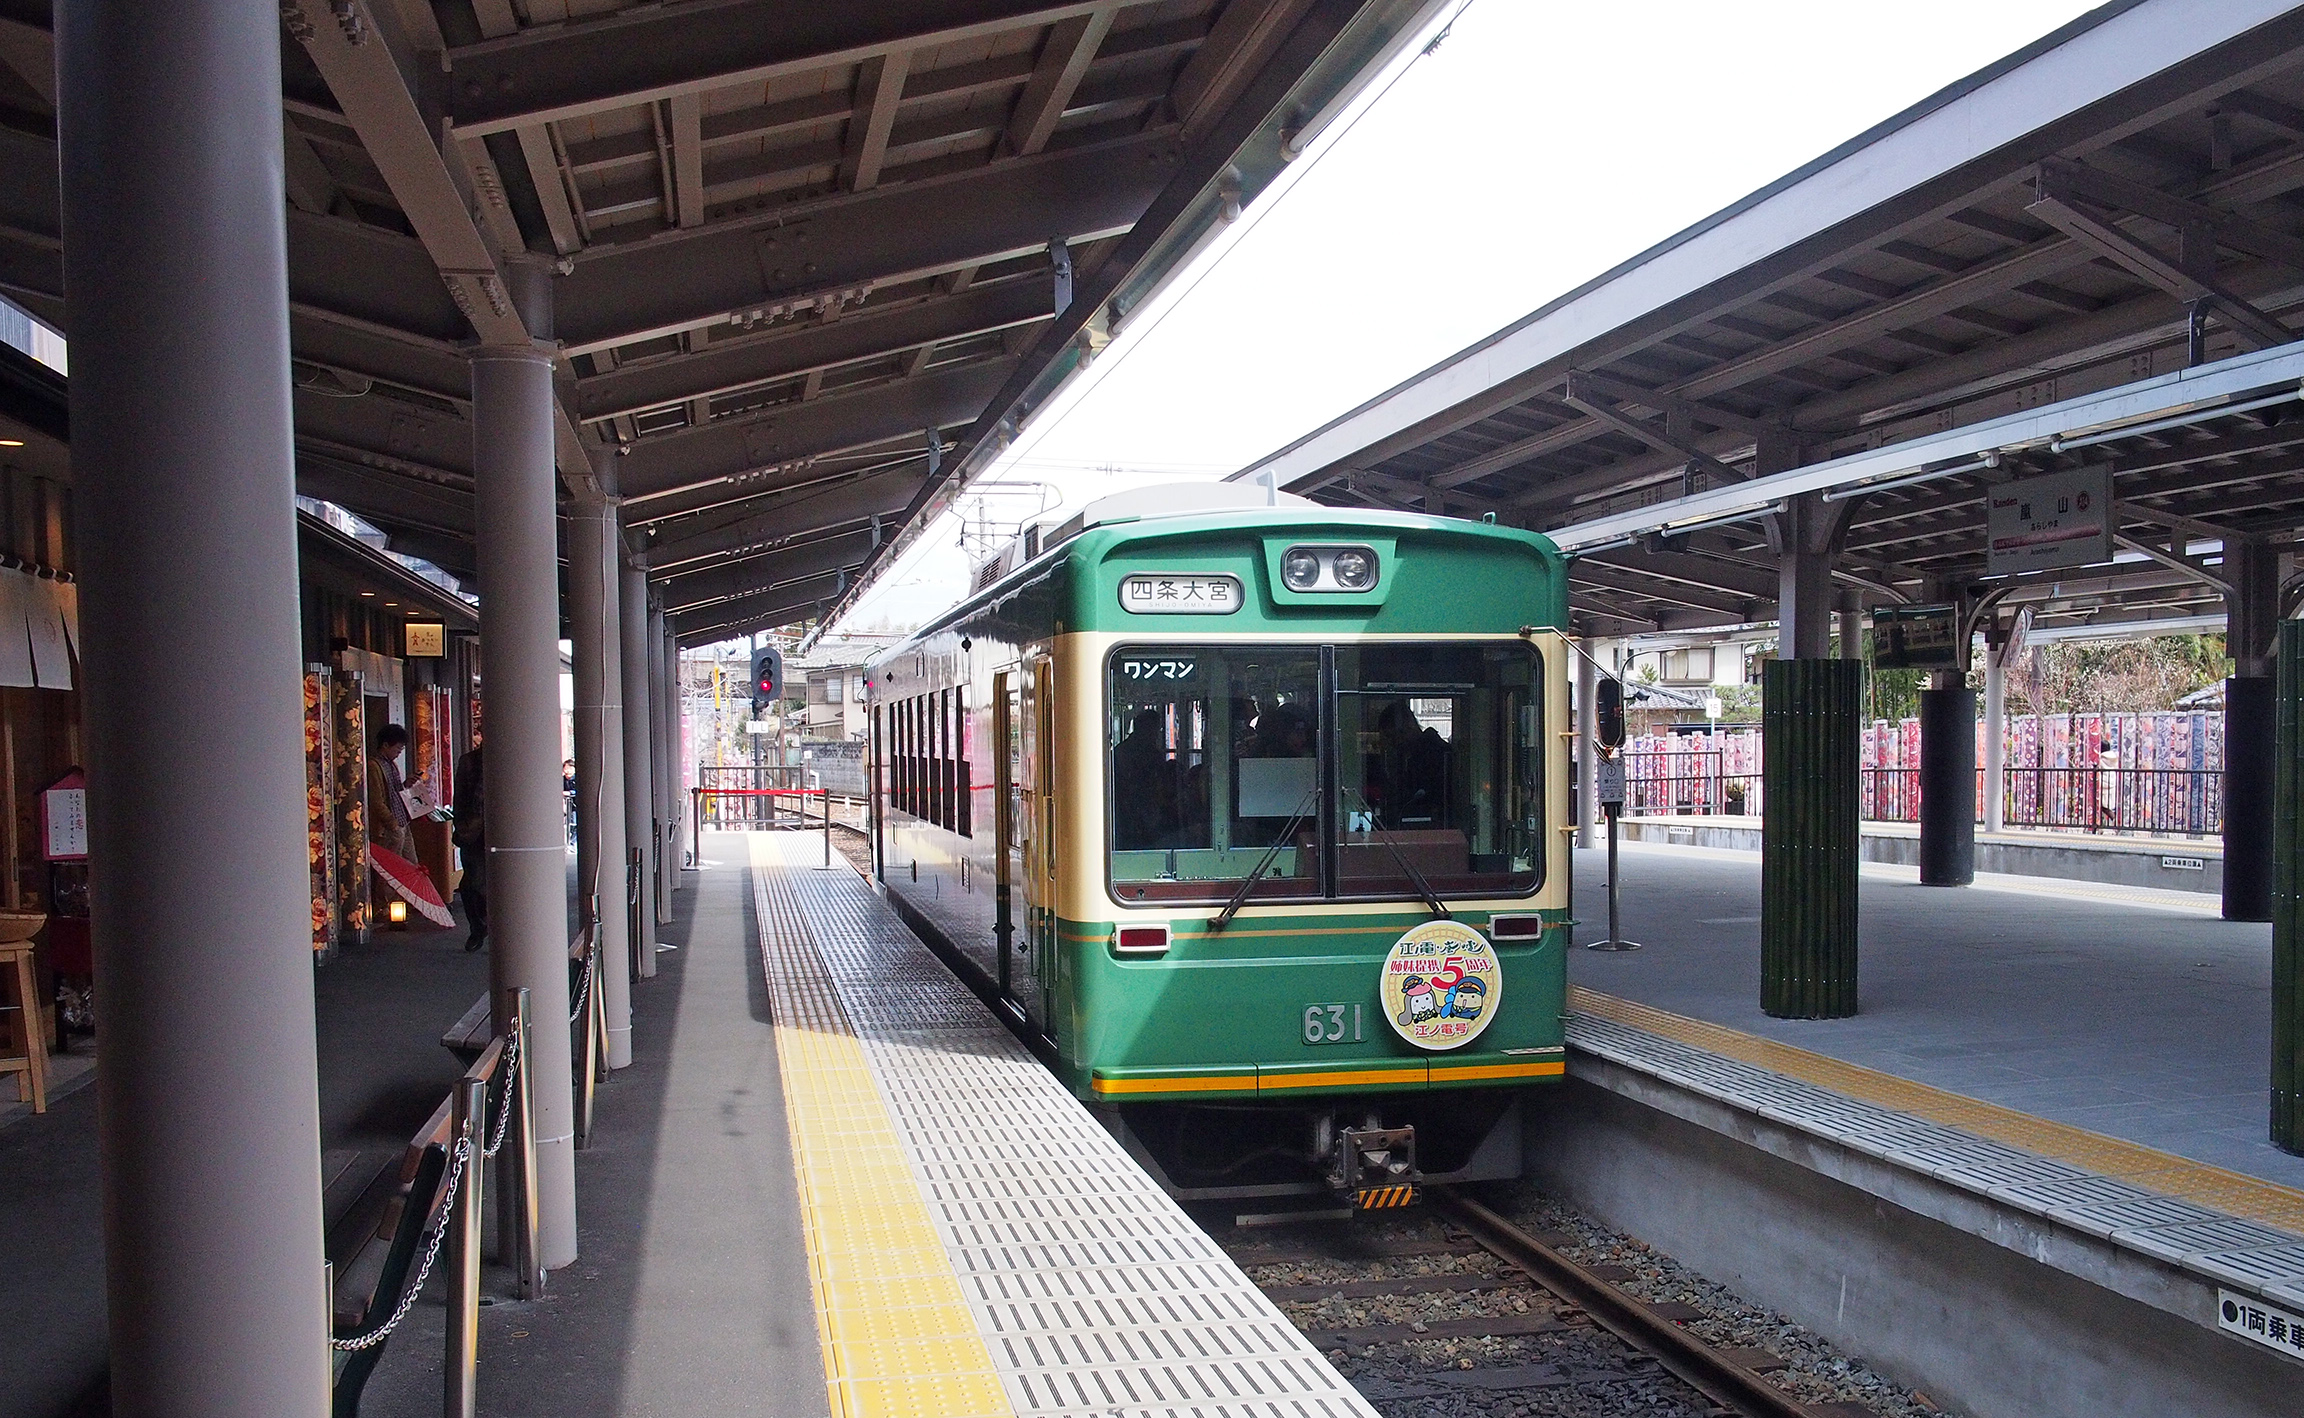
[Taken in
March 2015 at the Randen Arashiyama (嵐山) station.]
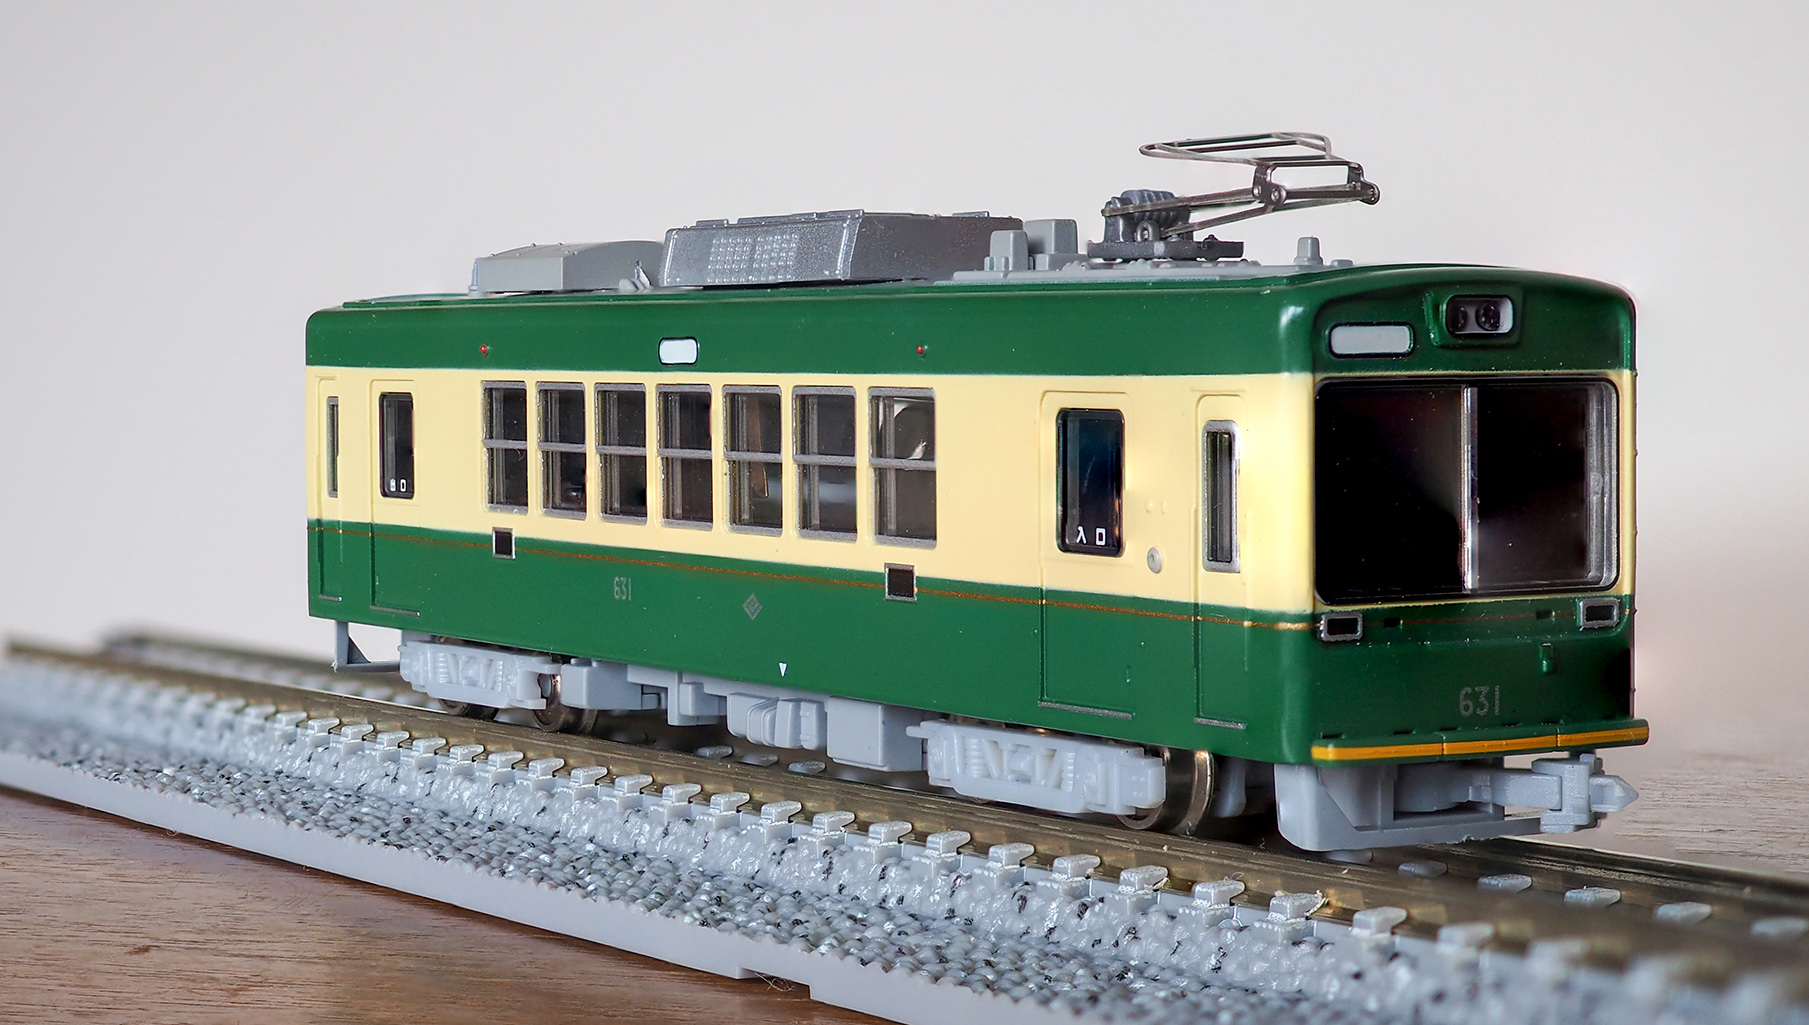
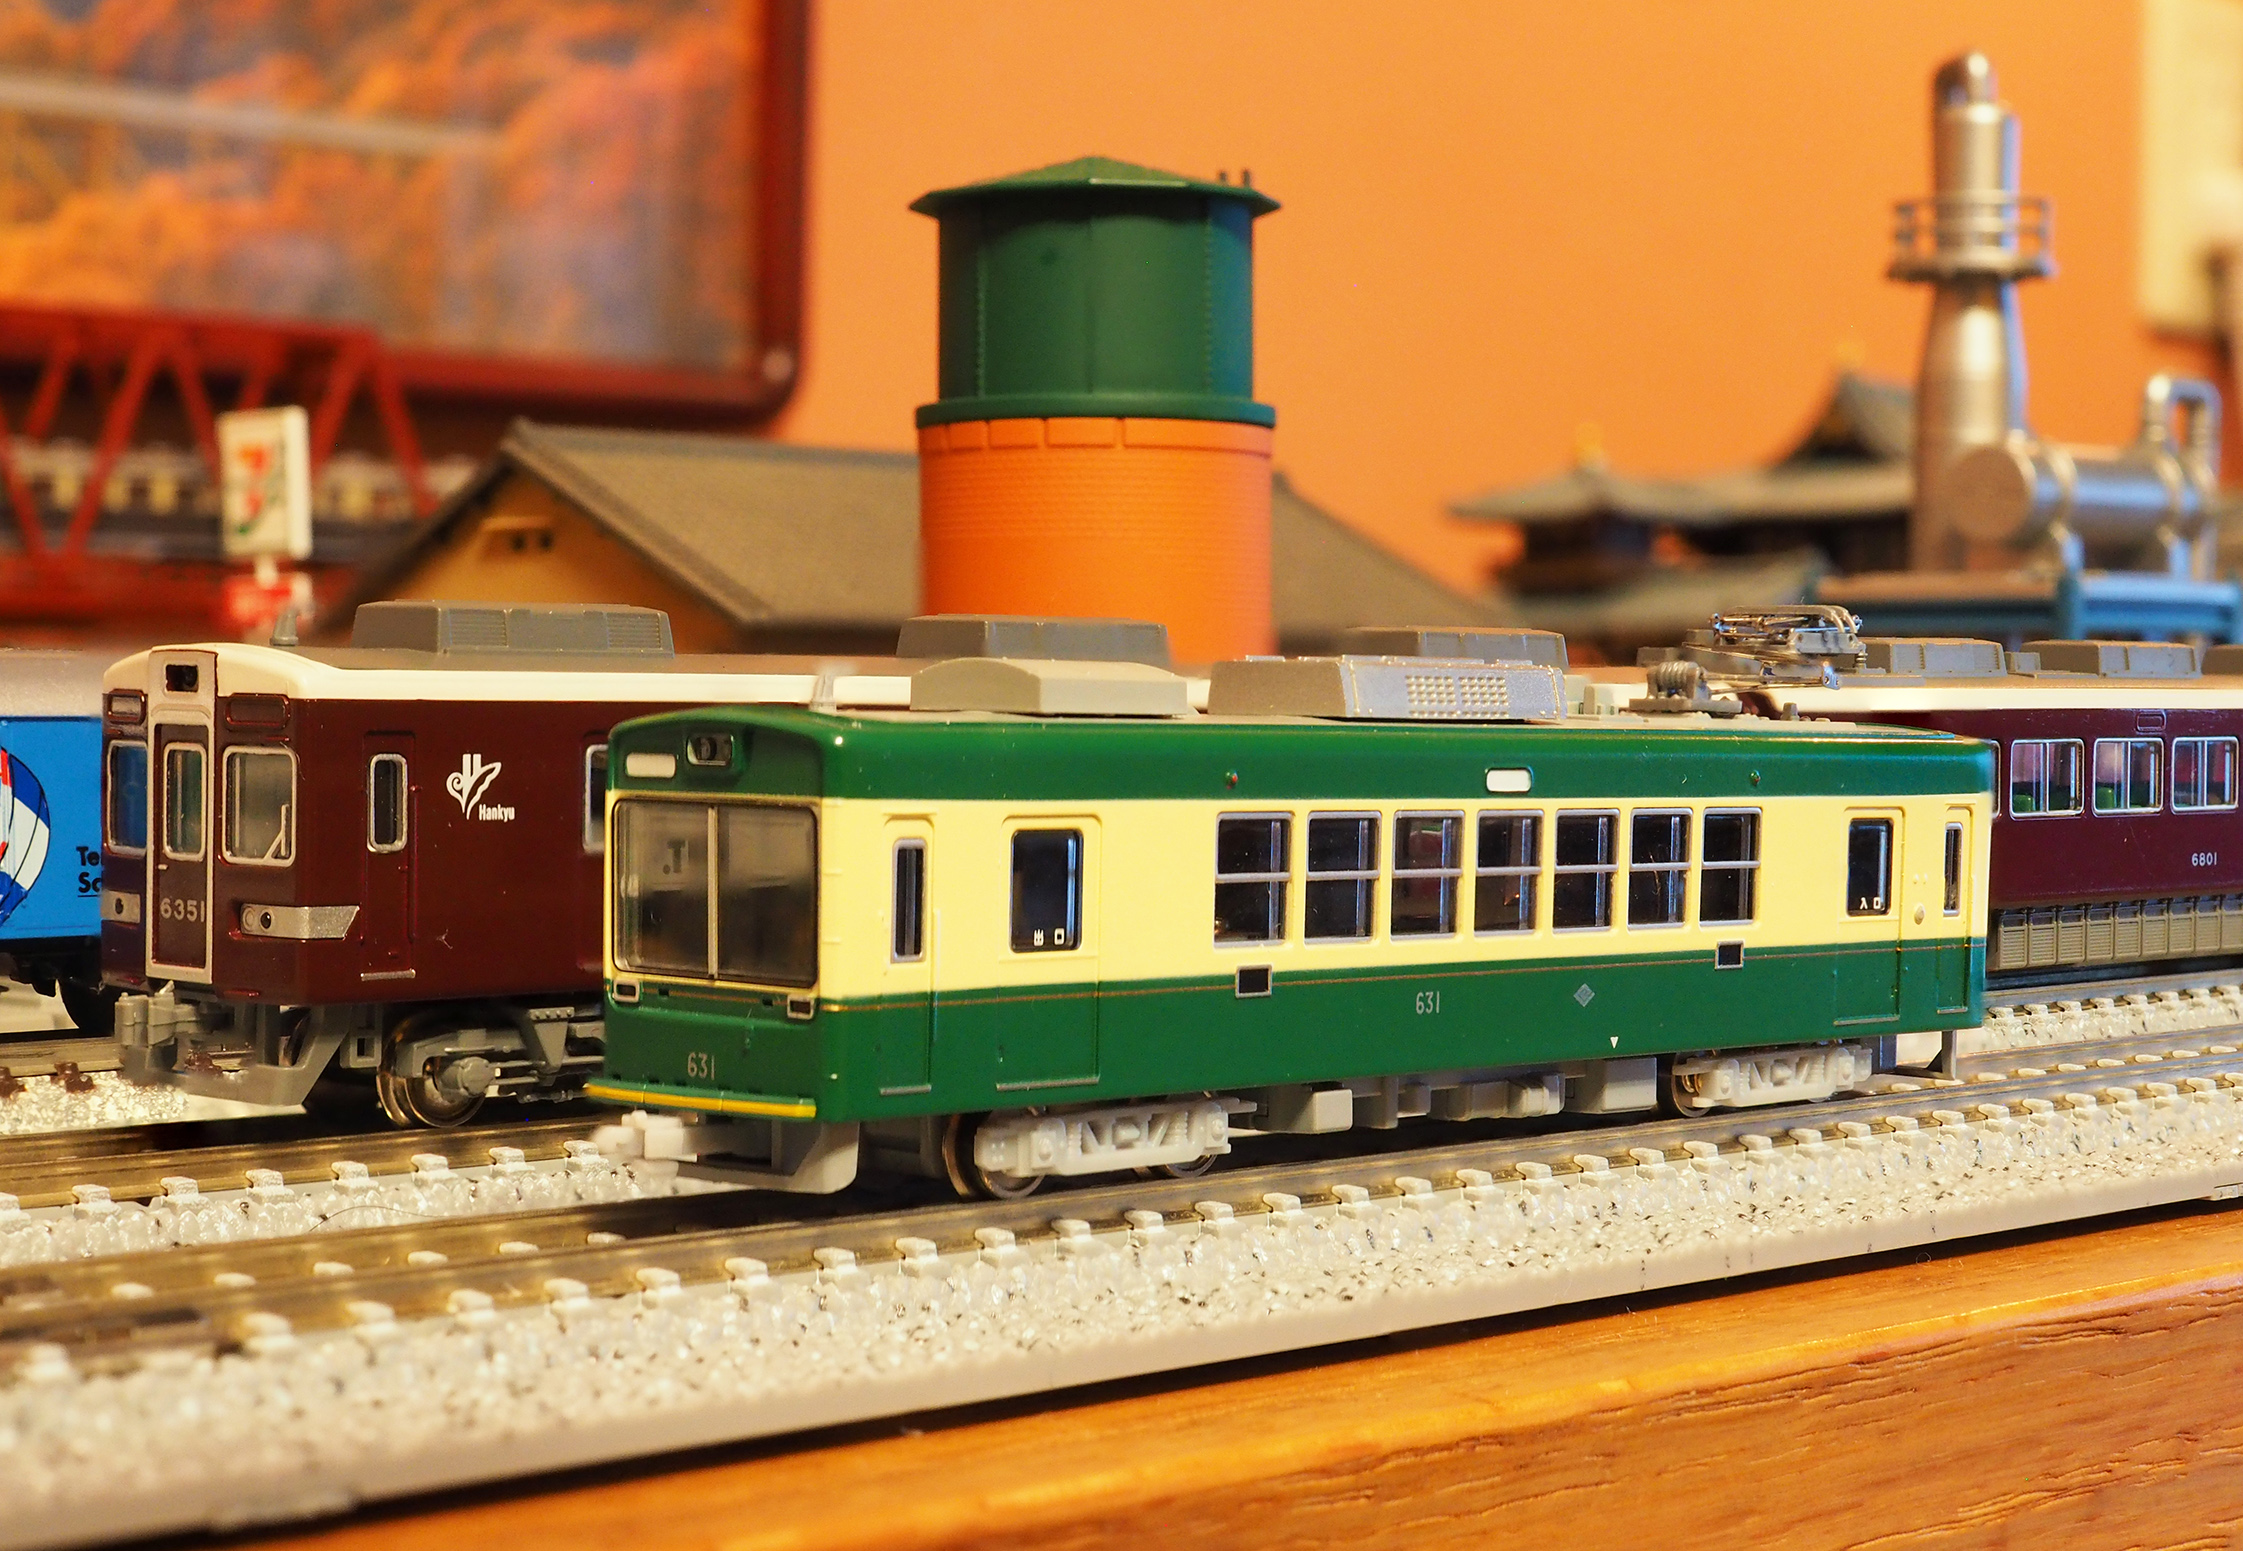
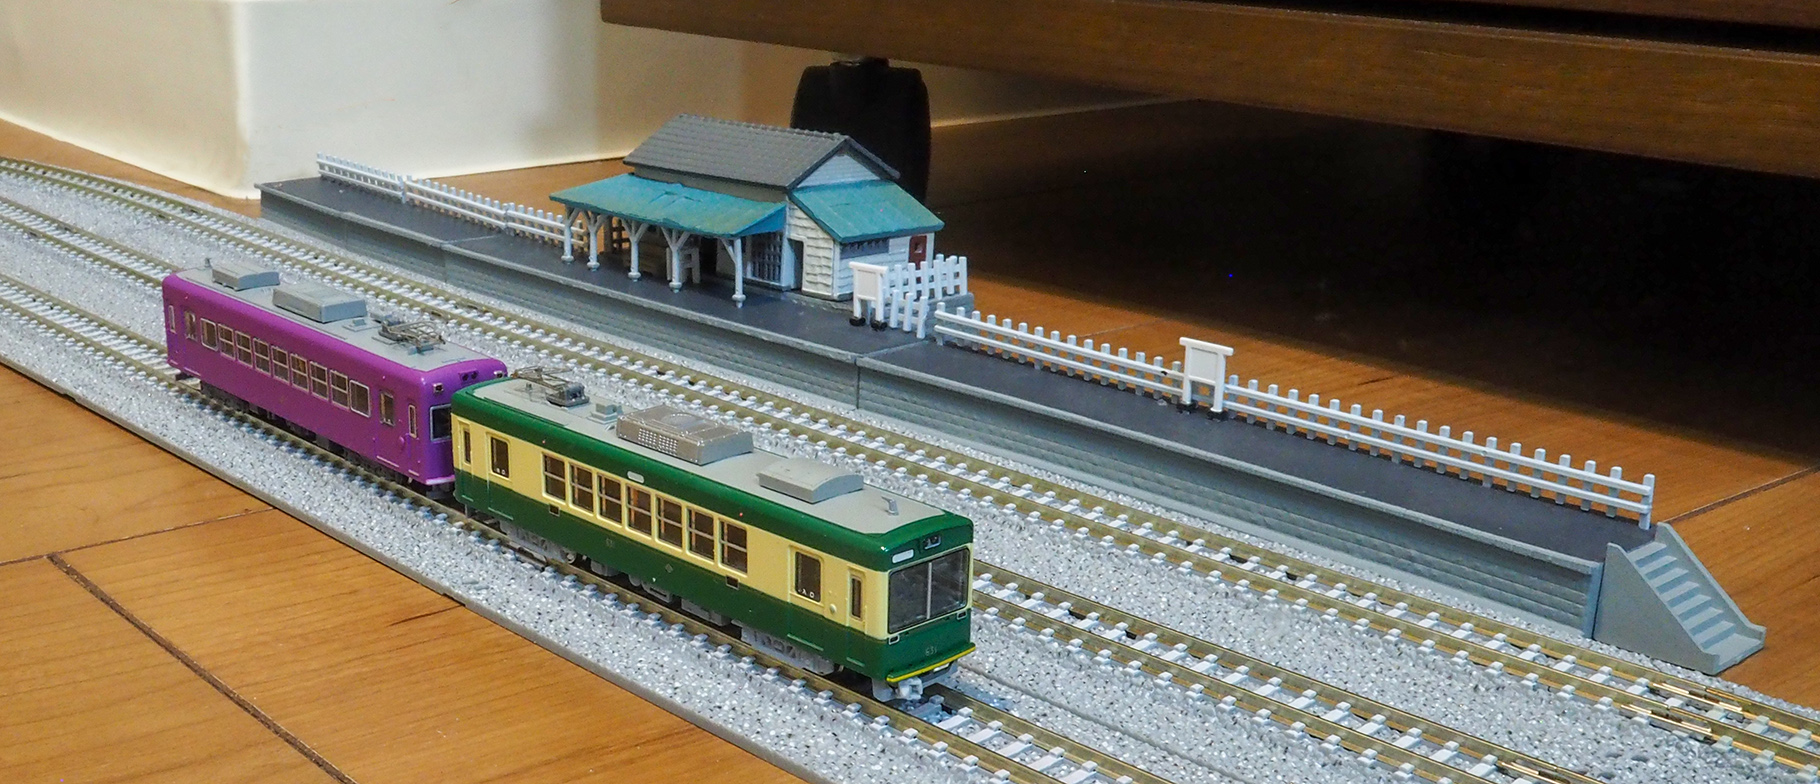
I also decided to pick up the Keifuku (京福) Randen (嵐電) モボ
631形 by Modemo (pictured on the left above). Here are both of my
first purchases (shown on my Kyoto friend's layout):
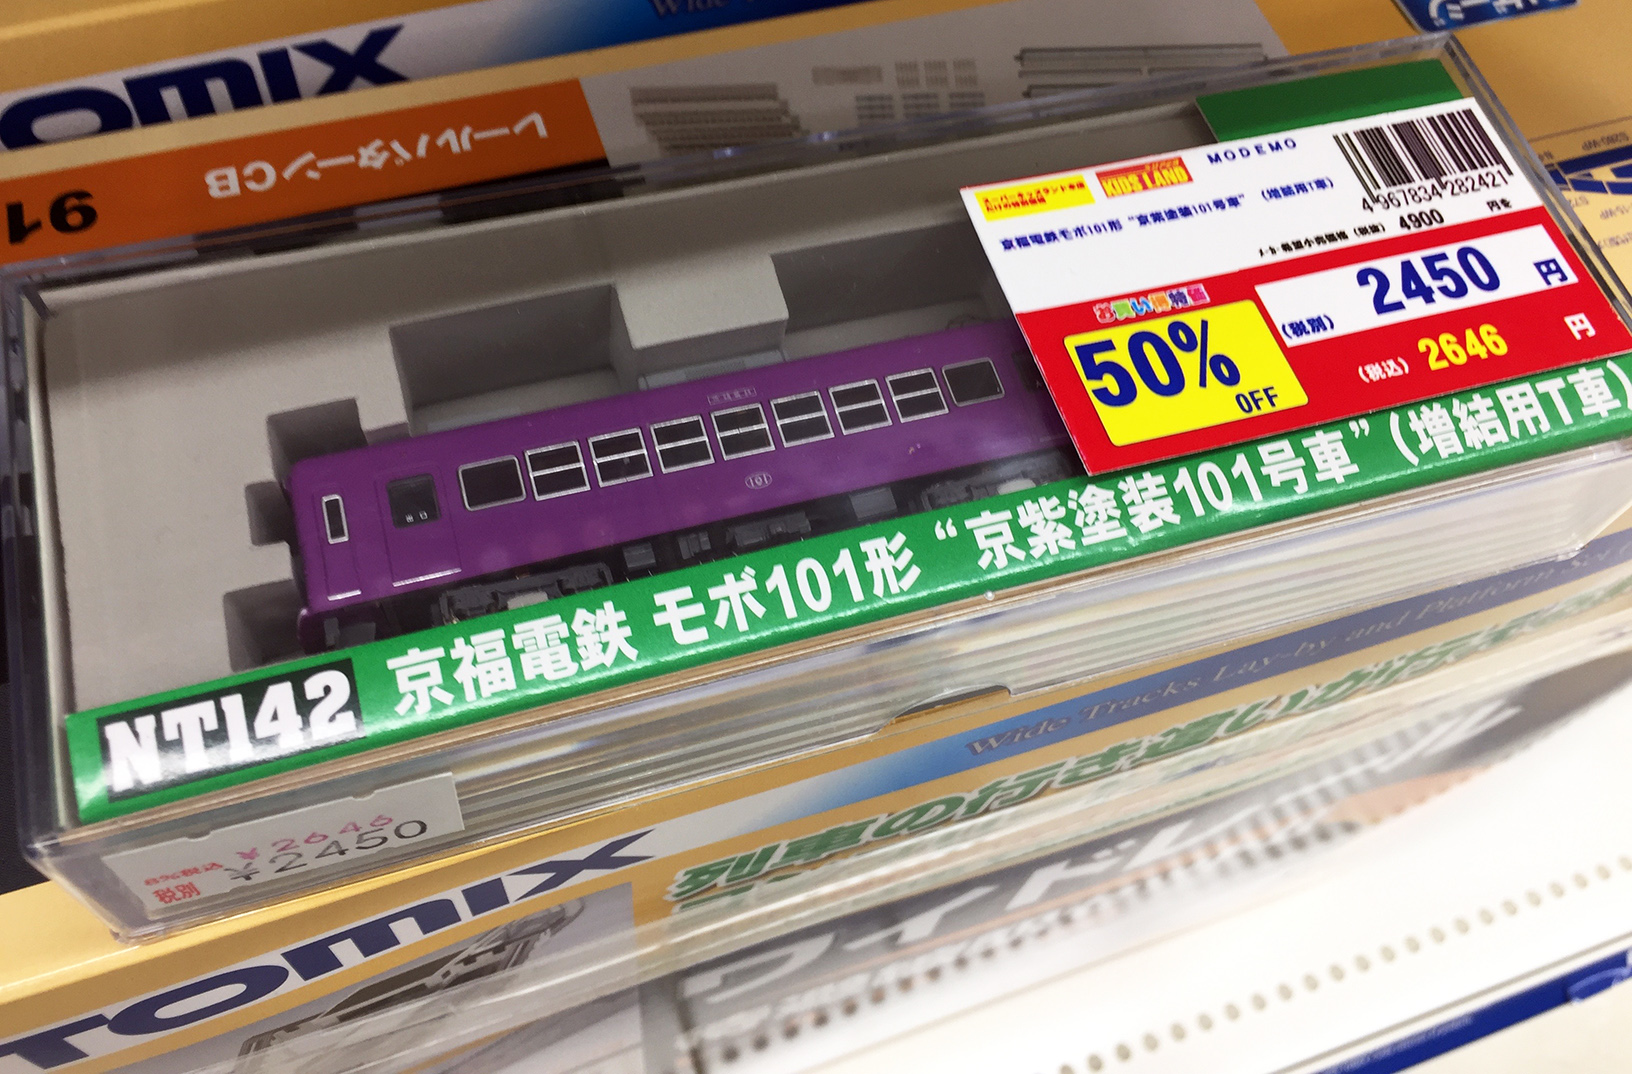
Later on, I managed to find the purple Randen 2nd car (shown
below left) at half price at Joshin.
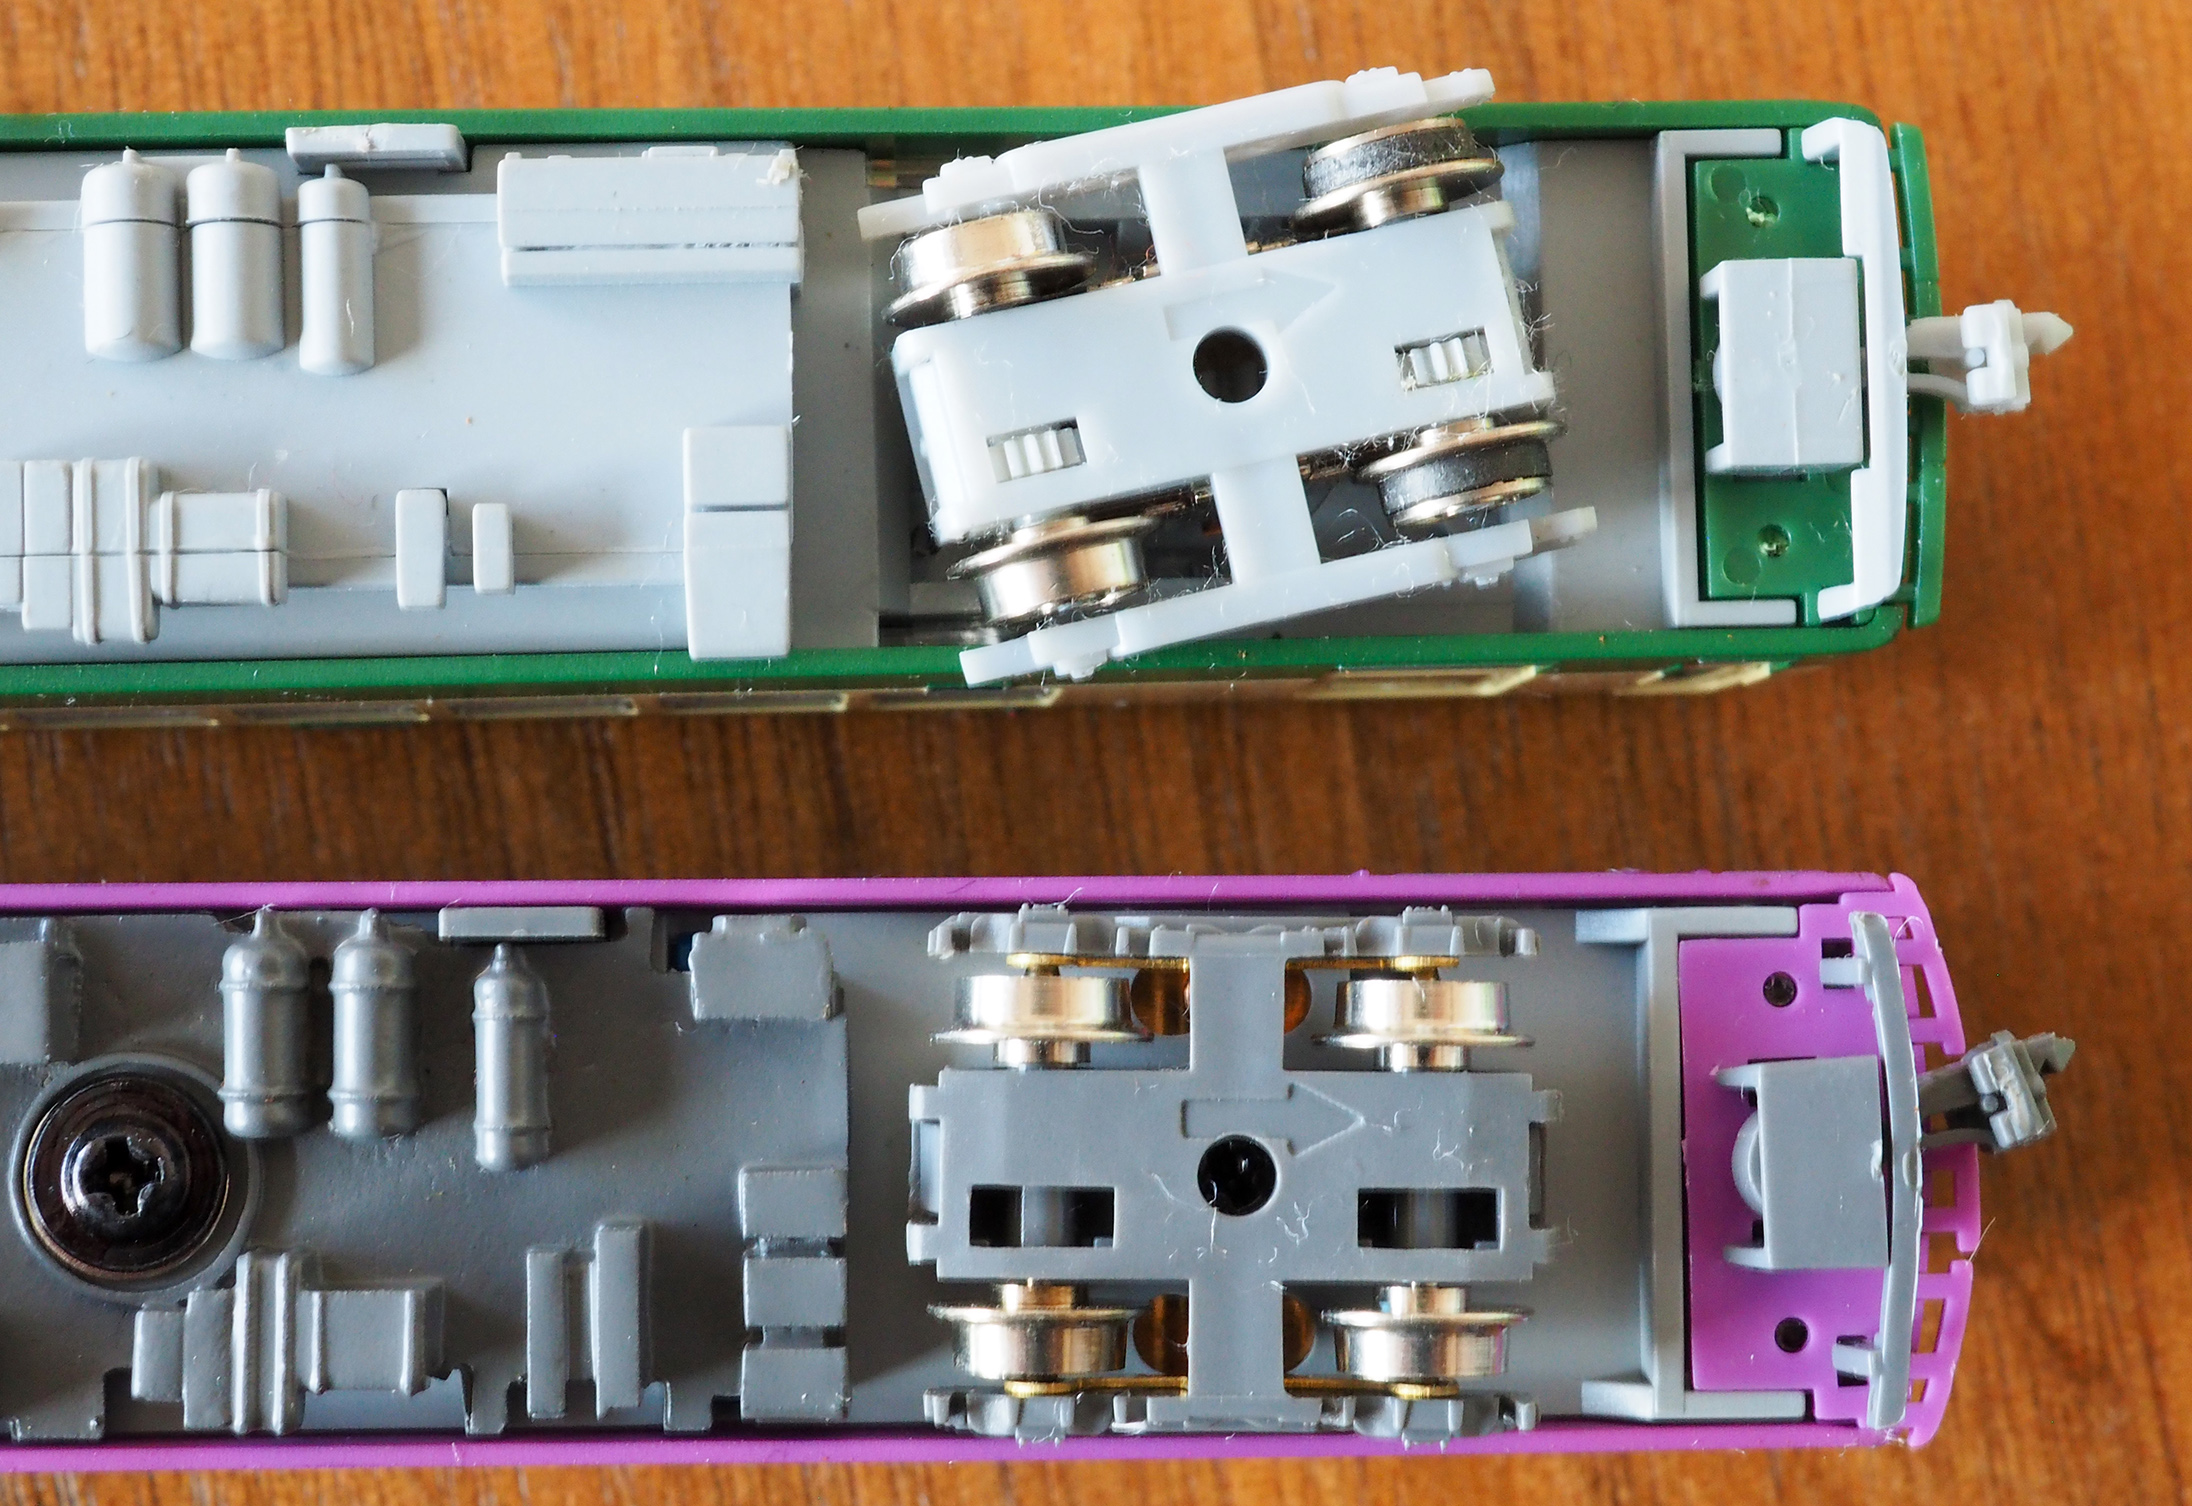
The connectors are rather small and fiddly on these two Modemos
(see above right); but once I got them connected, they look like a
nice pair:
[BTW, they
sometimes run this combination in real life. Station in the background
courtesy of my Kyoto friend.]
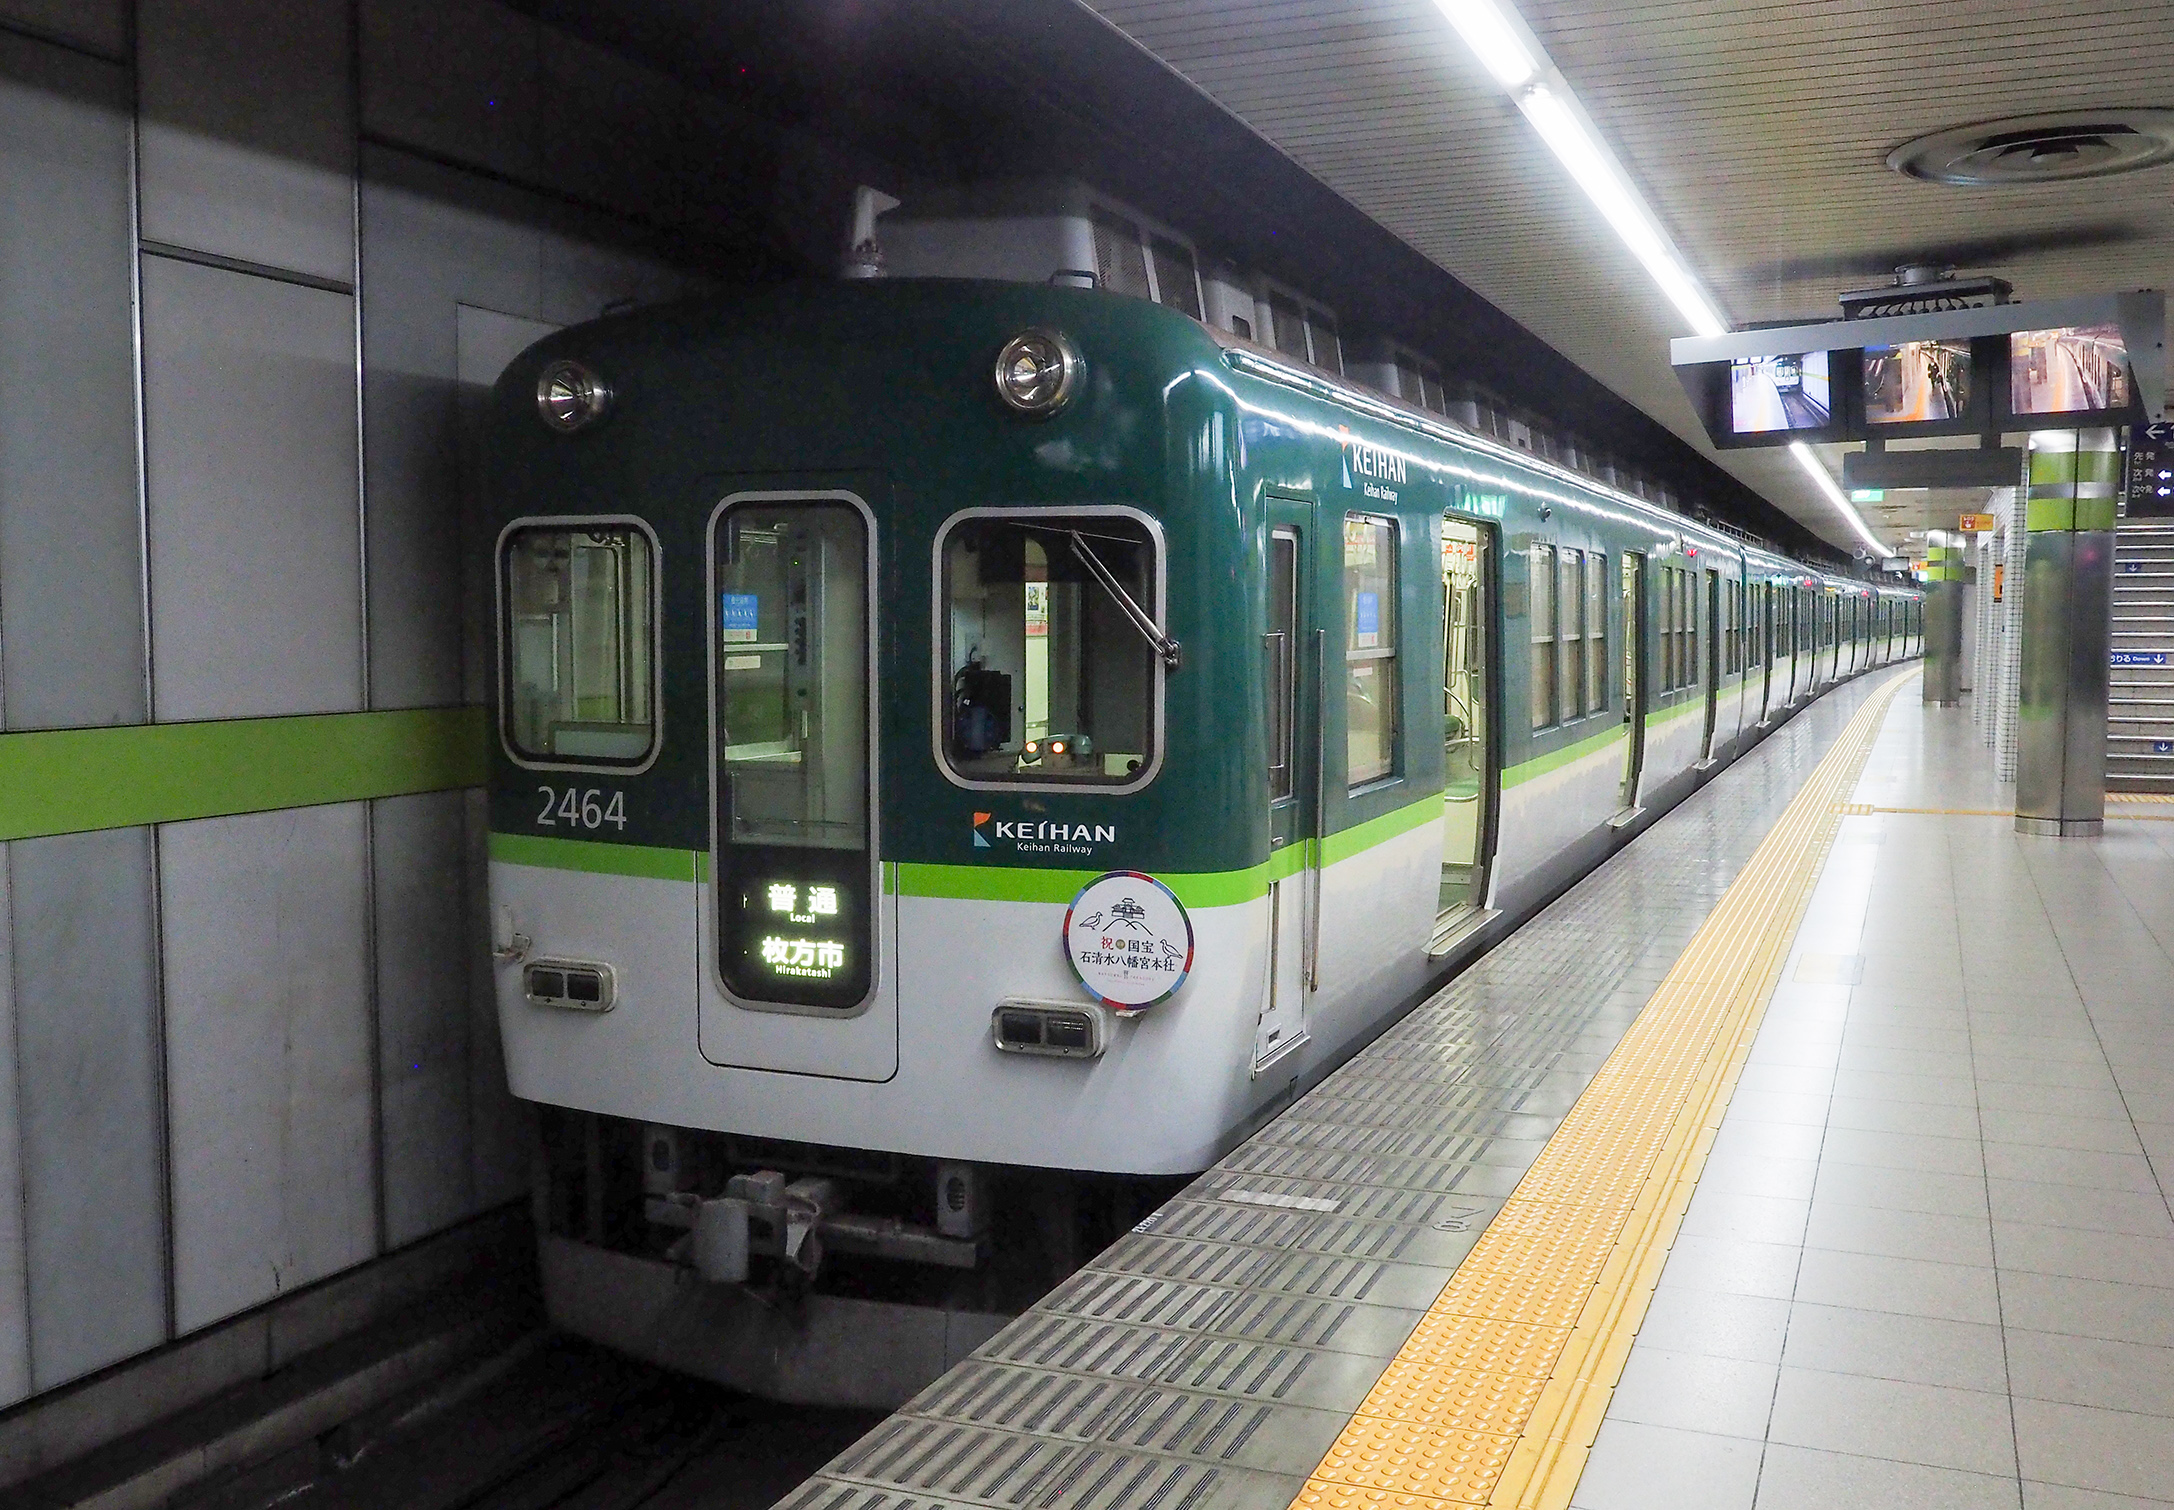
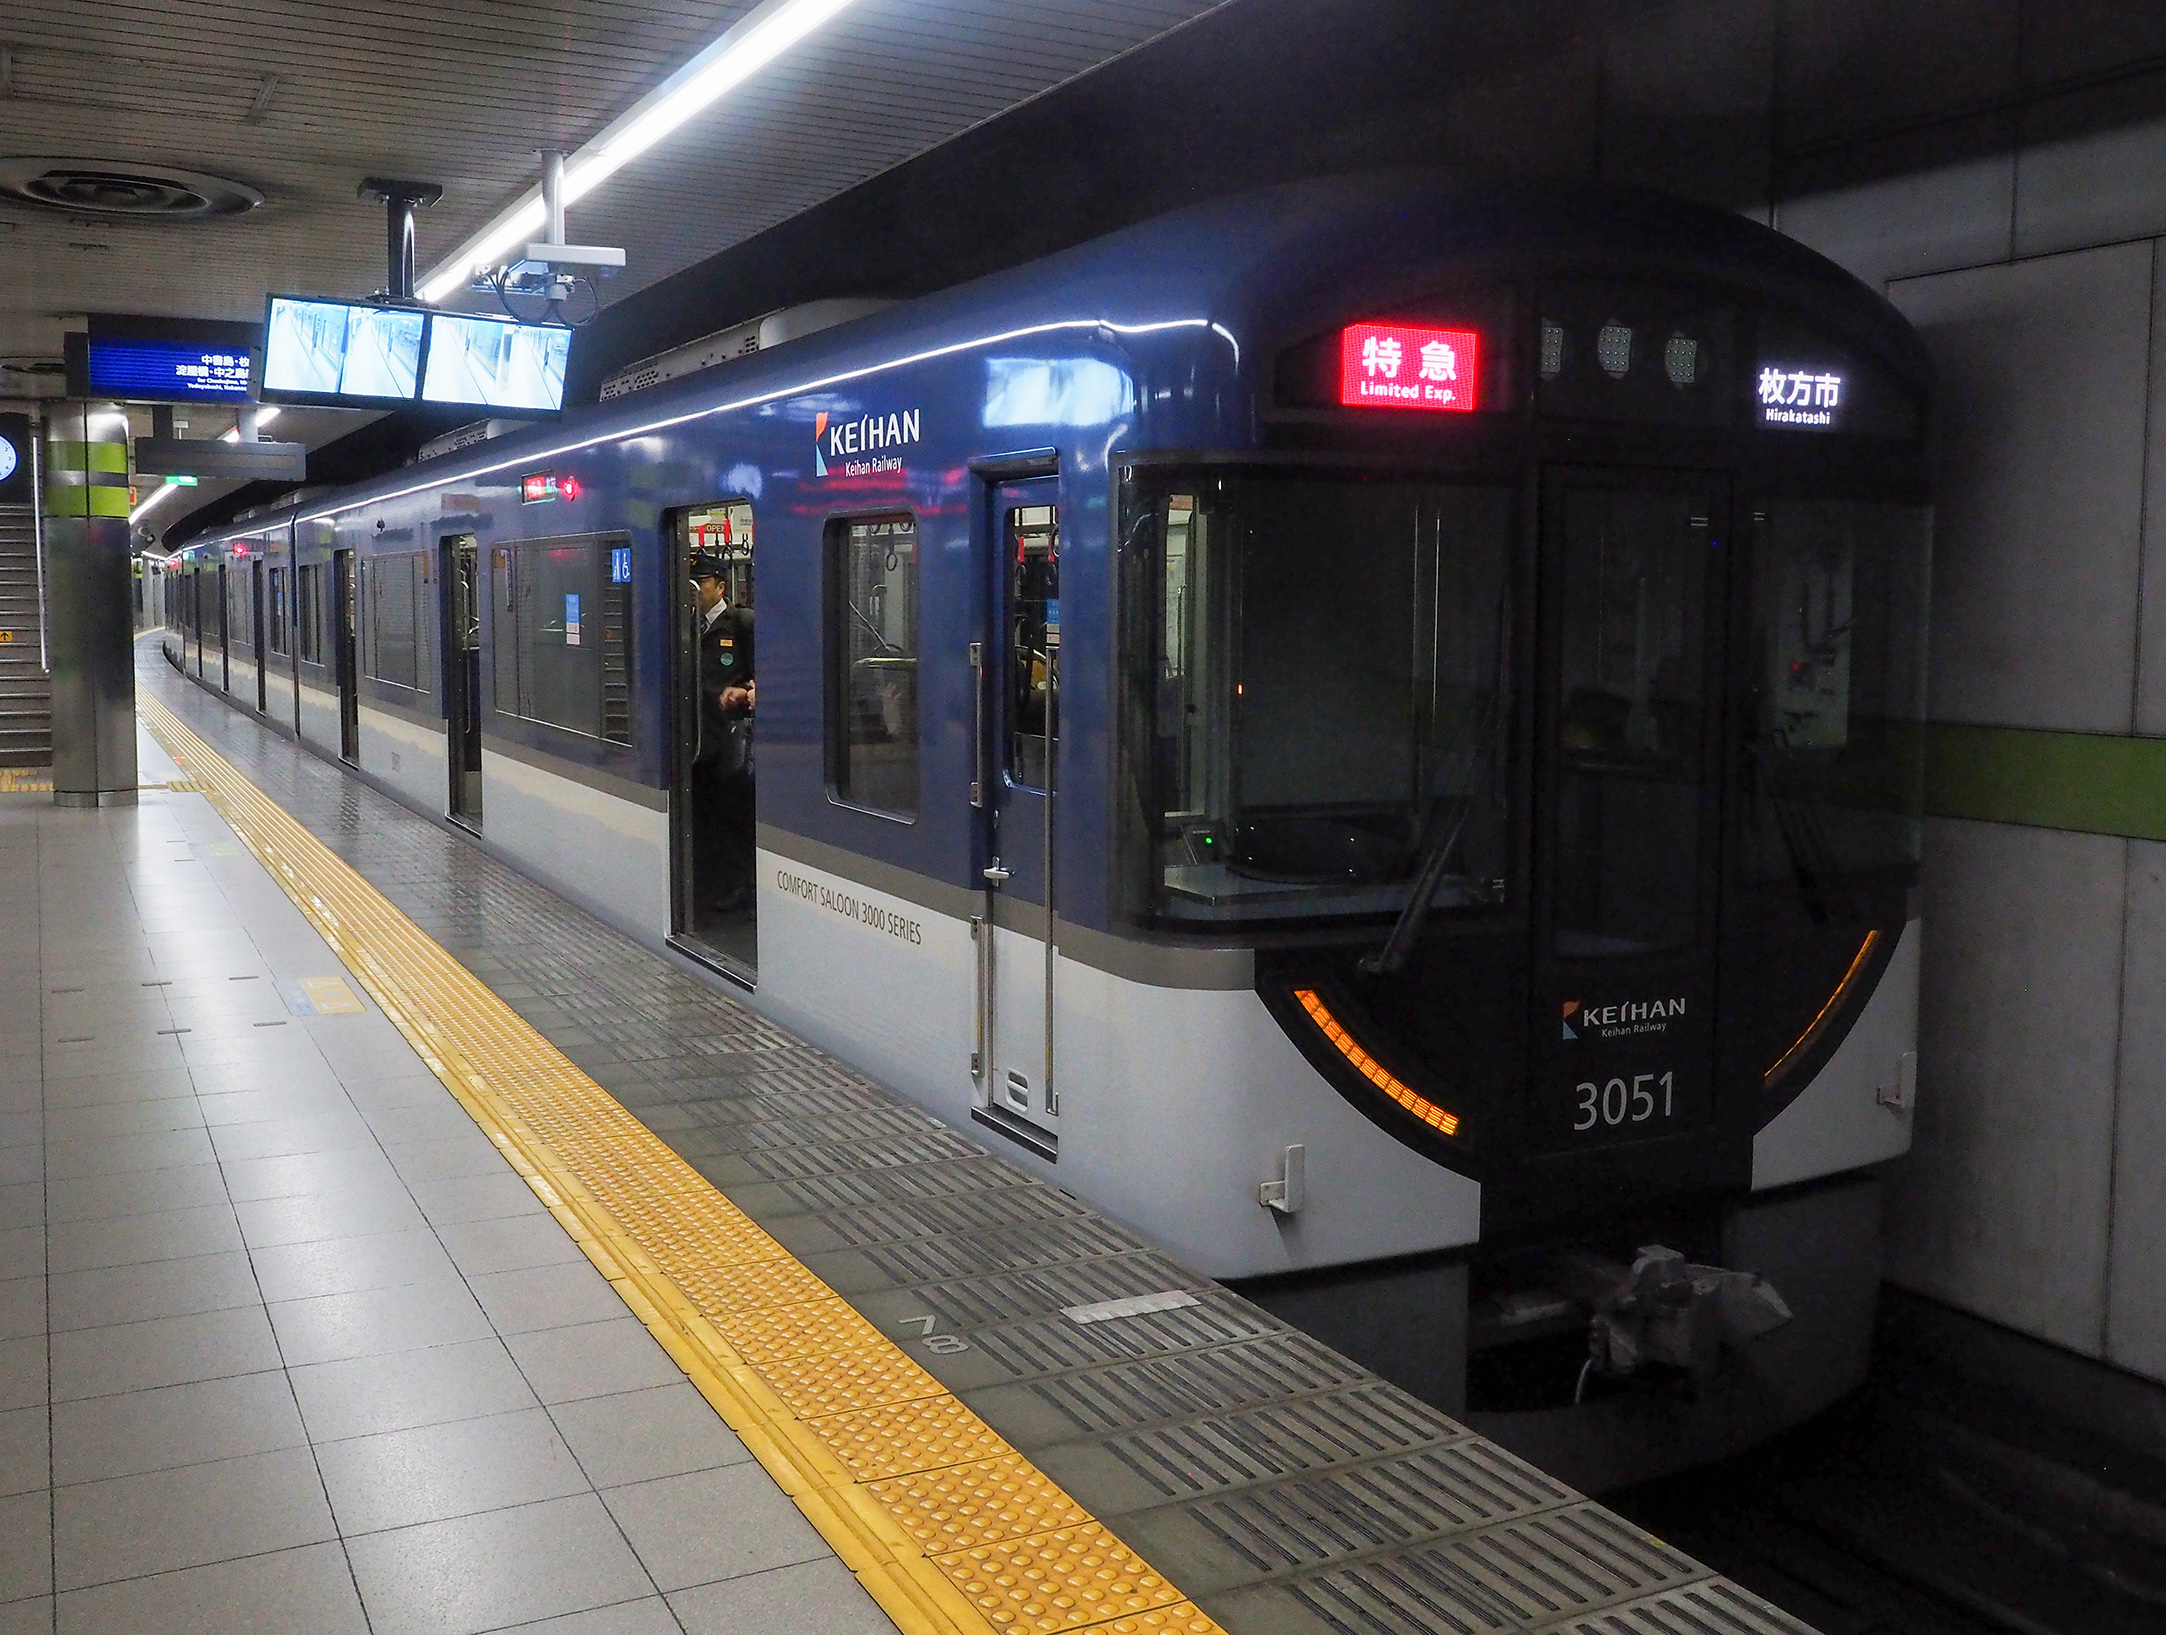
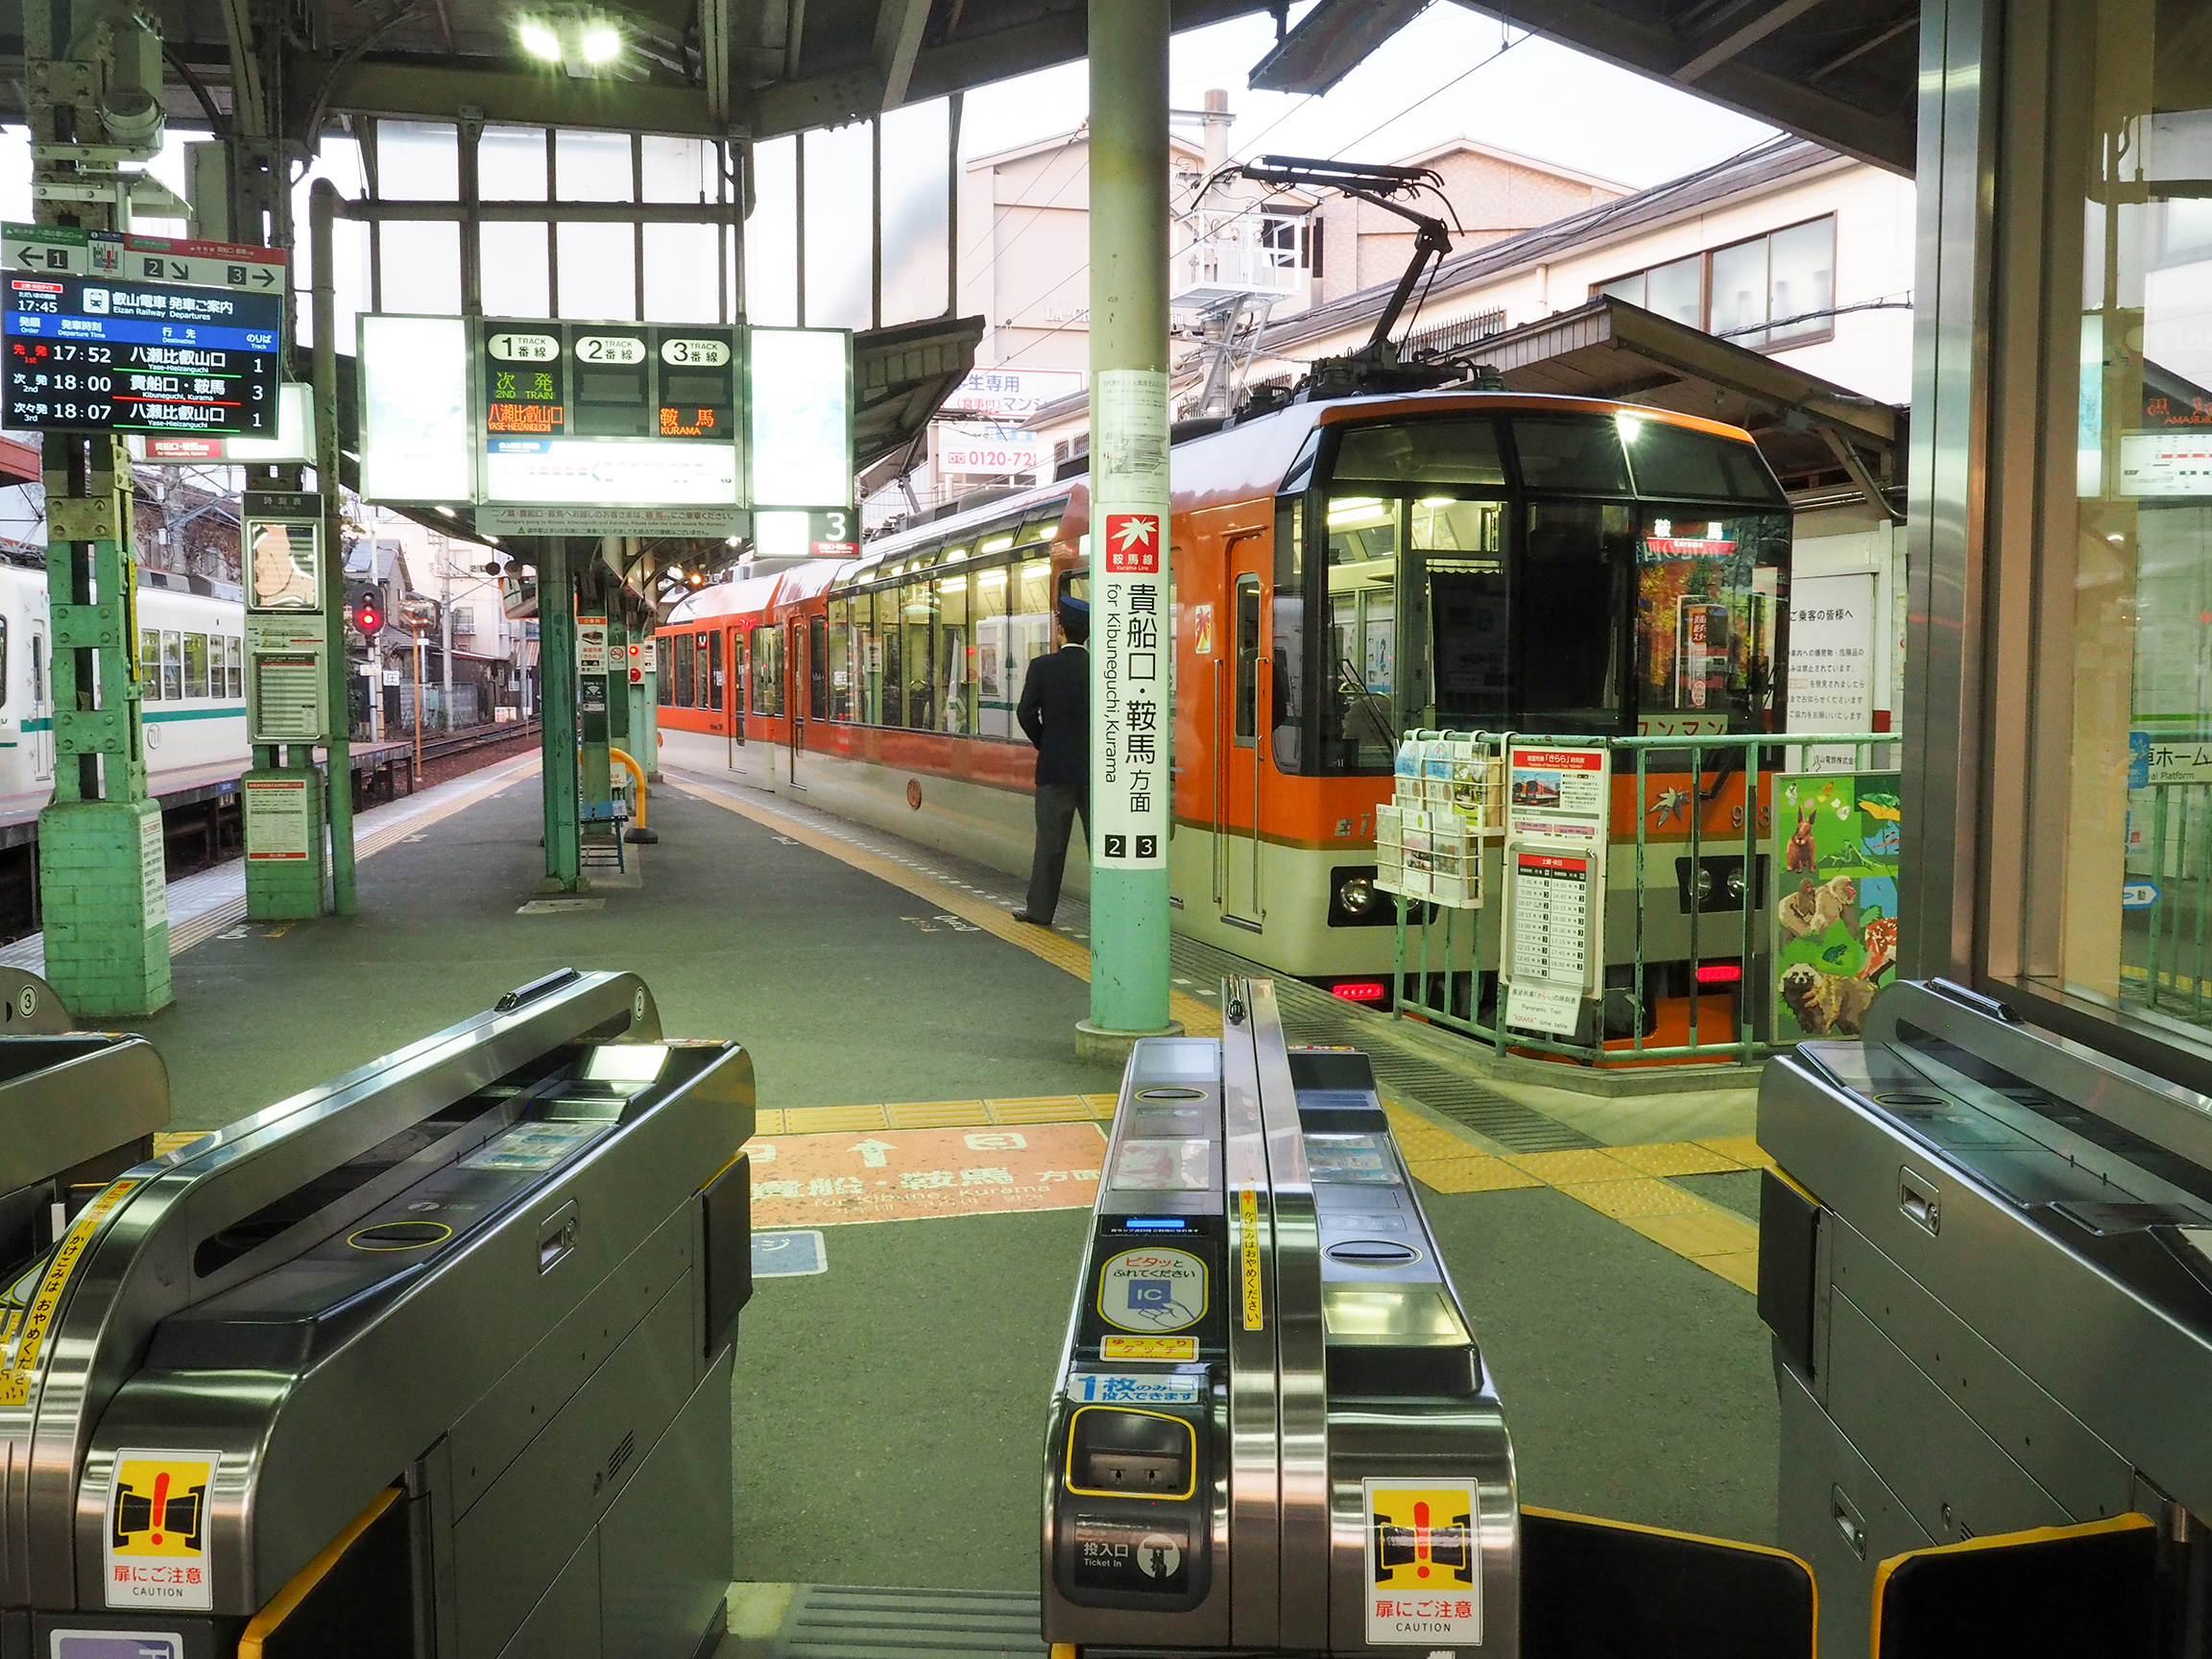
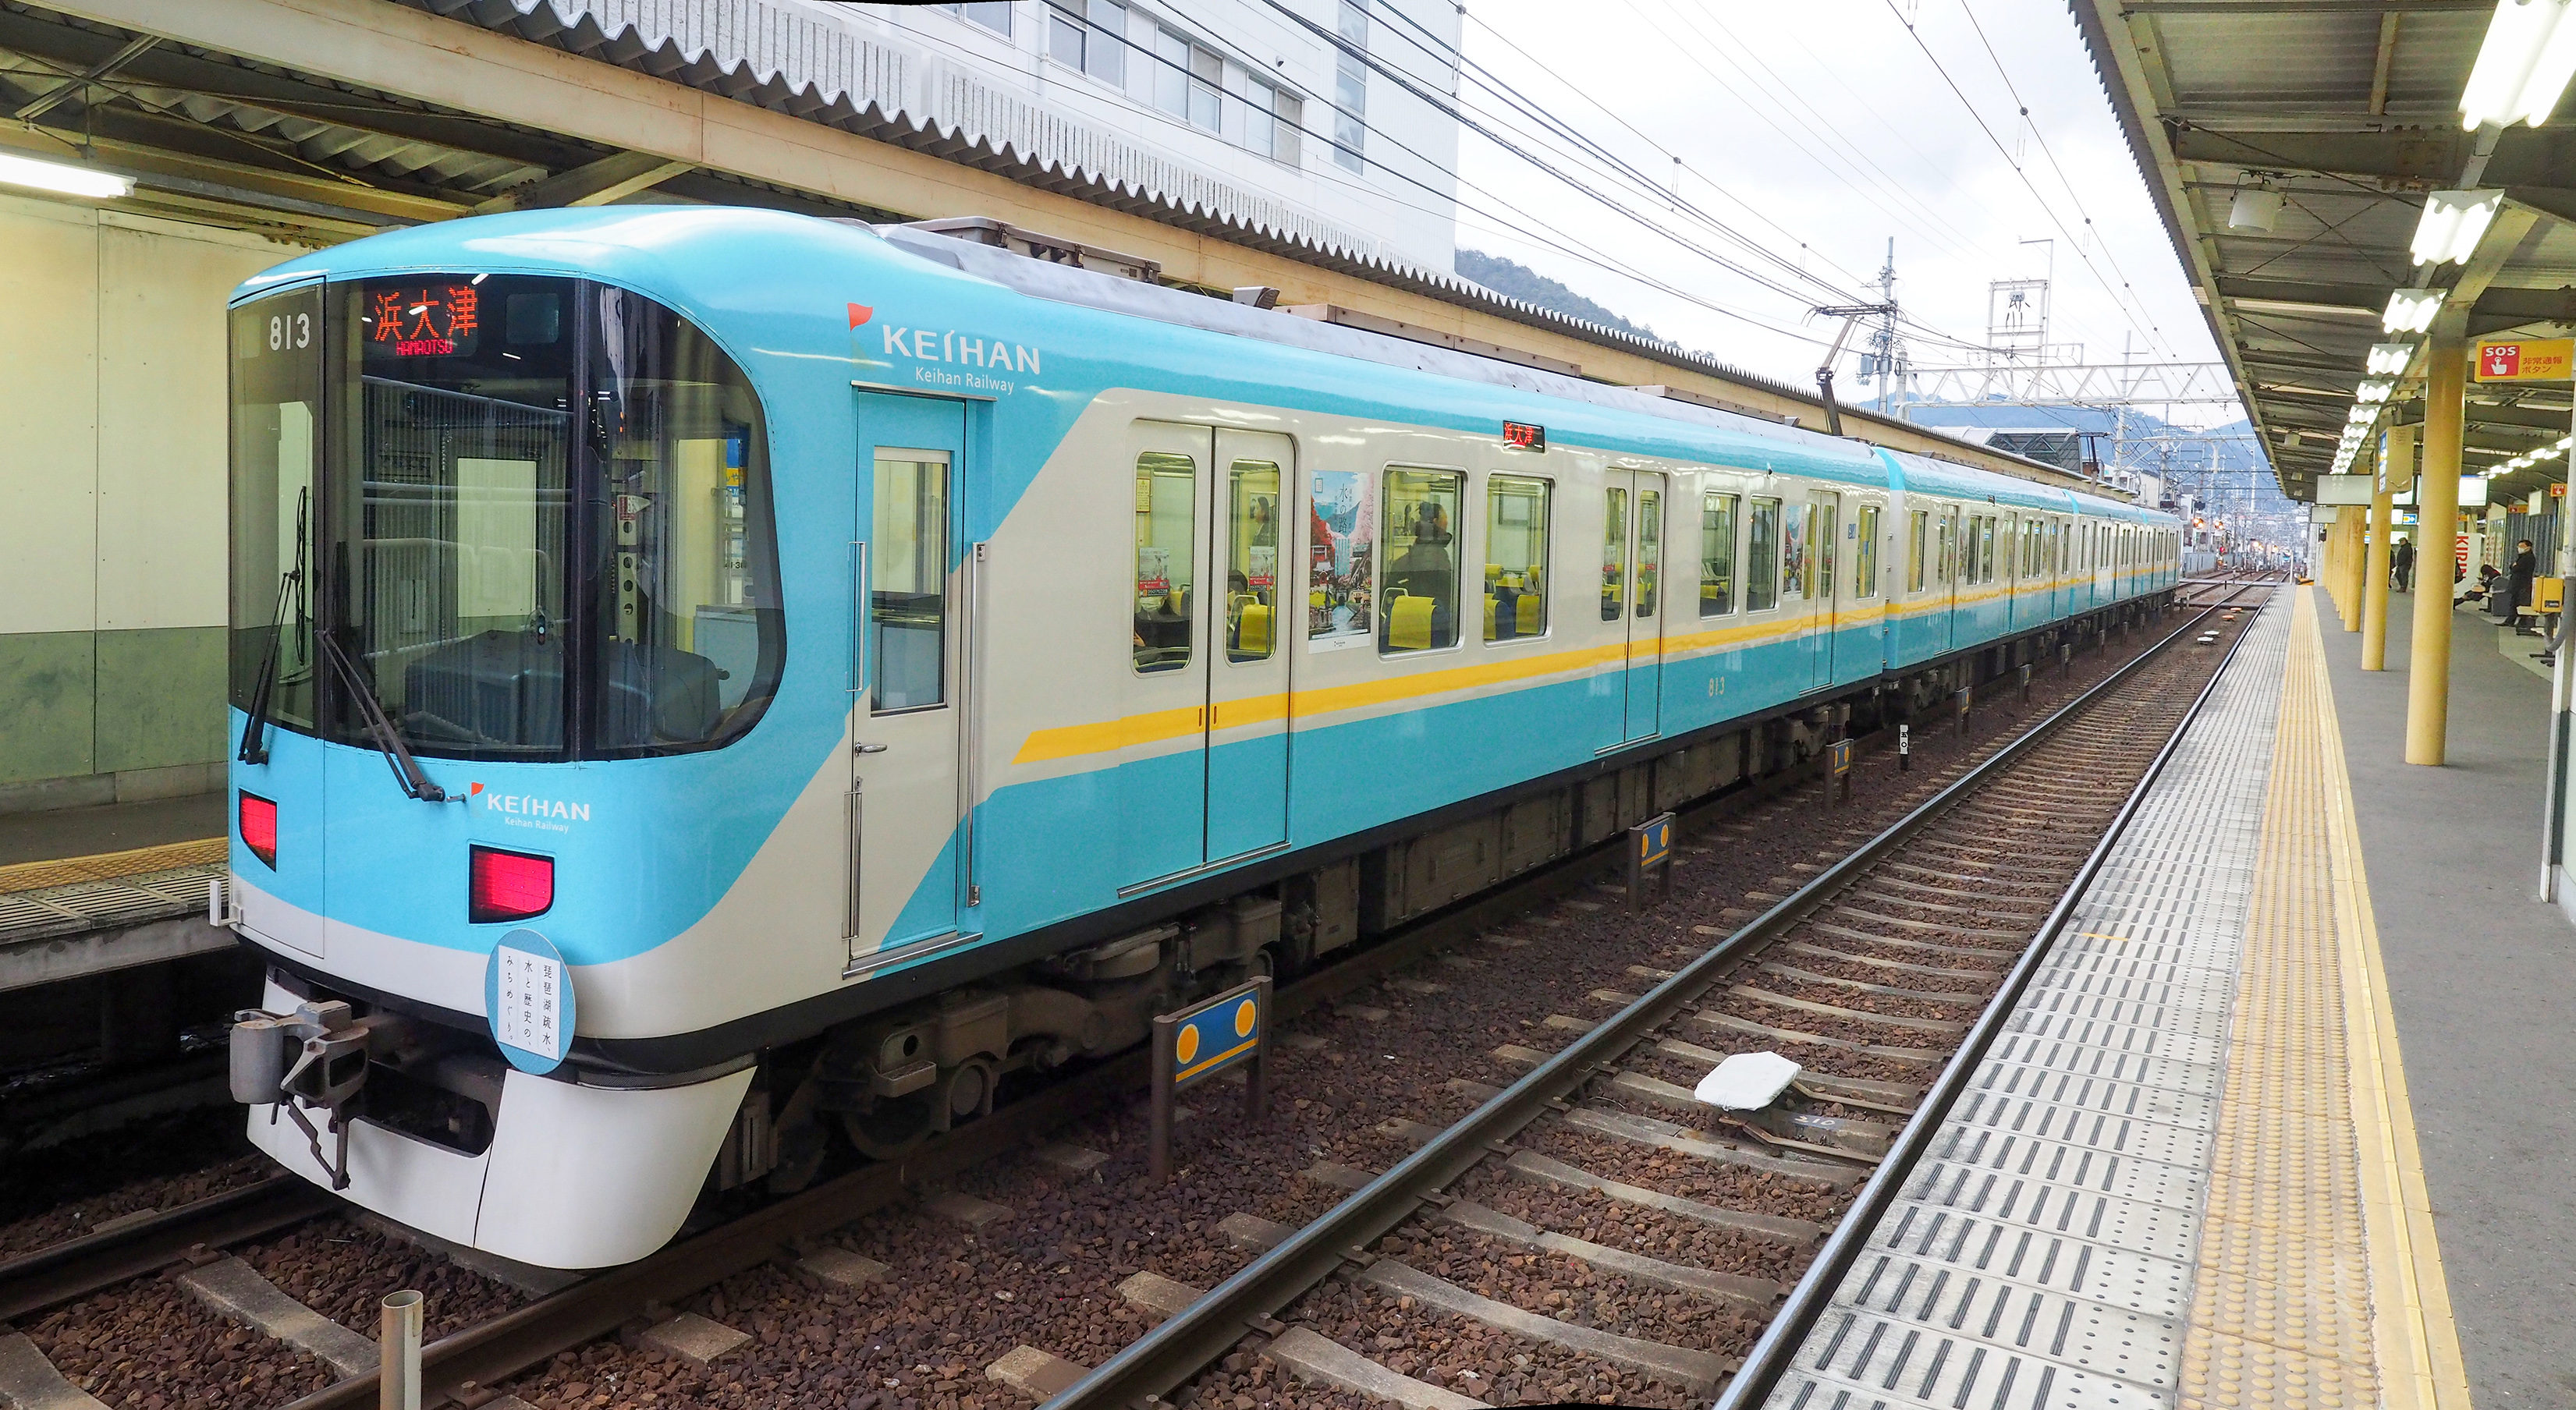
The Keihan main line is what I take about once a week.
[Picture taken at Kurama (鞍馬) station. 8000系 and 3000系
tokkyū (特急) trains are depicted.]
When I started looking for the Keihan (京阪) trains, I quickly ran
into some trouble. Limited Express (tokkyū;特急) trains from
Demachiyanagi (出町柳) employ livery in all three color schemes (8000
系maroon/yellow, blue/white (3000系) and green/white (9000系). As some
of them are "out of print", collecting all three isn't a matter of simply
picking stuff from a store shelf.
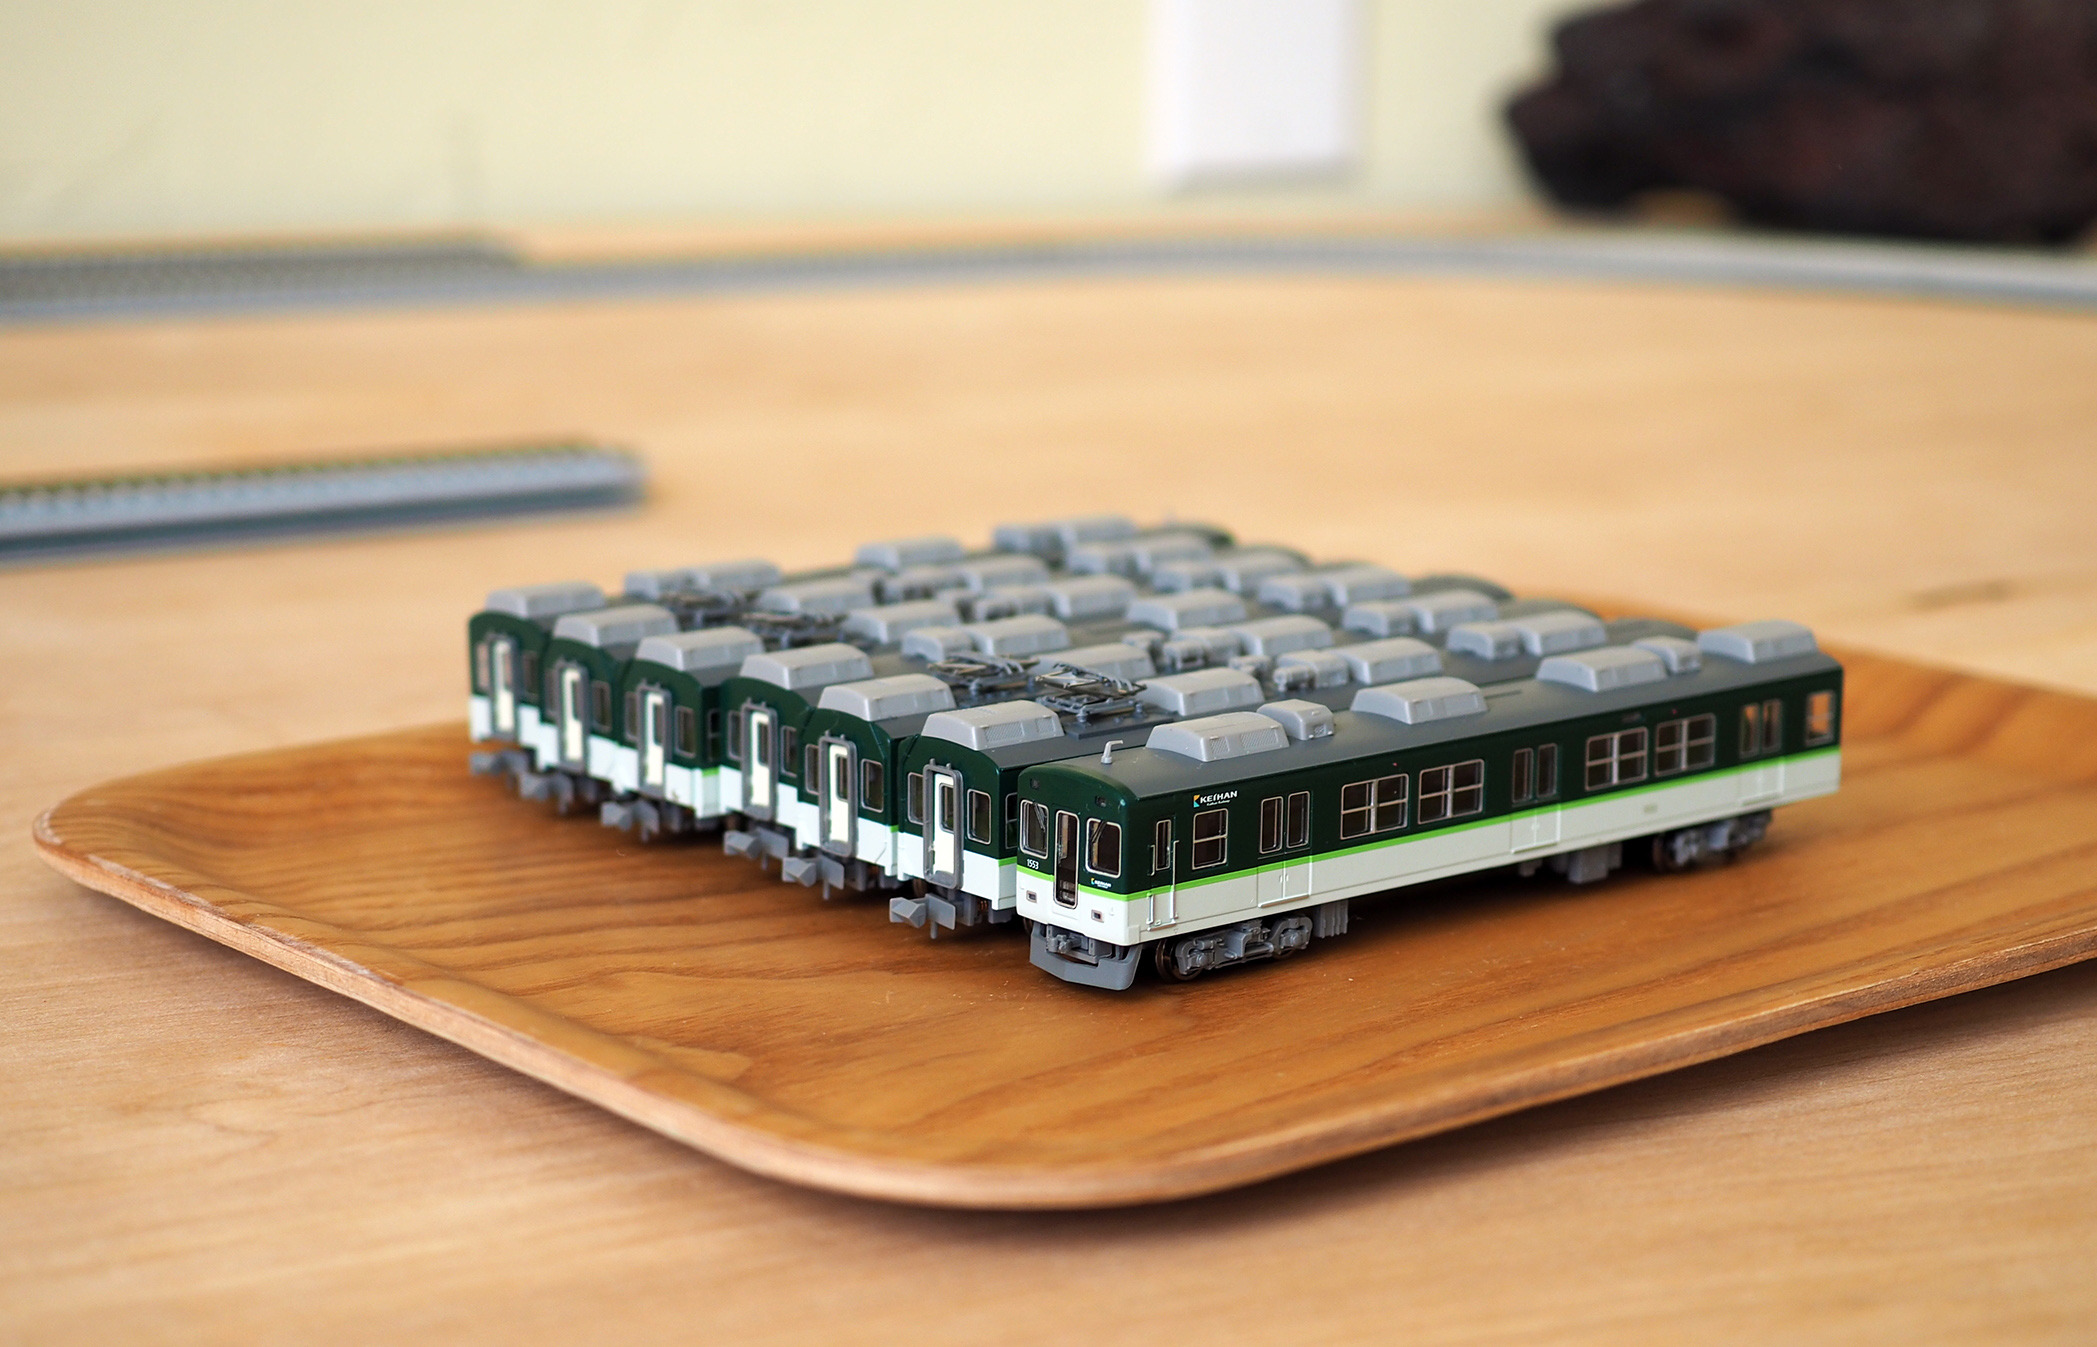
I picked up the green 7-car Keihan 1000系 (see picture above) as
soon as it was released by Micro Ace (A-9992) at the beginning of
February 2017, but I didn't have luck finding the maroon/yellow 8000系
8-car (with double decker) or the blue 3000系 that I often take (see
earlier Keihan advertising). Actually, it seems it's not only the 1000
系 that is painted green/white, see the following 2000系 (also 9000系,
not shown here):
[Taken at Demachiyanagi (出町柳).]
I see that Greenmax will release the blue Keihan at the end of
February this year. So that's an opportunity not to be missed. The
8000系 Micro Ace A2858 was released back in 2013 and is long
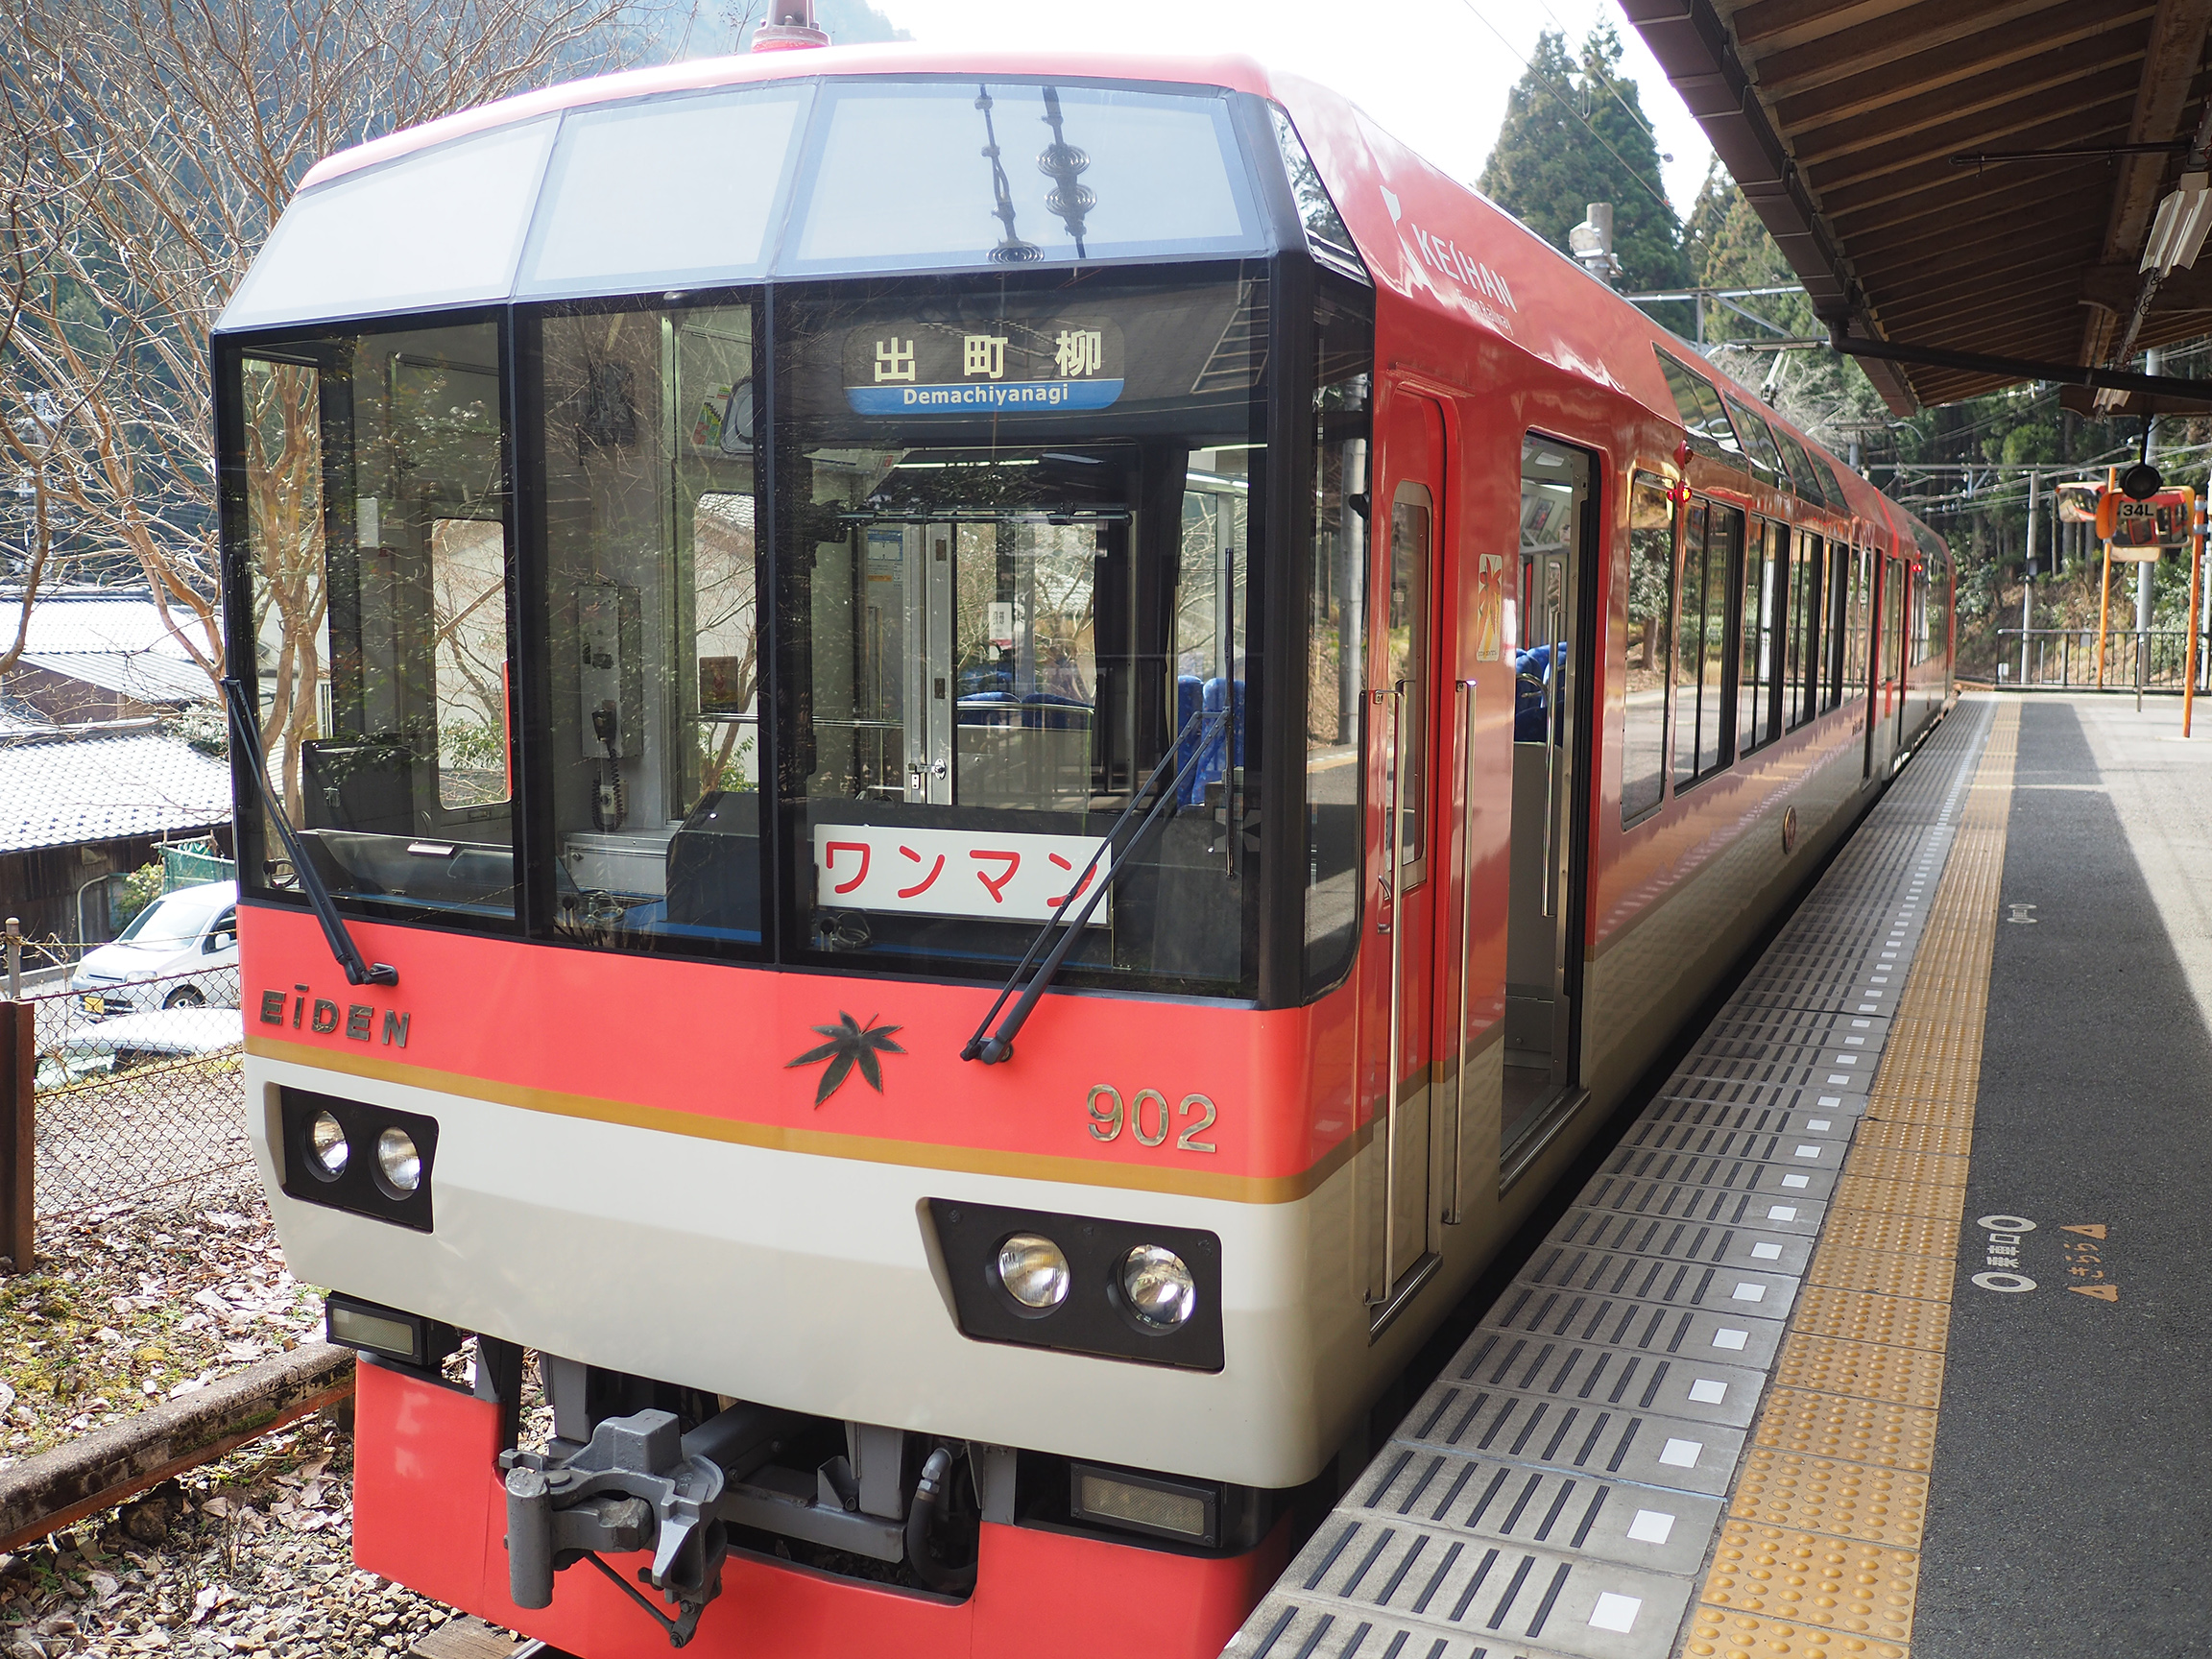
gone. Here is a picture of the real 3000系:
[Taken at Demachiyanagi (出町柳).]
The 3000系 has my favorite Limited Express (特急) seating
arrangement, 2+1. The single aisle (cum window) seat is the best: I
can break out the laptop for that hour long ride. (The 8000系 is 2+2,
and the 9000系 is longitudinal.)
Update
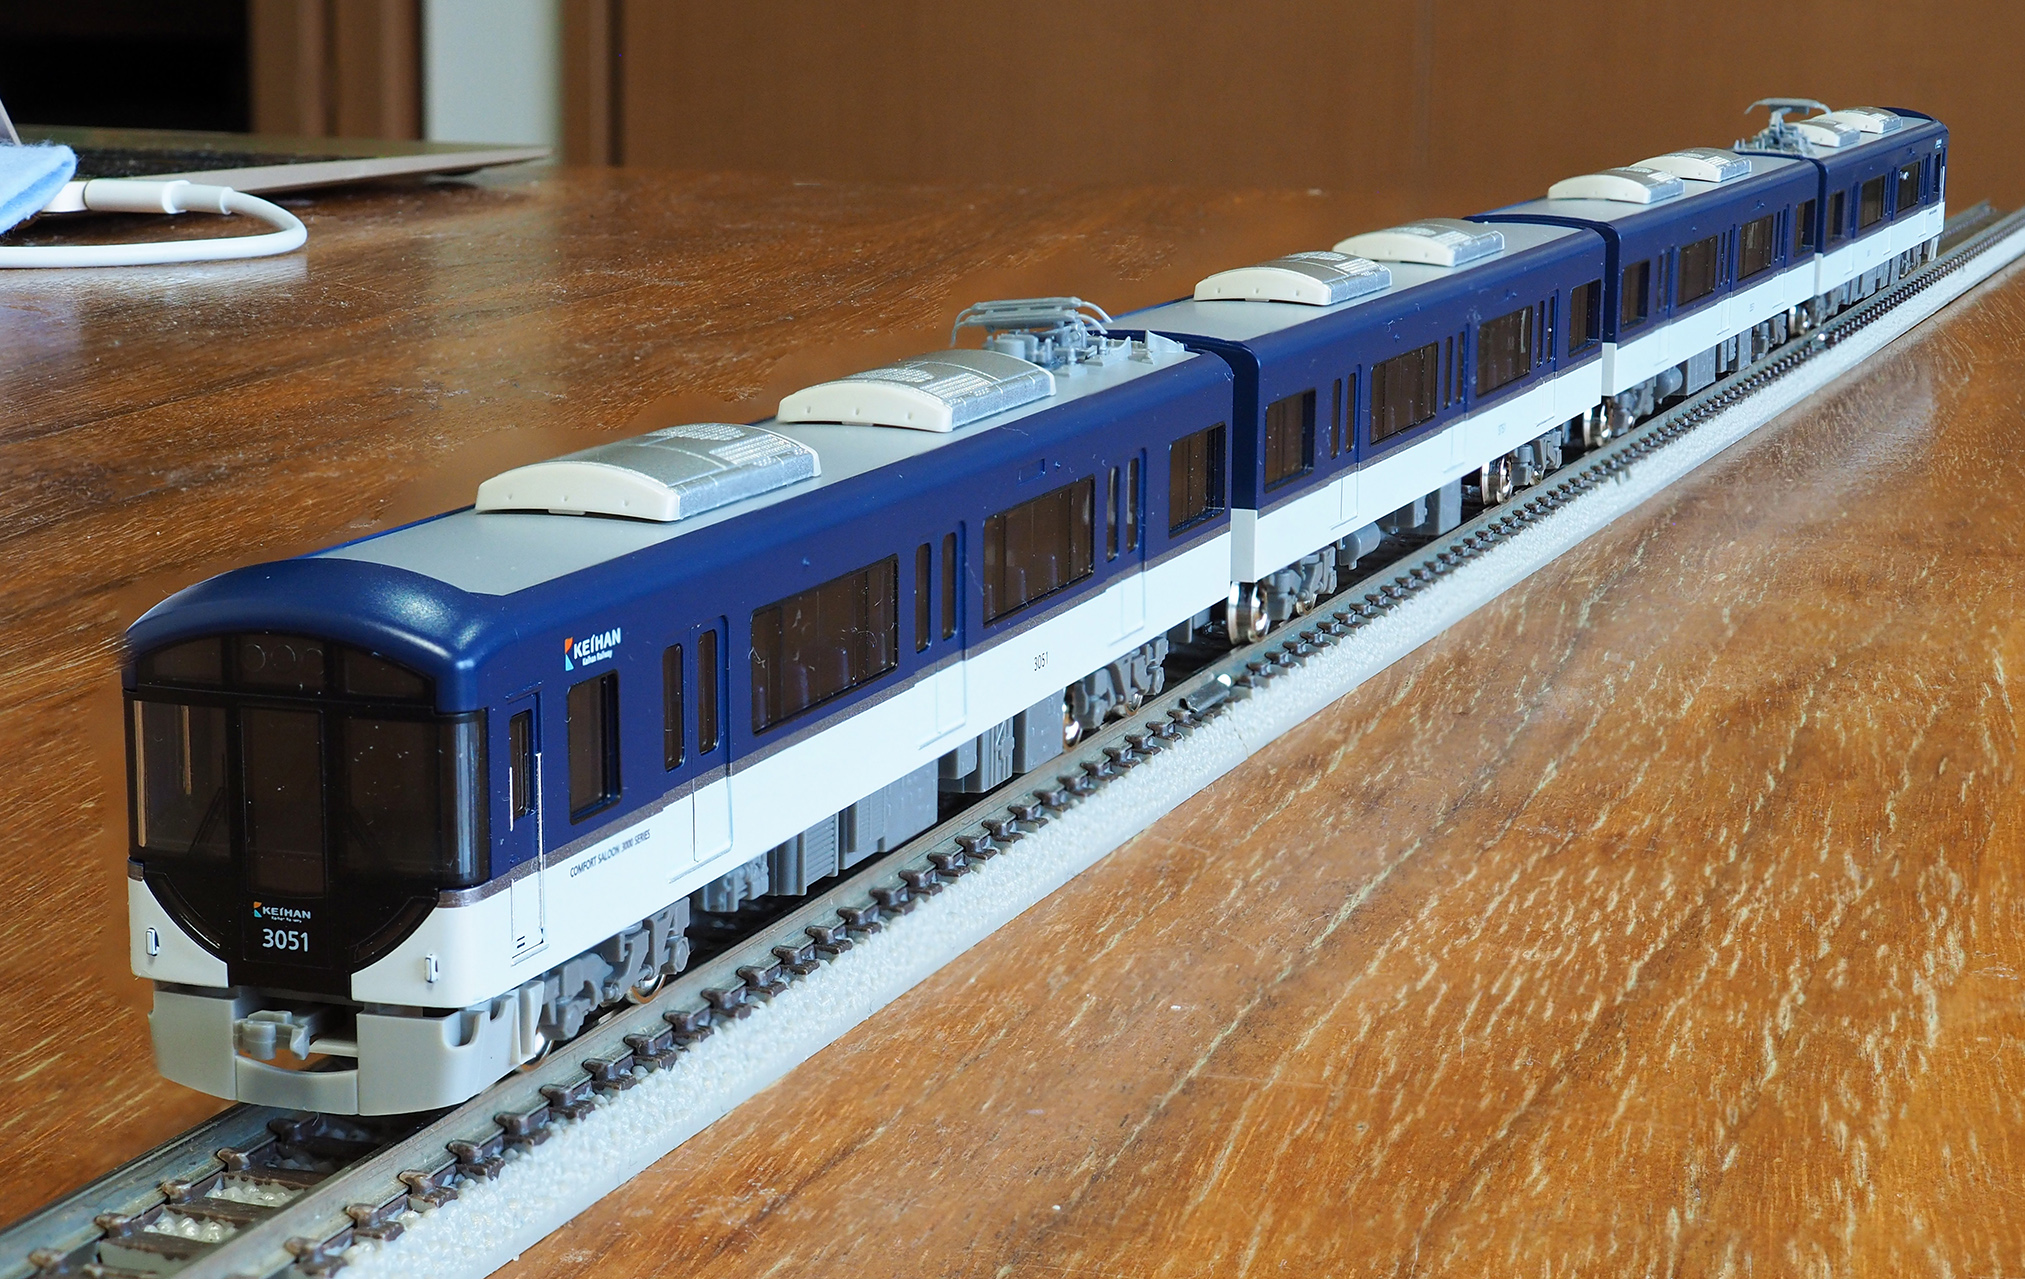
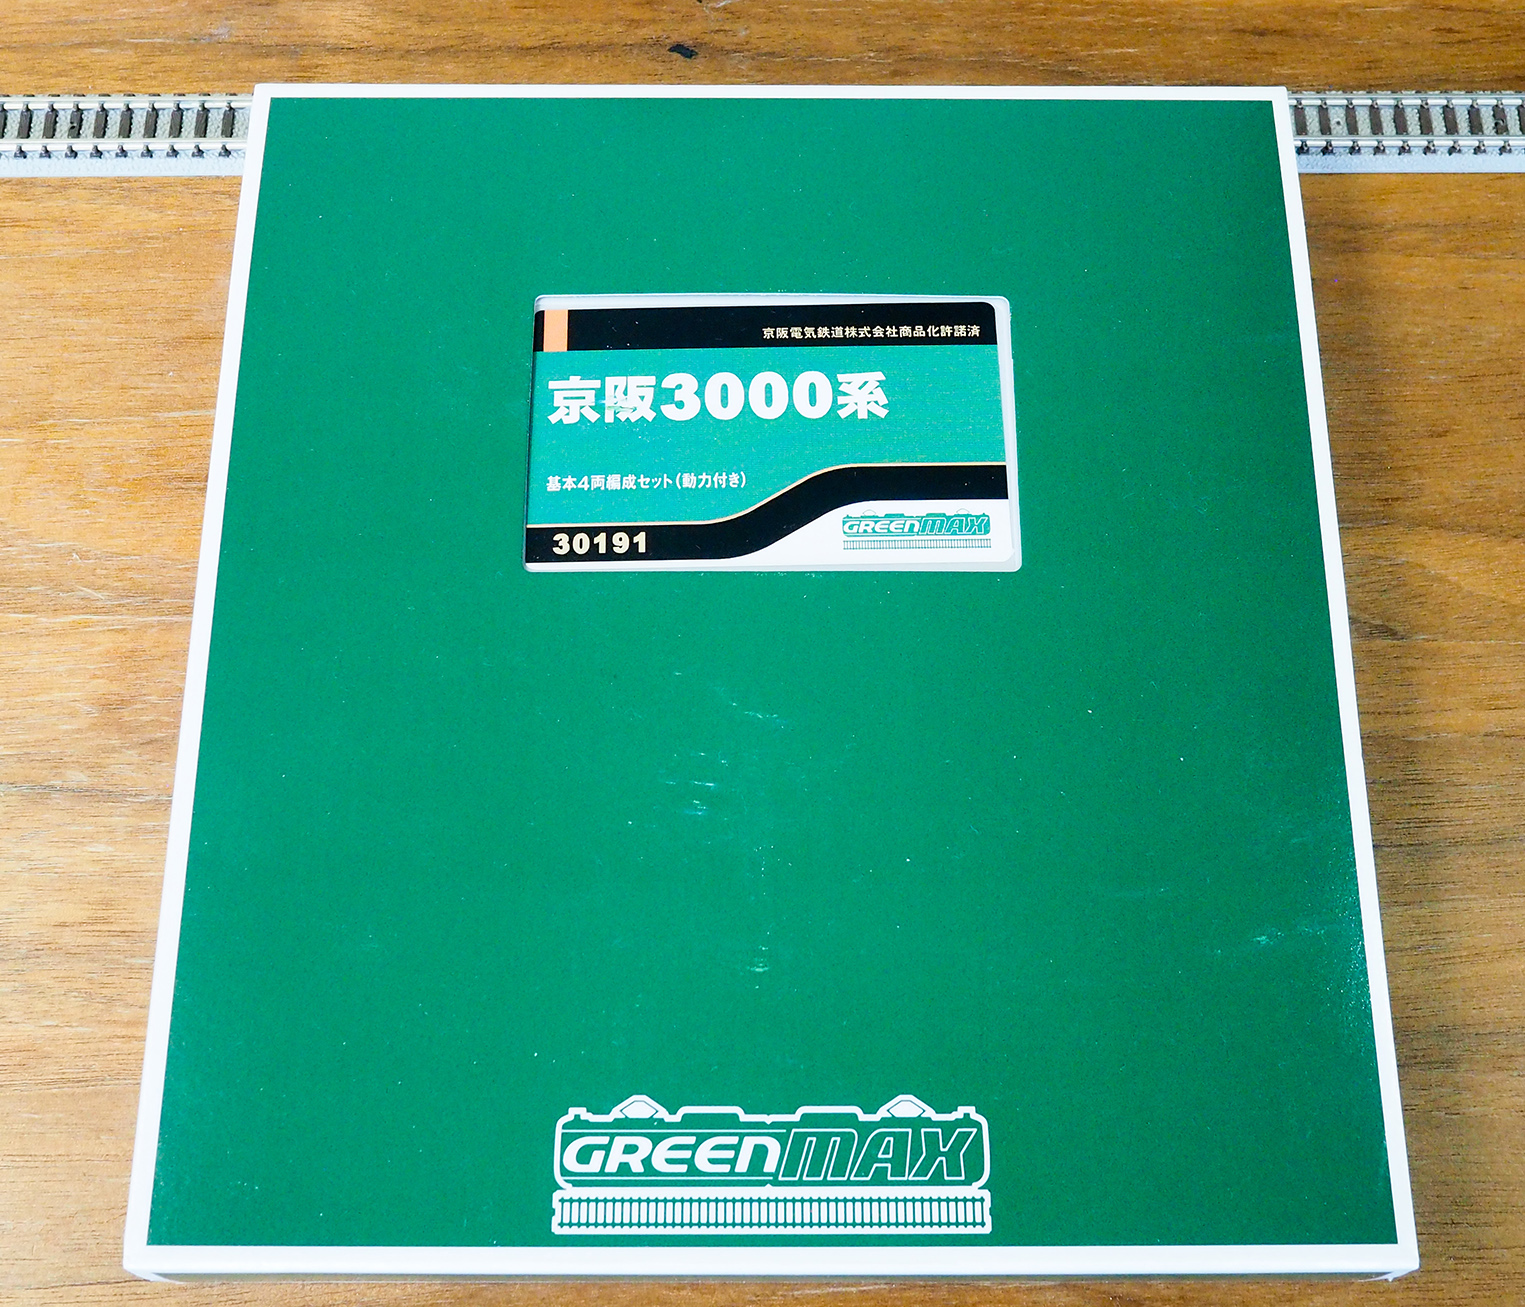
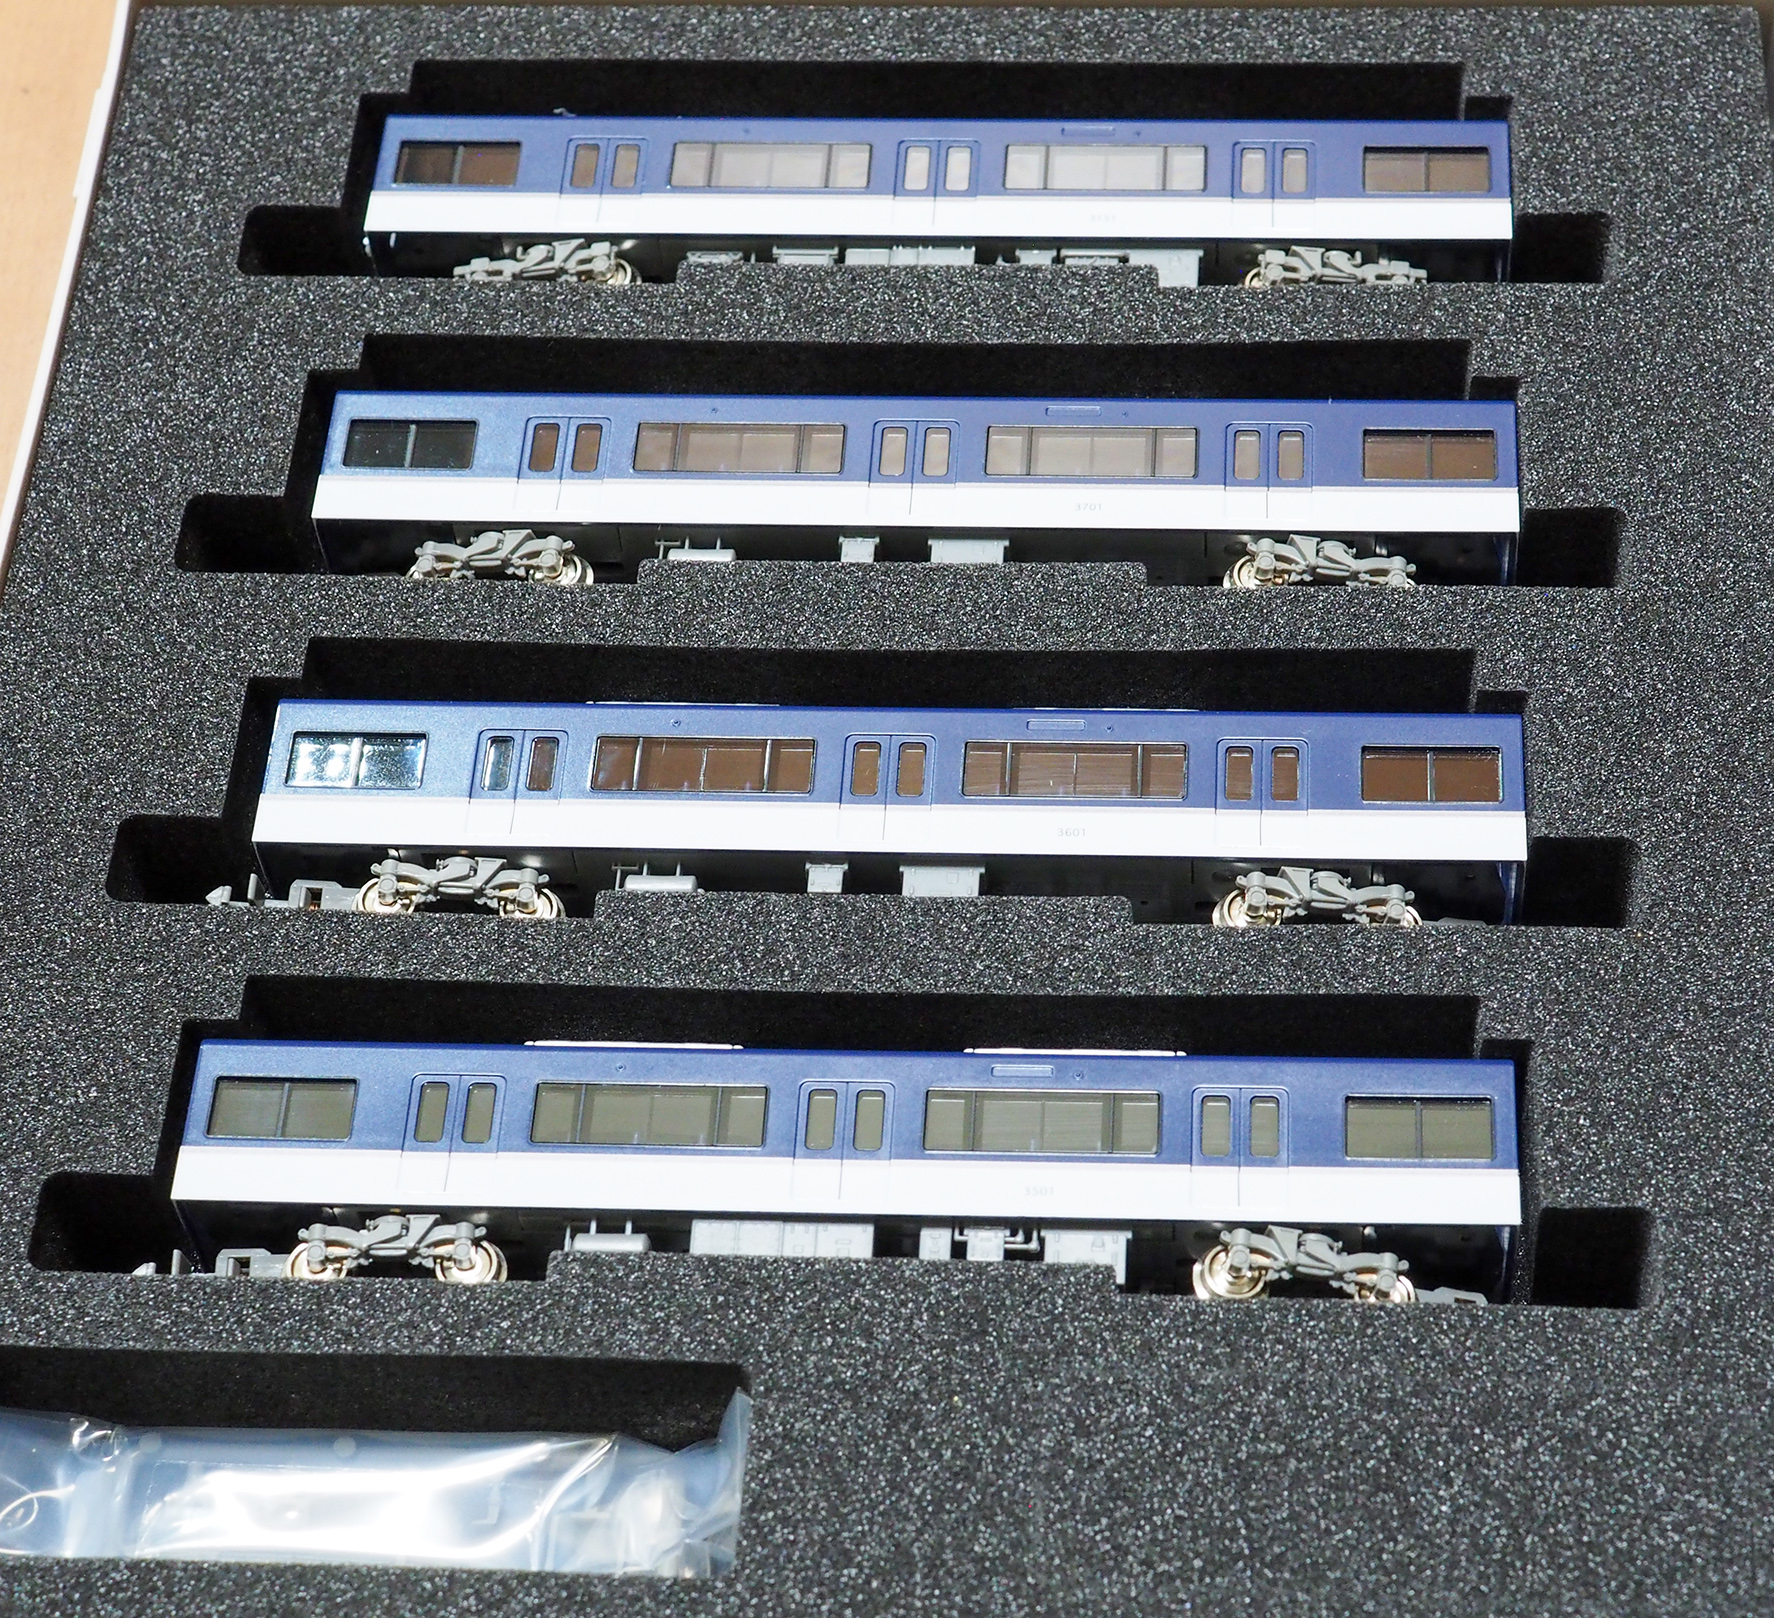
I was at Volks Kyoto at the begining of March 2017 and ended up
buying the newly-released Keihan 3000系 in 4-car format (see 30191 box
below). Compare the Greenmax 3051 with the real 3051 shown above:
I don't know if it is as good as a Kato release (my Keihan 1000
系), for example I can't get the Greenmax train to light up when
stationary, but it seems to run well. So all of a sudden, I have the
Keihan green and blue trains now! Just one more to go then.
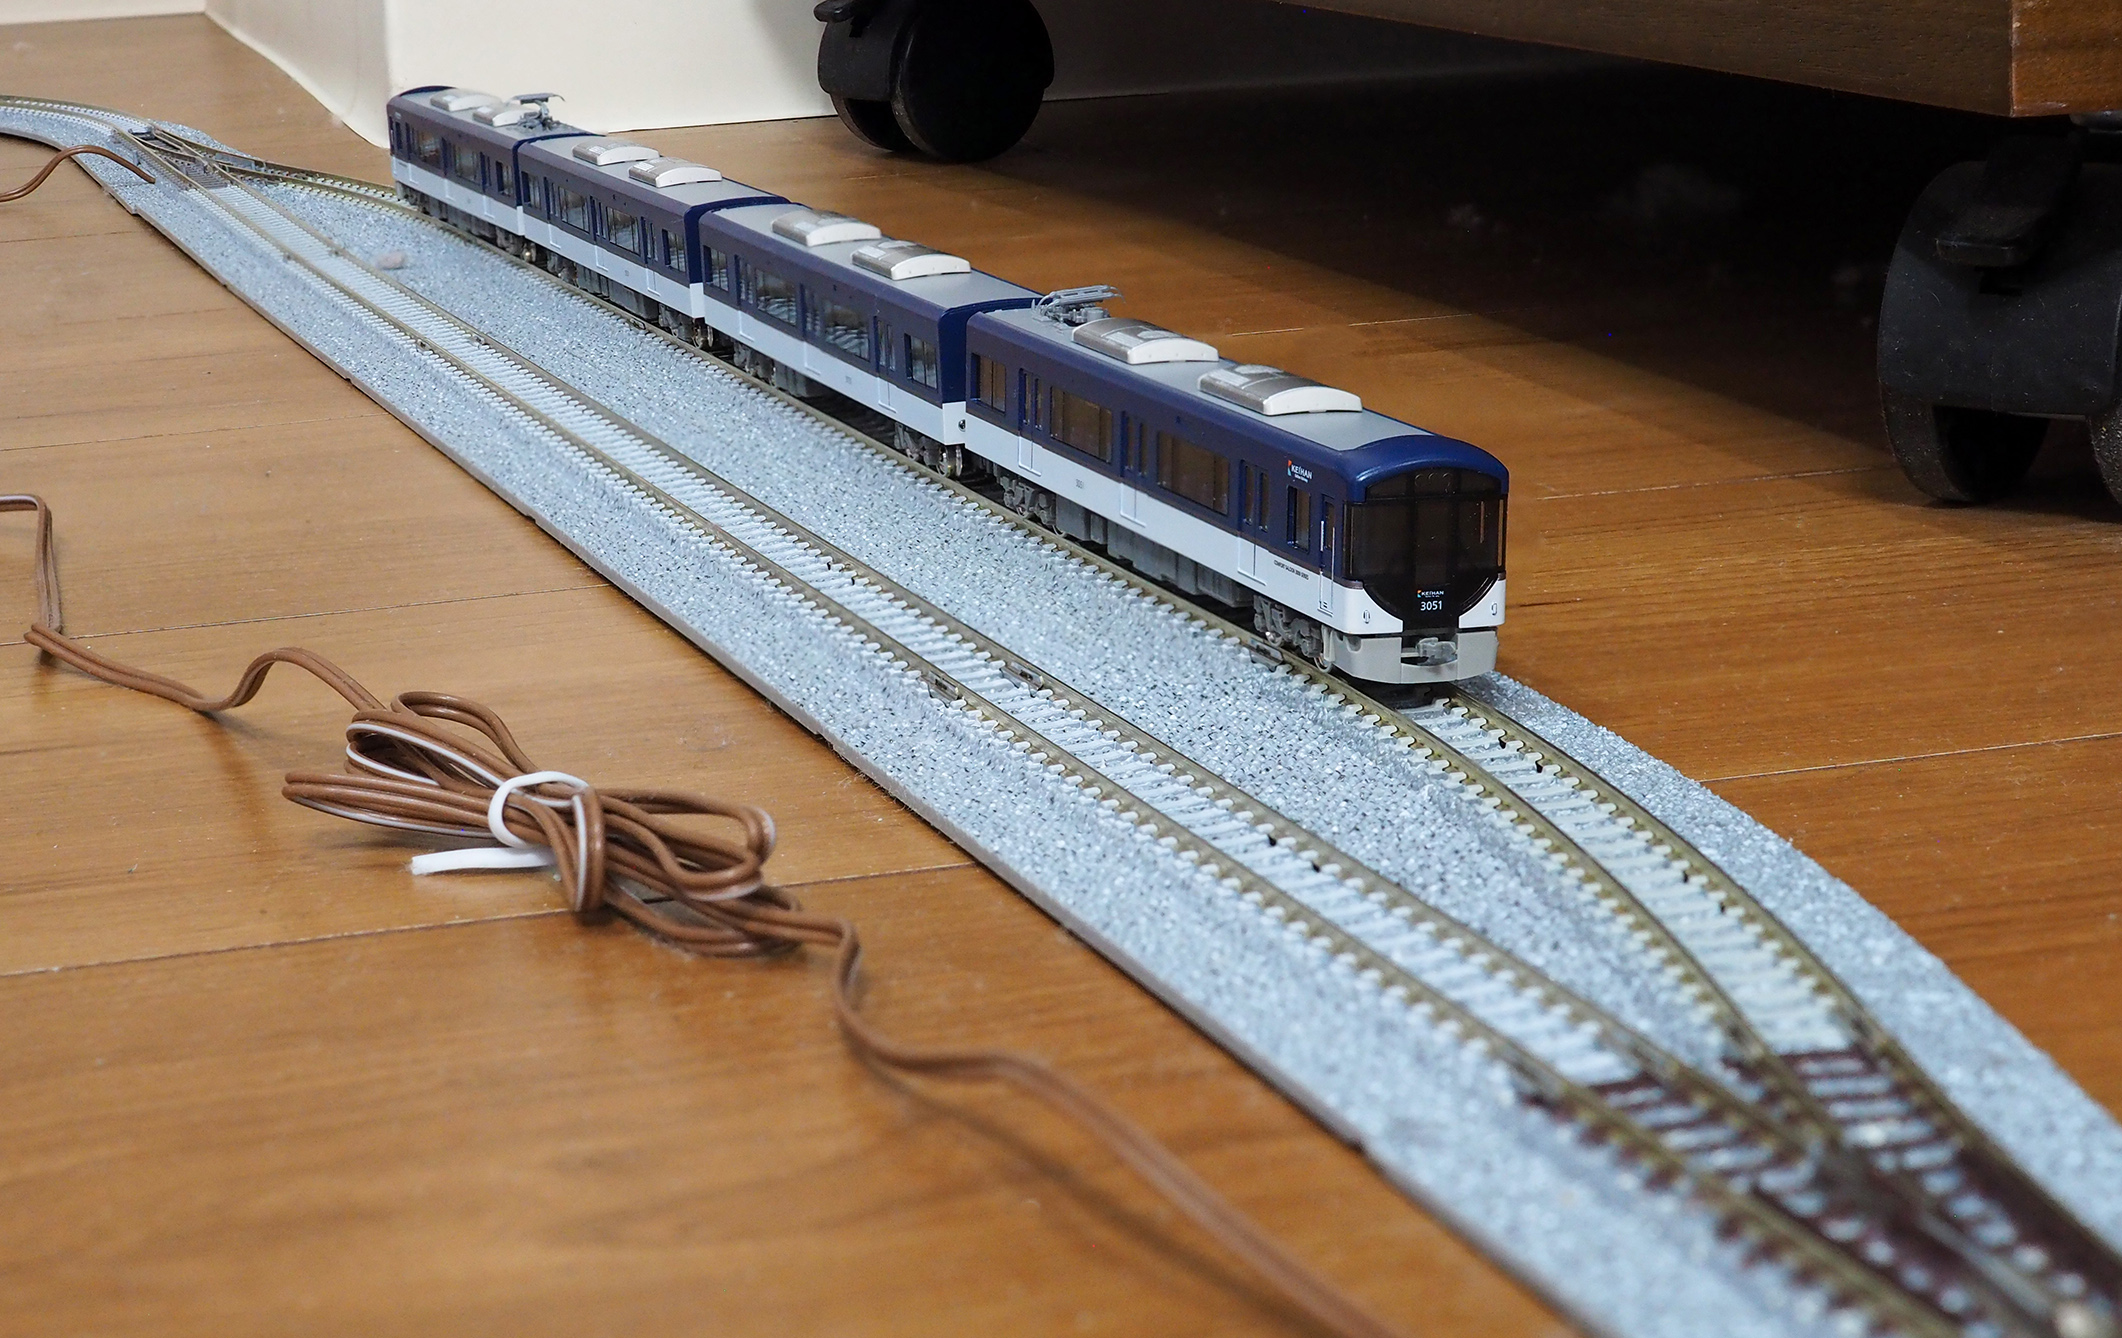
Greenmax released the 3000系 in 8 car and 4 car
(motorized/non-motorized extra cars) formats. I figure I'd save some
pennies since the sidings on my proposed little double loop can't
accommodate an 8-car train (see above picture). Having said that, I
think, on the spot, I didn't think it through and made a poor
decision. (I should just take a deep breath and get the other 4
non-motorized cars too.)
Well, it so happened the very next day I happened to pass by
Yodobashi Kyoto and they had a solitary non-motorized 4 car set in the
last glass case (no motorized 4 car set: someone like me must have
bought that). So I bought it (see 30192 box below).
(Anyway, the reasoning is that one day I might have a bigger layout
and thus be able to easily accommodate an 8-car train; in which case I'd
regret not picking up the extra cars, and would be forced to pay a king's
ransom for them in a Yahoo! auction. In the world of model railways,
collectors pay way over list for desirable "out of production" rolling
stock.)
[Keihan 8000系 arriving at Demachiyanagi (出町柳). Taken in
March 2017.]
My Kyoto friend helped me obtain a Keihan 8000系 Micro
Ace A2858 on the 2nd hand market. This is a significant milestone as
I now have my set of green, blue and red Main Line Keihans.
[A 5 car Keihan 8000系 crossing the truss bridge on my
outer loop. Love the double decker!]
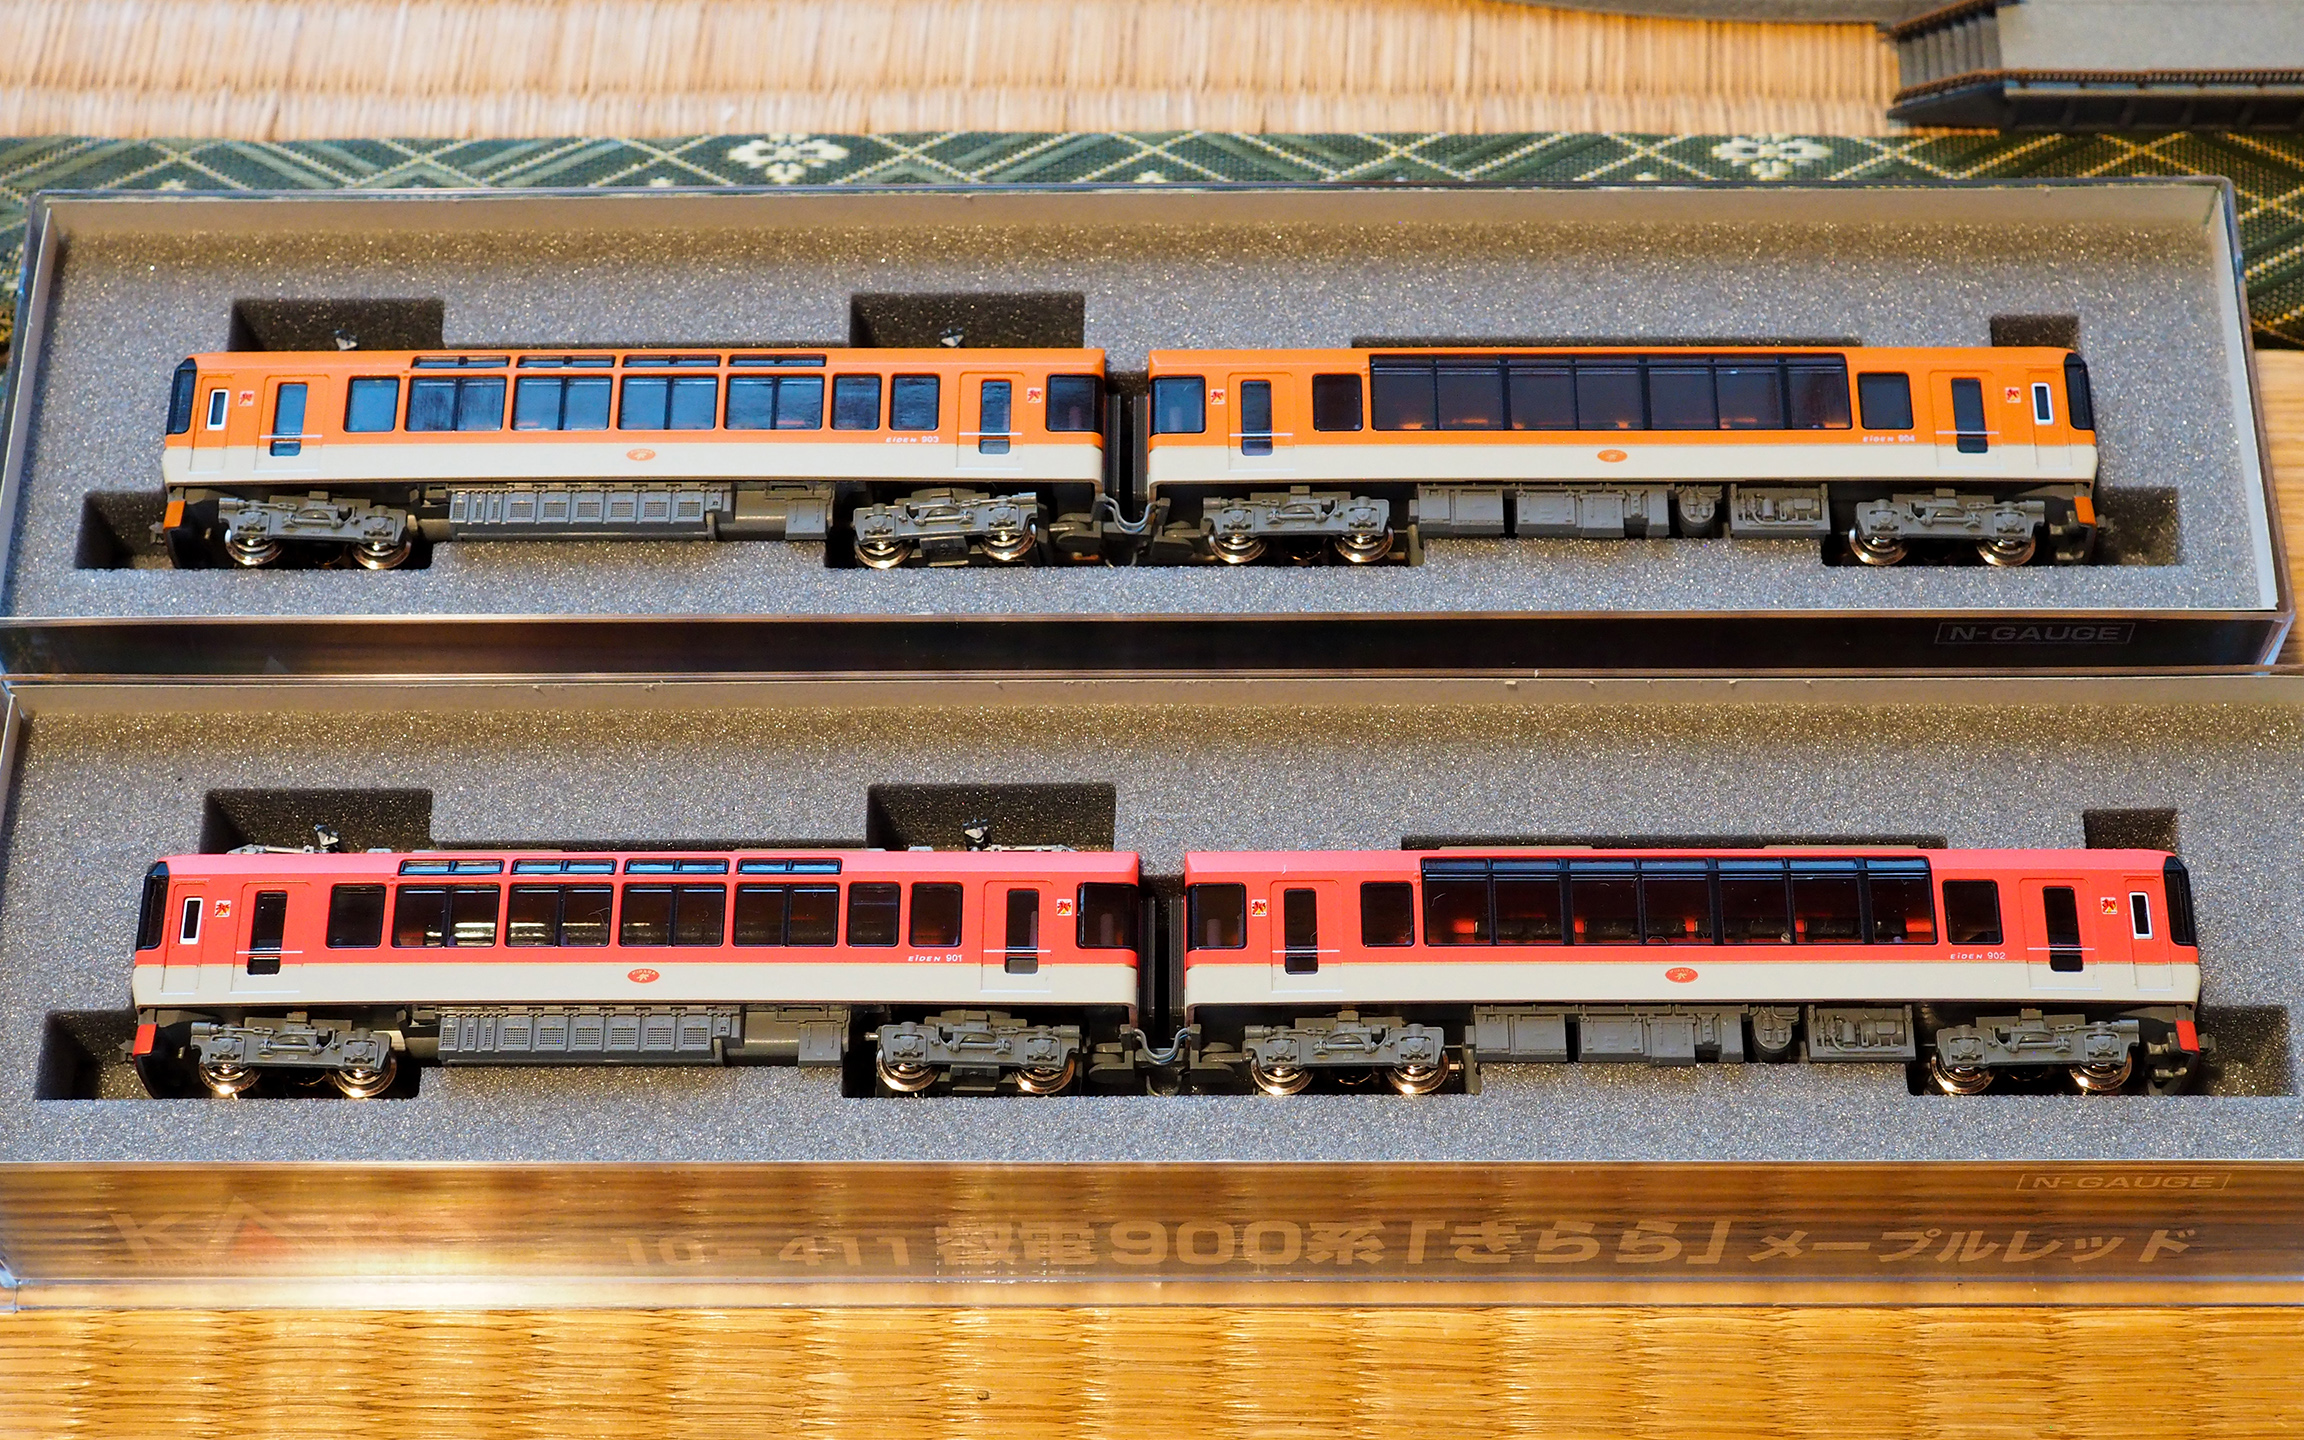
The Eizan Electric Railway (叡山電鉄) 900系 Kirara (きらら) trains
are also not available in the stores anymore but I was pleased that my
Kyoto friend was able to obtain both the Kato Maple orange (10-412)
and Maple red color (10-411) trains for me on Yahoo!. (See official
Kato page here.)
As it turns out, the red was brand-new and the orange was in mint
condition. Shown below on my friend's track:
Here's the real train in orange:
[Taken at Demachiyanagi (出町柳) in March 2017.]
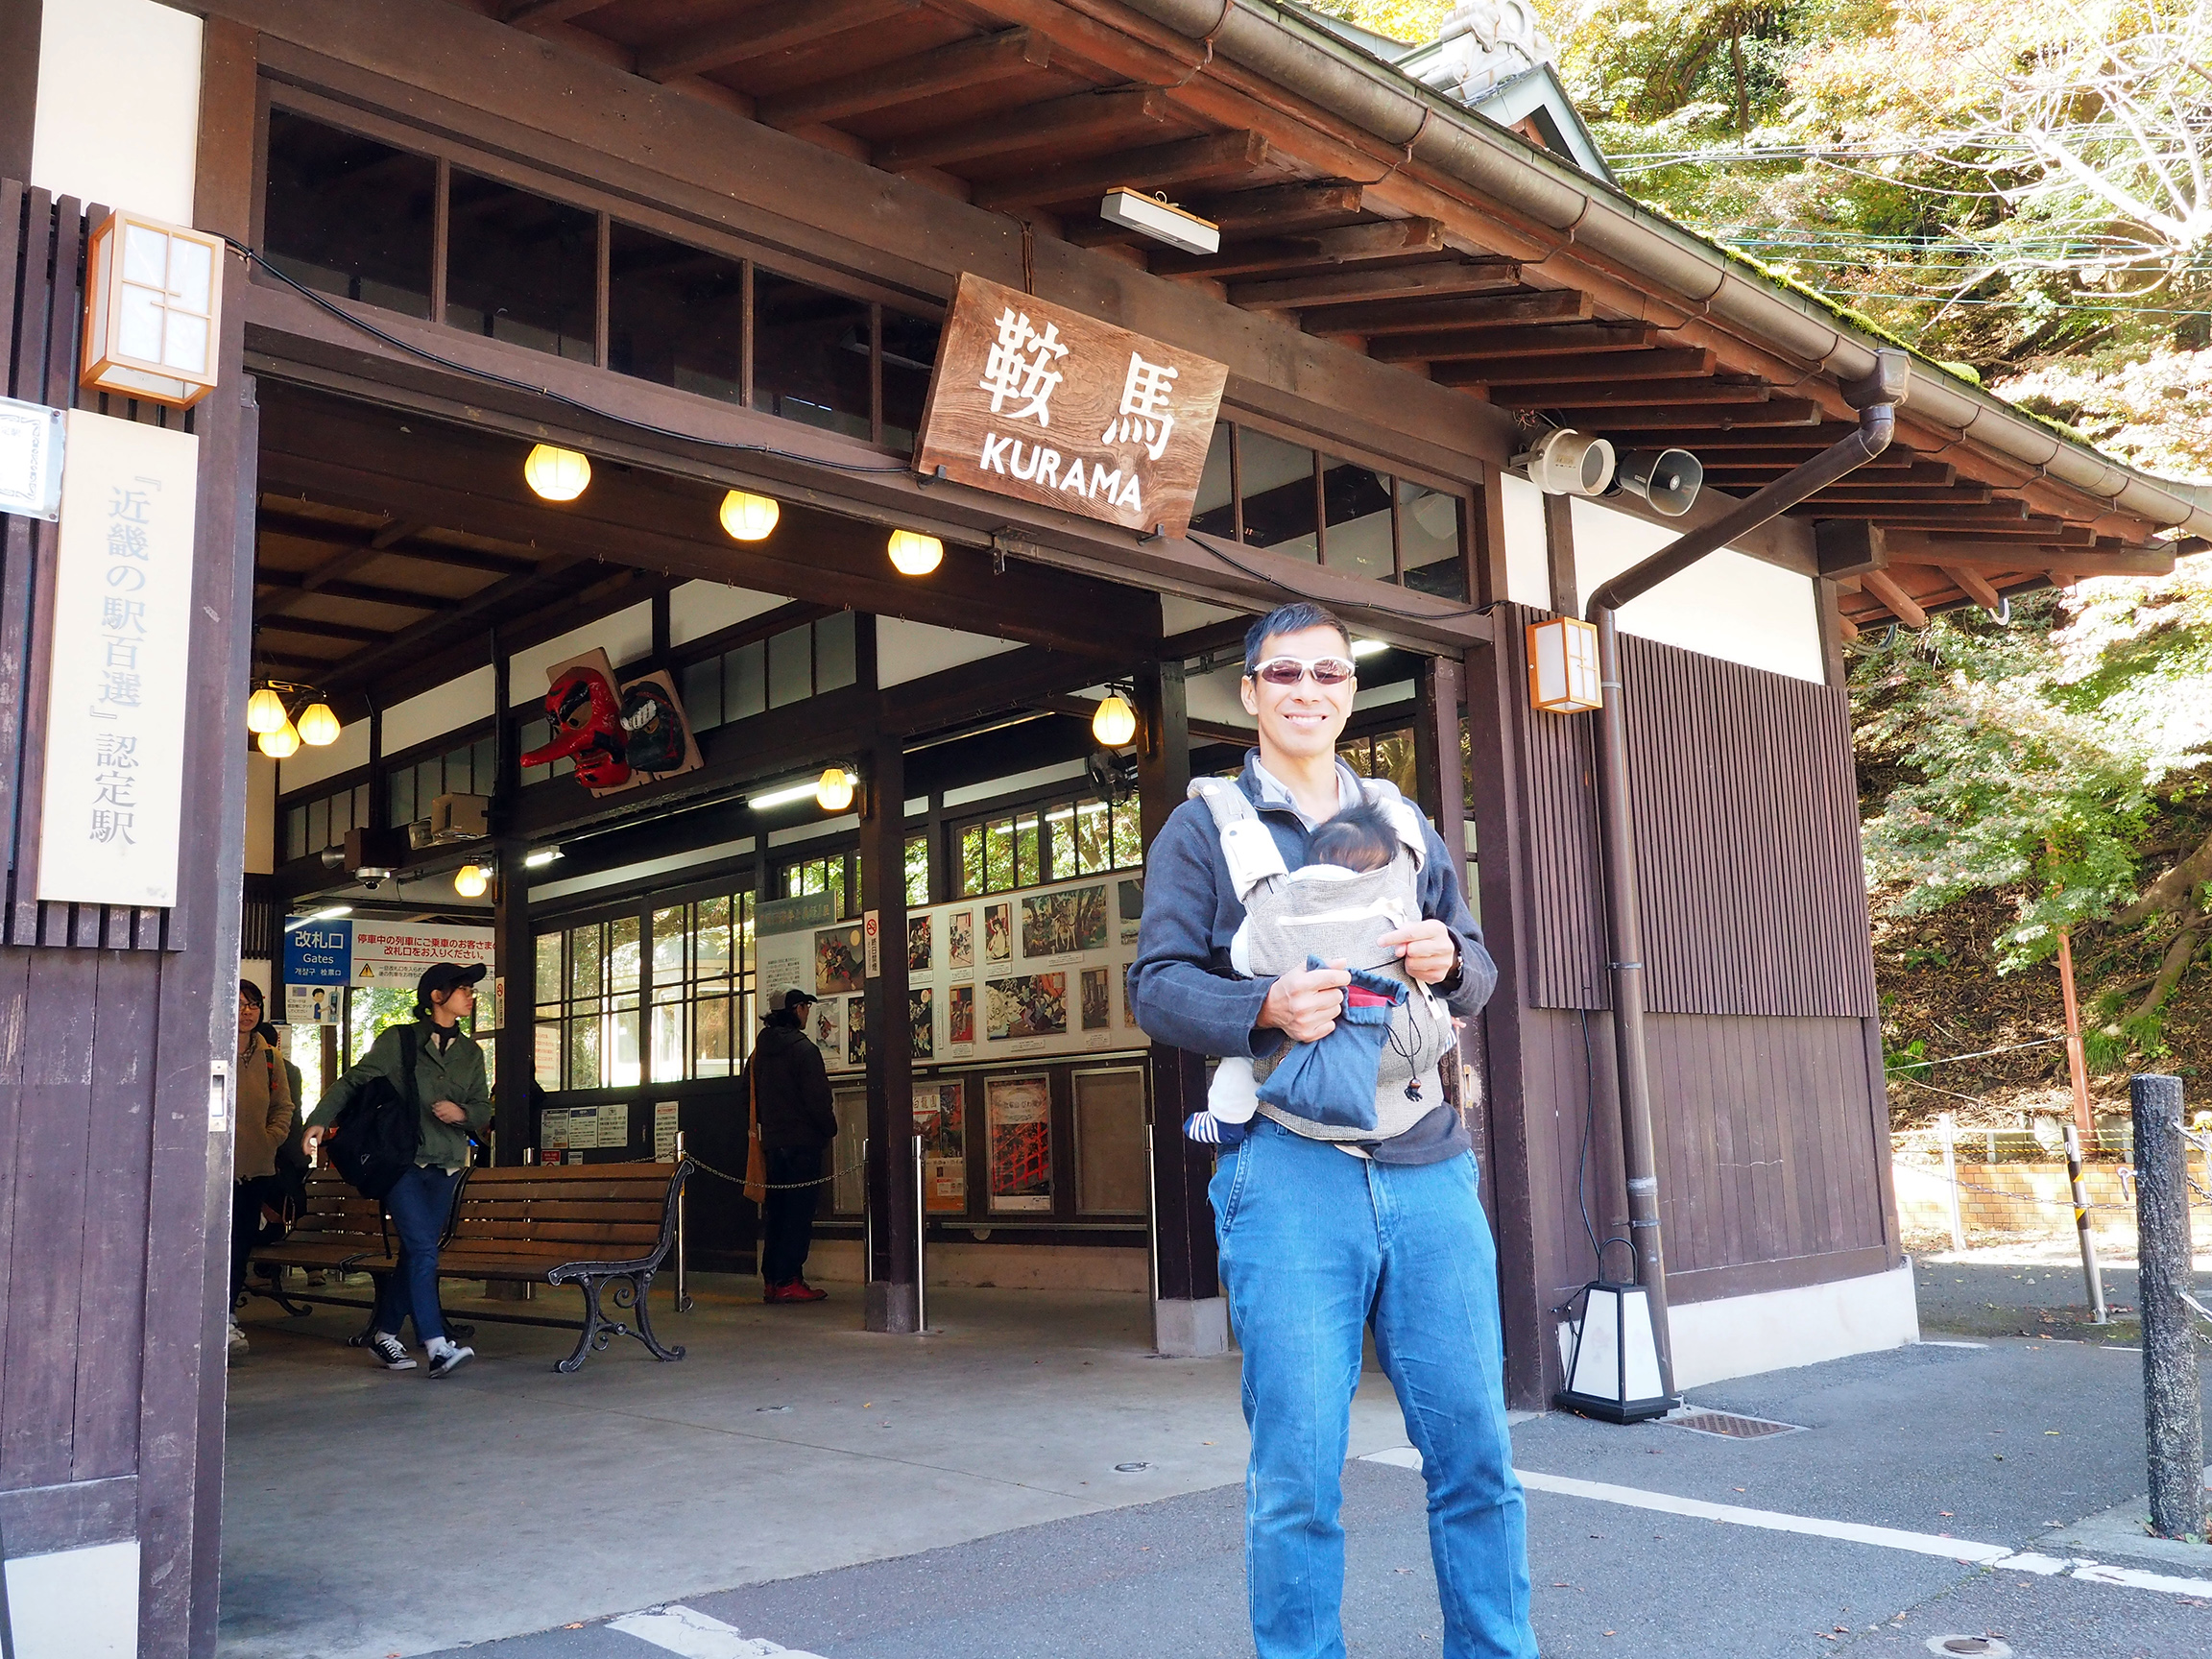
And here's the real train in red at Kurama (鞍馬):
[Taken at Kurama (鞍馬) terminus in March 2017.]
I'm still in Kyoto as I write this, but let's reminisce a bit about
the Autumn red leaves from 2016:
[Taken at Keihan Yamashina station (京阪山科駅) in March 2017.]
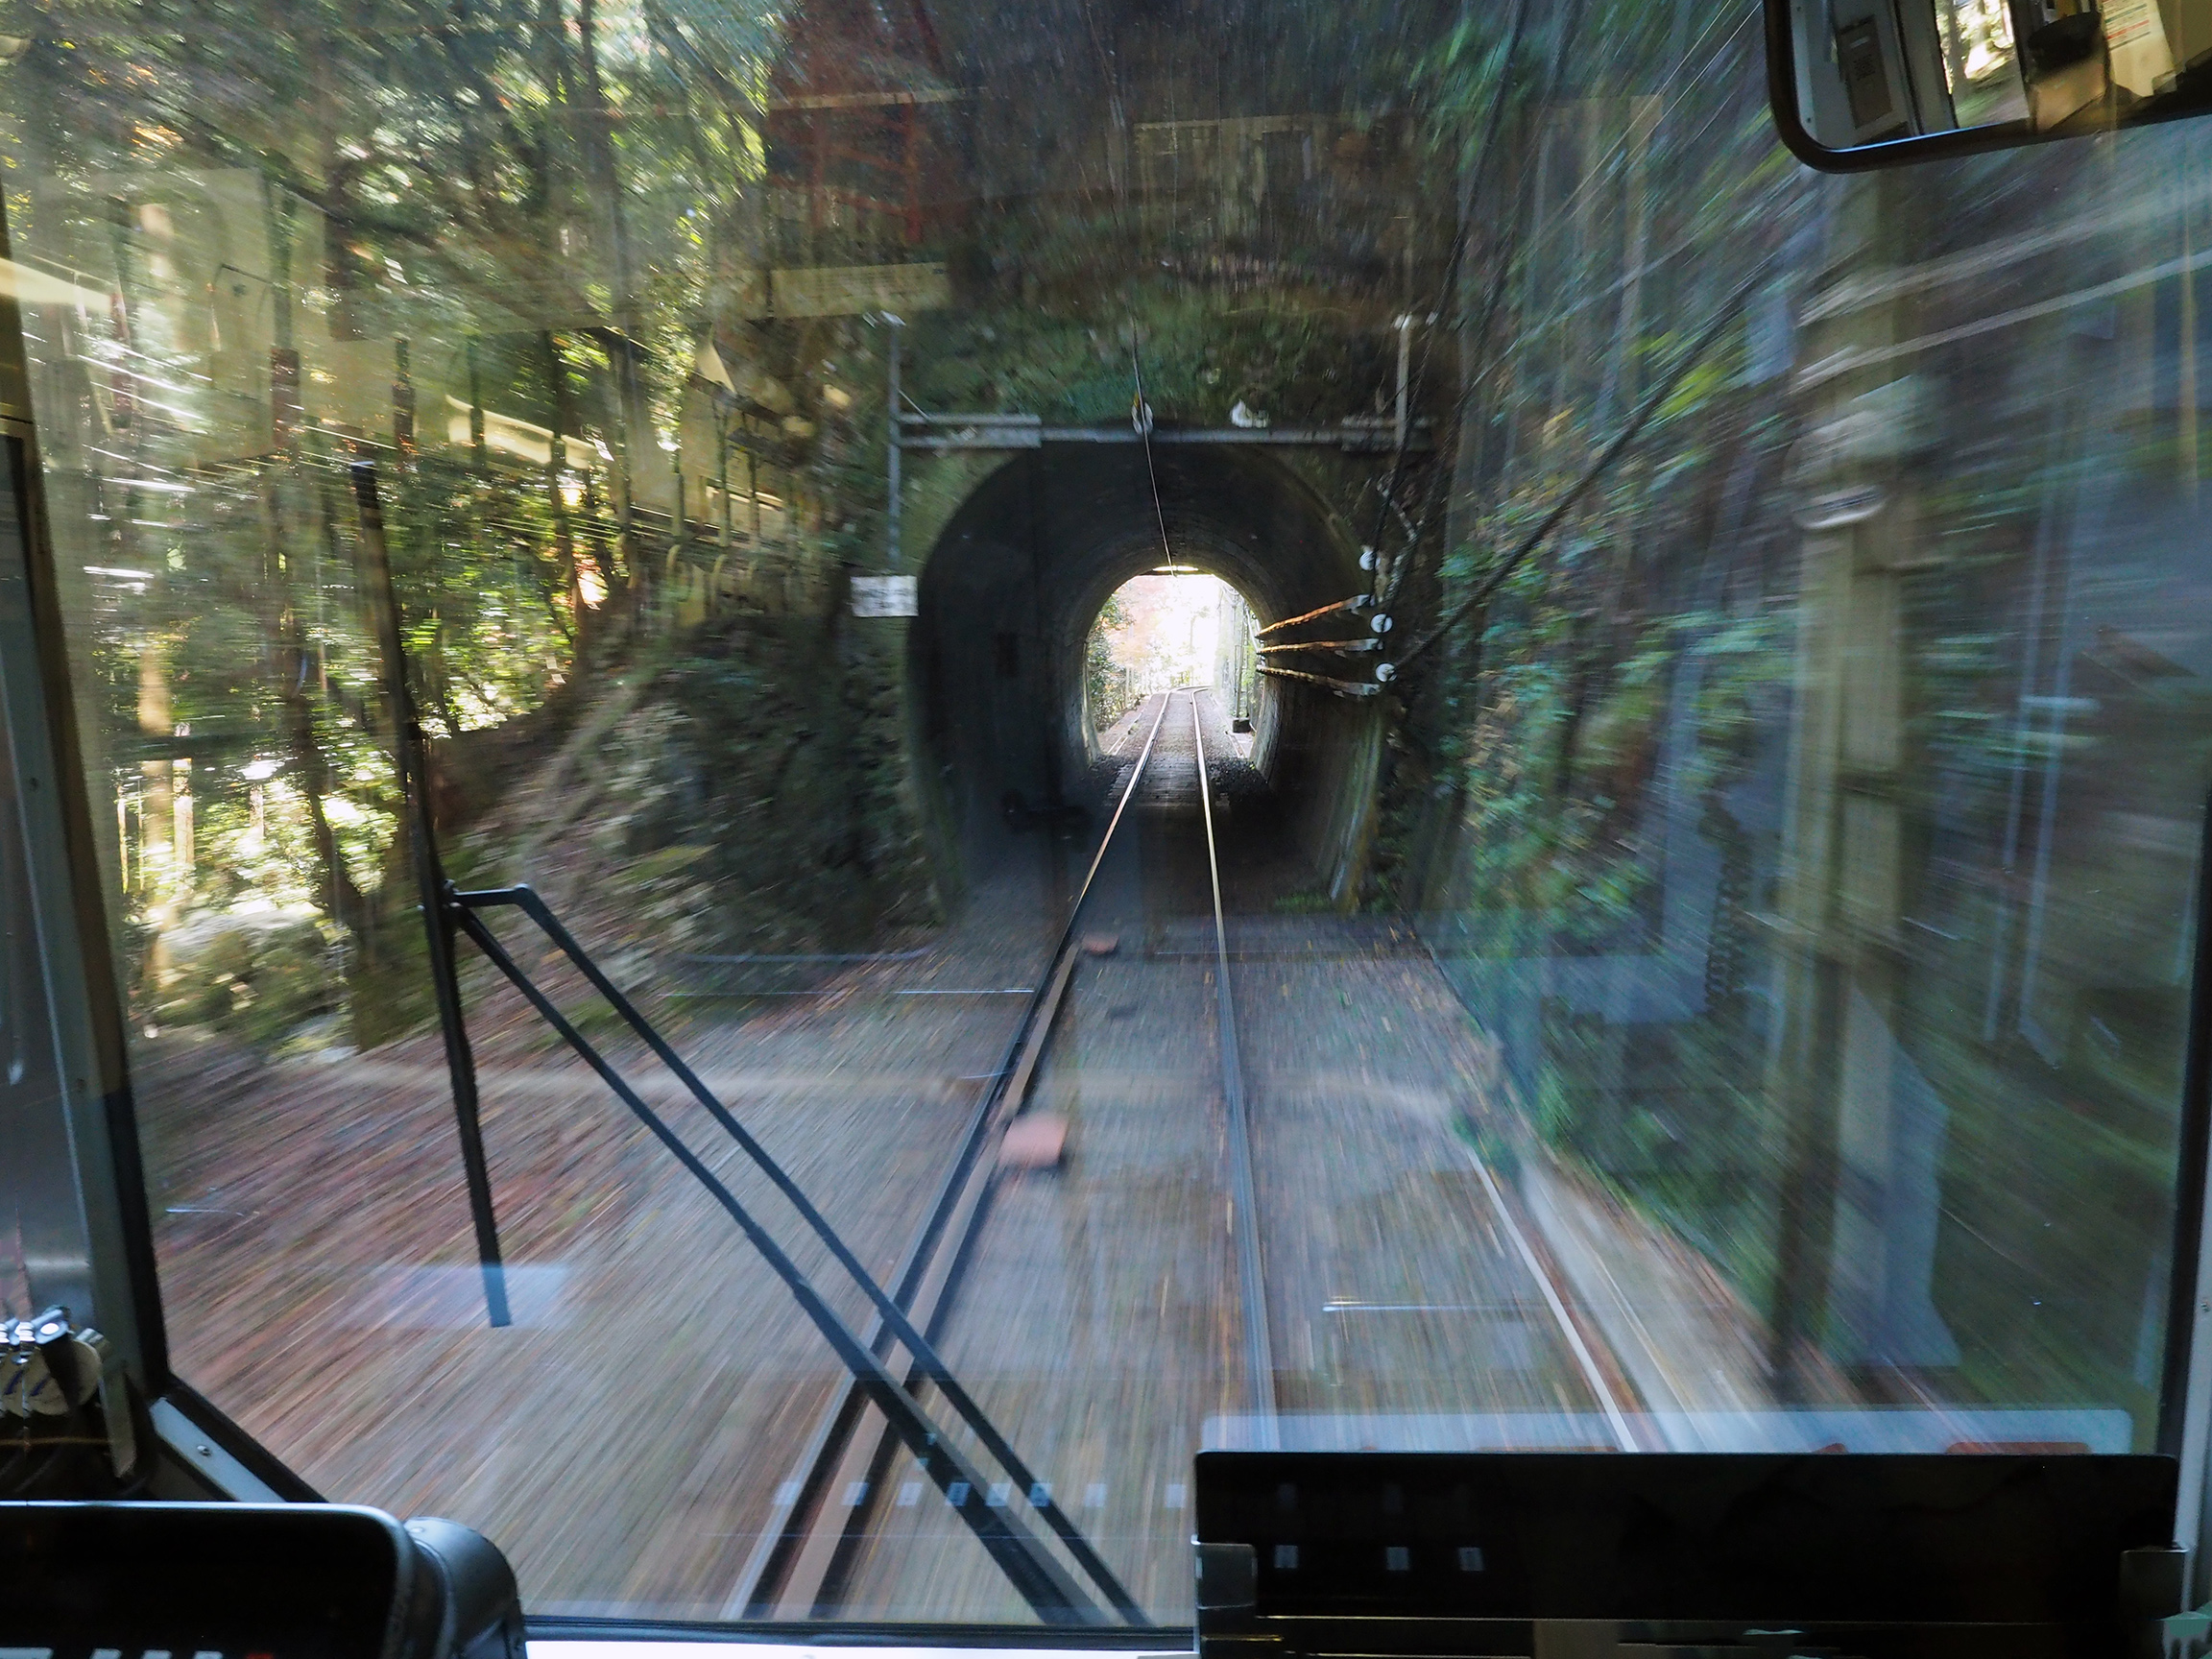
I wasn't intending to collect the Keihan (京阪) 800系, which runs
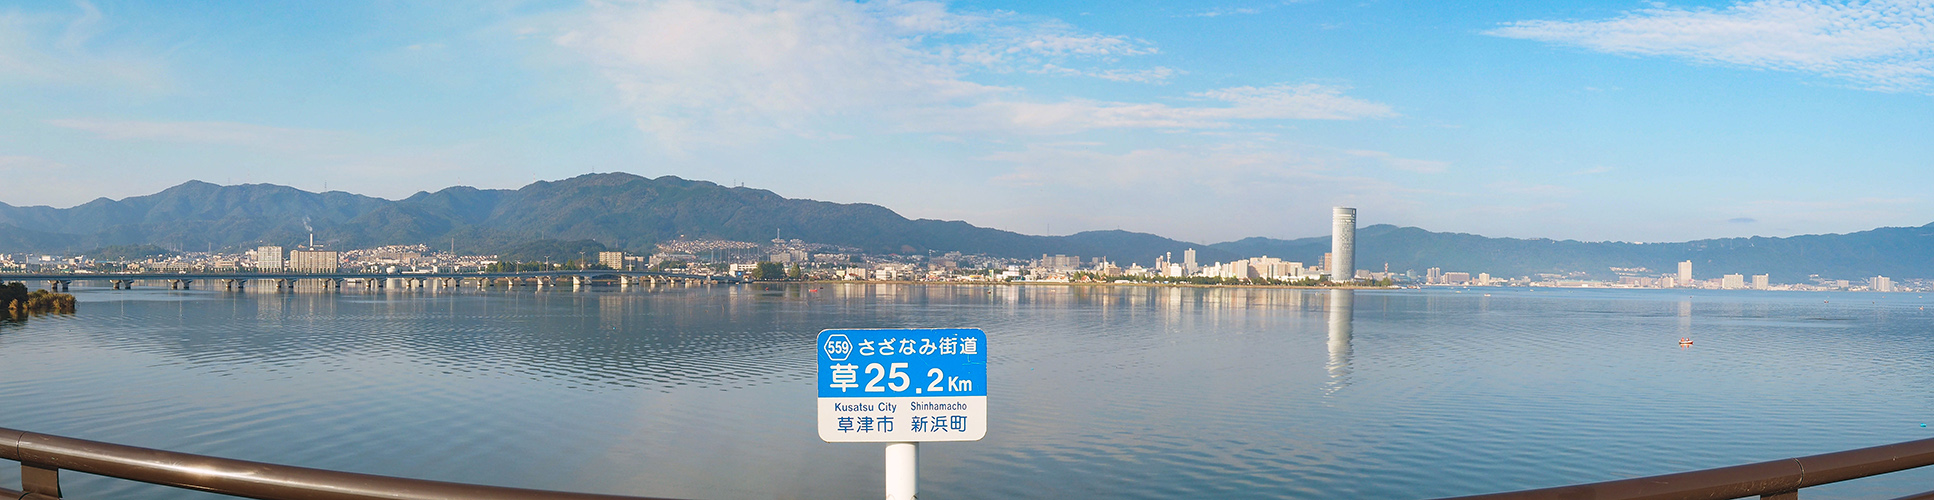
on the Keishin line (京津線) from Hamaōtsu (浜大津) in the city of
Ōtsu (大津) beside Lake Biwa (琵琶湖), because I usually take my bike
when I want to visit the lake. The train runs over the mountains
pictured below into Kyoto. Behind the sign is the city of Ōtsu (大
津).
[This is a scrollable panoramic
image.] Lake Biwa (琵琶湖) with Ōtsu
(大津), Shiga Prefecture (滋賀県) in the background. Beyond those hills in the
background is Kyoto. If you scroll, the sleek tall
modern building to the right is the Prince Hotel.
(Incidentally, the first picture of this webpage is a view of Kyoto
taken from a point up on the other side of those mountains.)
The train goes through Misasagi (御陵) into Sanjō Keihan (三条京阪)
and out west as far as Uzumasa Tenjingawa (太秦天神川), which is
actually part of the Kyoto City municipal Tōzai (東西) subway
line. (Misasagi station is the point at which the Keihan Keishin (京津)
turns into the Tōzai subway line. The section between Misasagi and
Sanjō Keihan was moved underground in 1997.) But a chance came to
acquire the Micro Ace A8360 4-car set pictured in front of my
orange Kirara (きらら). So I own it now!
I think it looks especially good crossing my friend's truss bridge:
Update: Unfortunately, I think I got hit by bad
pay-it-forward karma. I wasn't intending to collect this model, so I'd
neglected my golden rule: only buy what you have already ridden
first. And riding it just to say you've ridden it after buying doesn't
count.
Anyway, the motor developed a nasty screech only a few days
in. Either it was a dud (the risk of buying second-hand) or something
inside got jiggled during the ride back to the university on my bike
rack. Took it into Volks Kyoto to see what they could do, expecting at
worst they'd simply swap out the motor (and I'd learn how to do it
myself next time). Instead, they listened to it for a moment, and
motioned there was nothing they could do for it. They said it has to
go back to Micro Ace. And Micro Ace turnaround time is approximately 3
months! That is unbelievable and truly sucks. If I leave Japan before
it comes back - insert shoulder shrug here - all I can say is that me
and the Keihan 800系, it just wasn't meant to be...
The problem with small layouts is always straight length (and
therefore siding length). In real life, even regular passenger trains
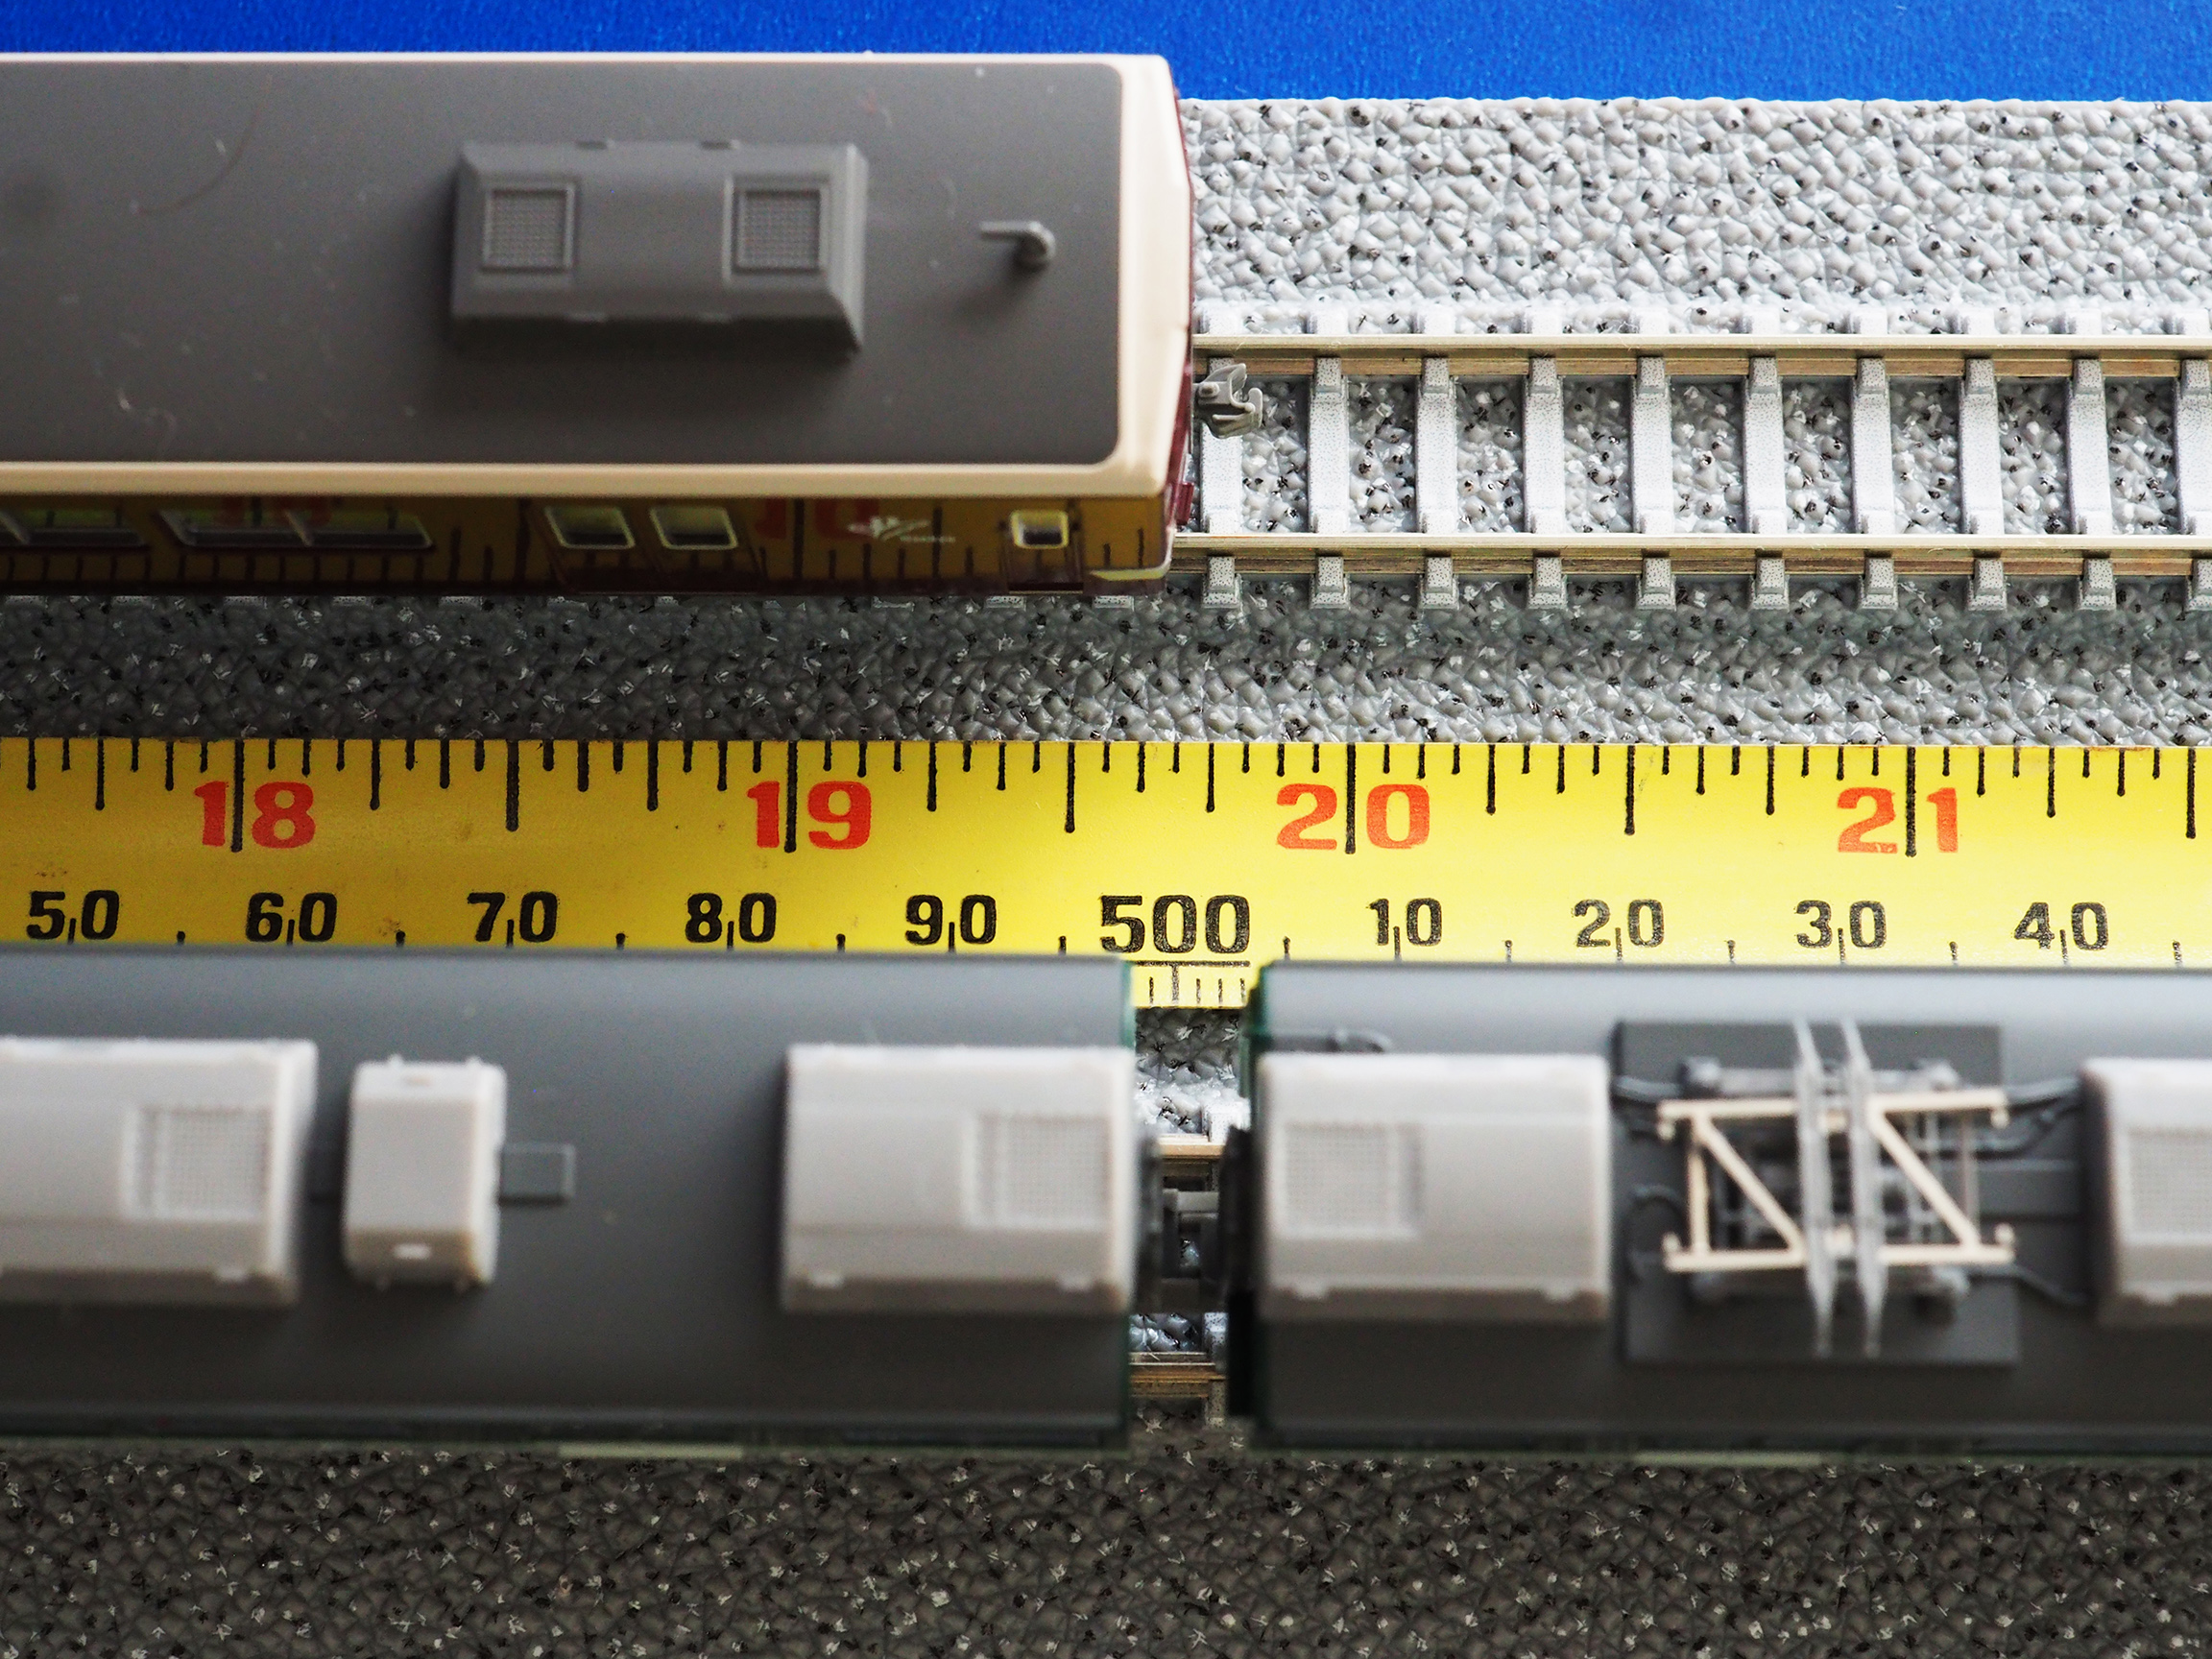
are long; see the 7 car Keihan below:
[Taken at the Sanjō Keihan (三条京阪) station, March 2017.]
I have the Micro Ace 7 car Keihan and Kato 4 car Hankyu pictured
below.
Seen from the top:
[The actual length required is 875mm and 500mm for the Keihan
and Hankyu, respectively.]
To get my feet wet with Tomix track, I first test ran a slightly
extended Tomix CA-S Widetrack loop (shown below center) both in Kyoto and
Tucson.
[I've added two S280s and moved the two S140s to the CA-S kit.
The $12 plywood board from Home Depot is just temporary.
It probably won't be plywood in the end.]
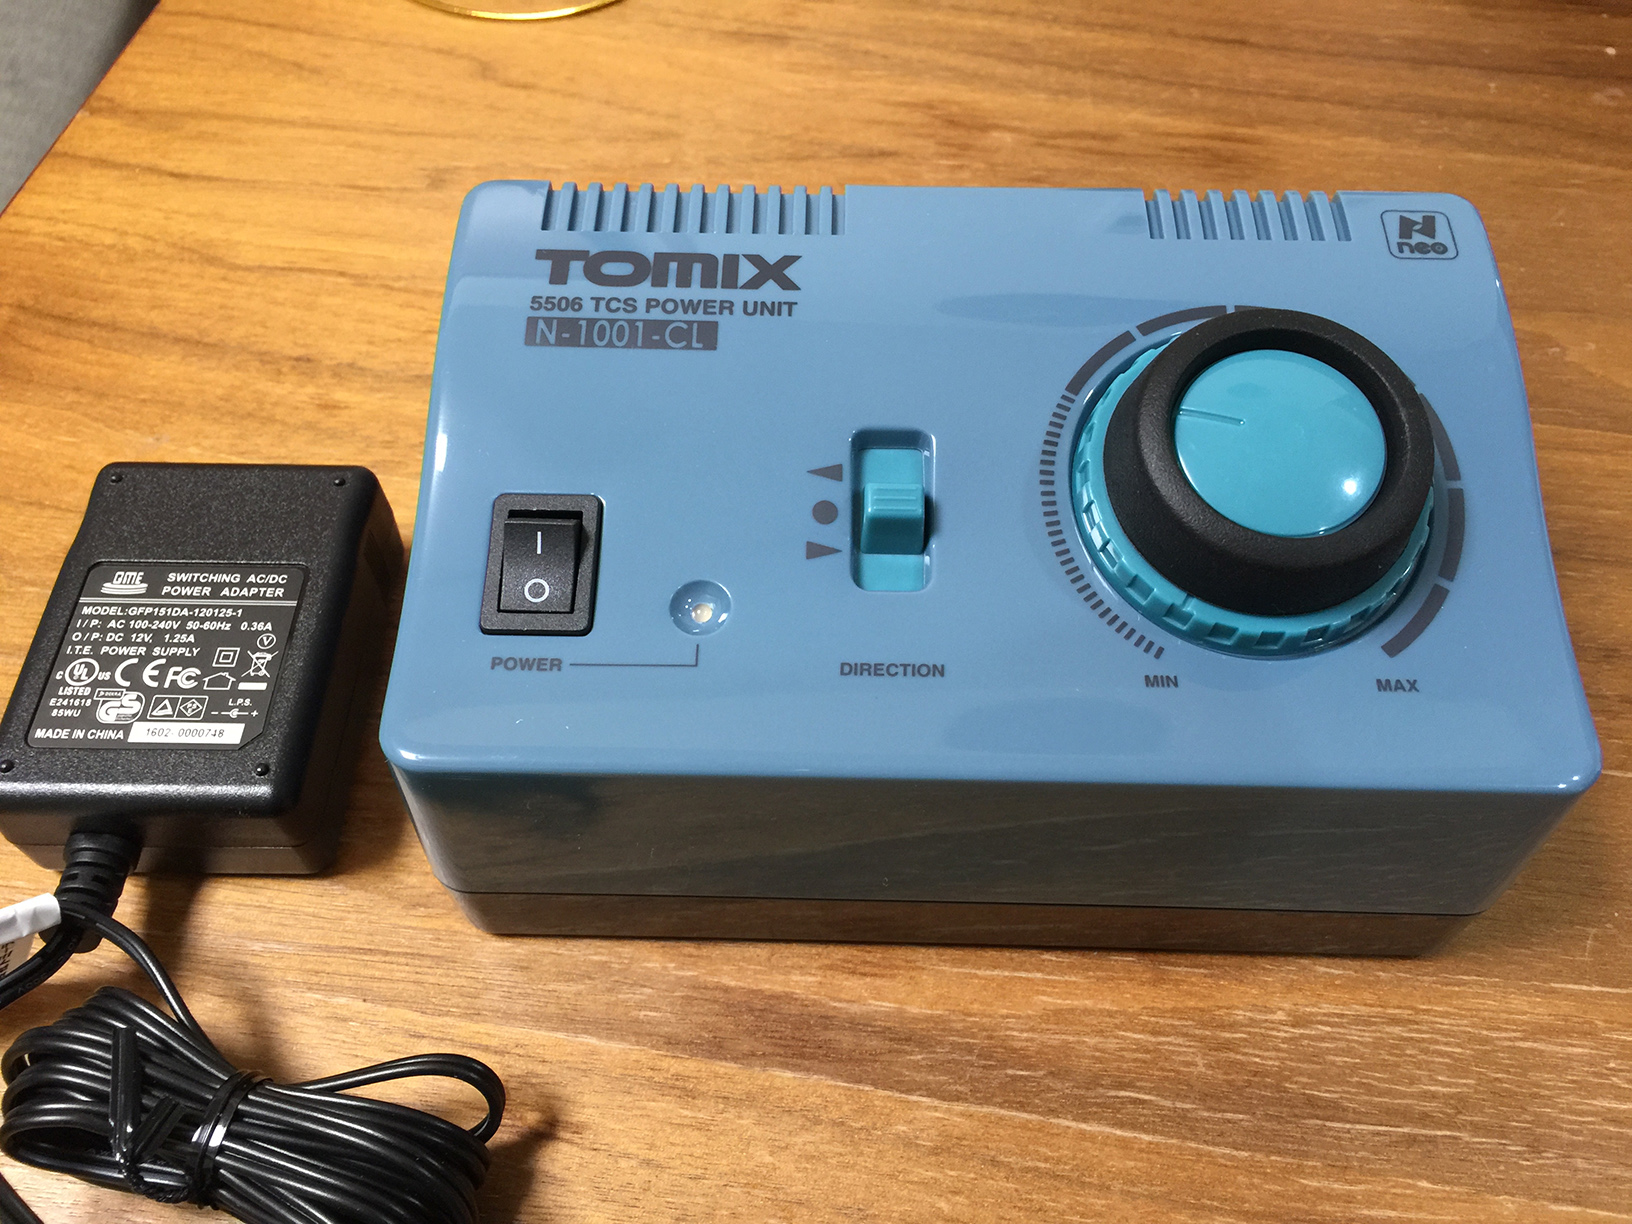
[It's nice that they package the N-1001-CL controller
with a multivoltage-compatible (100-240V) power brick.]
Inspired by my Kyoto friend's simple (and reliable) yet
elegant double loop with a truss brige on the outer loop, I've decided
to try something similar. I prefer Tomix's Wide PC railroad over their
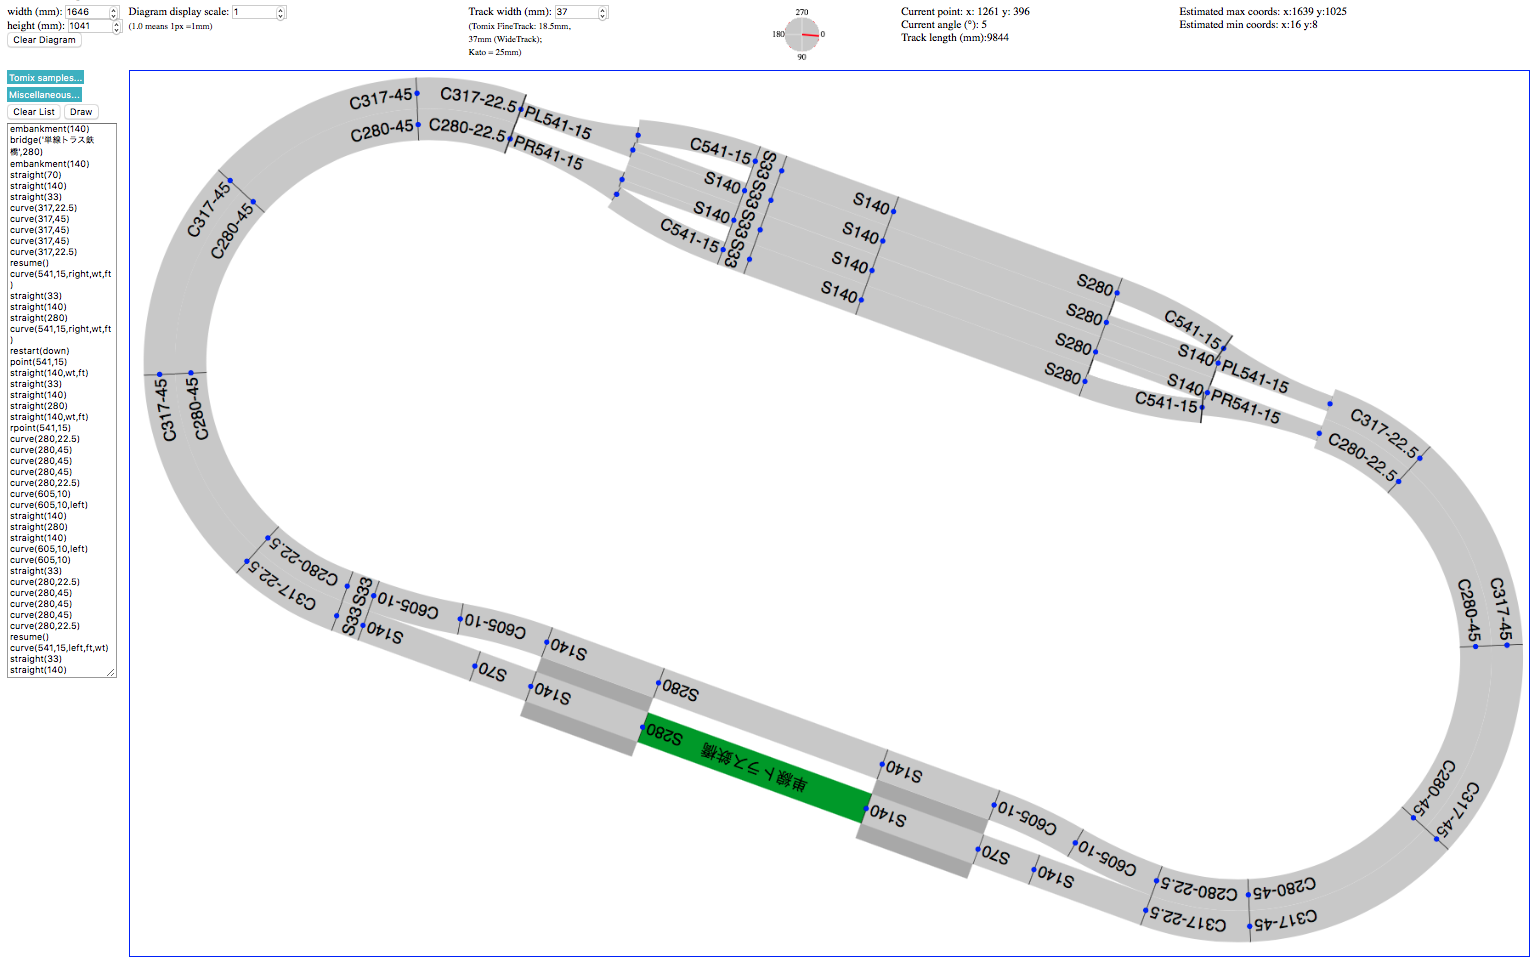
regular FineTrack, so I'll go with that. The diagram below depicts
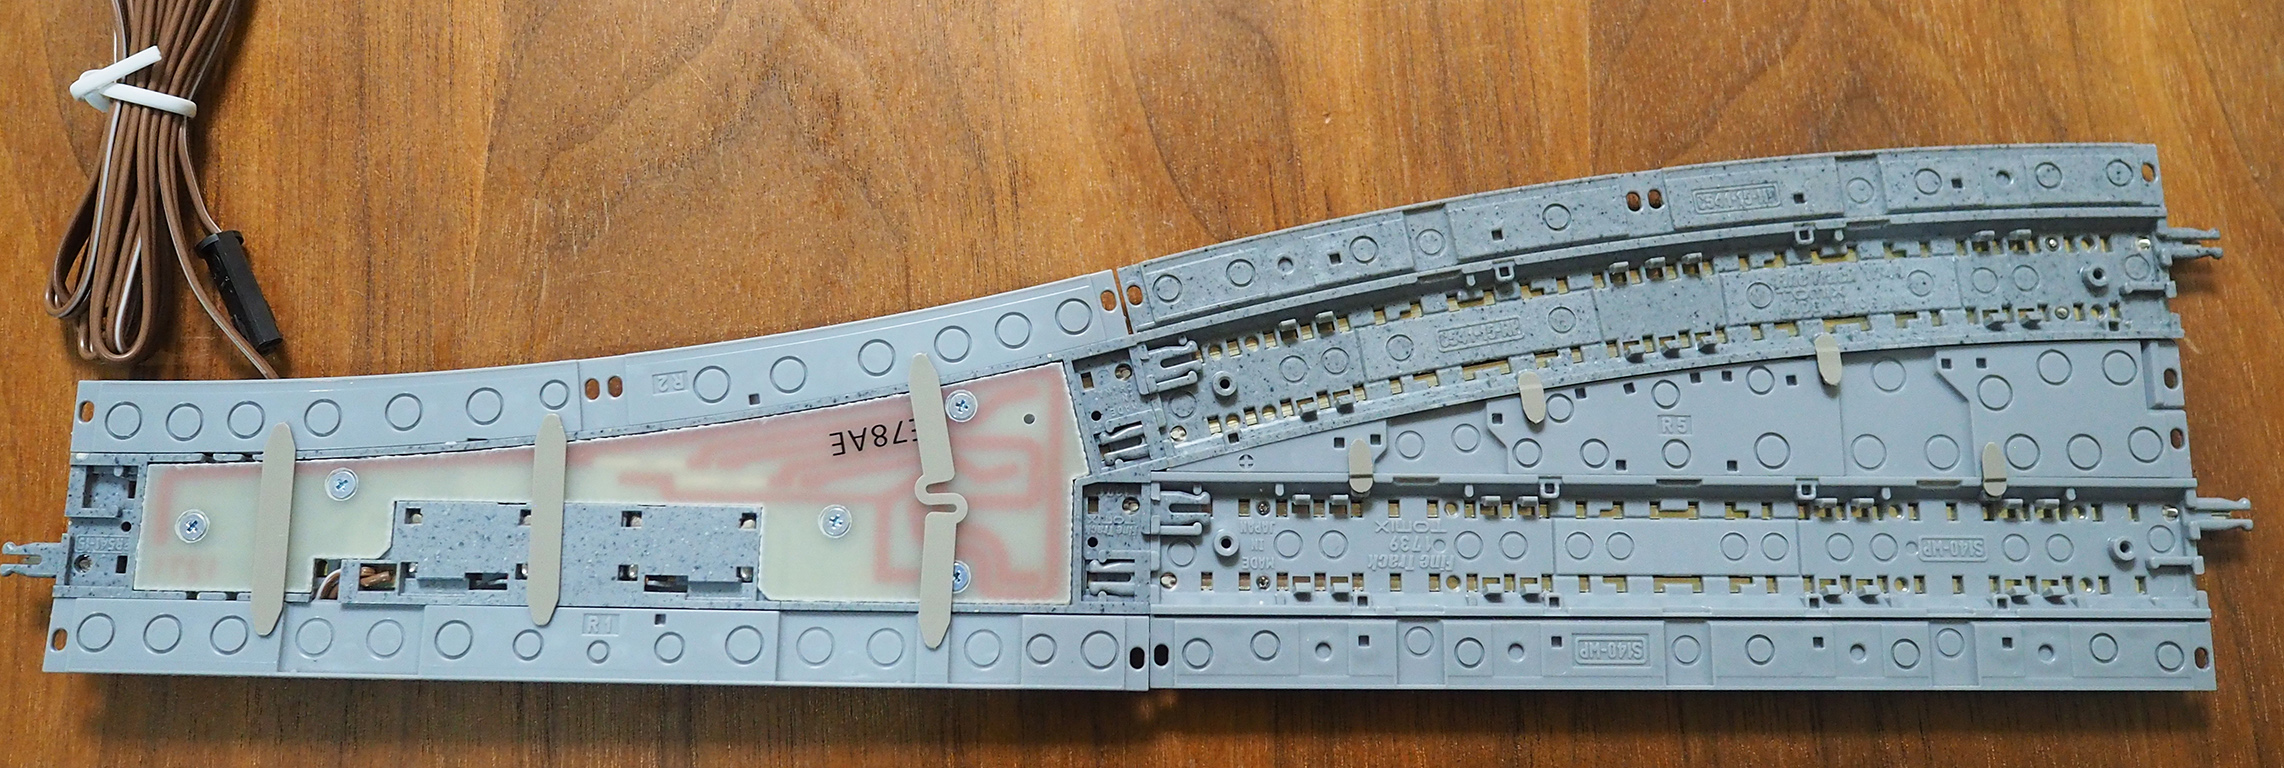
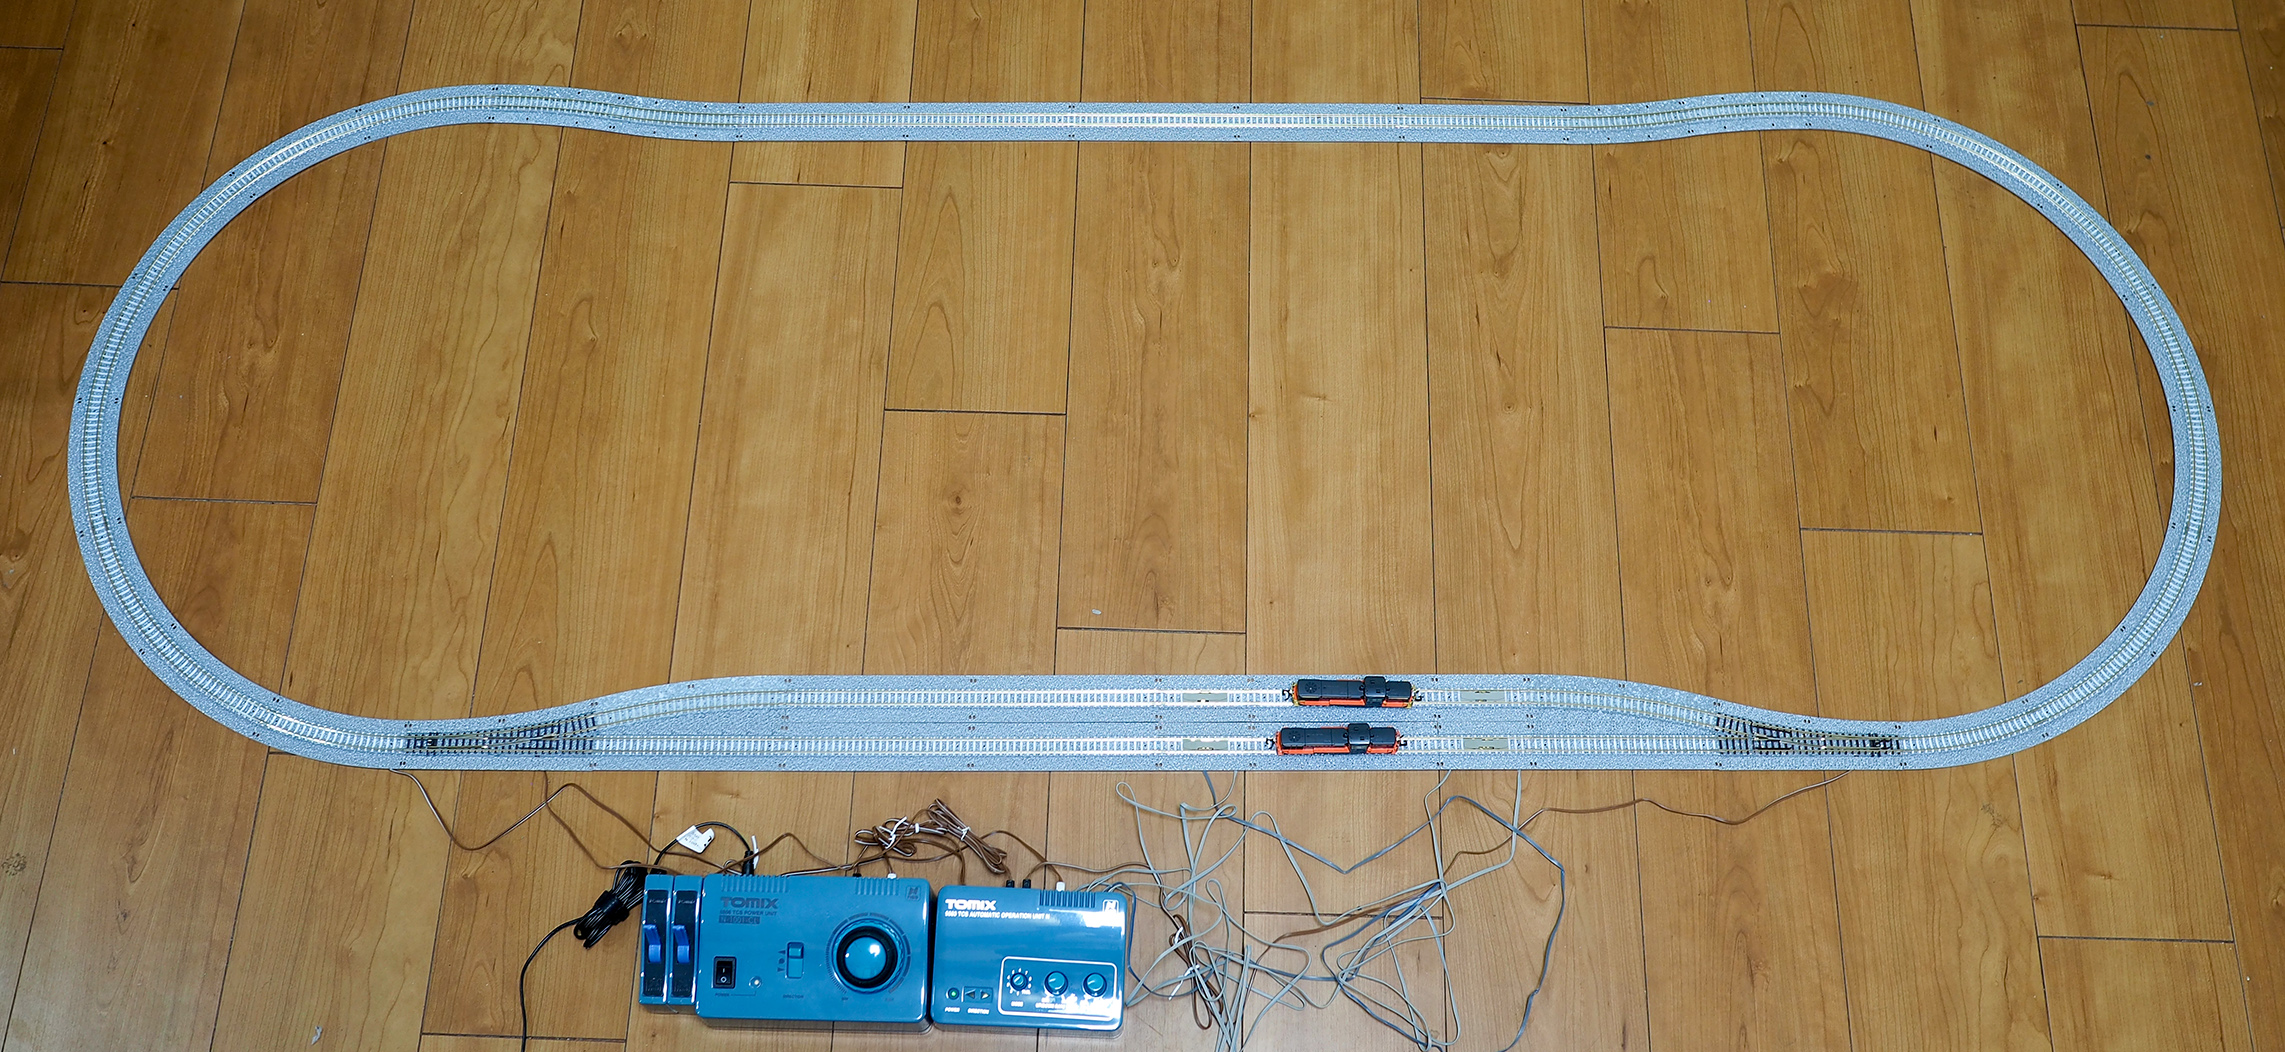
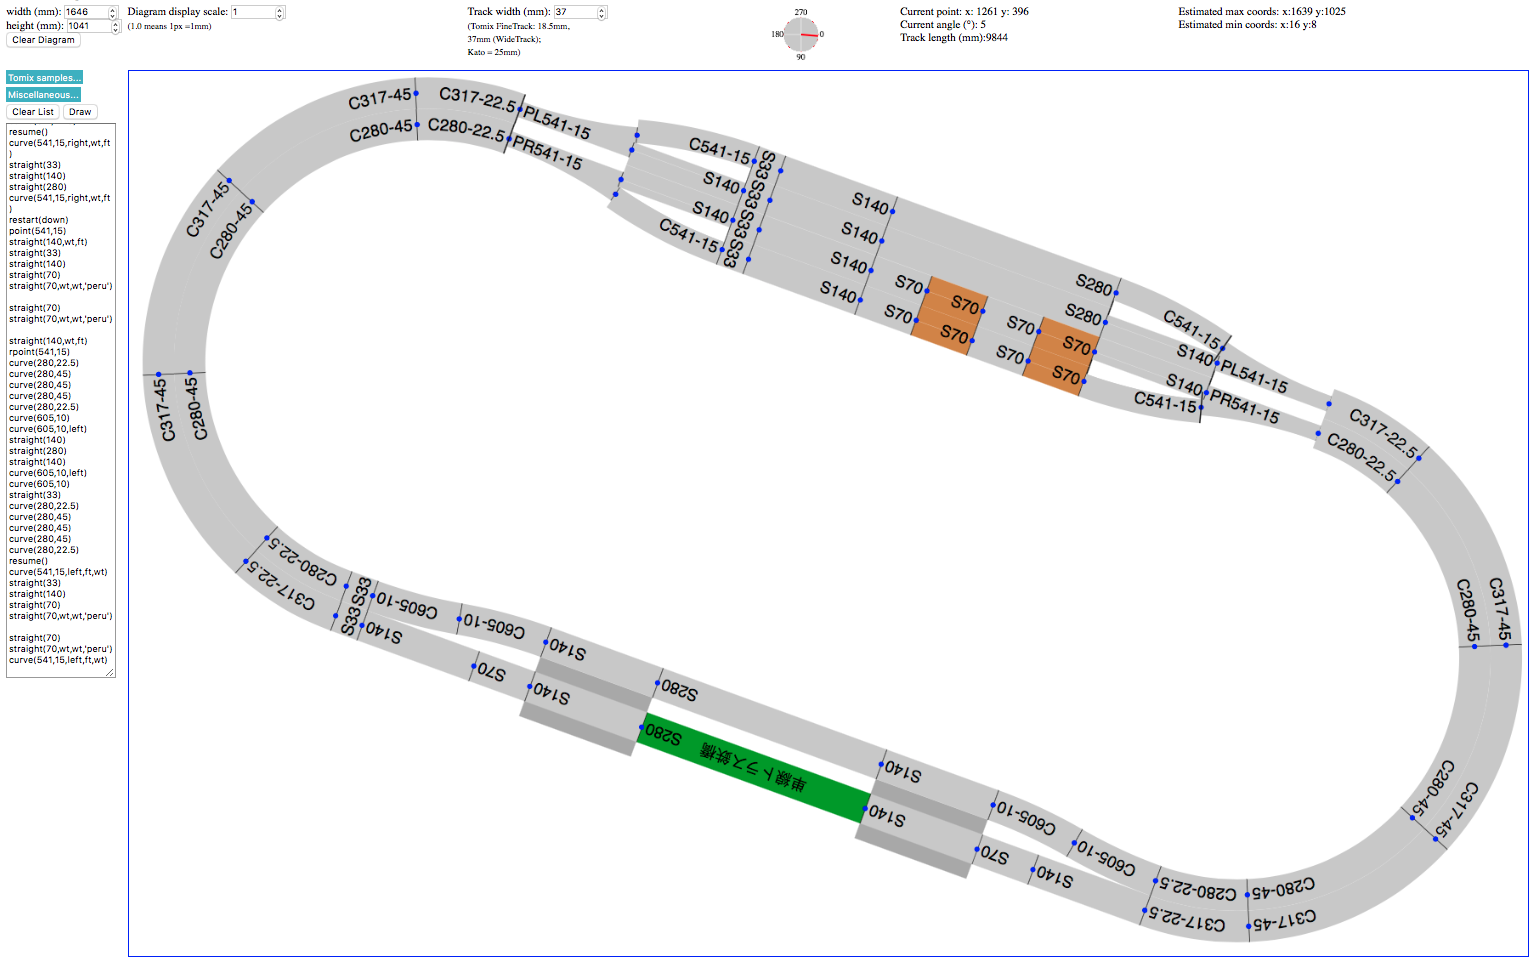
what I ended up with, using the C280/C317 radius curves:
Track is drawn with Wide PC track wherever possible, and
detachable Wide PC track where it is needed, i.e. at the points. A
ballast package is available from Tomix to fill in the gaps (see later
pictures). The single level Tomix embankments are also drawn. The
C605-15 x 2 wriggles in the inner loop are there to create an extra
18.5mm gap to accommodate the embankments. Note that 2 x C605-15 is
equivalent in length to a S140 + S70 combination.
Unfortunately, the longest straight, at 1013mm, is only
slightly longer than the 7 car Keihan 1000系 train I bought, which
measured at 875mm (see earlier picture). Still, it's nice to see a
train straighten out, if only for a fleeting moment. Due to the
limitations imposed by my 1.645m-long board, also the sideouts aren't
as long as I would like to have available. This means, if I am to
switch between the 1000系 and 3000系 trains, I'd have to run just (a
reduced) 4 (or at most 5) cars at a time. Bummer.
[My Keihan 8000系 and 3000系, both in 5-car configuration, side by side. The siding is comprised of C541-15 + S33 + S140 + S280 +
C541-15.]
As the build above shows, the siding is barely 5-car
compatible. (The little S33s across the board helps.)
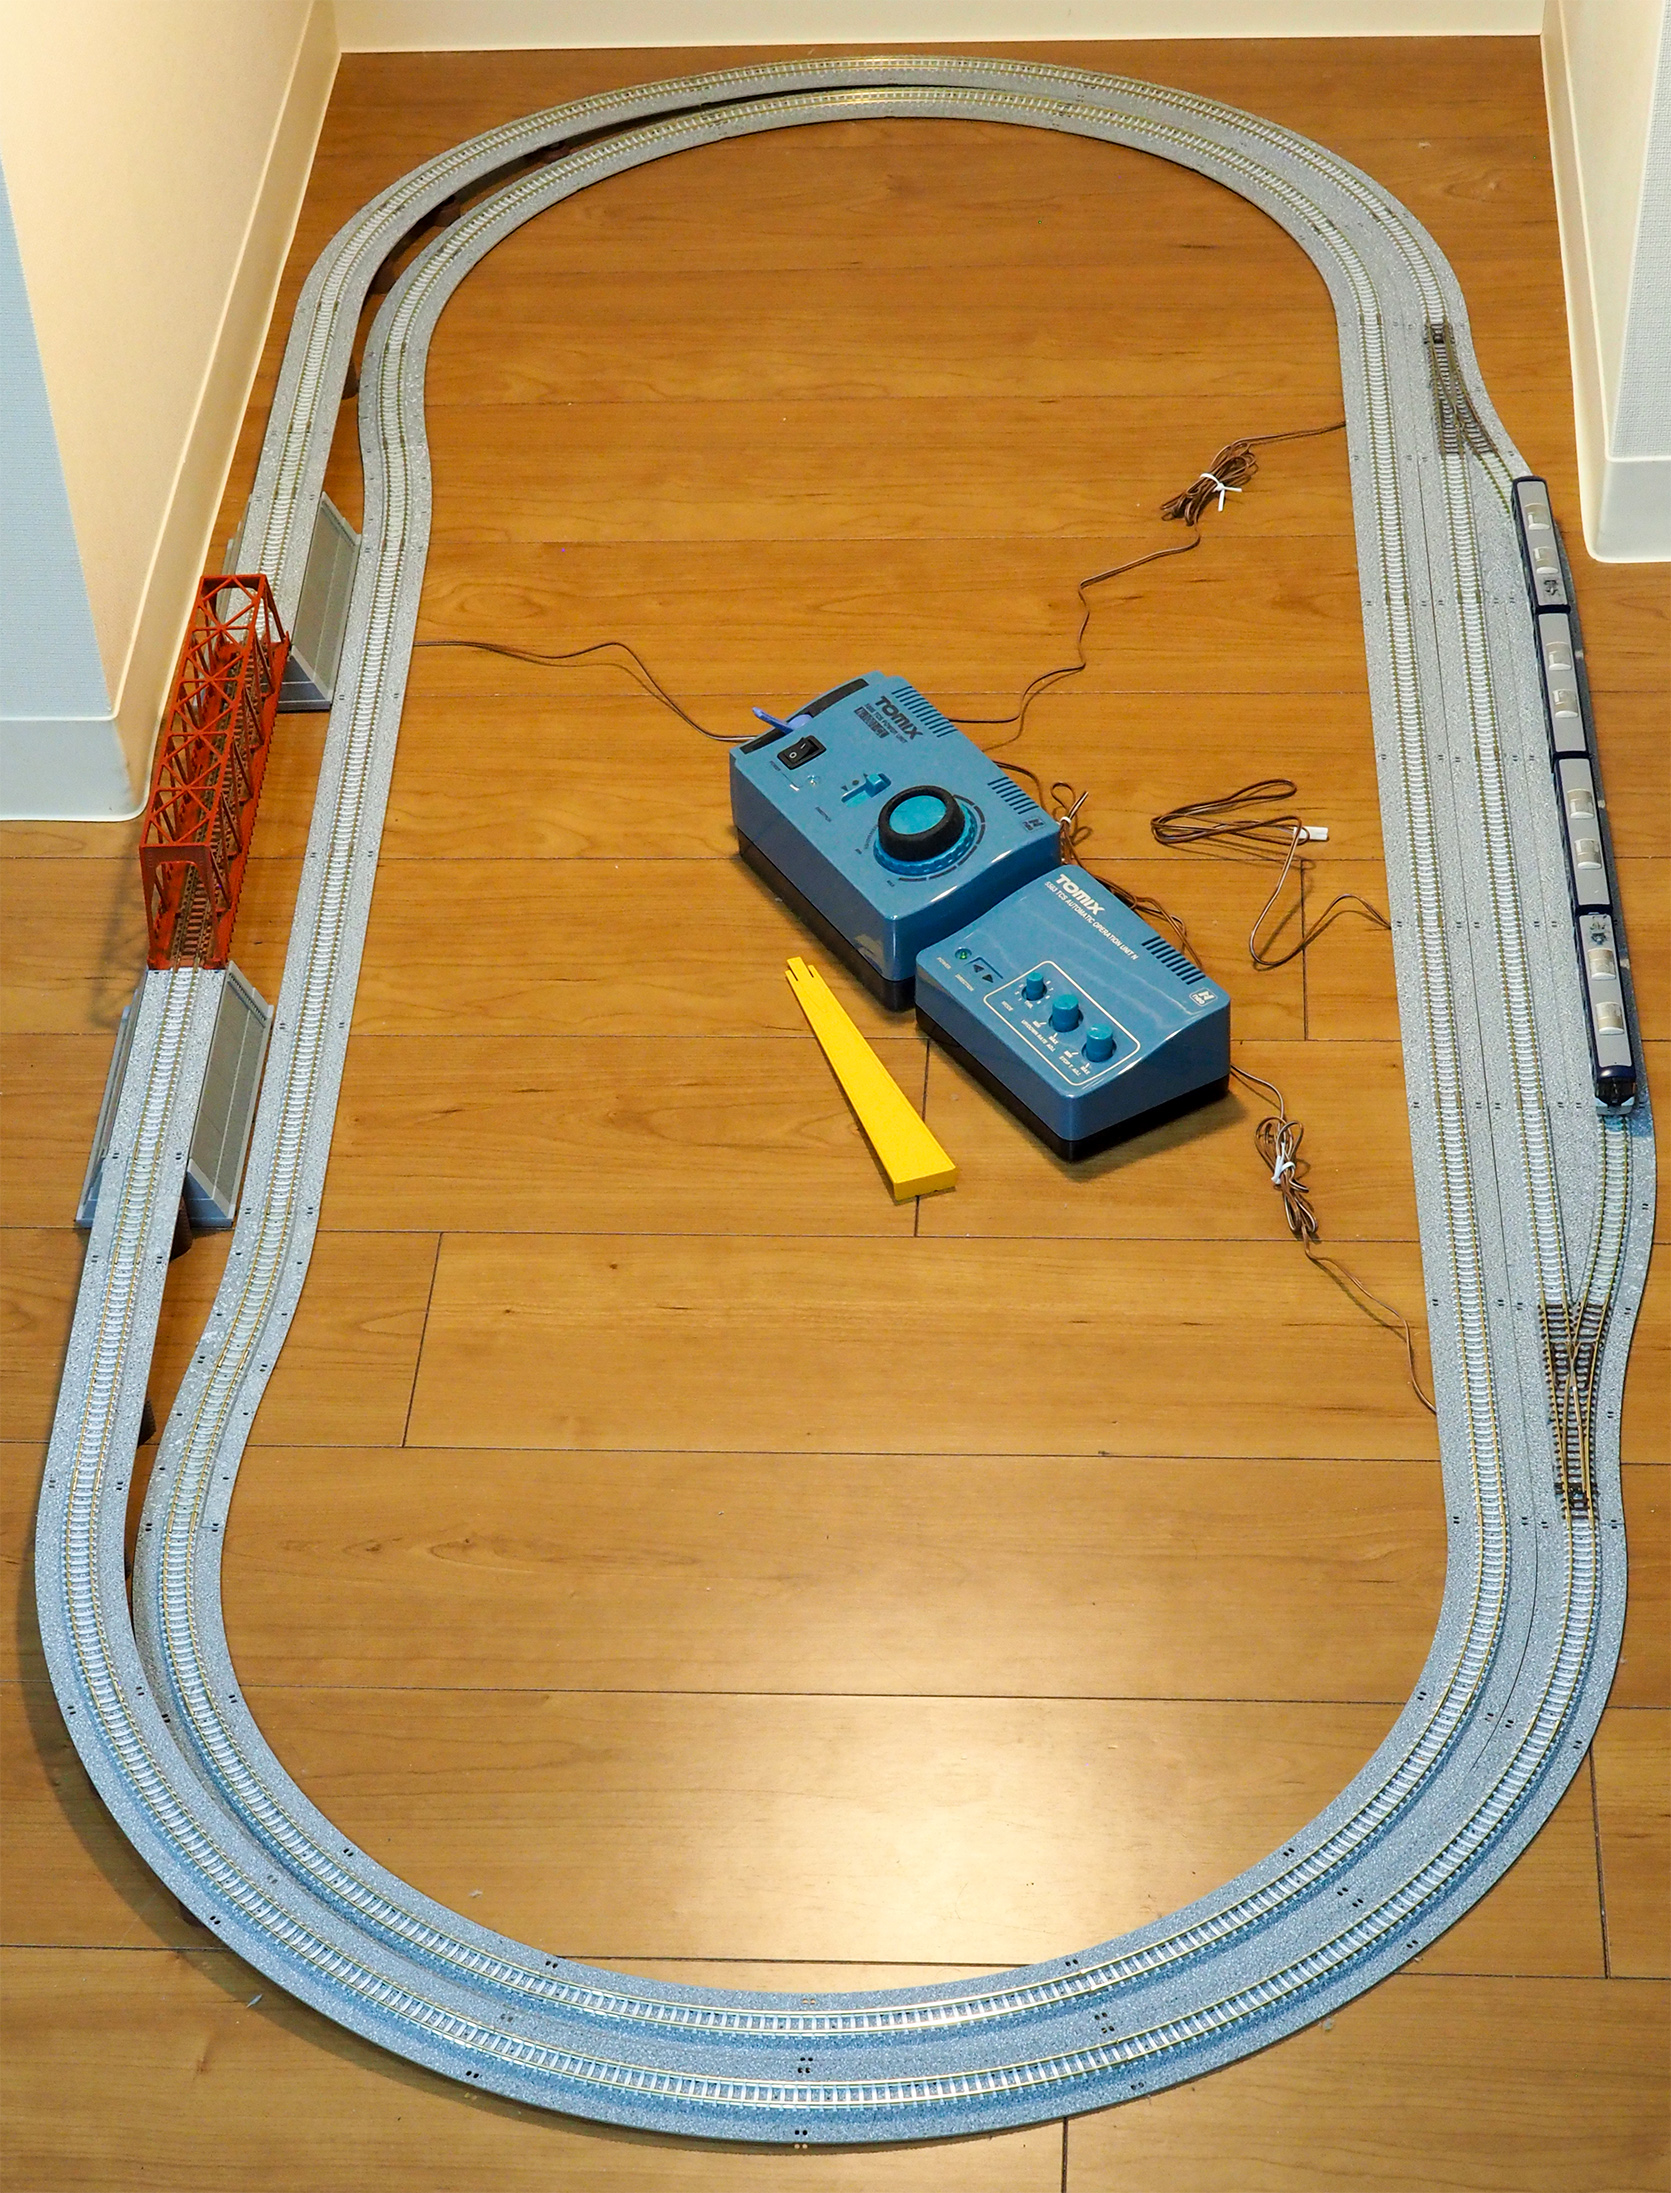
Arriving back in Kyoto, I decided to start by implementing the
outer loop.
[Here is the outer loop only with the Maple red Kirara (stationary in the
sideout) and orange Kirara (running).]
Two items of note in the above diagram:
Although I'm initially just concerned with the outer loop, I
subsequently added a dummy simple inner loop to make sure the track
dimensions were correct. (Would be bad if I'd left Japan only to
find out in Tucson AZ that my software was buggy and inner track
doesn't actually fit.)
Initally, I had the wriggle in the outer loop (as shown), but
my Kyoto friend wisely counseled I move it to the inner loop; the
reasoning being, once I get the bridge in place, a slope containing
a wriggle doesn't look as good as one with straight track only. He
was right of course.
Anyway, here is a picture of what I brought back from my first
track foraging expedition to Yodobashi Kyoto. (I had to go back a
couple of times to get extra pieces. I also had to visit Volks Kyoto,
despite it generally being more expensive, as Yodobashi doesn't have
everything in stock.)
[There is actually more track above than I need for the outer loop
because of the way Tomix bundles track in sets.]
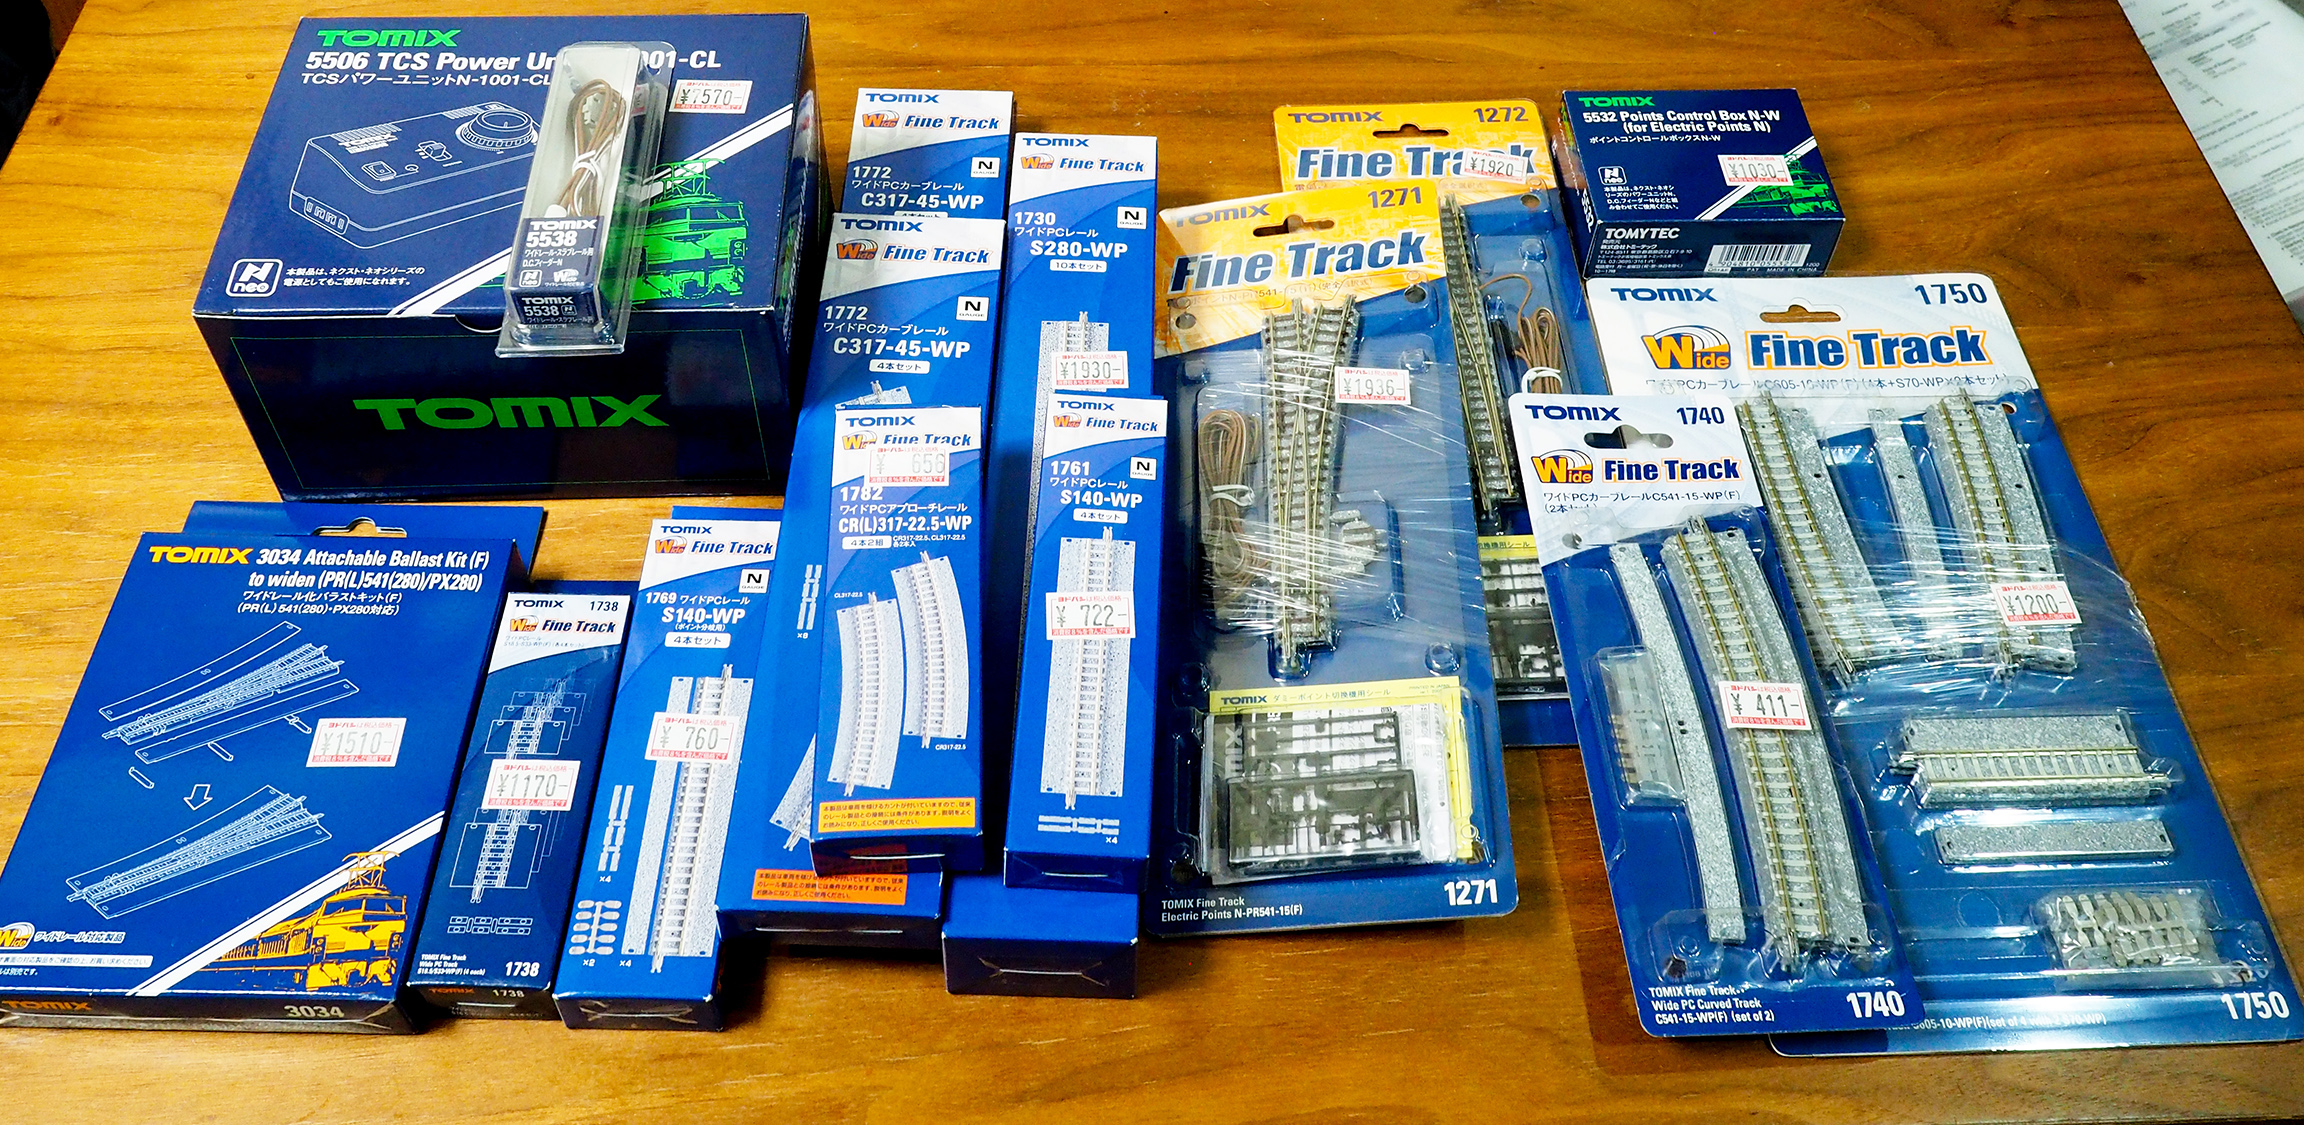
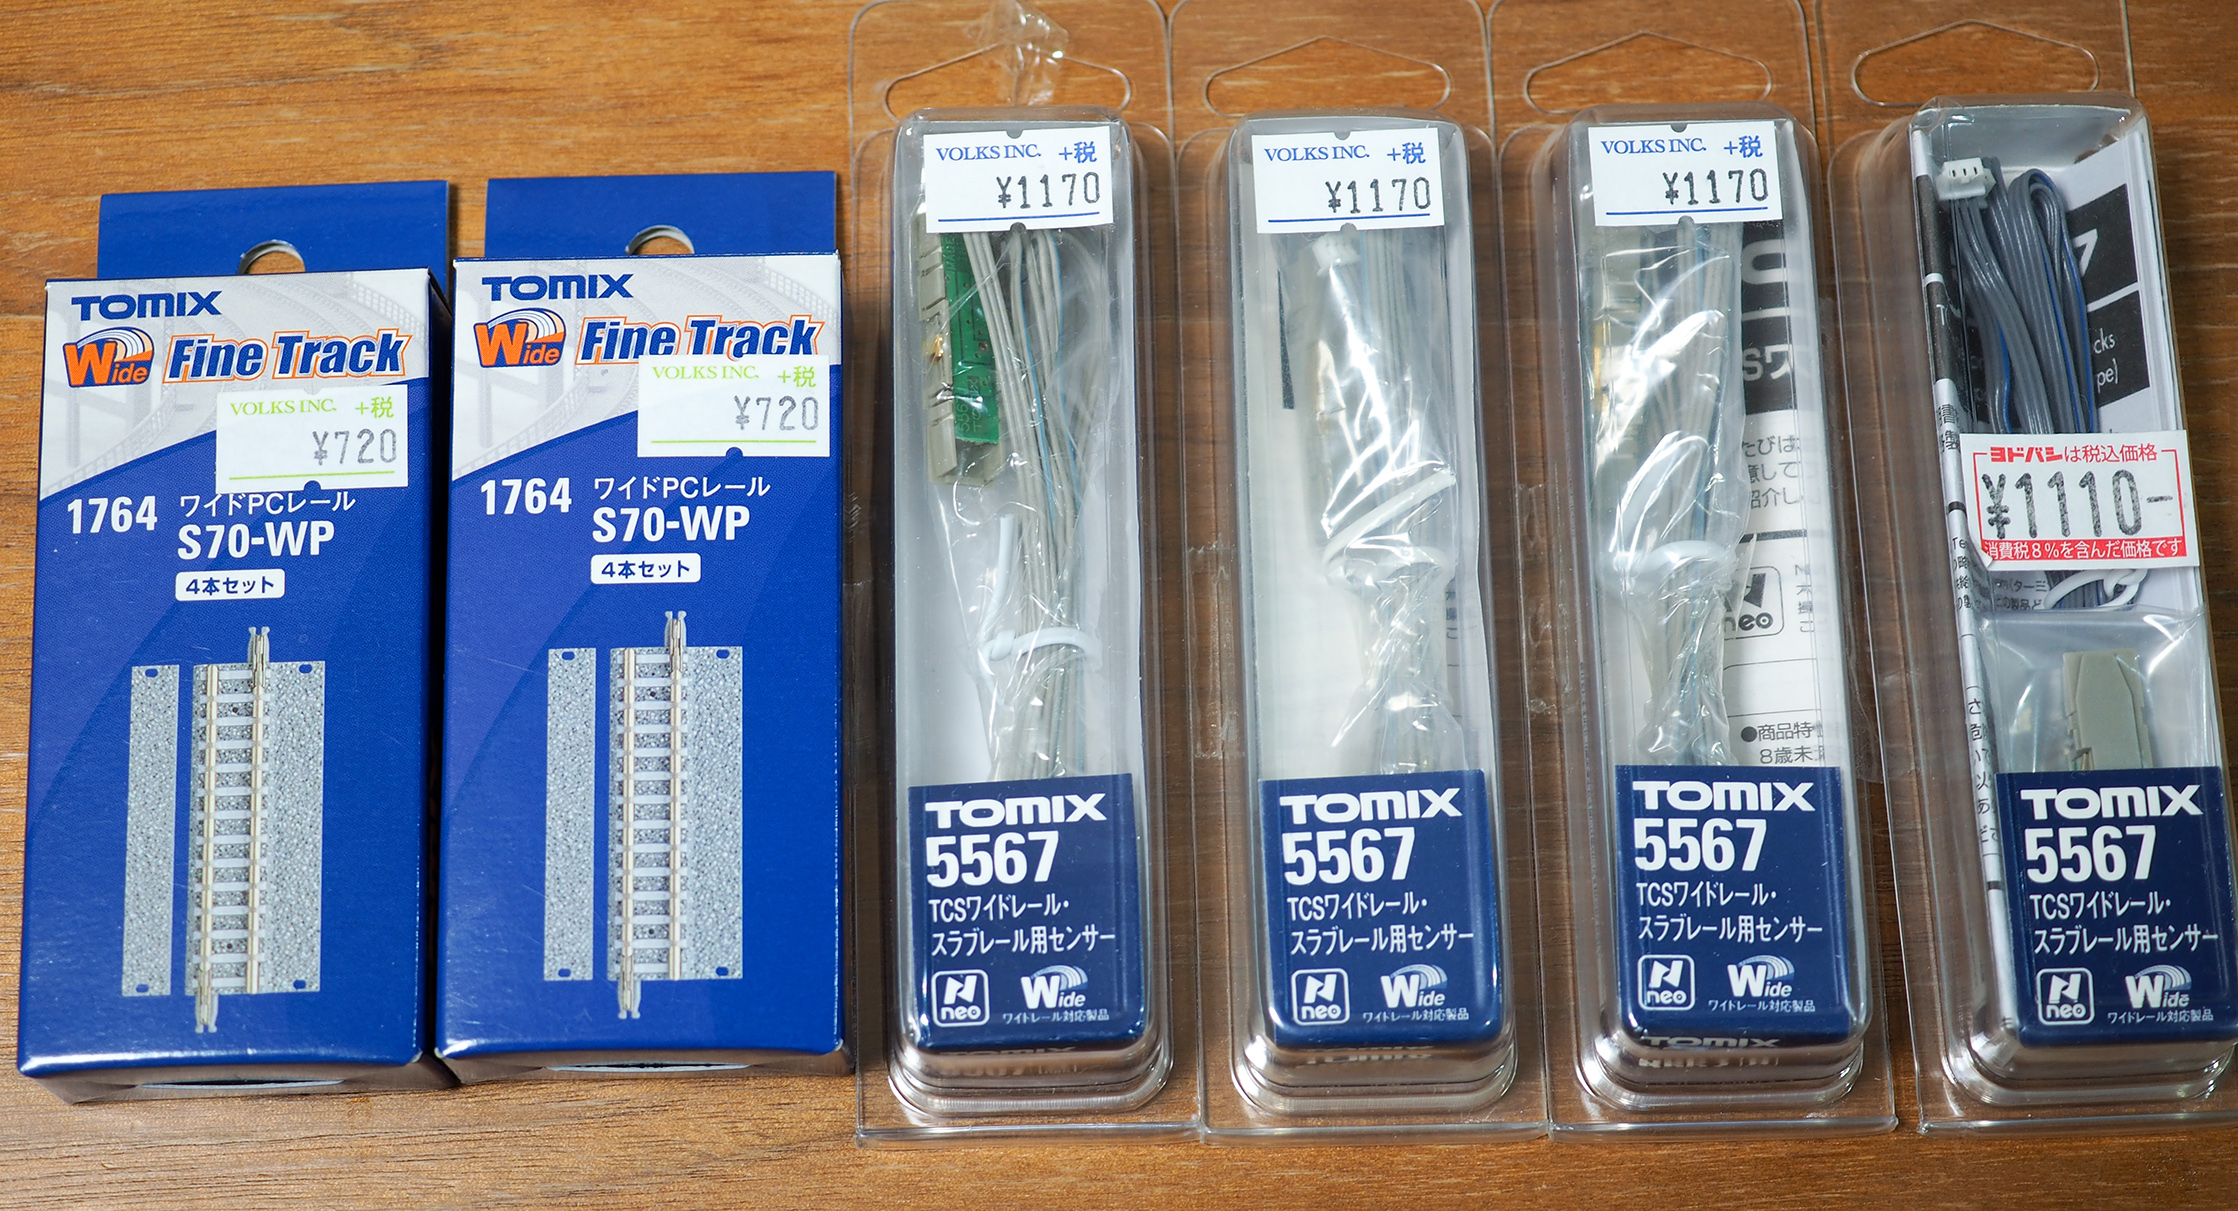
For the record, here are the parts I ended up with, Yodobashi
vs. list pricing (in ¥), and with links to the Tomix online
catalog:
[Green indicates Volks pricing. Didn't spot this item in
Yodobashi's catalog.]
Grand total is about ¥62,900 ($565), exchange rate calculated
for April 2017. You save about 32% by shopping at Yodobashi. Some
notes on the table:
¥14,115 ($127) for the basic outer loop, including the
double point switch. The truss bridge plus embankments will add
another ¥5,821 ($52). So the outer loop in total will be
about ¥20,000 ($180).
Note that because of Tomix packaging, buying the necessary
track for the outer loop will result in some leftover pieces, so the
inner loop ends up less expensive at ¥7,966 ($72). (BTW,
there will still be some leftover pieces after the inner loop.)
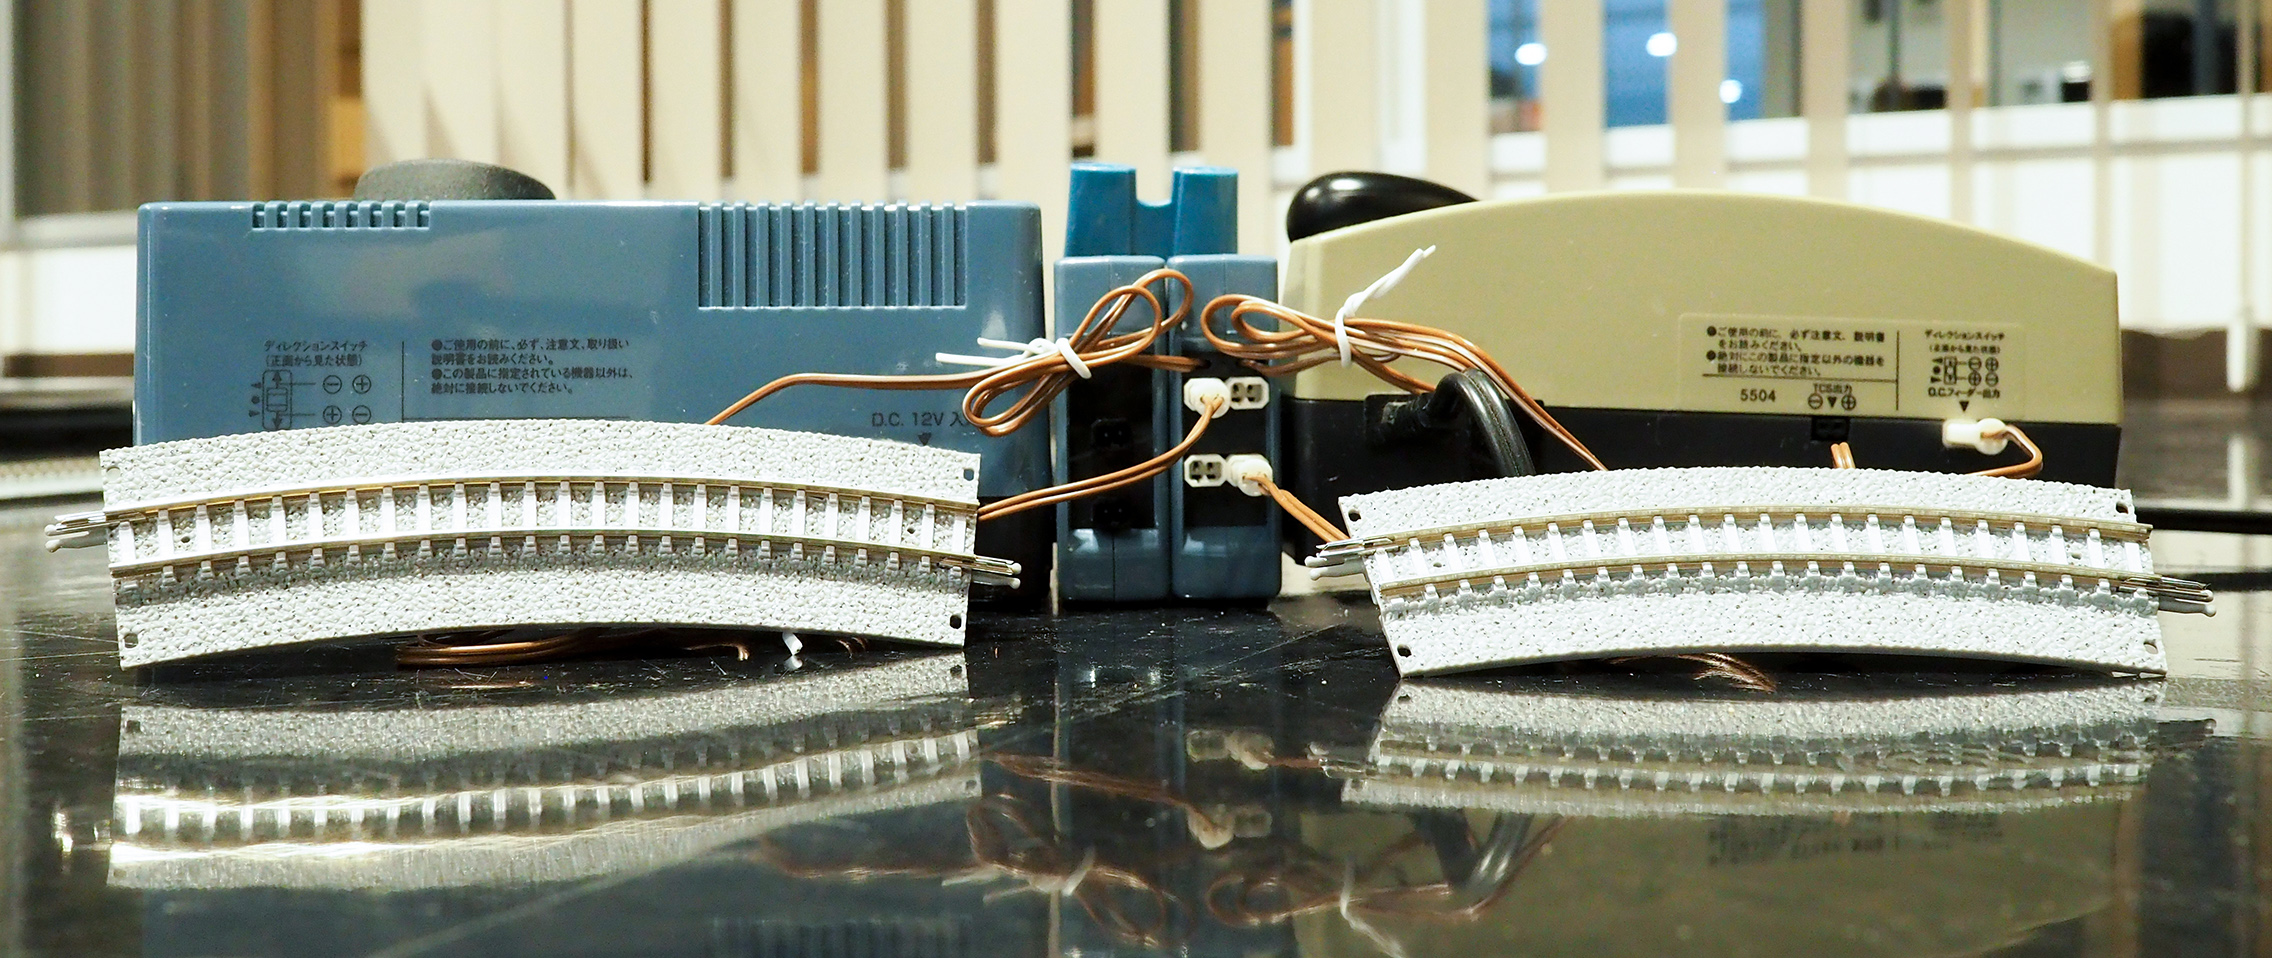
Finally, we need the electronics, including two controllers
and two feeders, at ¥17,000
($129).
I have not discussed the TCS parts here, see the separate TCS
section below. But that's another ¥12,000 ($108).
Later on, I added the front yard and the mighty N-PX280
crossover for convenient loading. The price of convenience works out to
¥2,100 + ¥6,048, or about $73.
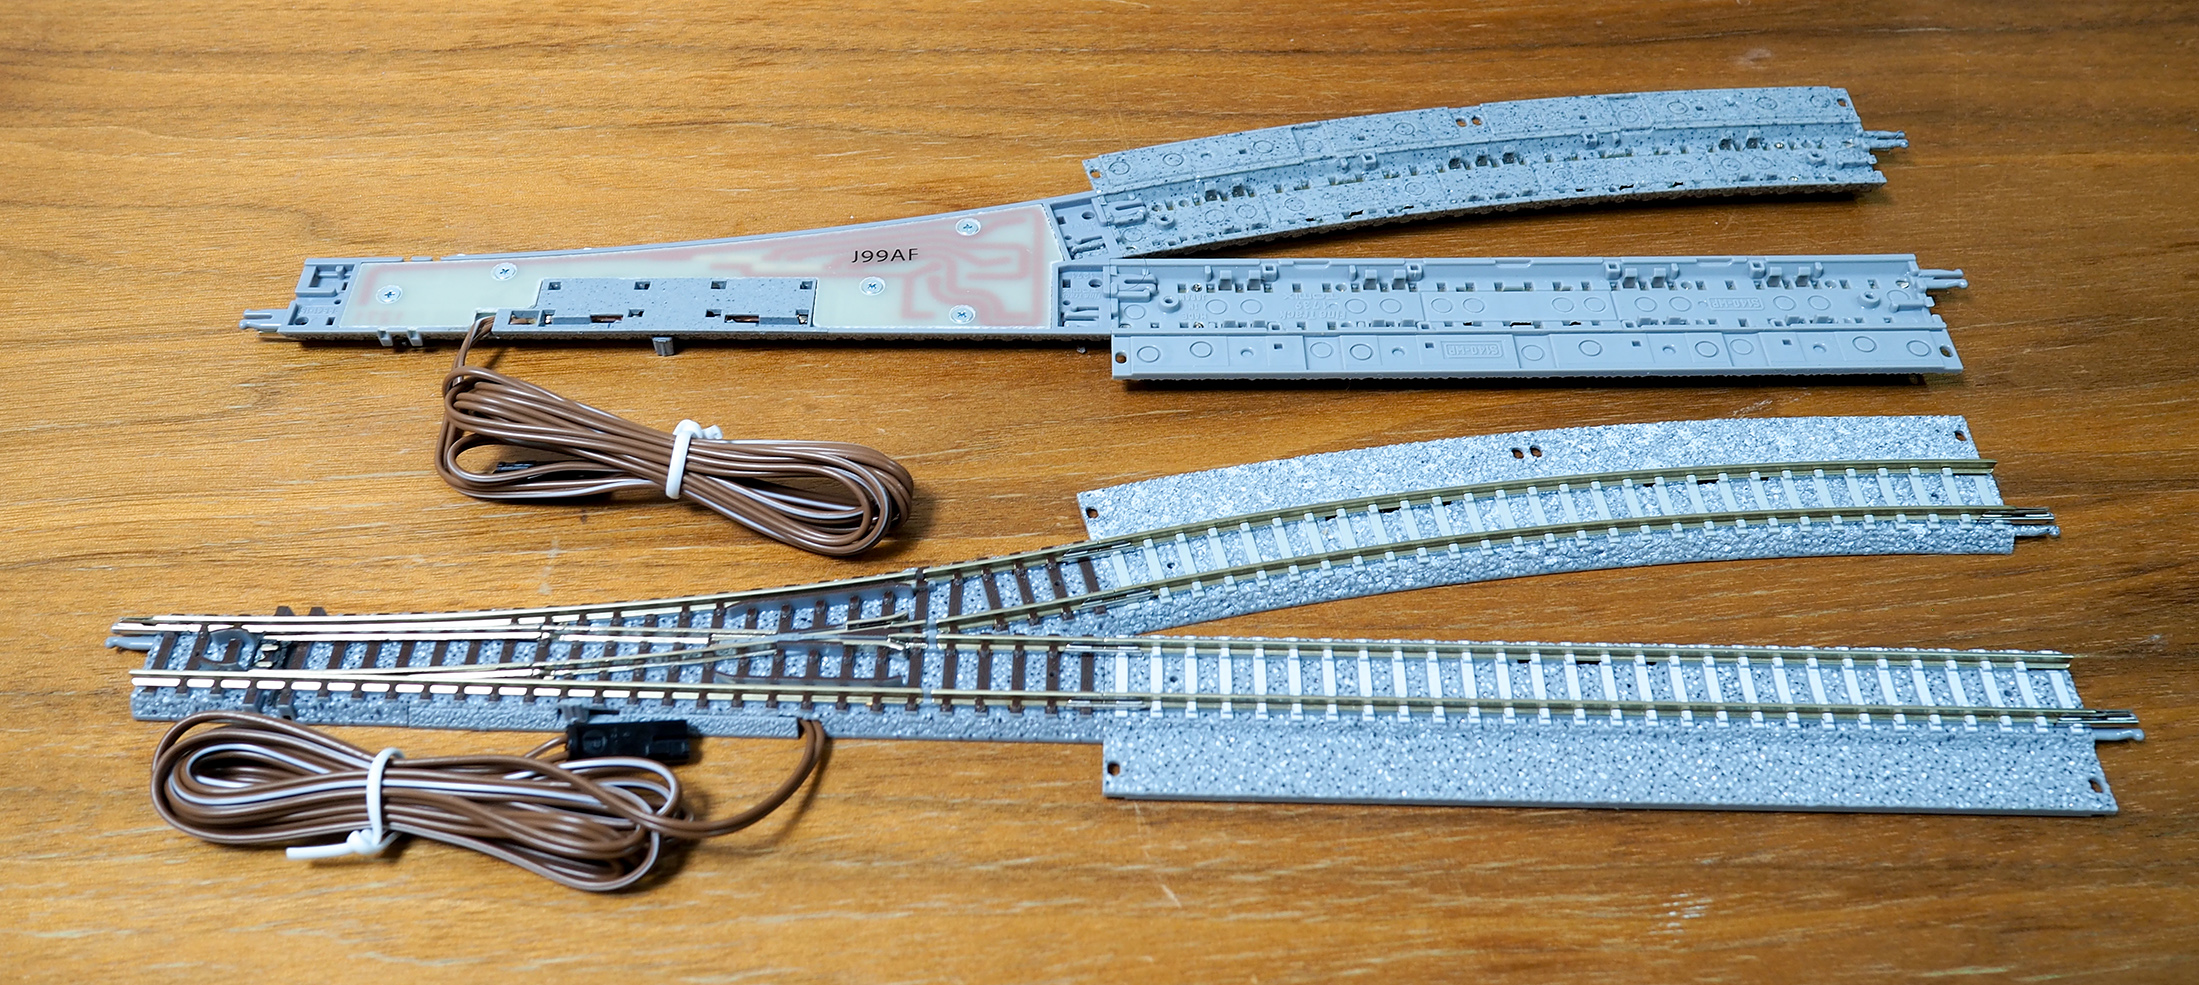
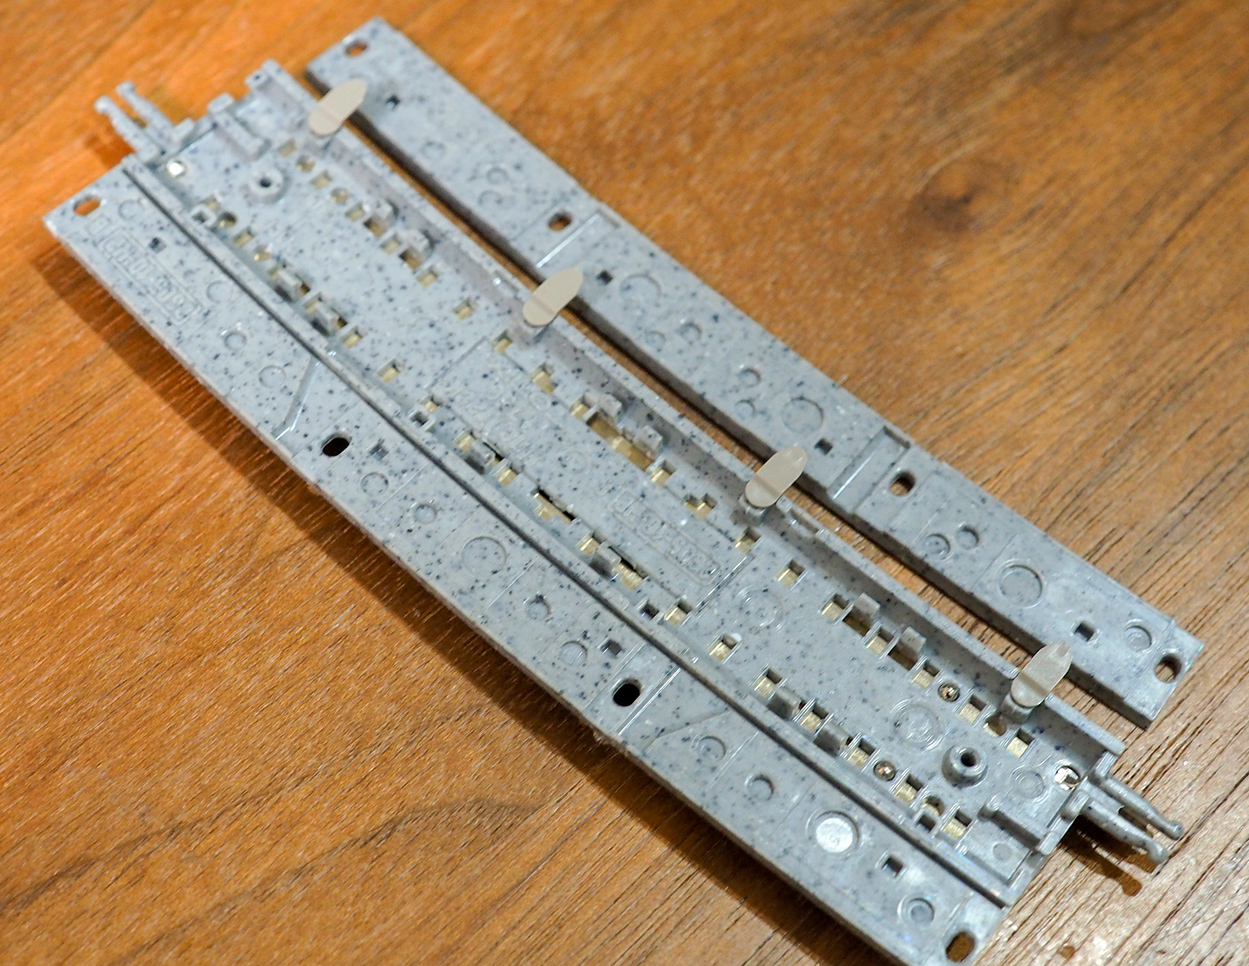
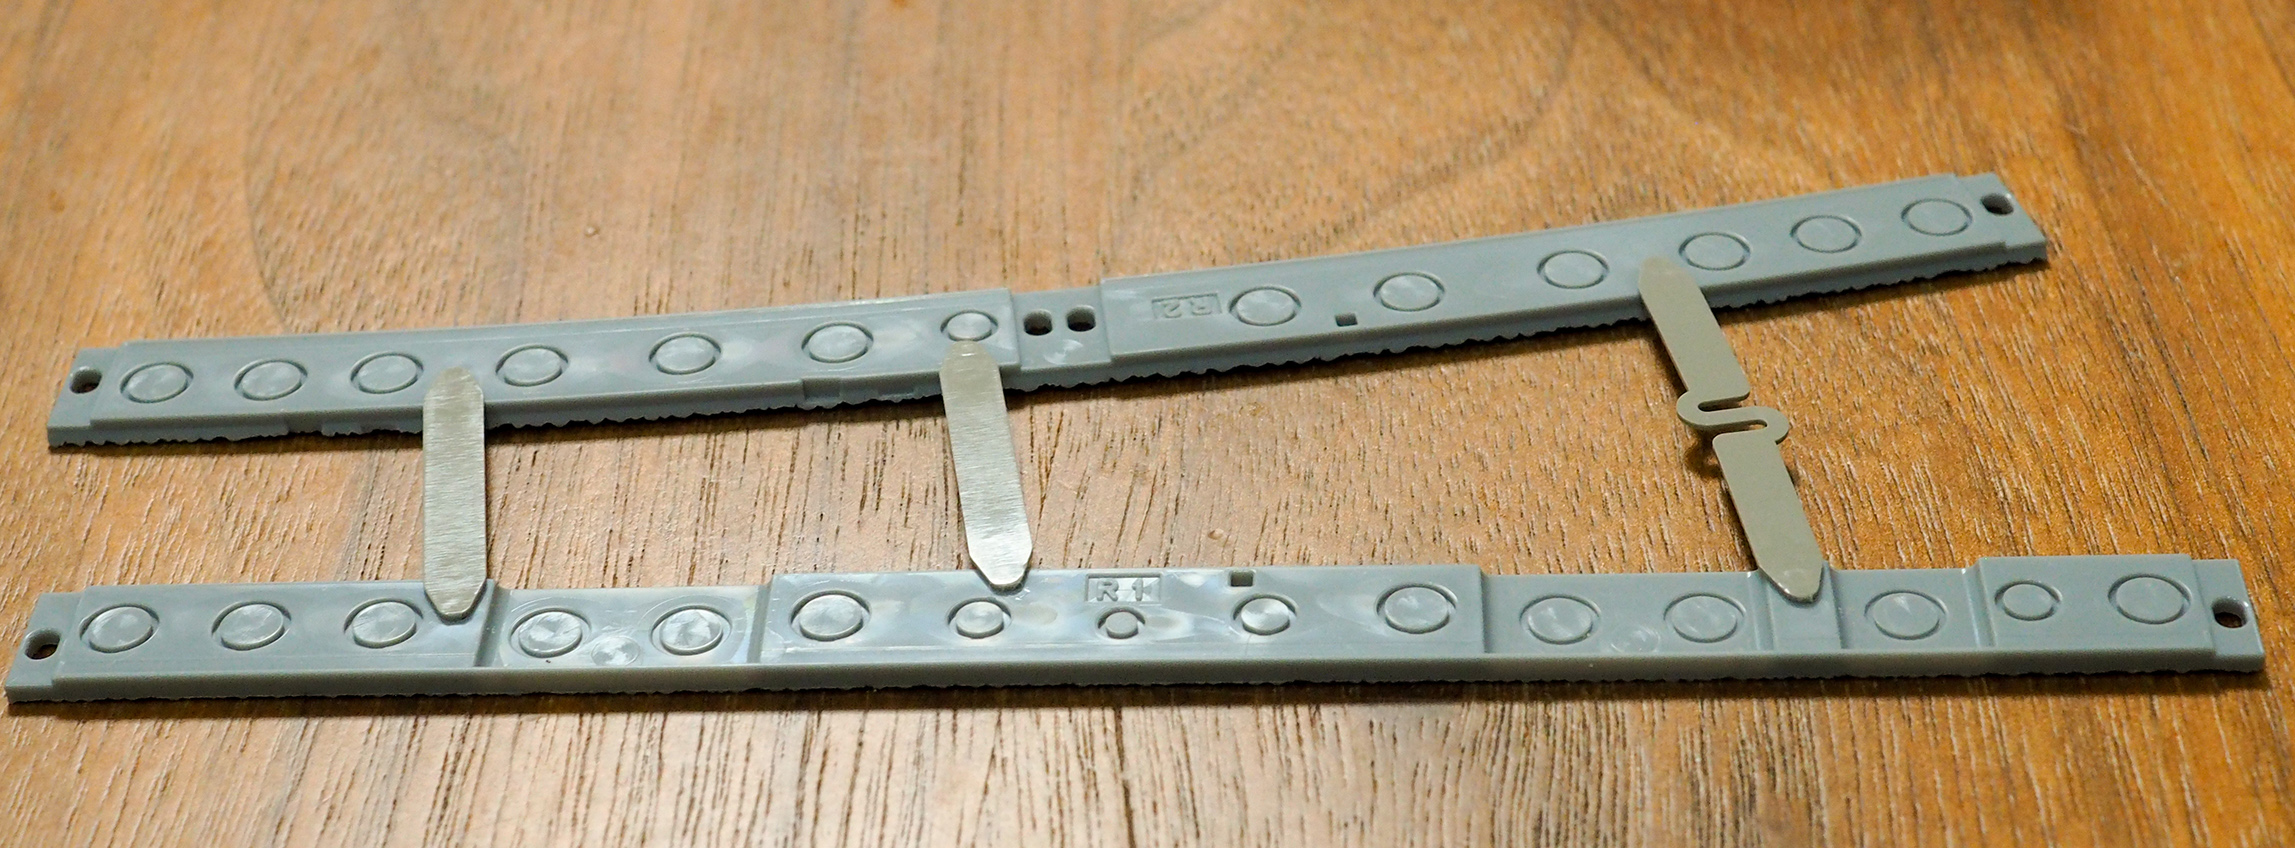
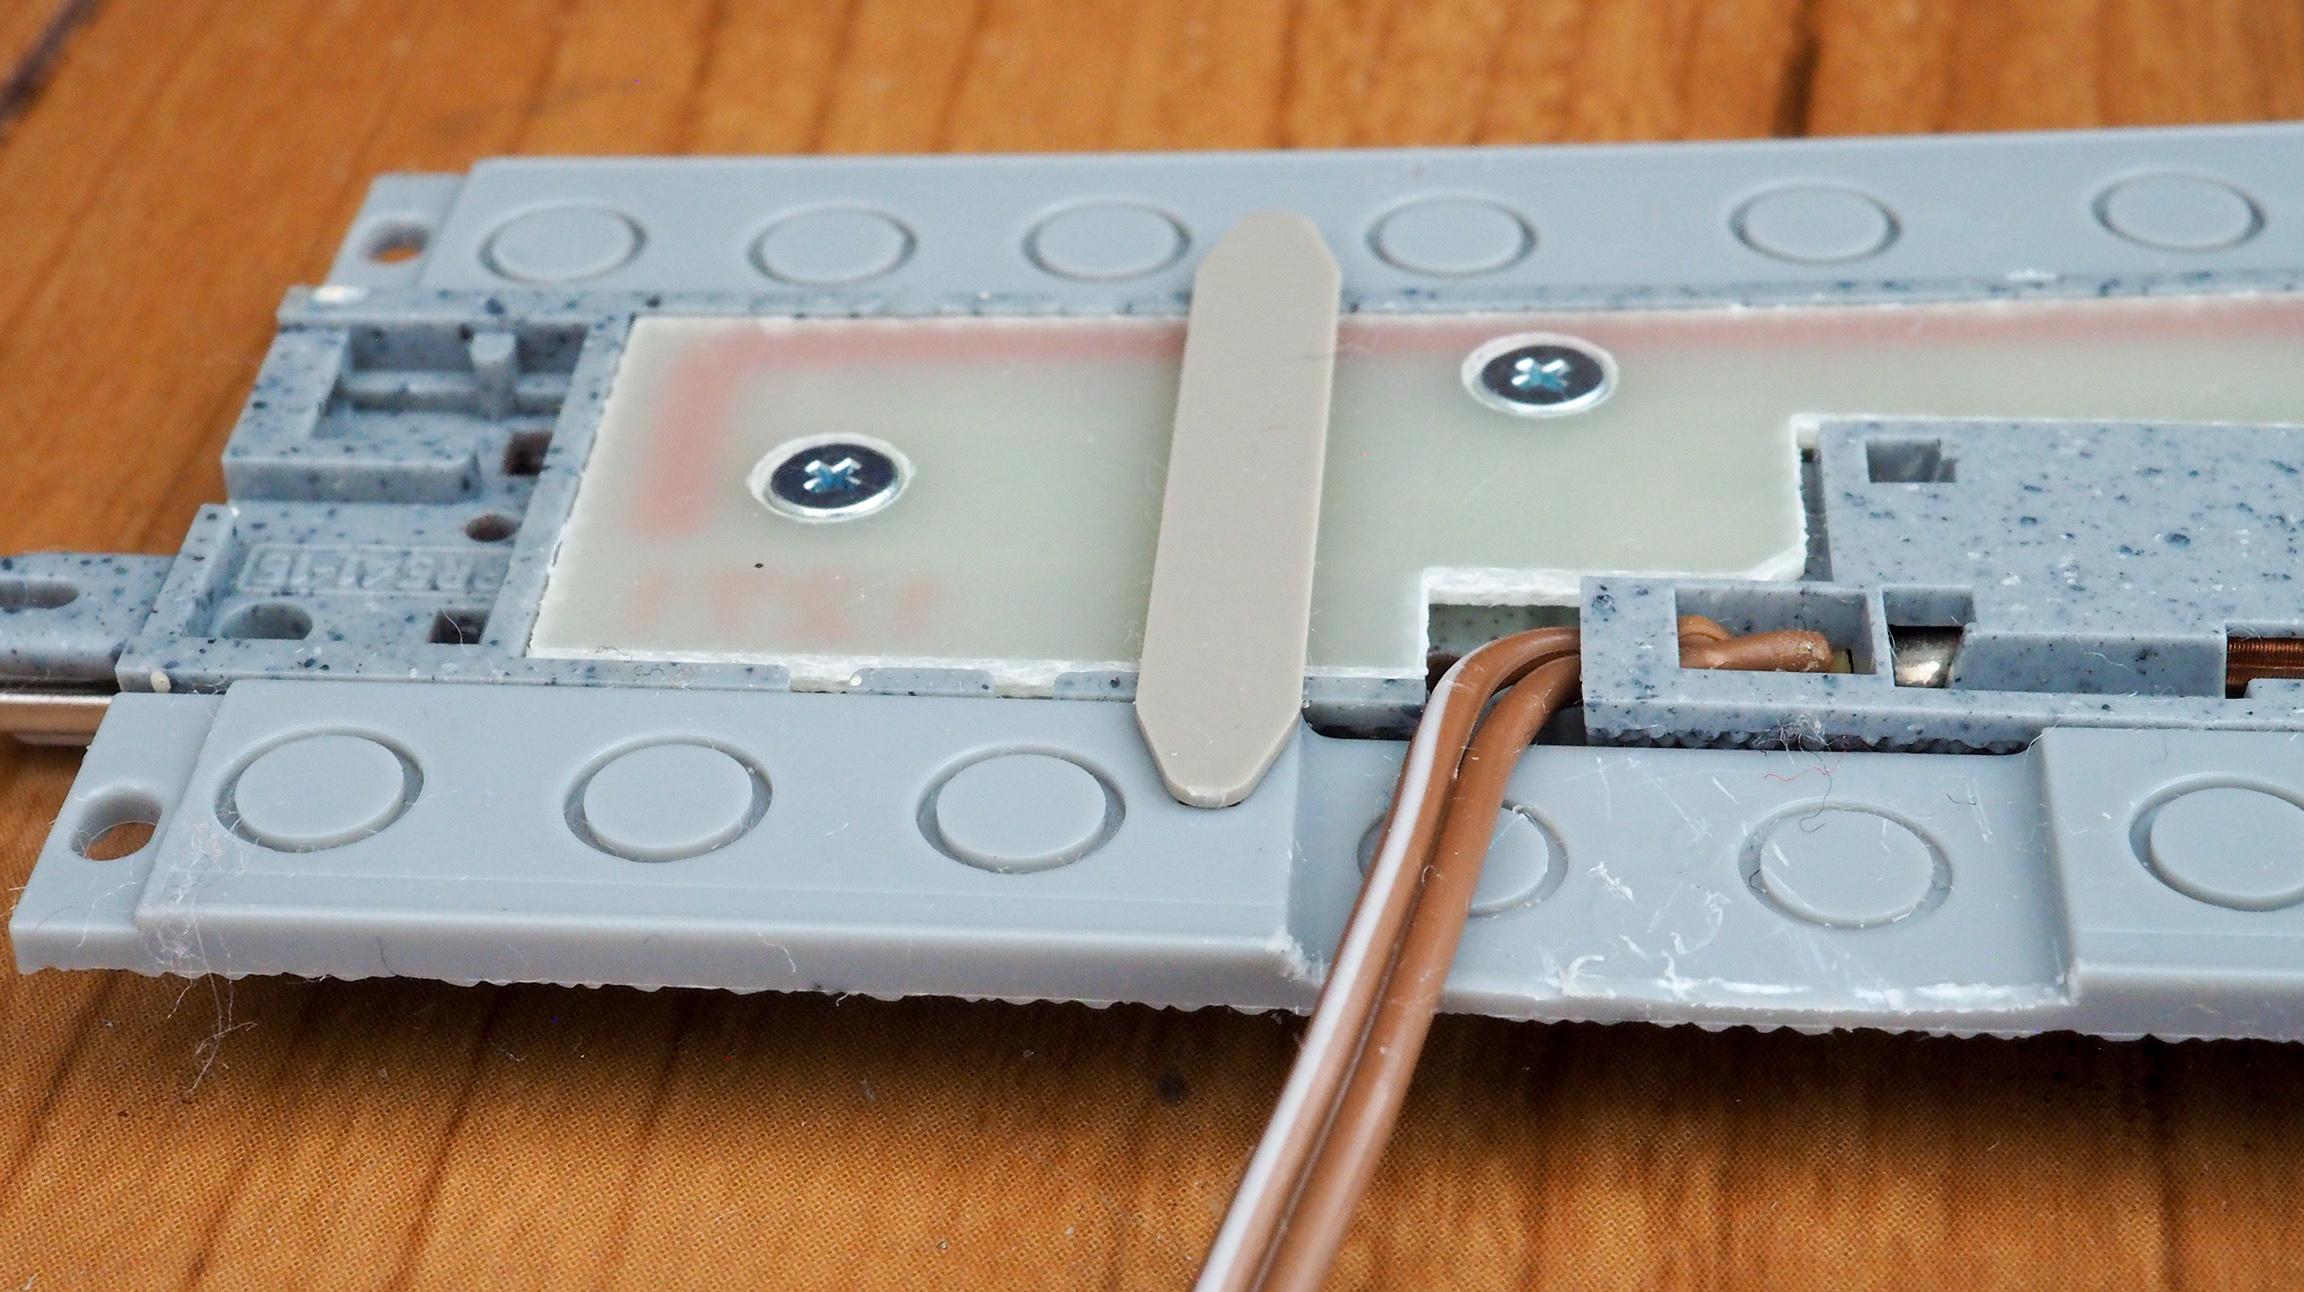
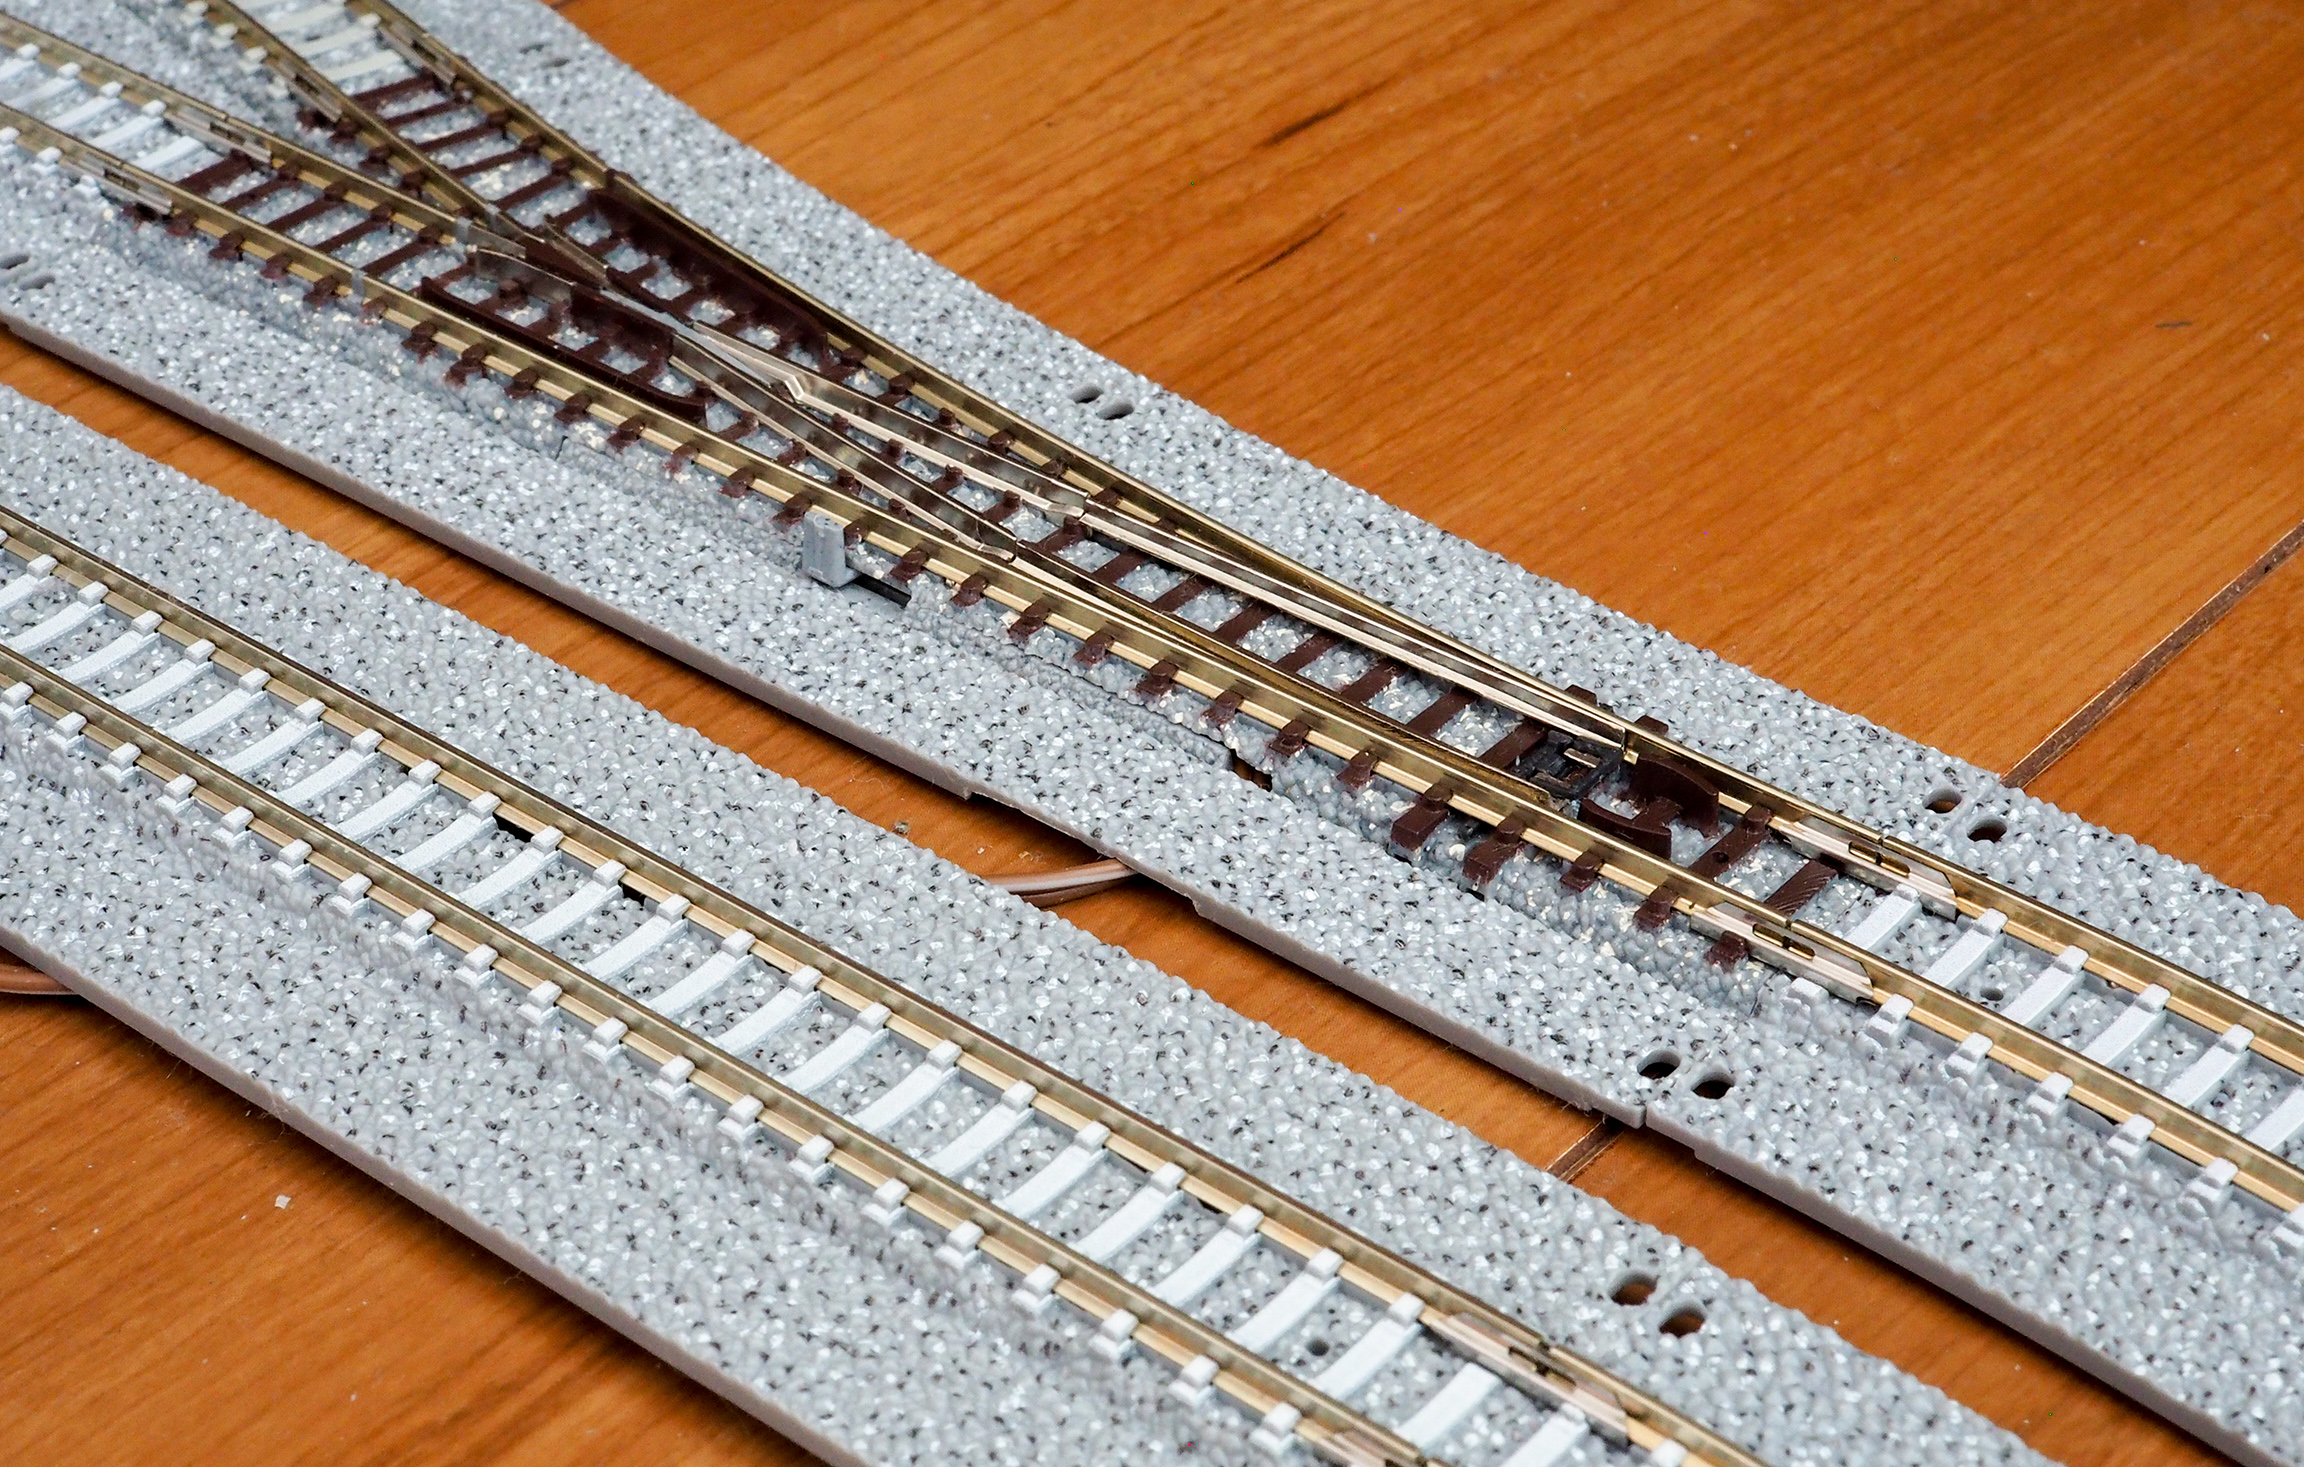
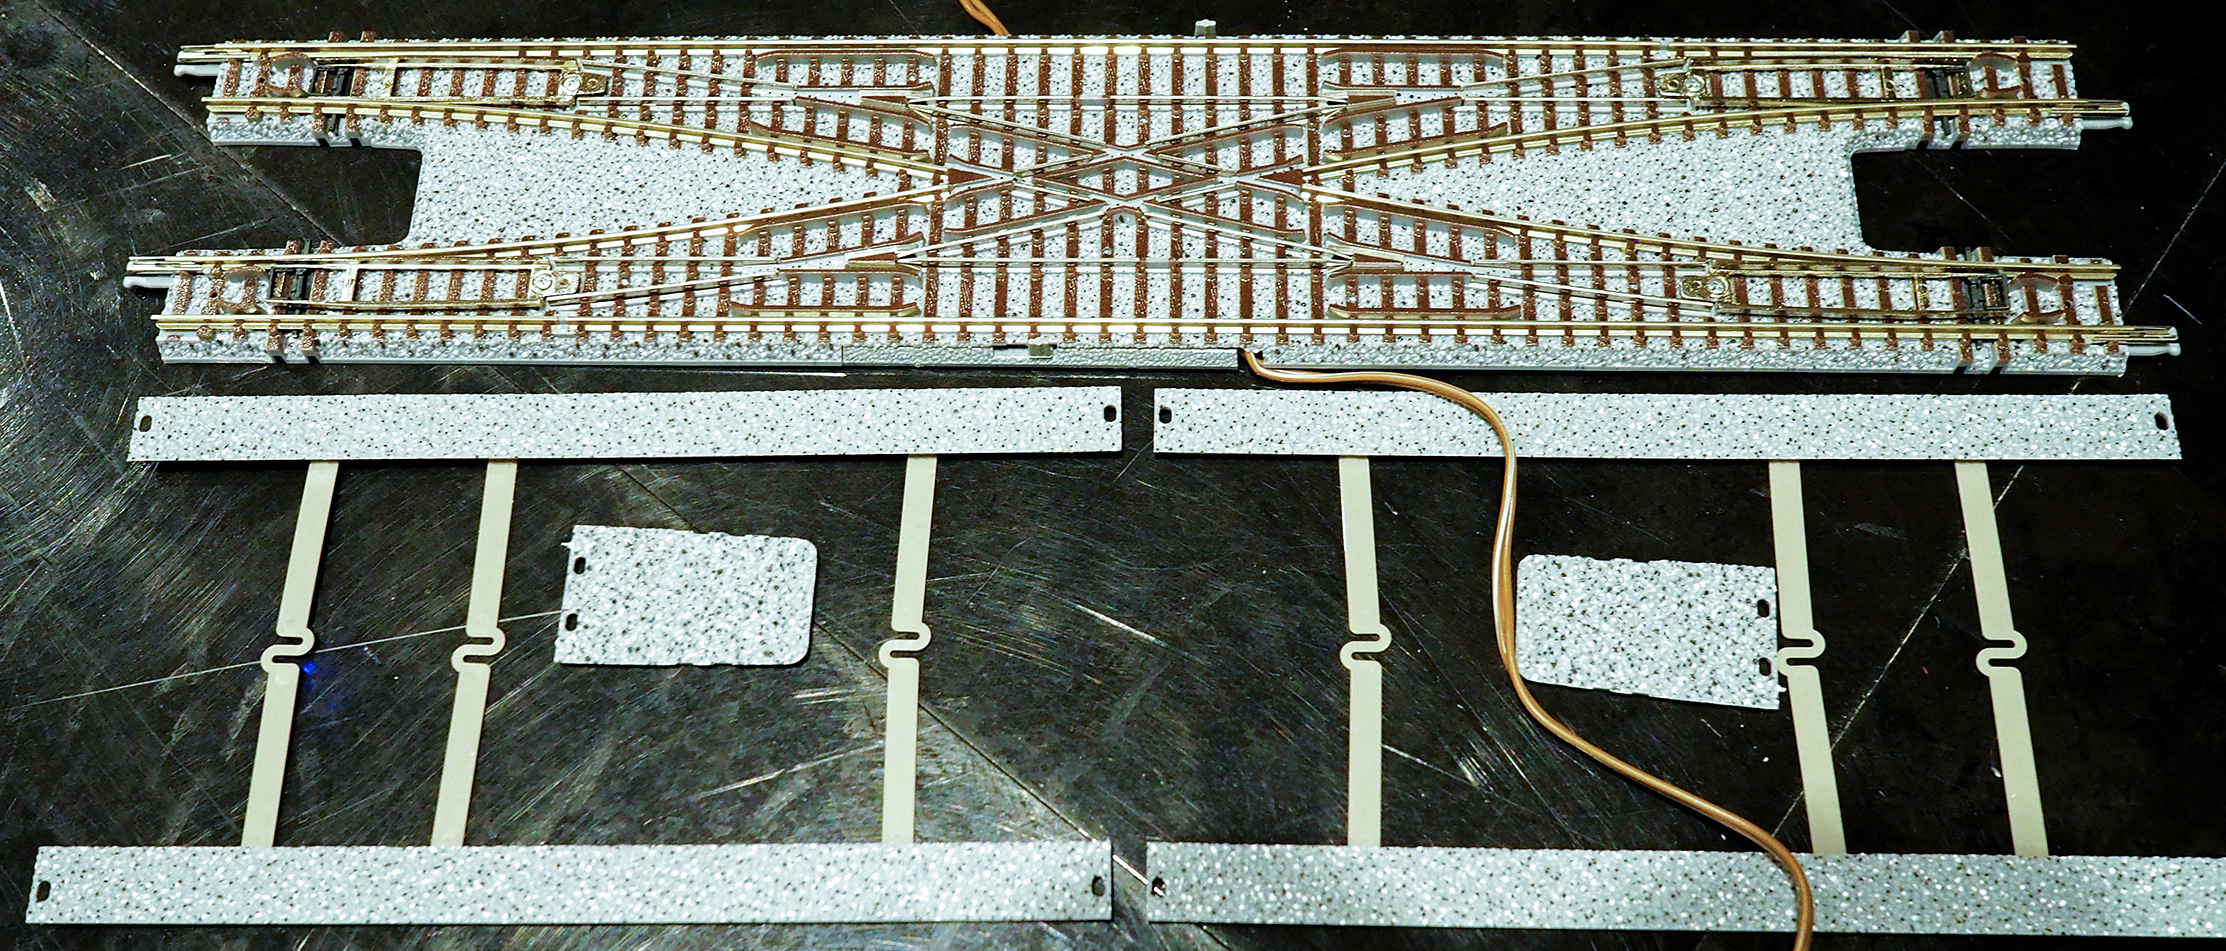
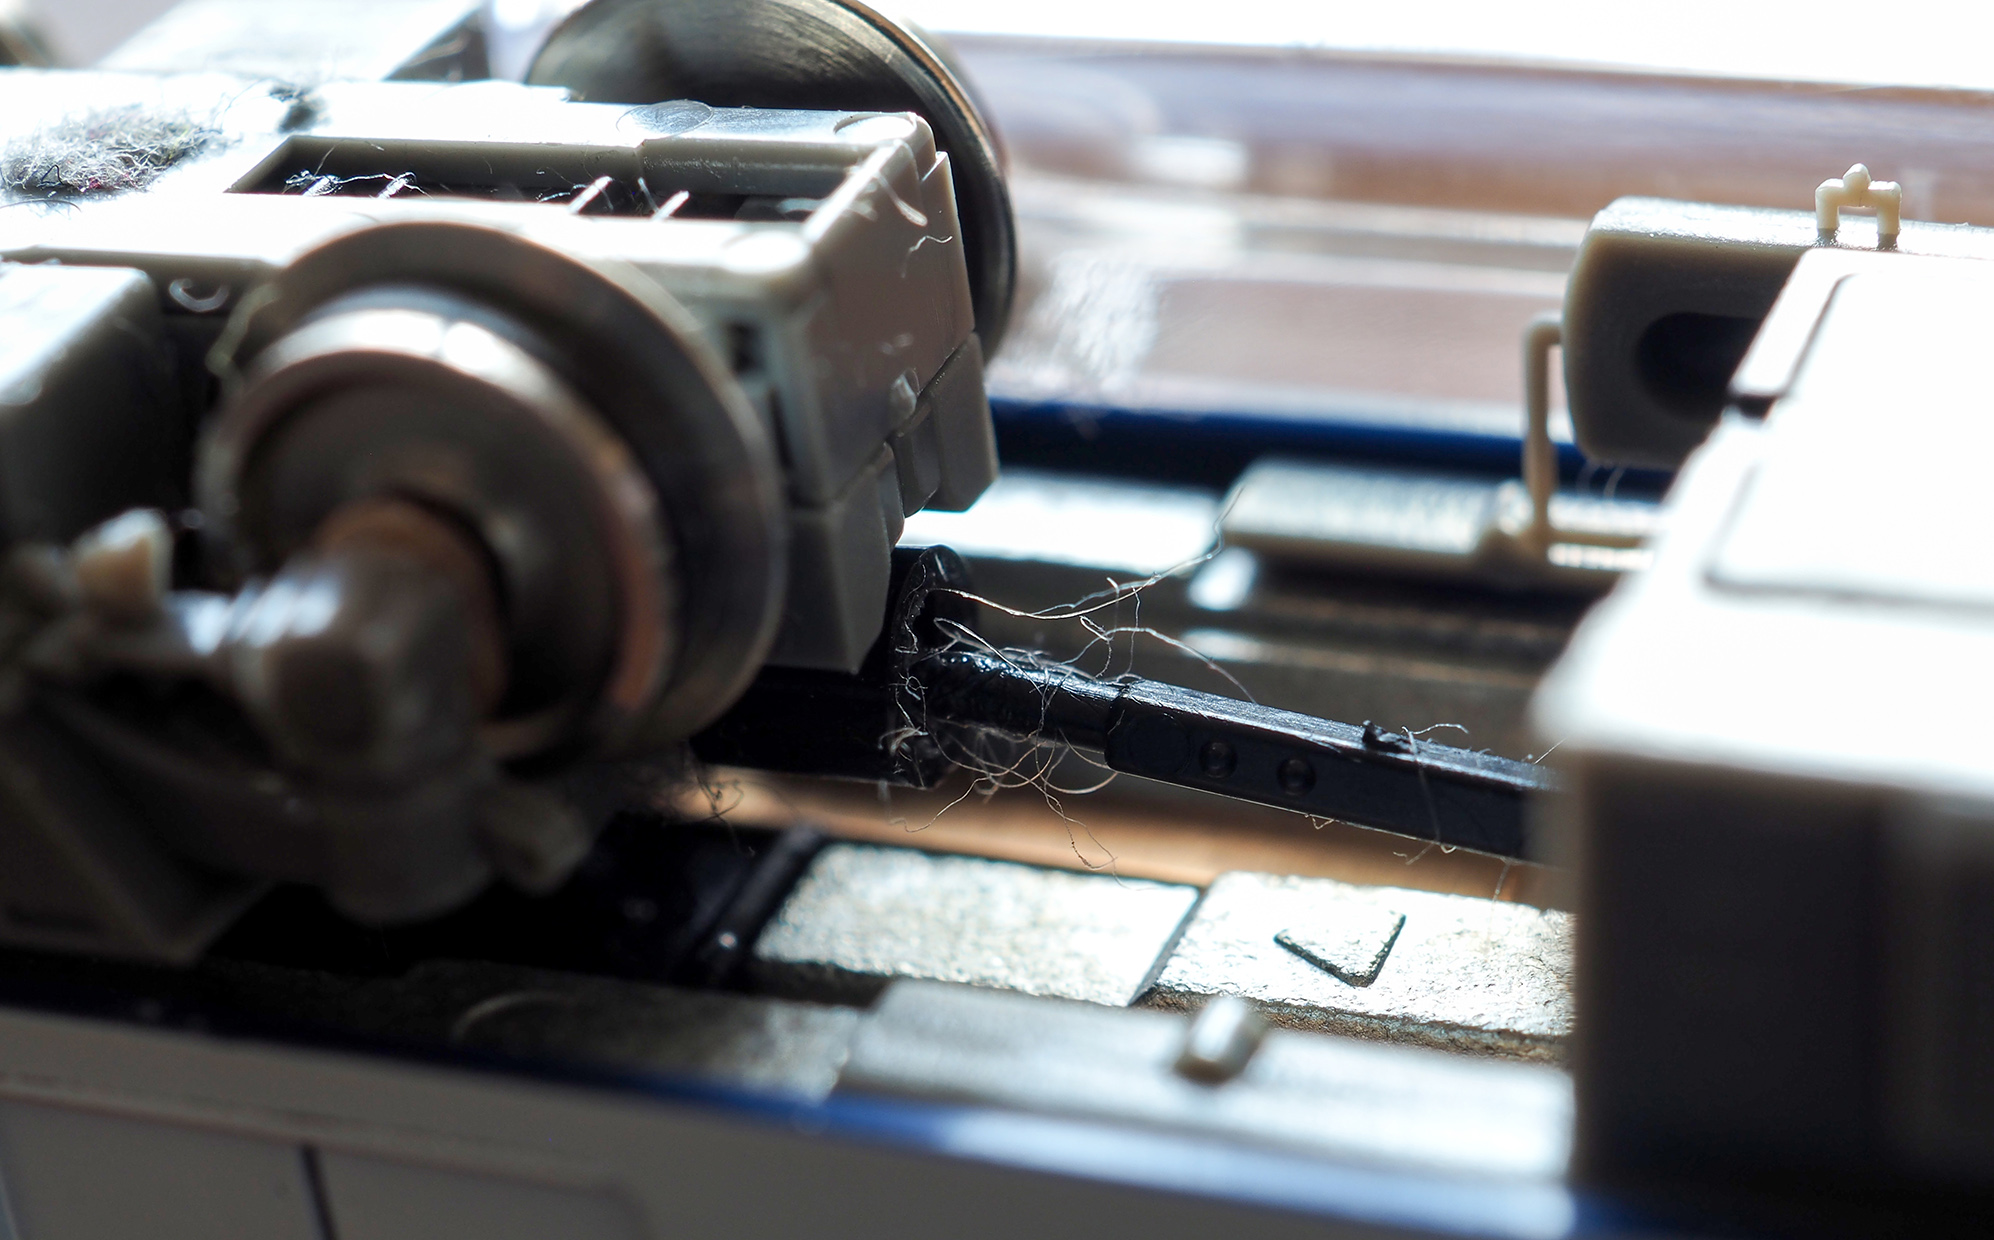
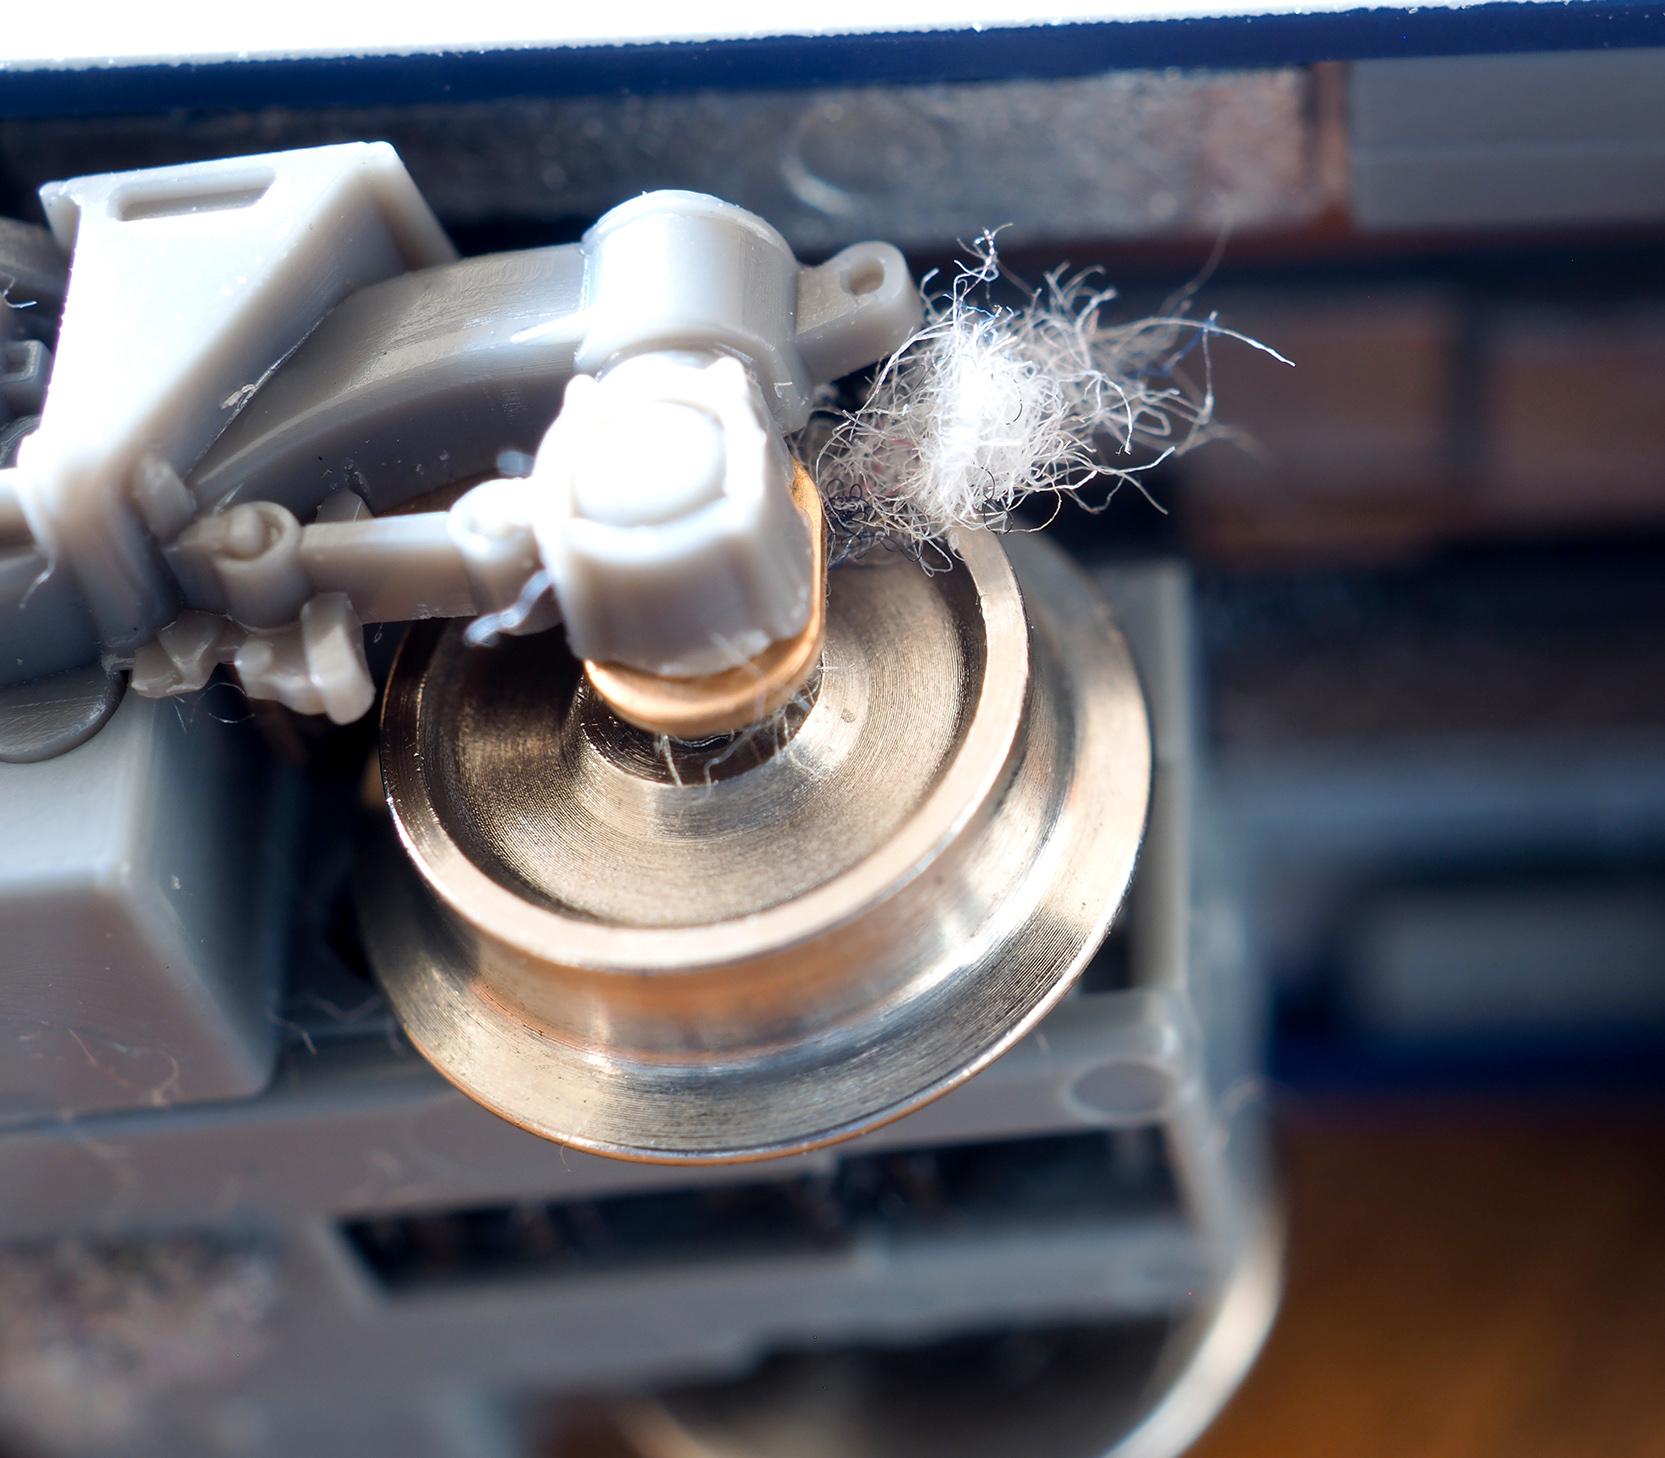
Wide PC rail can be a bit tricky to work with when it
comes to points (same goes with TCS):
Sometimes you need a piece of one-sided wide track with the
detachable ballast with fiddly little buttons (see left picture below)
to accommodate point spacing. From above, two one-sided wide pieces
are usually needed: here, the special versions of the C541-15 and
S140. Also, since Tomix does not make wide PC versions of their
points, one needs to use the attachable ballast kit to "fatten up" the
point (right picture below):
Then the C541-15 that comes after the P(L/R)541-15 plus the
single-sided S140 must also undergo fattening for consistency:
[The configuration shown above is actually not quite complete. There
are a few little nubs that remain to be attached.]
And so we have become fully wide PC track:
For the point wire, one can cut the trim piece as follows to allow the
wire to go underneath:
The Outer Loop (Round 2)
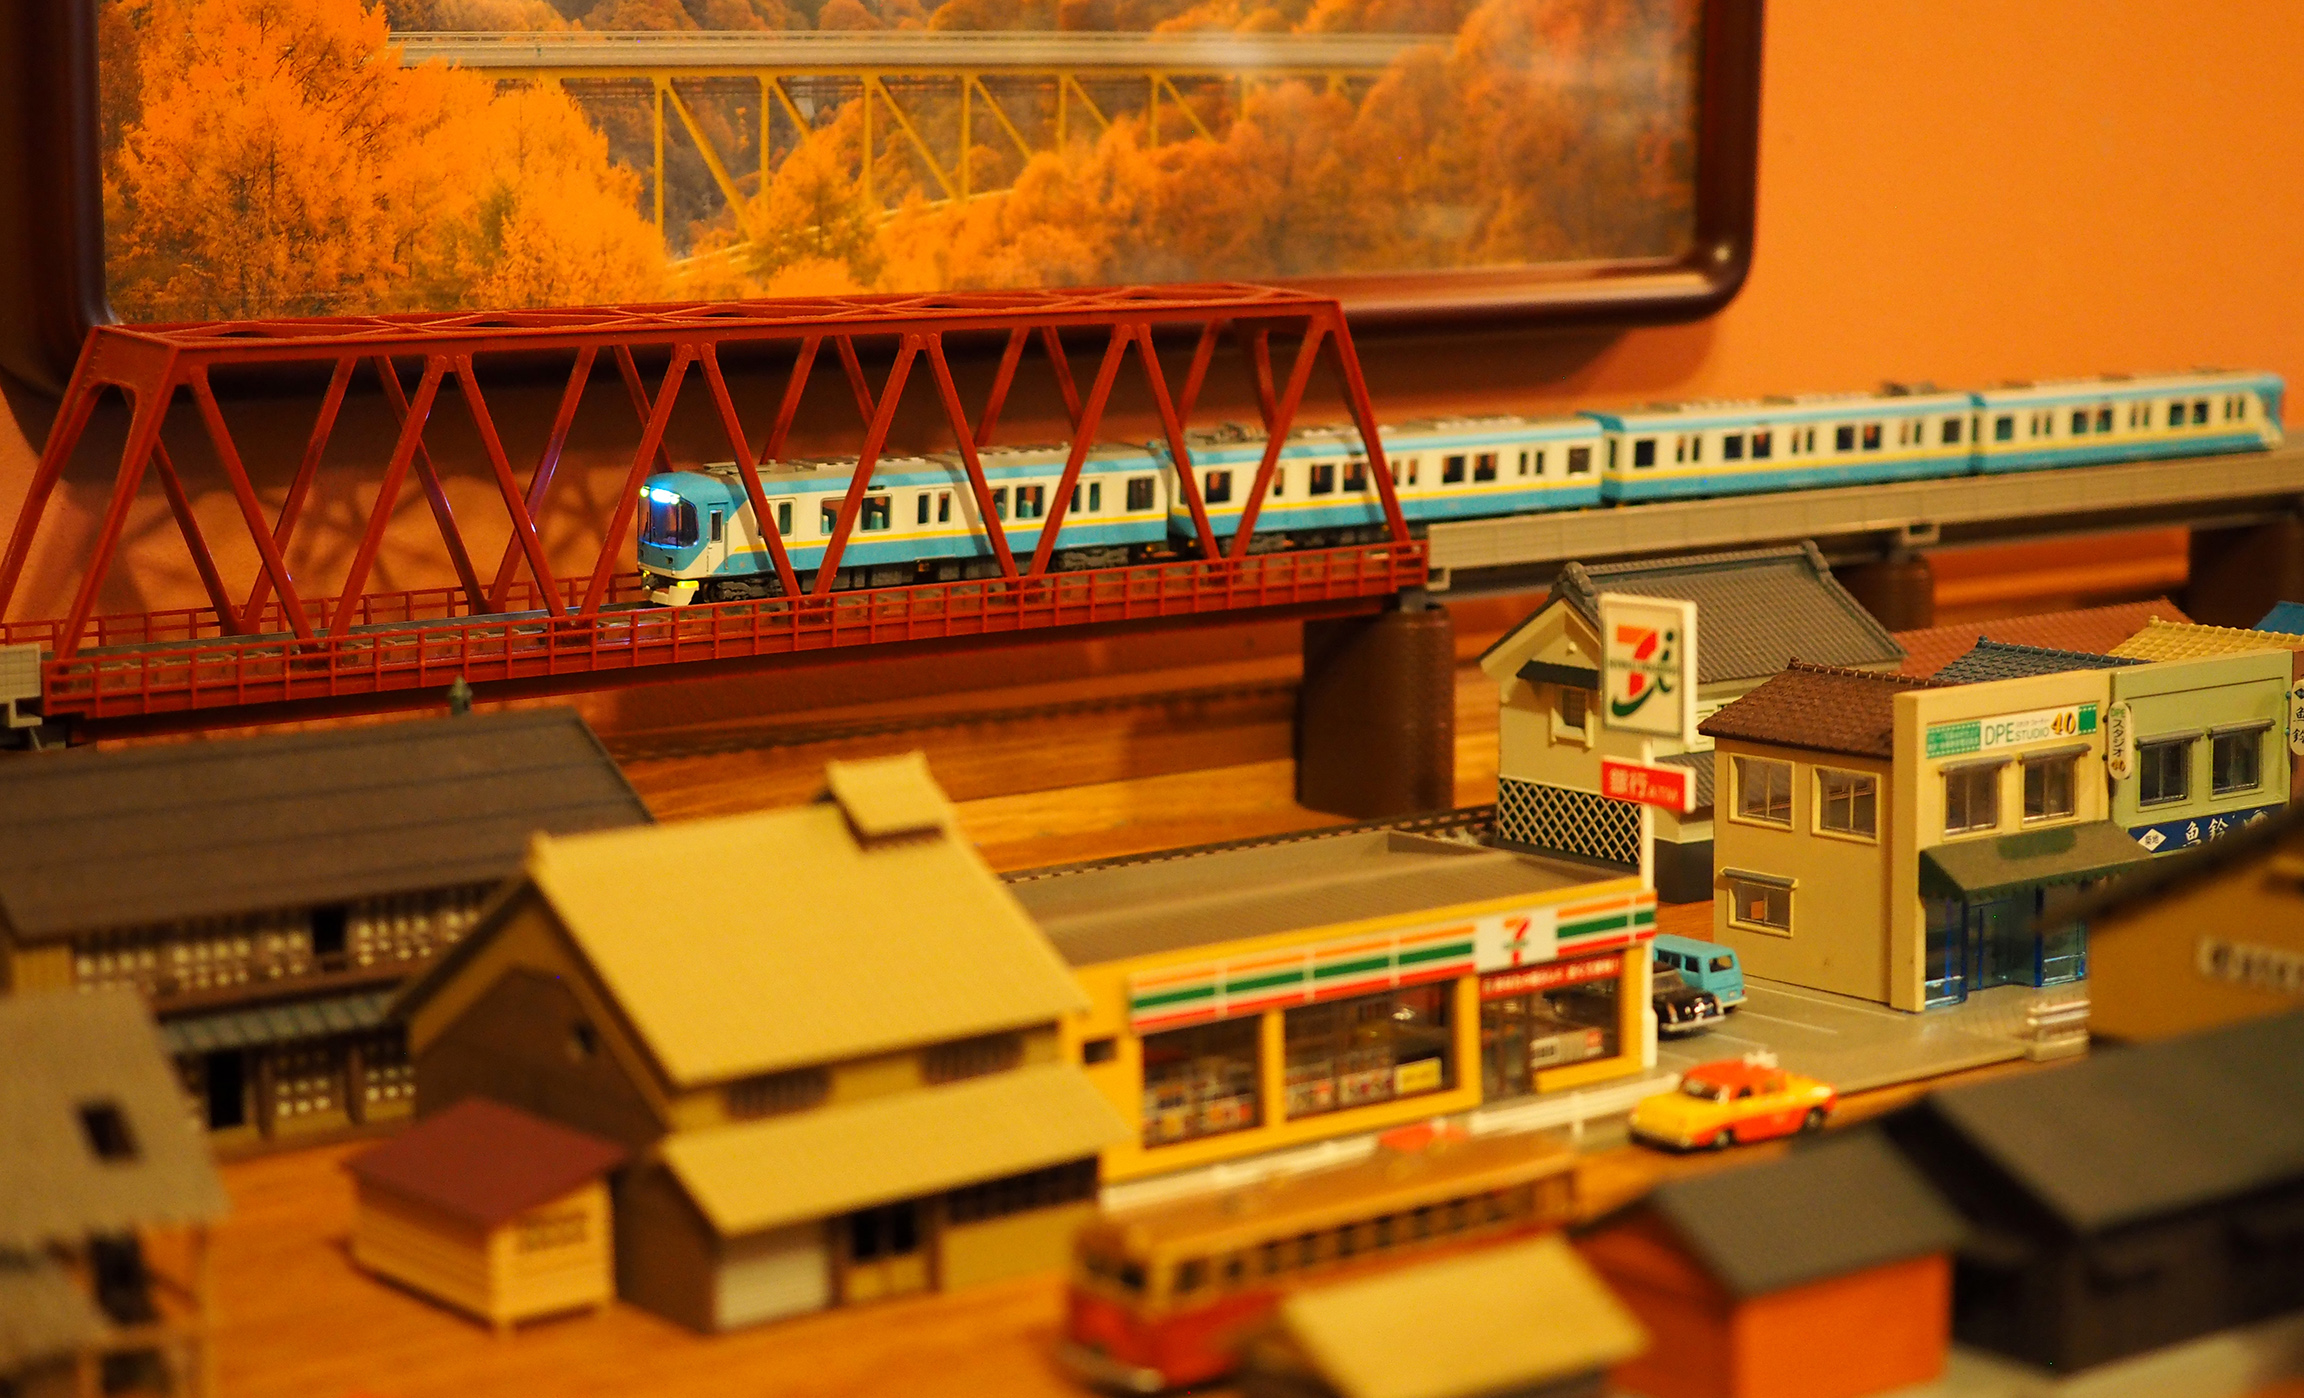
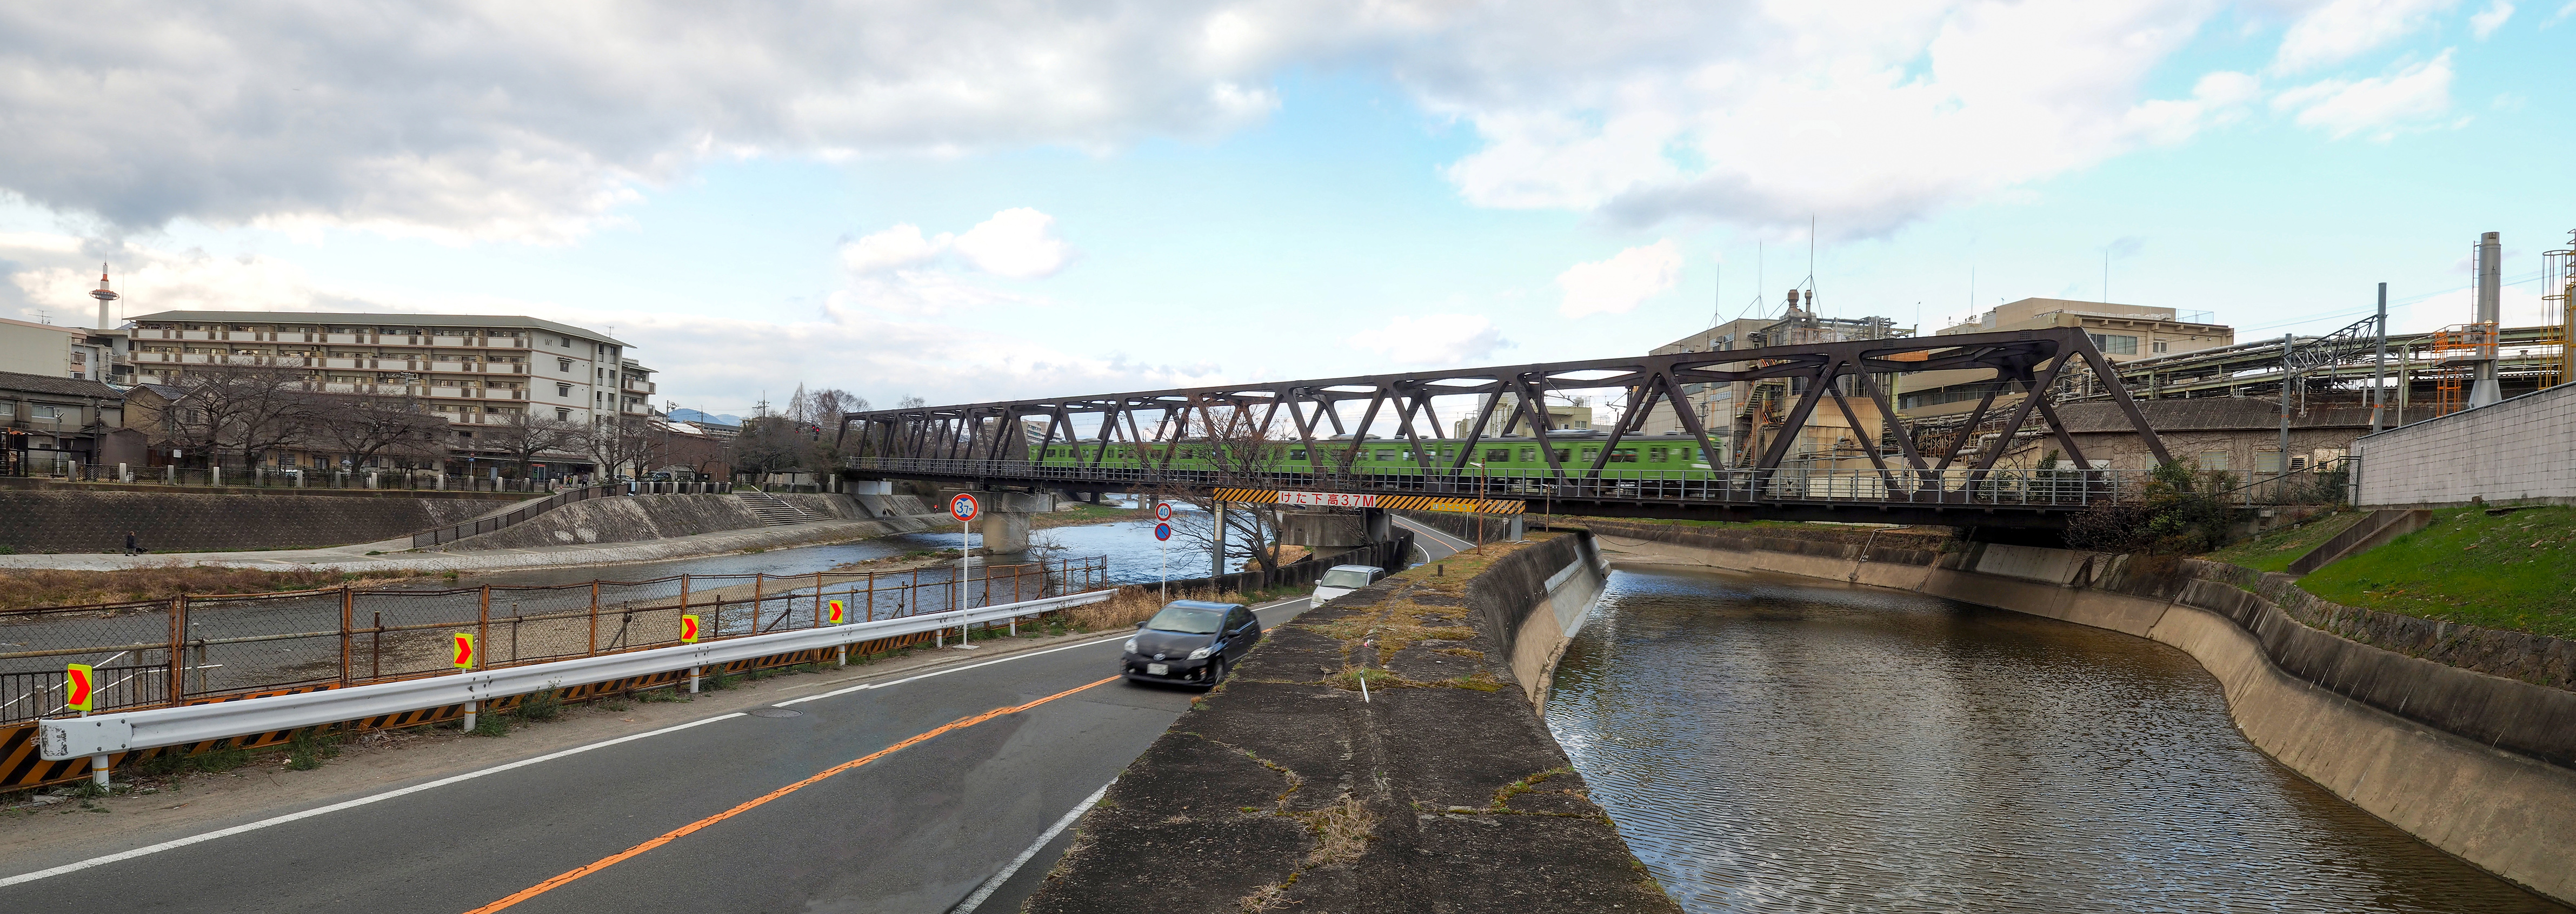
[Truss bridge spanning the Kamogawa (鴨川). Picture taken
March 2017. JR 103系 going from Kyoto station (see Kyoto tower on
far left) to Tofukuji (東福寺) on the Nara line (奈良線).]
Well, my Kyoto friend donated a Tomix single rail truss bridge to
my project (see below). That kicked off another round of parts buying:
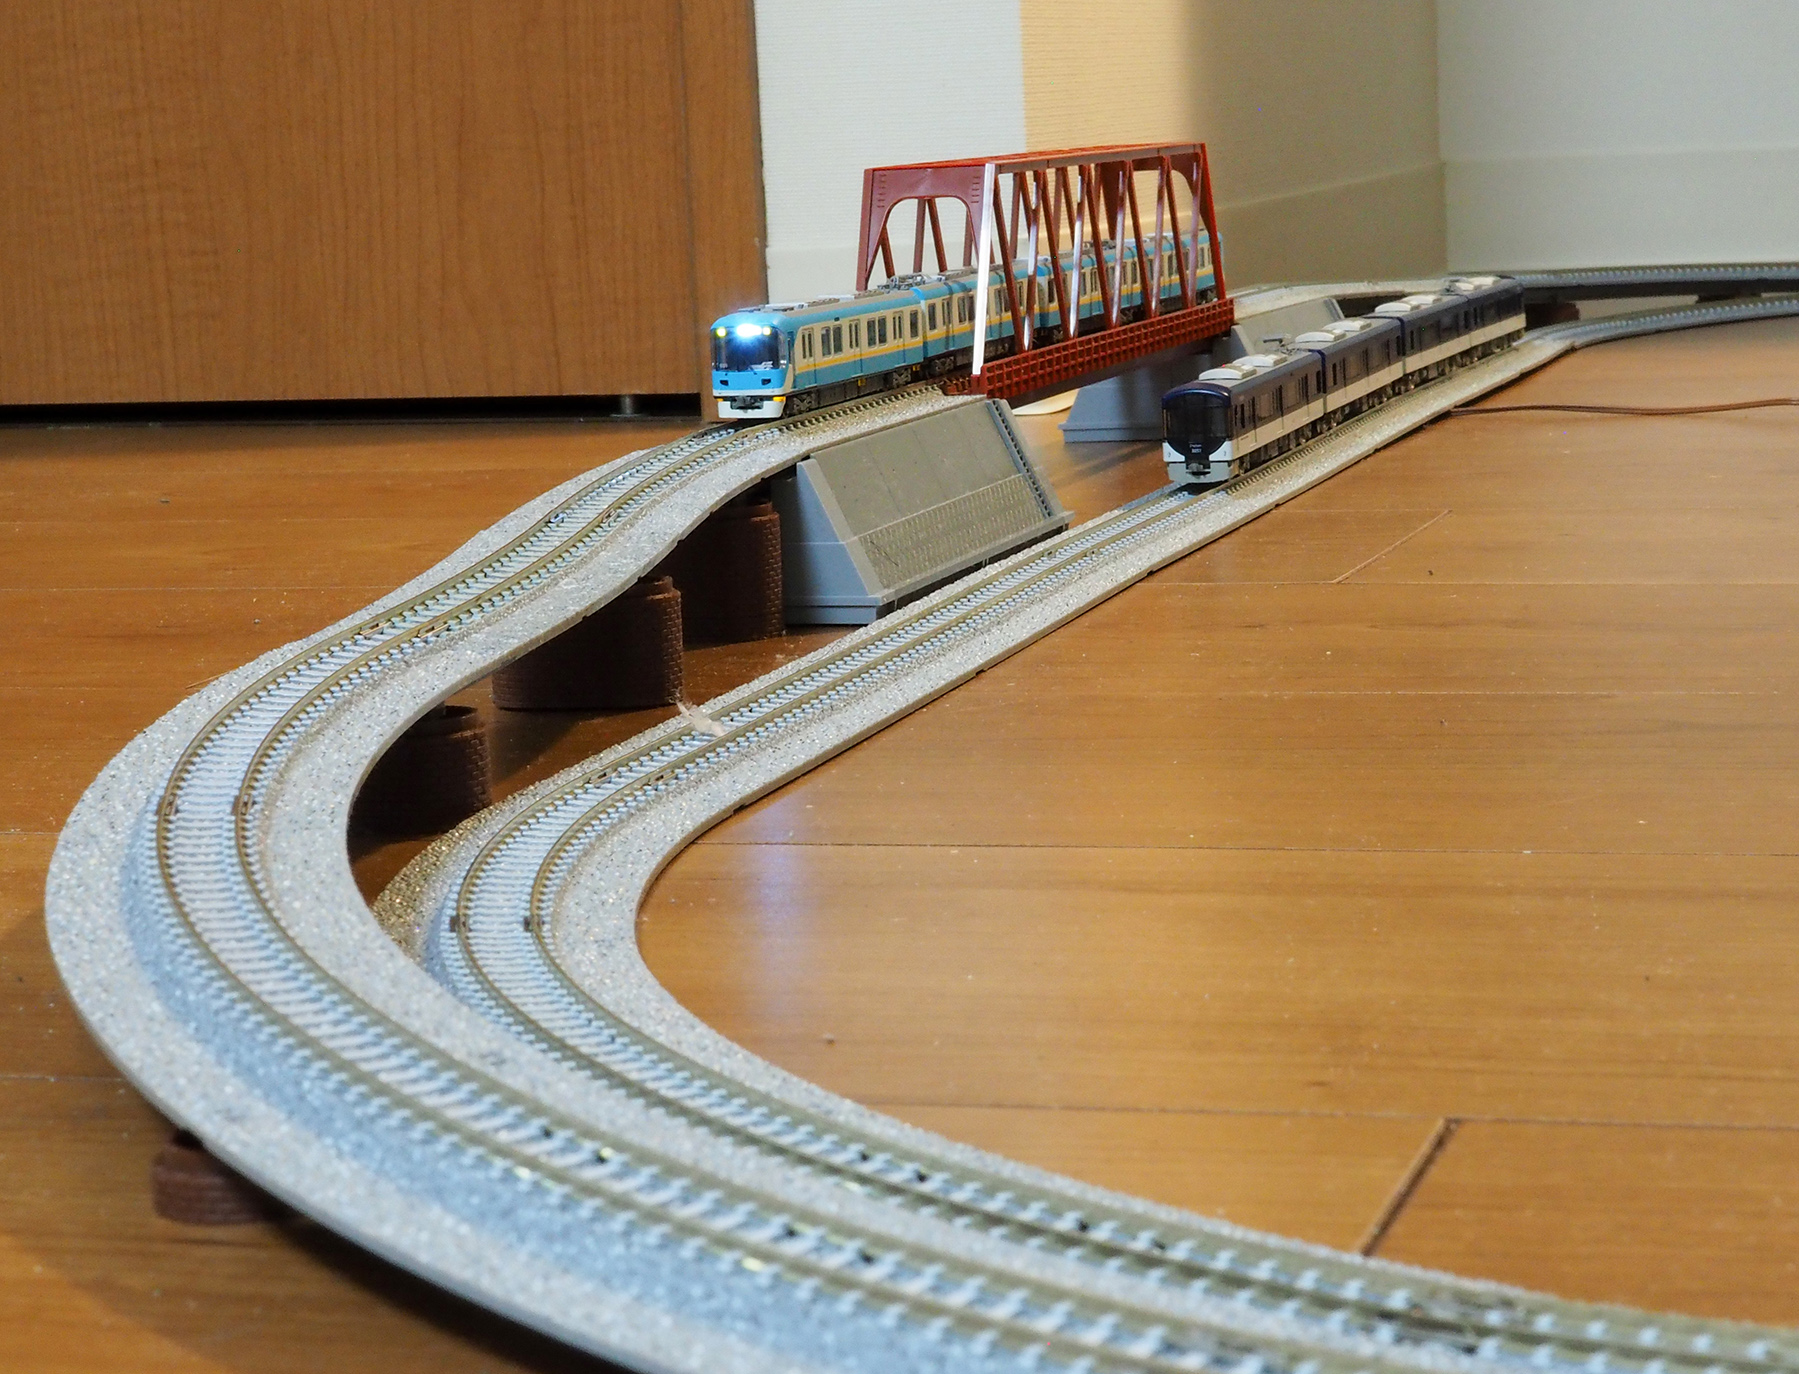
[Keihan 800系 up on the bridge; Keihan 3000系 below. Picture
taken before the wriggle was moved to the inner track. And
before the Keihan 800系 was sent to Micro Ace
for repair.]
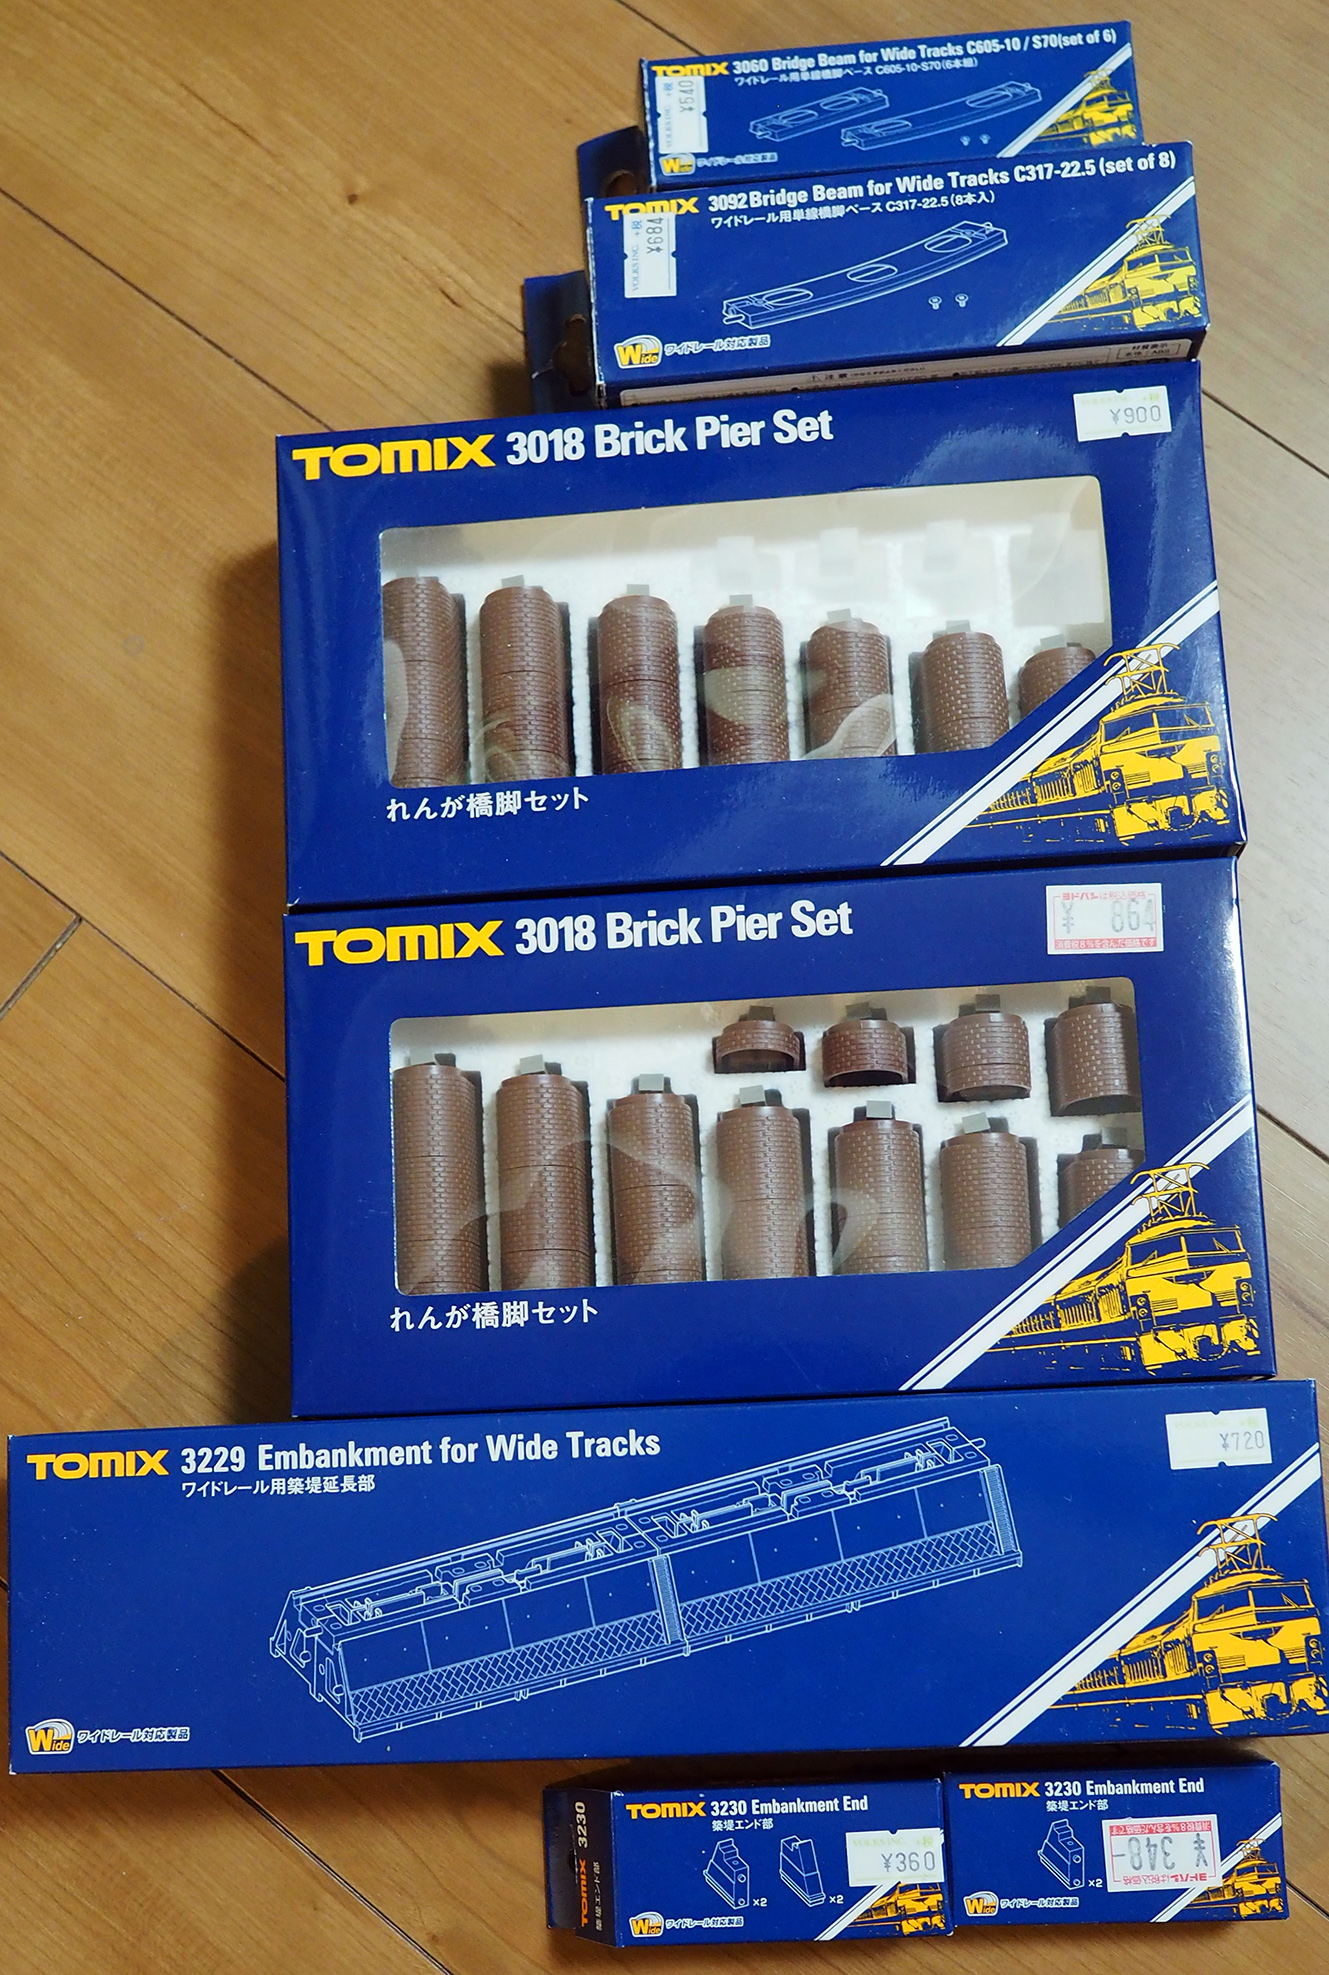
[One too many sets of brick piers.]
The truss bridge is flanked by single height (25mm) 140mm long
embankments on both sides. (See the table shown earlier for the parts
and the prices for the truss bridge build.)
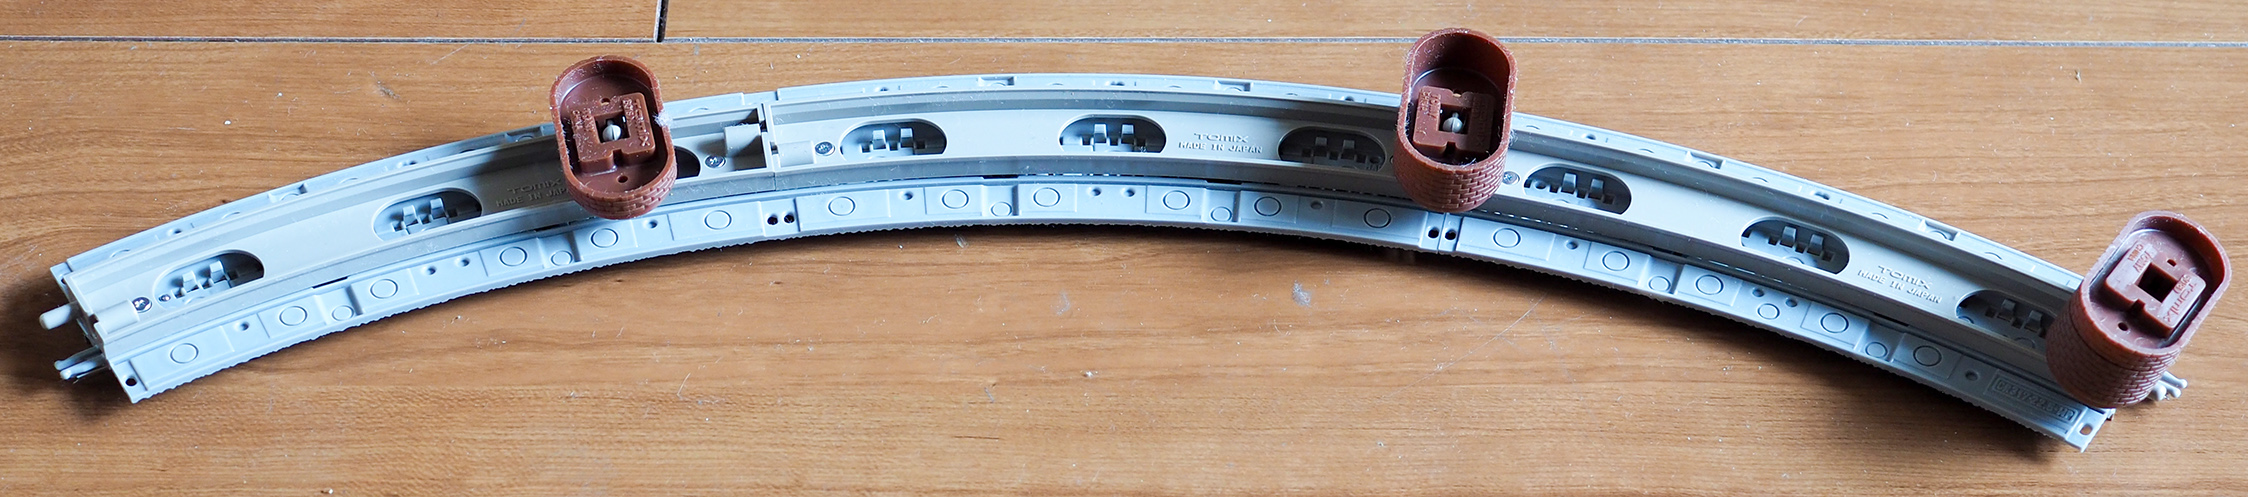
Initially, I thought I couldn't use just one Tomix brick pier set
(10 pieces since the piers are from 5mm to 55mm in 5mm increments), as
the higher piers are a minimum of 20mm tall. (My Kyoto friend informed
me that one can pop the connectors from the 20mm bridge beam supports
and move then over to shorter ones.) So unfortunately, I bought two
pier sets and only used half of each. Each piece of elevated wide
track also needs a bridge beam screwed into the bottom of track (see
picture above). Bridge beams are extra cost items for wide track, but
the beams are already molded into Tomix elevated track. The beams are
necessary for the piers to connect to them. The total cost of
partially elevating the outer loop was nearly $60 ($50 if you didn't
make my mistake), but then you have that wonderful truss bridge
embankment feature.
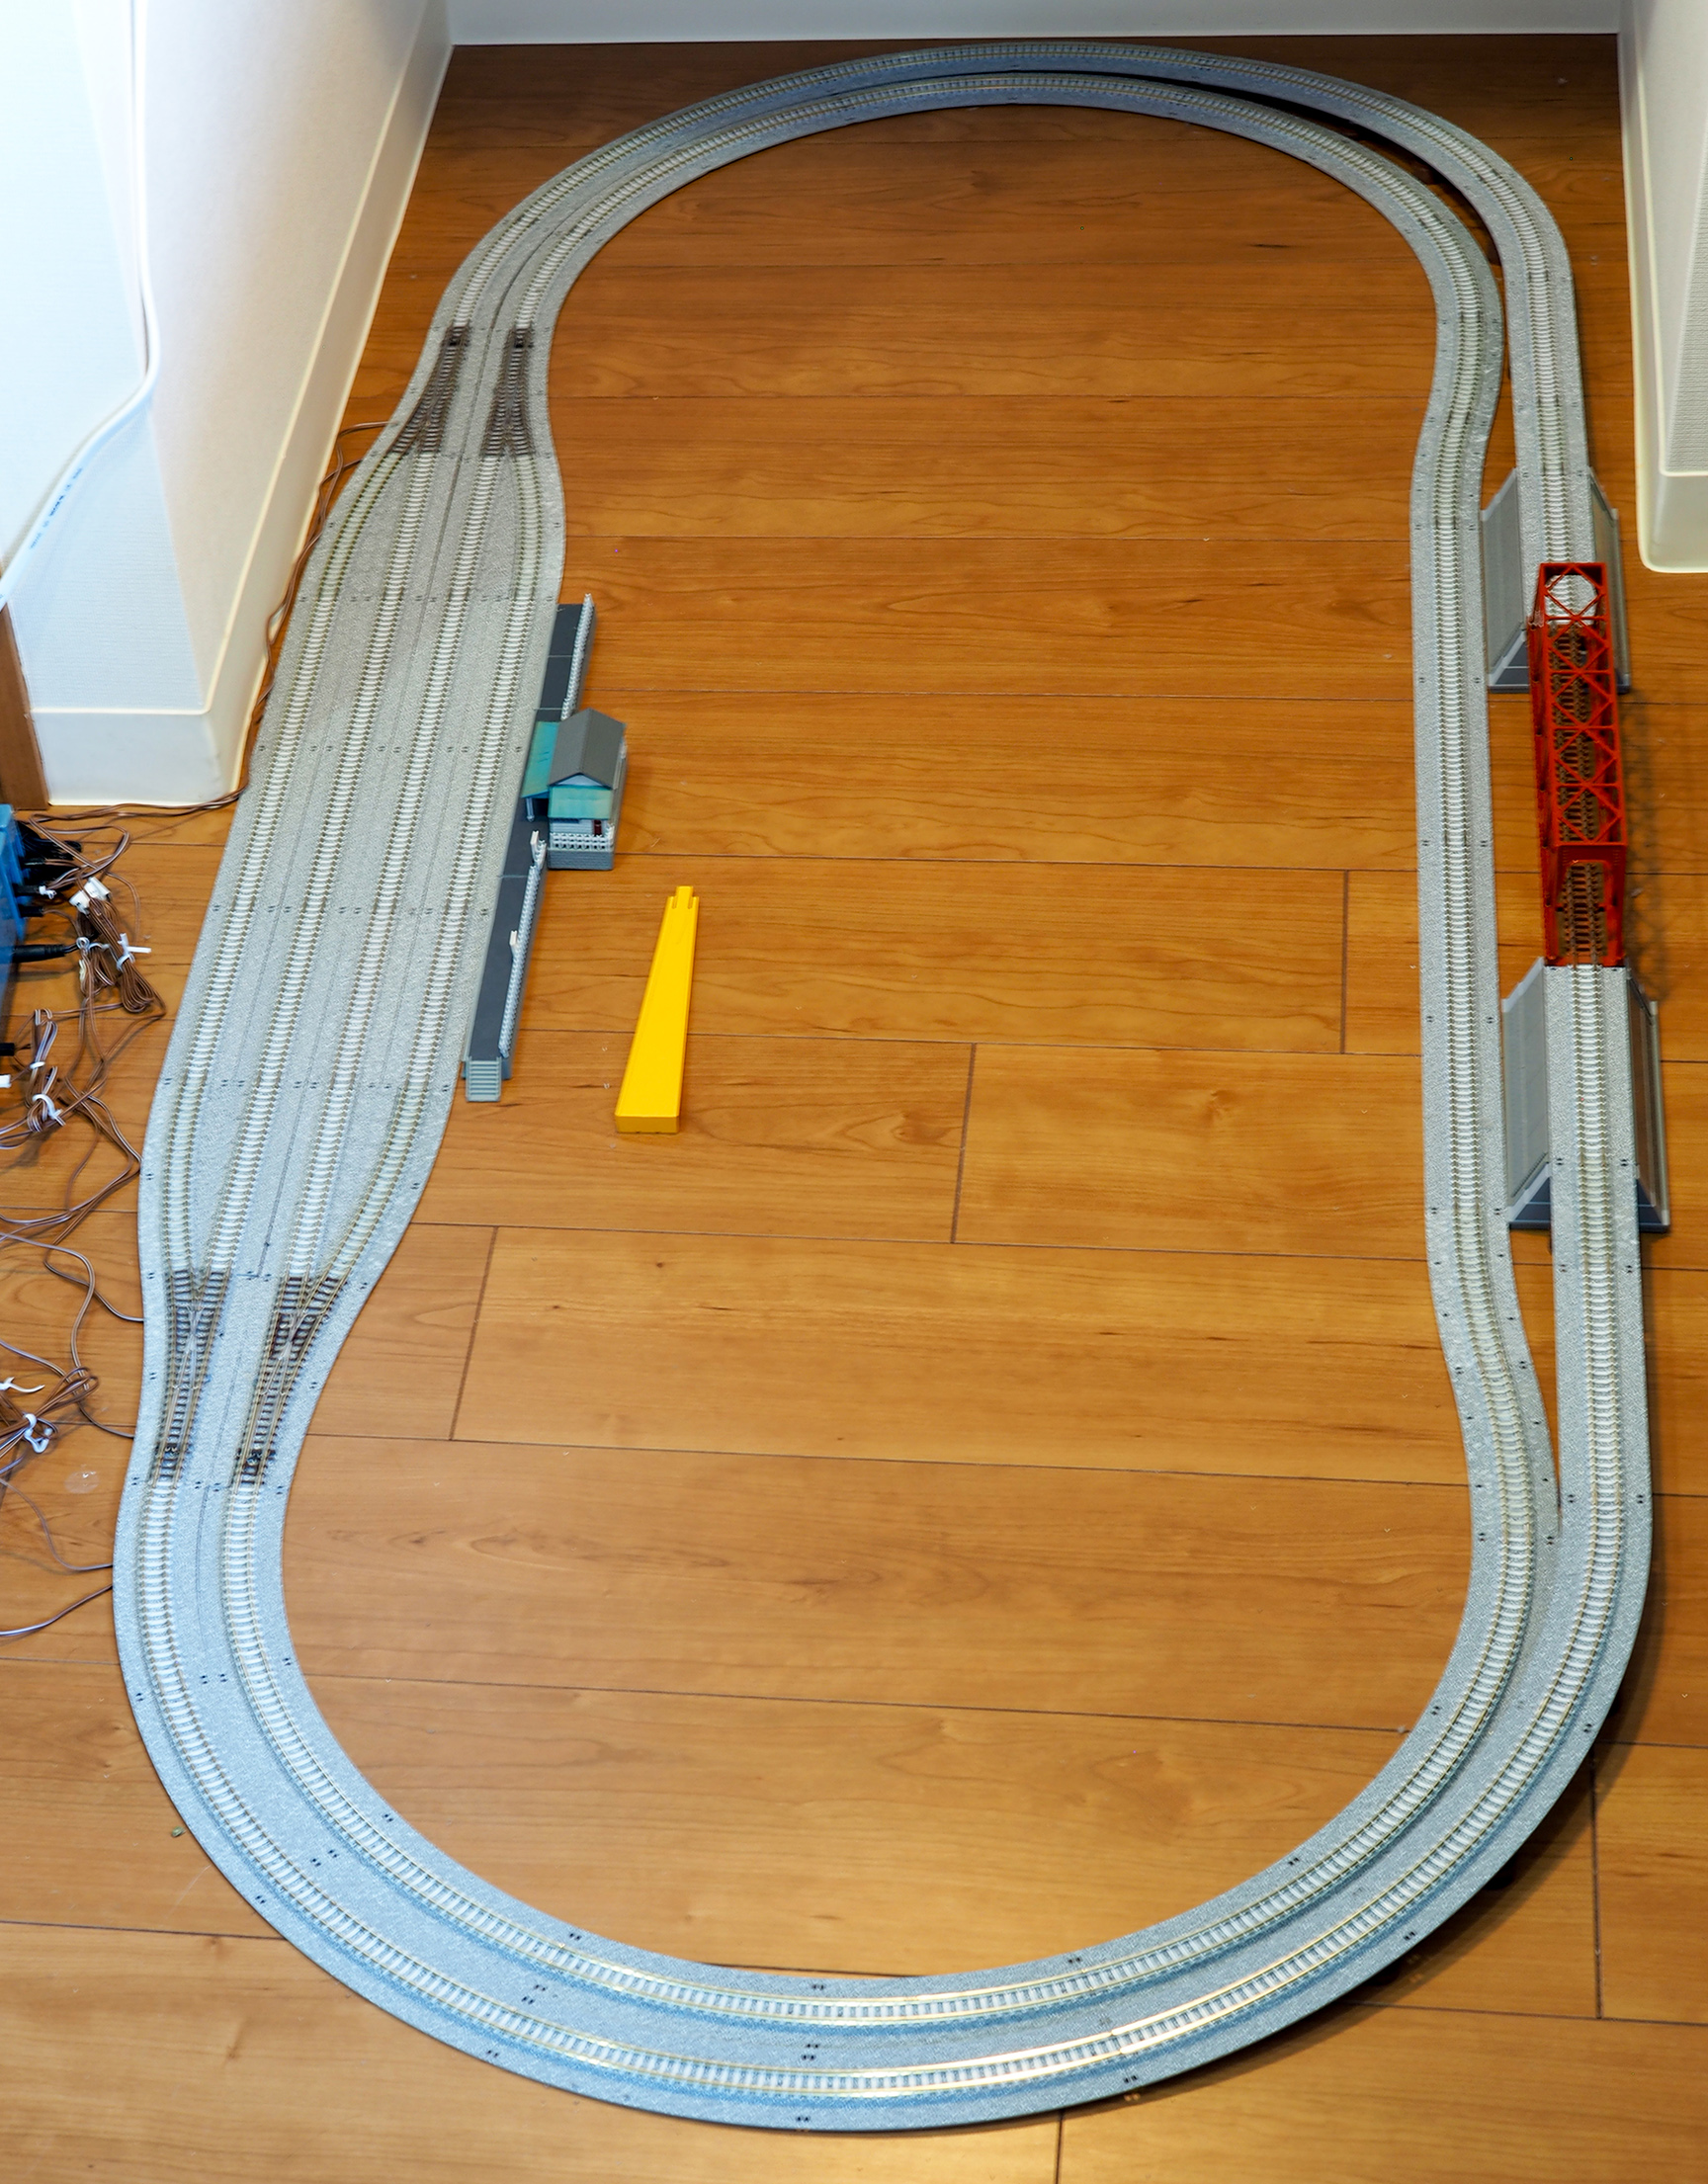
Here is a picture of the outer loop, with the wriggle on the inside
dummy loop to make room for the embankment bases:
[The inner loop is only missing its siding (symmetric with the outer
loop's). Do ignore the TCS box for now.]
I think it looks rather decent now. I will get to borrow a
controller in Kyoto (I have one back in Tucson), and work on
completing the inner loop and the TCS sensor placements. I simply love
the way the Wide PC rail comes together; Tomix has designed it so that
everything fits together just so.
Not much remains to be said here, the parts have been specified in
the table shown earlier. As shown below, both loops have a sideout. I
moved all the wiring to one side, anticipating that back in Tucson,
the controllers will be in one corner. (I have pro-actively purchased
extension wiring just in case for both points and the feeders.)
I have to be grateful to my Kyoto friend for telling me to respect
simplicity and aesthetics, and not try to maximze the amount of track
that I can cram in. In my humble opinion, this layout has an elegance
and coherence that will somehow remind me of Kyoto and one of my
friend's layouts that is sorta similar in concept.
Having said all that, I did insert a row of S33s to help
accommodate one extra car in the sideouts (so I can put a 5 car train
there). In my opinion, 5 cars looks significantly better than 4. (Of
course all 7 or 8 cars would be the best should there be enough
straight.)
I thought I was done buying track, but see the next section.
For convenience, I added a handy front loading yard, plus the
N-PX280 crossover to bridge the inner and outer loops. In doing so,
all tracks can be reached, e.g. by the cleaning train, from the
loading yard. I use a manual point for the front yard, not
electric.
[The yard looks a little short, as it is missing two S33s. The electronics: from bottom left to bottom right, (1) inner loop
controller; (2) double point switch for the outer loop siding; (3)
double point switch for the innner loop siding; (4) universal switch
for power routing ganged with; (5) double point switch for the PX280
crossover, and finally (6) the outer loop controller.]
The PX280 (pictured below) is quite a beast to manage. First of
all, it requires two point switches, or a double point switch. I chose
to use the 5532 Point Control box, which it is a double point
switch. Second, it requires controller management (as discussed
immediately below) if there is more than a single controller, as there
is in a double loop.
[The N-PX280 dressed up in Wide PC rail format.]
The PX280 actually comes in regular Finetrack format as shown
below, not wide PC track. The extra pieces needed to fatten it comes
from the 3034 ballast kit.
[The N-PX280 dressed up in Wide PC rail format.]
Okay, here comes the complicated bit. I have one controller per
loop. And as long as the loops are independent, i.e. the PX280
crossover is in straight-thru mode, it's not a problem. Now suppose
the PX280 is in crossover mode. Then both loops are connected together
(basically the whole layout becomes a single folded figure-of-8 loop),
and we have to disconnect one controller. Question: when should we
switch one controller off? Answer: when we switch the PX280 into
crossover mode. (When we switch back from crossover to straight-thru
mode, we should turn the second controller back on.) Tomix's solution
is to gang two switches together; so the controller on/off happens in
sync with the PX280 mode switch. The 5533 Universal Switch box can be
used for this purpose.
Shown below is the wiring for the 5533 Switch box. It is powerful
and a little bit complicated:
[From left to right, (1) outer loop
controller; (2) the 5532 double point switch for the PX280; (3) 5536
universal switch for power routing; (4) the inner loop controller.]
The switch box has two power feed (brown) ballast wires and four
feed output sockets. Here are the salient points of the configuration:
I have the left brown wire attached to the controller on the
left, and the right brown wire attached to the controller on the
right.
No matter where the switch is, power flows from the left
controller through the box and out the top left output. This goes to
my outer loop.
When the switch is up, power flows from the right controller
out to the bottom right output. This goes to my inner loop. The trick
is, when the switch is down, it routes power from the left controller
to the bottom right output; the right controller is cut off. That
means both loops will be powered by my left controller. So continuity
is maintained when a train passes through the PX280 from the outer
loop to the inner one.
The box next to the 5533 Switch box is a double point control
box (5532)that toggles the PX280 between straight-thru and crossover
modes.
By flipping both switches at the same time, it's possible to
arrange for the right controller to be switched off if only if the
PX280 is in crossover mode. In that case, the left controller operates
both loops as one.
For the record, in the case of a simple double loop like mine, we're
not actually making full use of the 5533 Universal Switch box (and
therefore a 5536 box might be sufficient). In the above
configuration, we used only two of
the four outputs.
[Note: from discussion on
jnsforum, I now believe the 5536 switch won't be able to get the job
done. The crucial reason is that the PX280 electrically isolates all
four legs.]
The Universal switch is also designed to function in non-loop PX280
applications. The left power input is routed to both outputs on the
left side when the switch is up. Similarily, the right power input is
routed to both outputs on the right. However, when the switch is down,
the lower two outputs are flipped. In other words, the left power
inputs goes to the bottom right output, and vice versa. (The upper two
outputs are unchanged.)
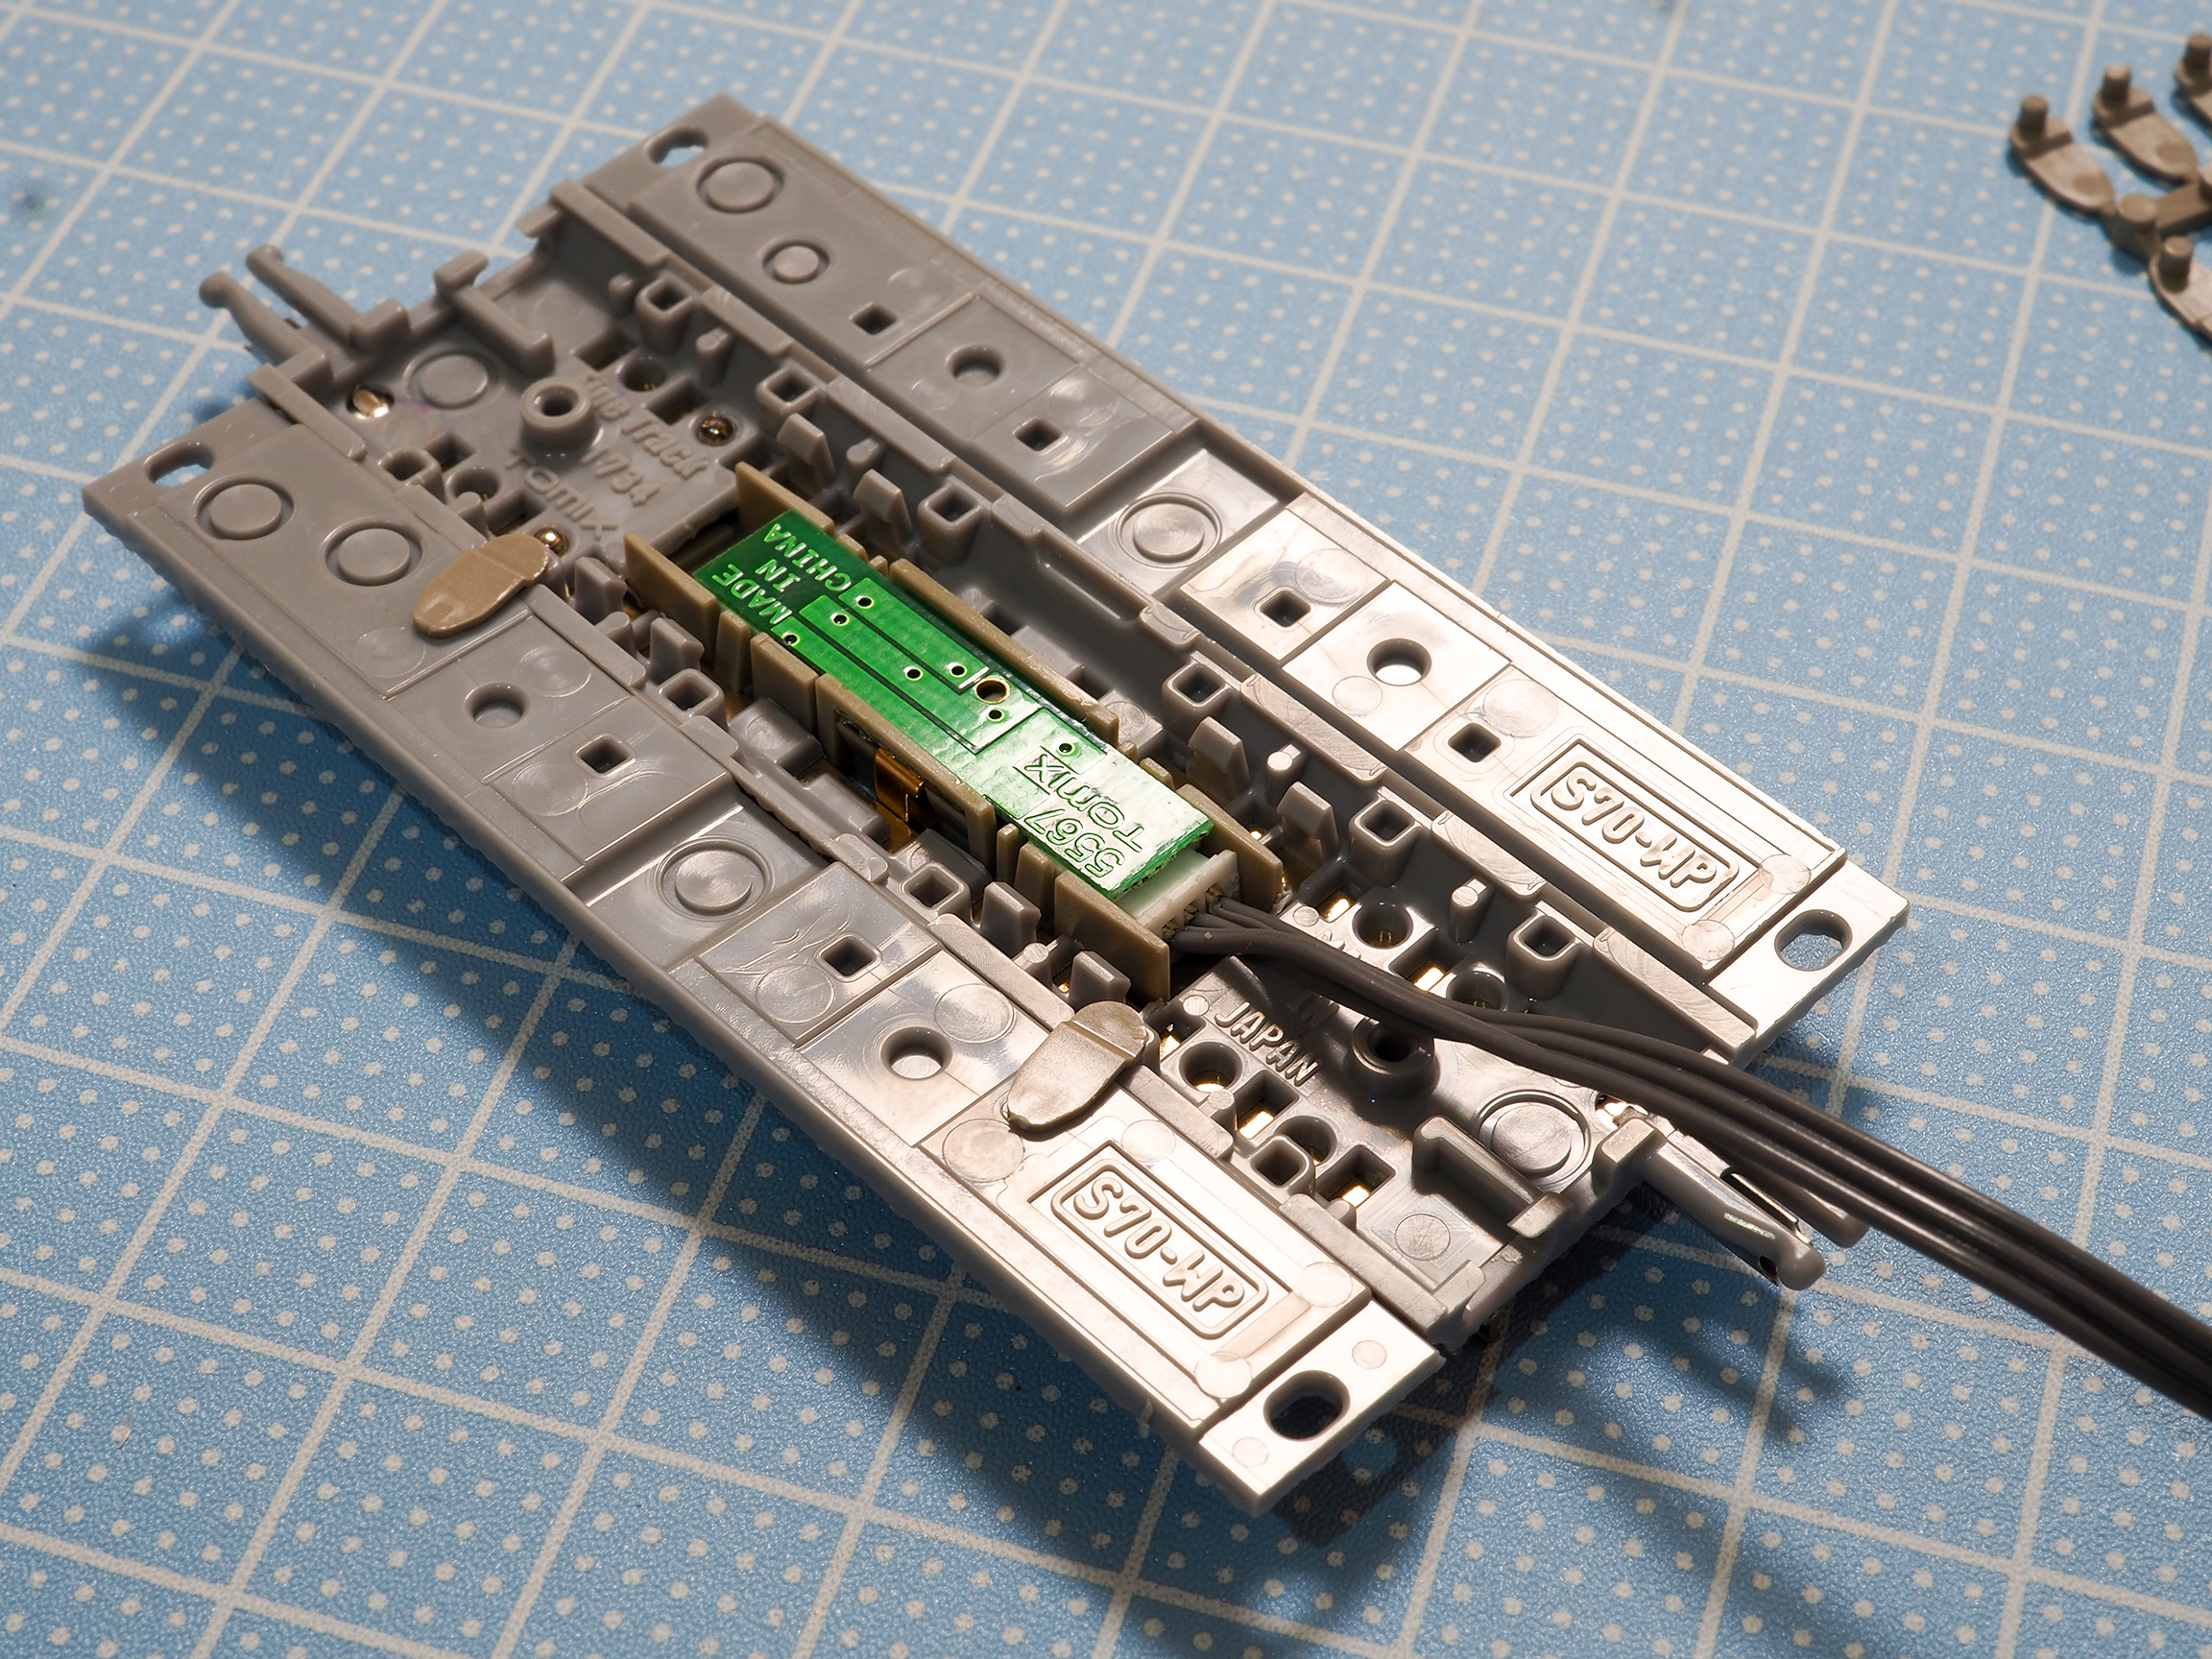
Next project involves Tomix's 5563 TCS Automatic Operation Unit
(which has 9 modes plus a bypass). The idea again is simple: with two
loops, leave one automated, and I can have the pleasure of working the
other loop manually without worrying about the trains on the
TCS-enabled loop. I will use the 5567 TCS sensors and pop them into
specially prepared S70s, which will allow more flexible sensor
placement than S140s.
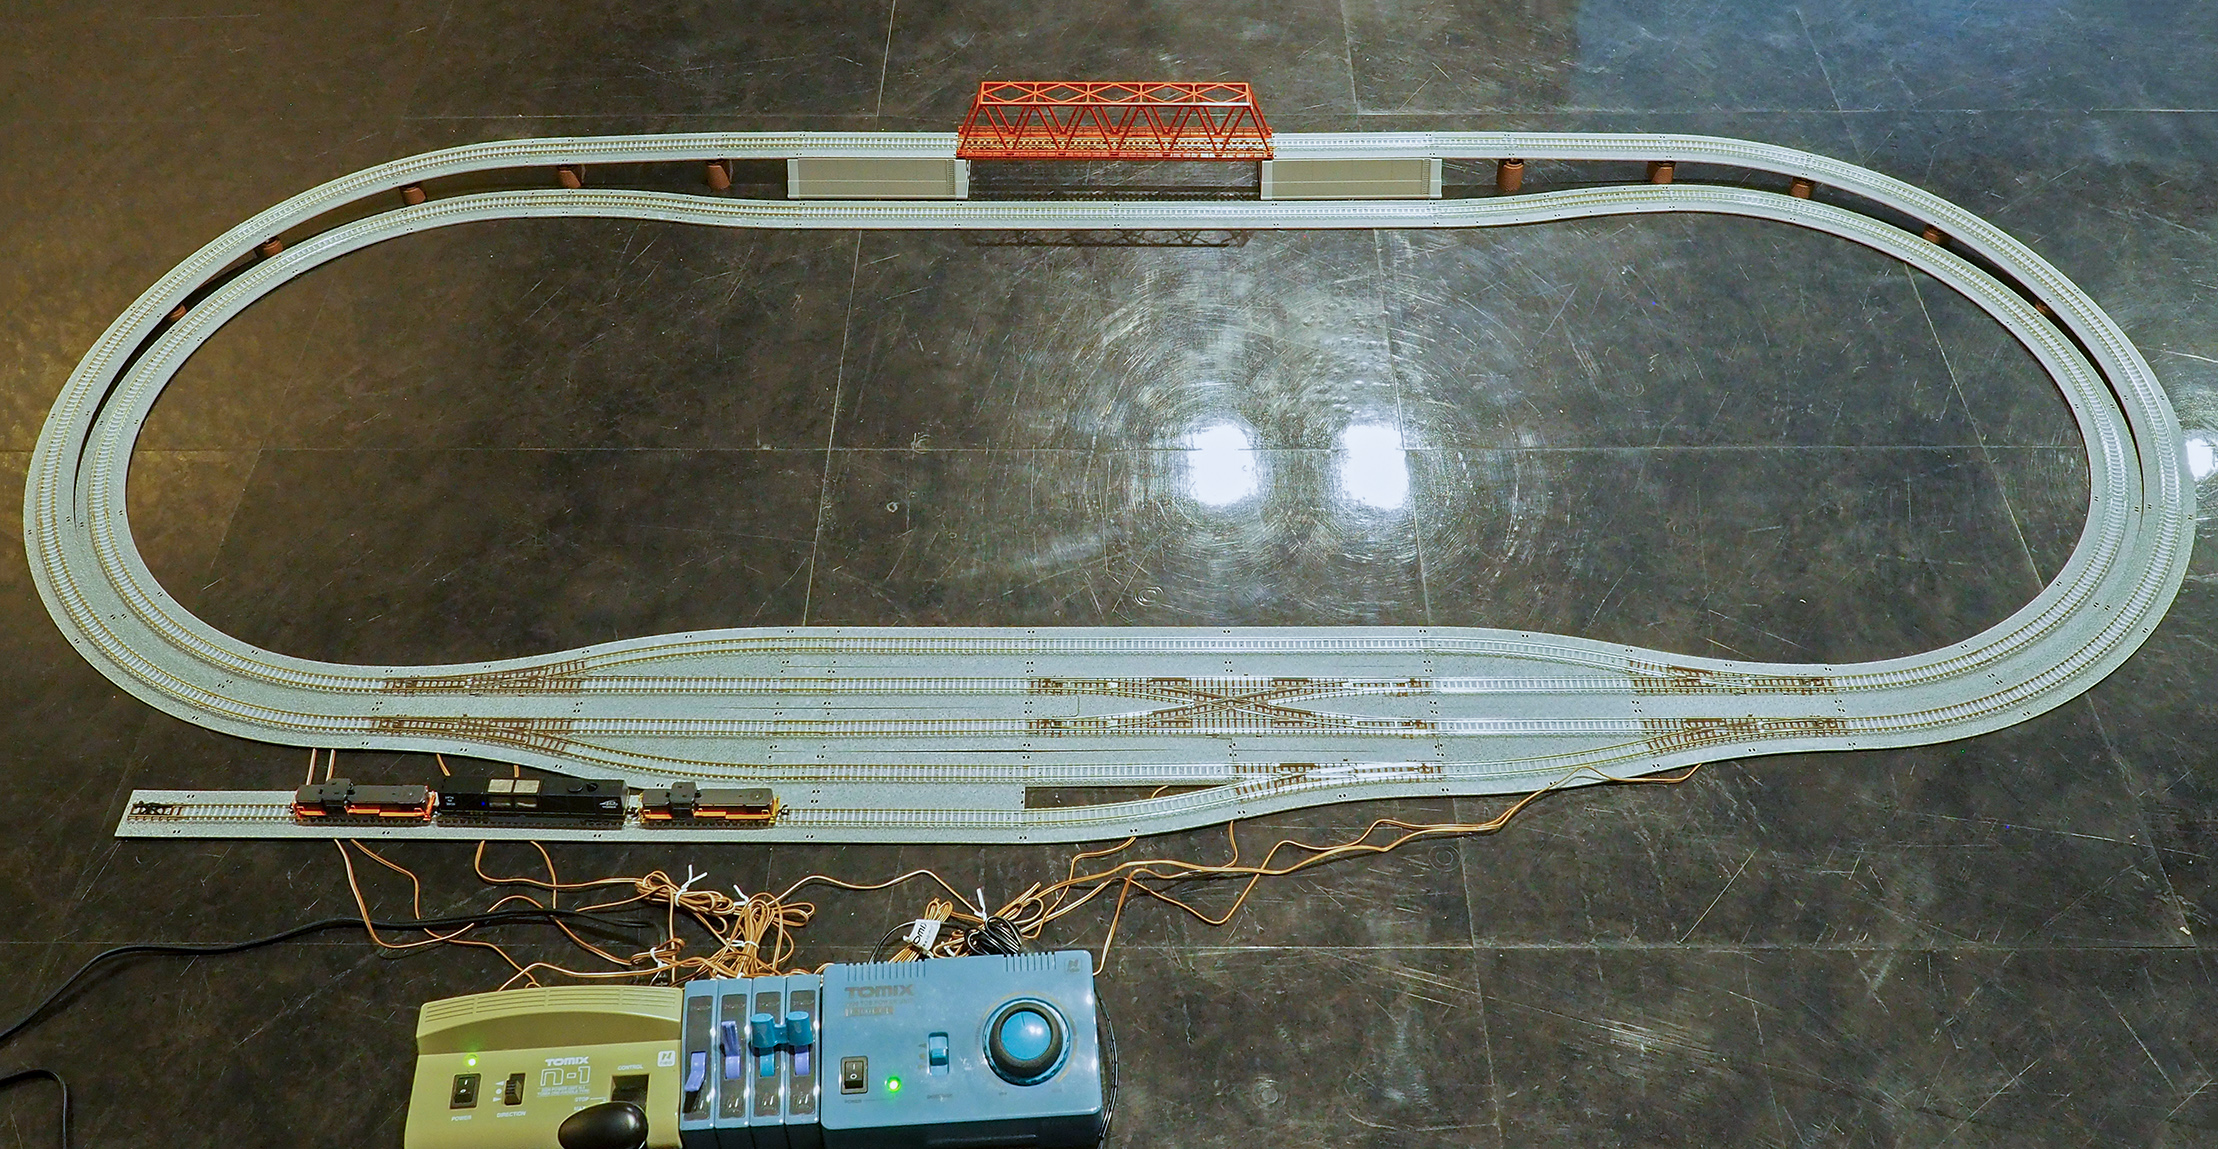
[This is my inner loop by itself. The 5563 TCS Automatic Operation
Unit sits next to the N-1001-CL Controller. All wires to the track
plug into the TCS unit. The TCS unit gets its power from the controller.]
Actually, the test loop shown above is longer than planned because
I was lacking an extra package of S140s. The siding here is composed
of S280 + S70 with sensor + S140 + S70 with sensor, instead of the
original S140 + S280. Perhaps, the TCS should be integrated into the
inner loop as follows:
The planned double loop augmented with TCS sensors marked here
in brown. I need to buy more S70s.
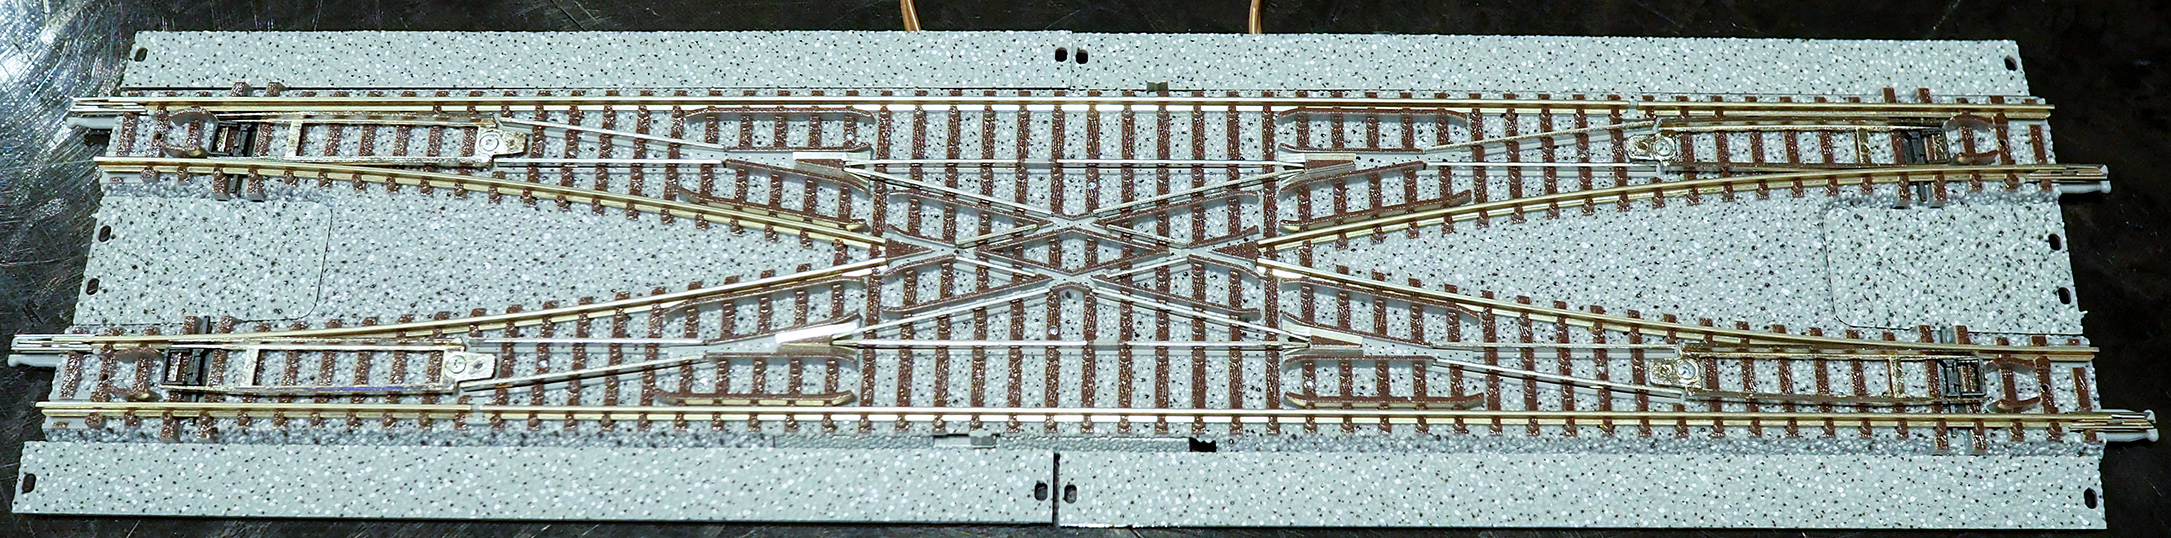
For loops with two trains, modes 7 and 8 are the relevant
modes. (Mode 8 is identical to mode 7 except the trains run in
opposite directions.) Four wired 5567 TCS sensors are plugged into the
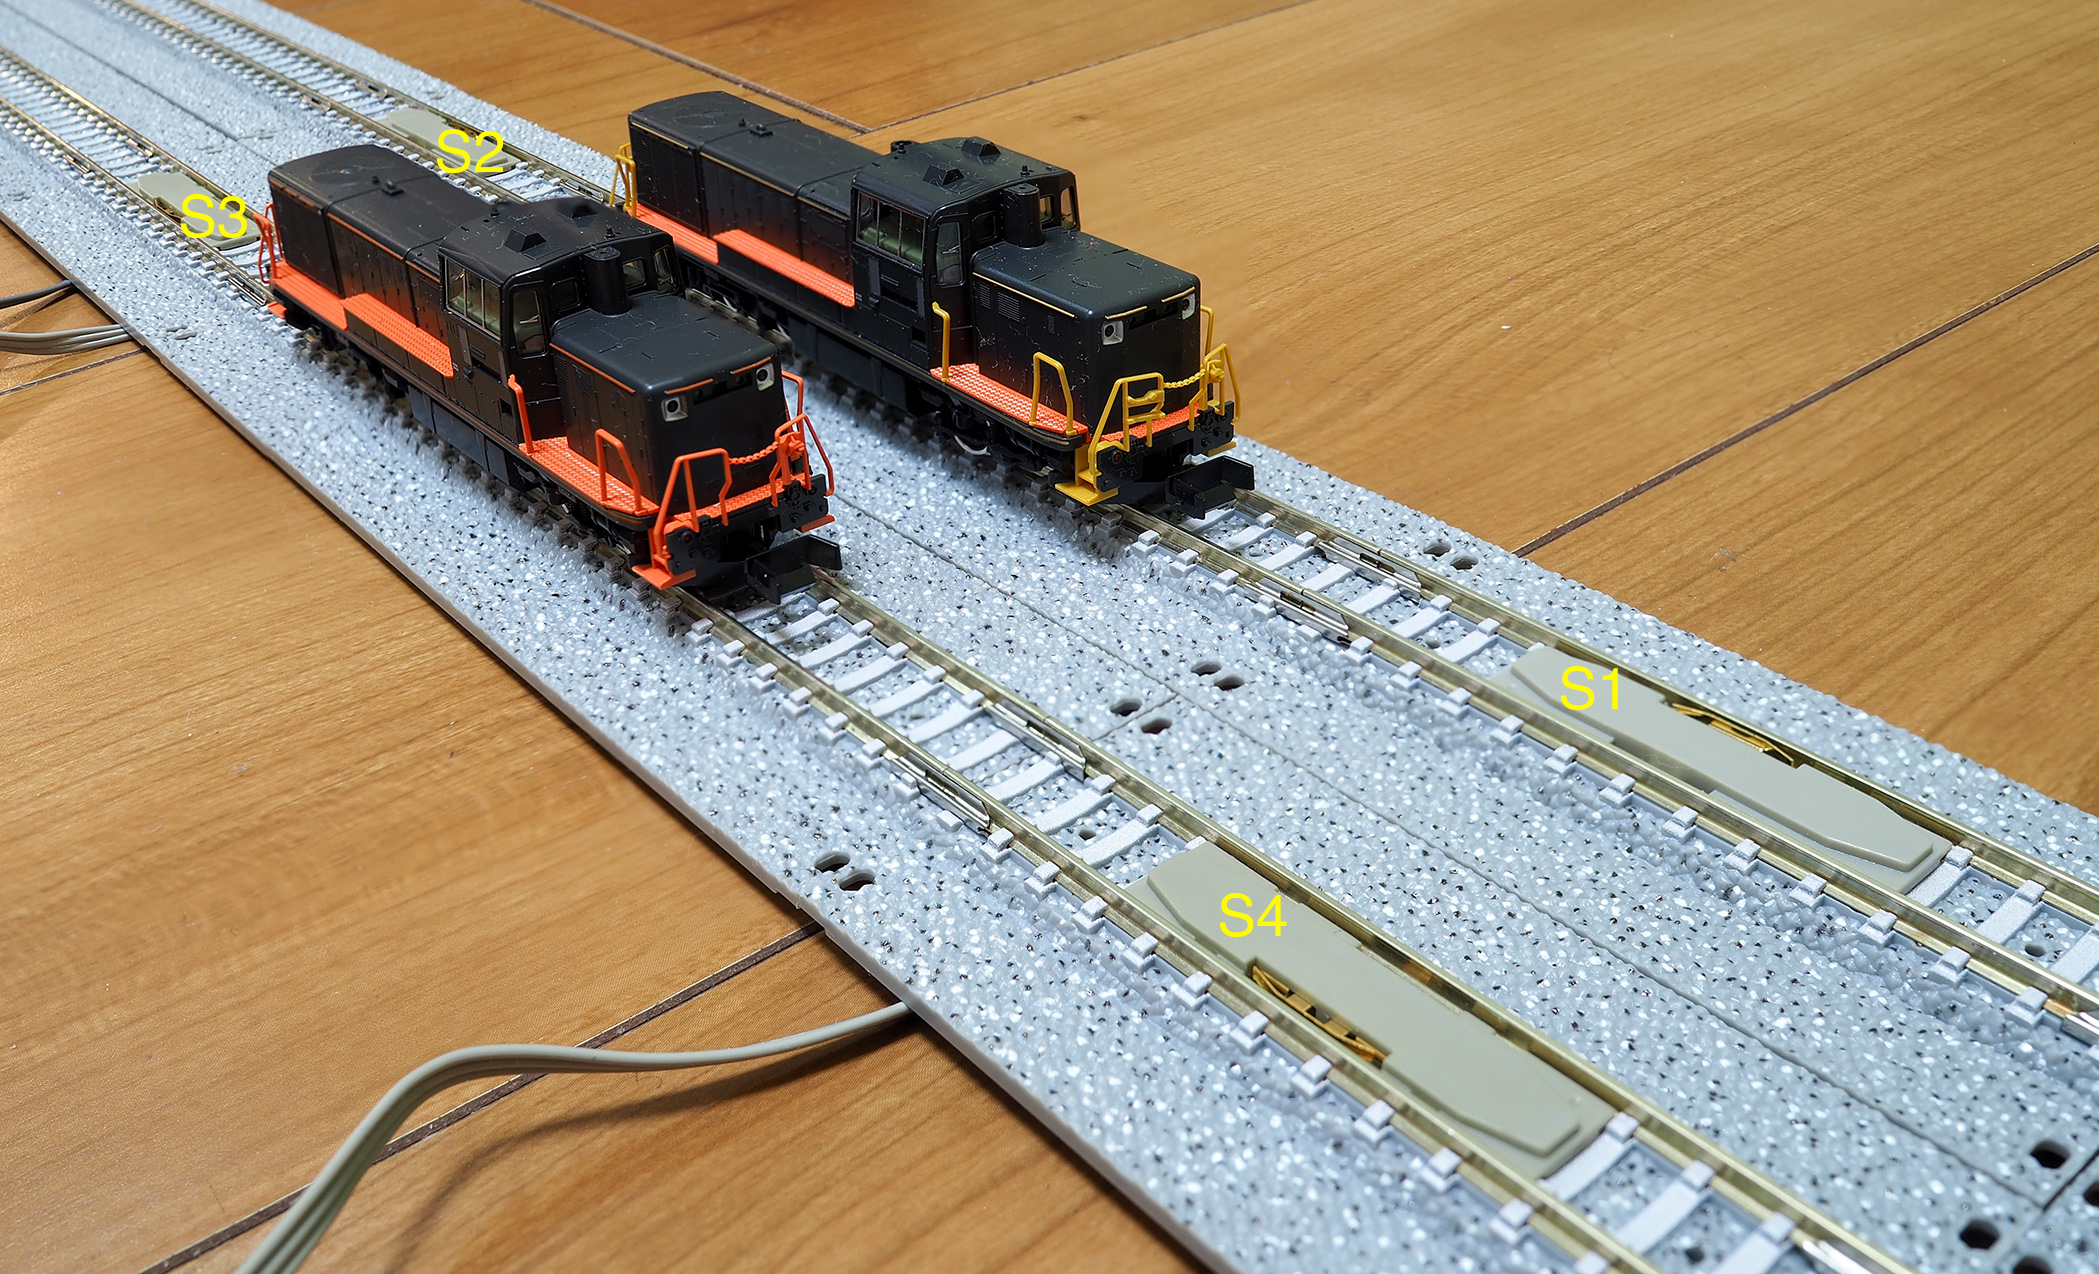
TCS unit. Two of them, named S2 and S1, are emebedded into Wide PC
rail on a siding and two, named S3 and S4, are embedded on the mainline
adjacent to the siding, see the labels in the closeup of the test
track below.
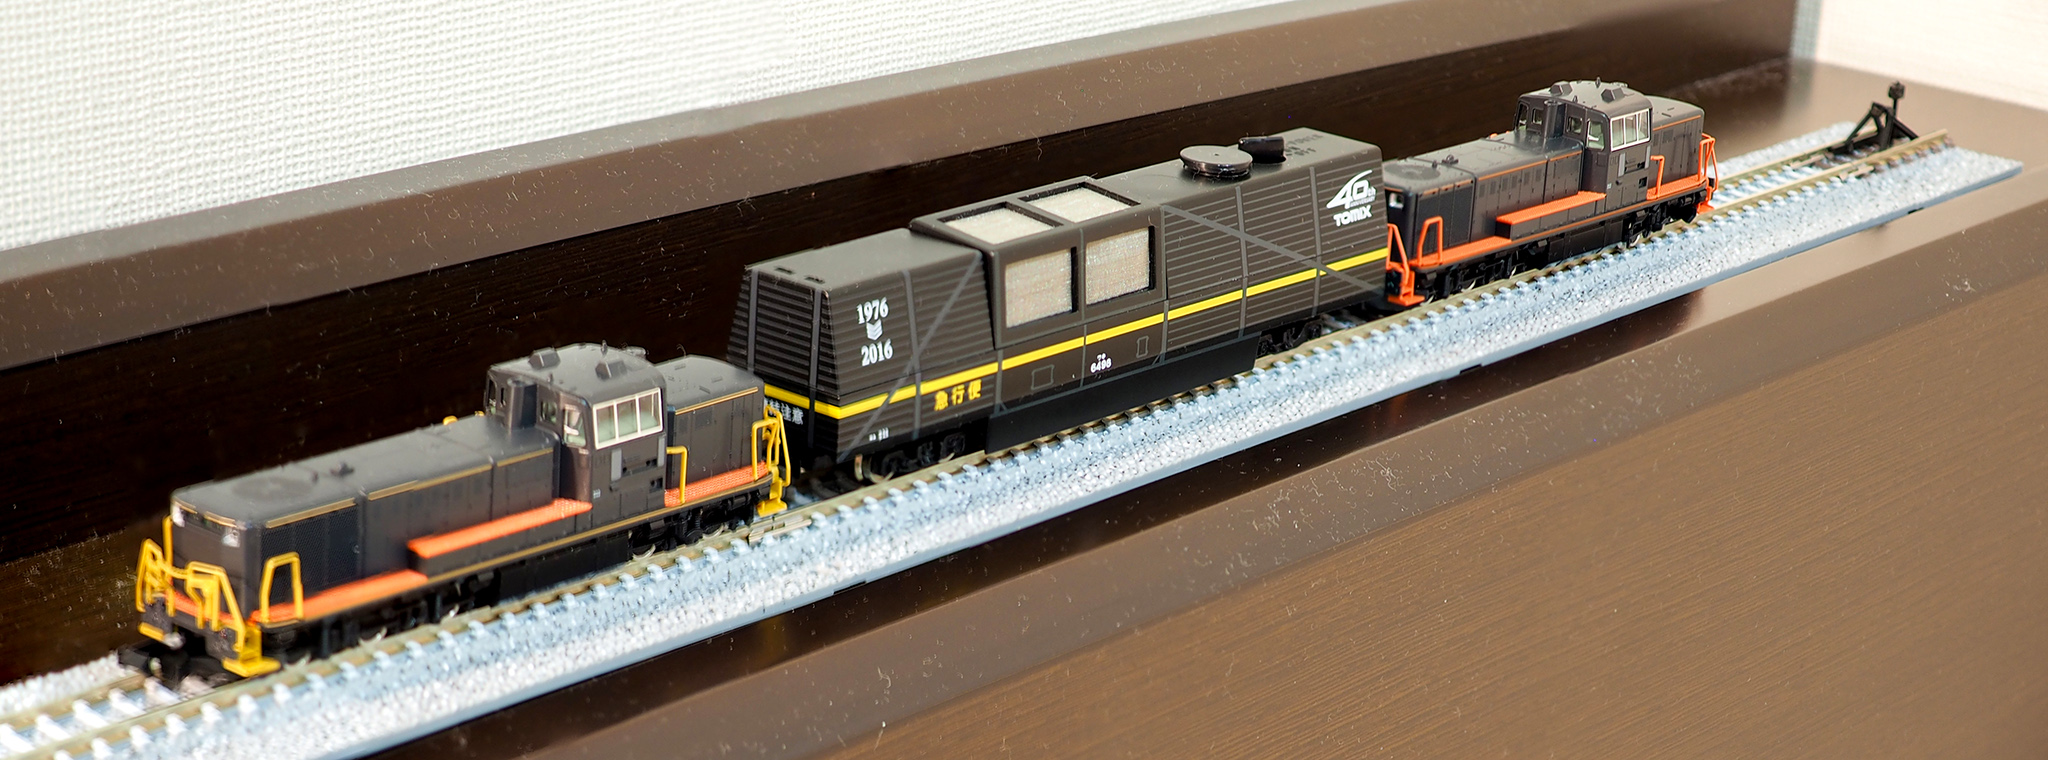
[My two JR Kyushu black DE10s side-by-side; one on a siding, one on
the outer mainline. See the TCS sensors embedded in the Wide PC Rail.]
It is still rather unclear to me how much space I need to leave
between the sensor pairs (S2/S1 and S3/S4). The test track uses a S140
between them, perhaps I can get away with a S70 to maximize siding
space, as shown in the diagram earlier.
In mode 7, the TCS unit controls the two points and the feeder as
well as the four sensors, so it has 7 wires going to the track. (It
also plugs into the controller via another two wires: one for the
D.C. feed and one for the TCS operations.)
A video is worth a thousand words of description, so here is a one
min video showing how it runs, link here.
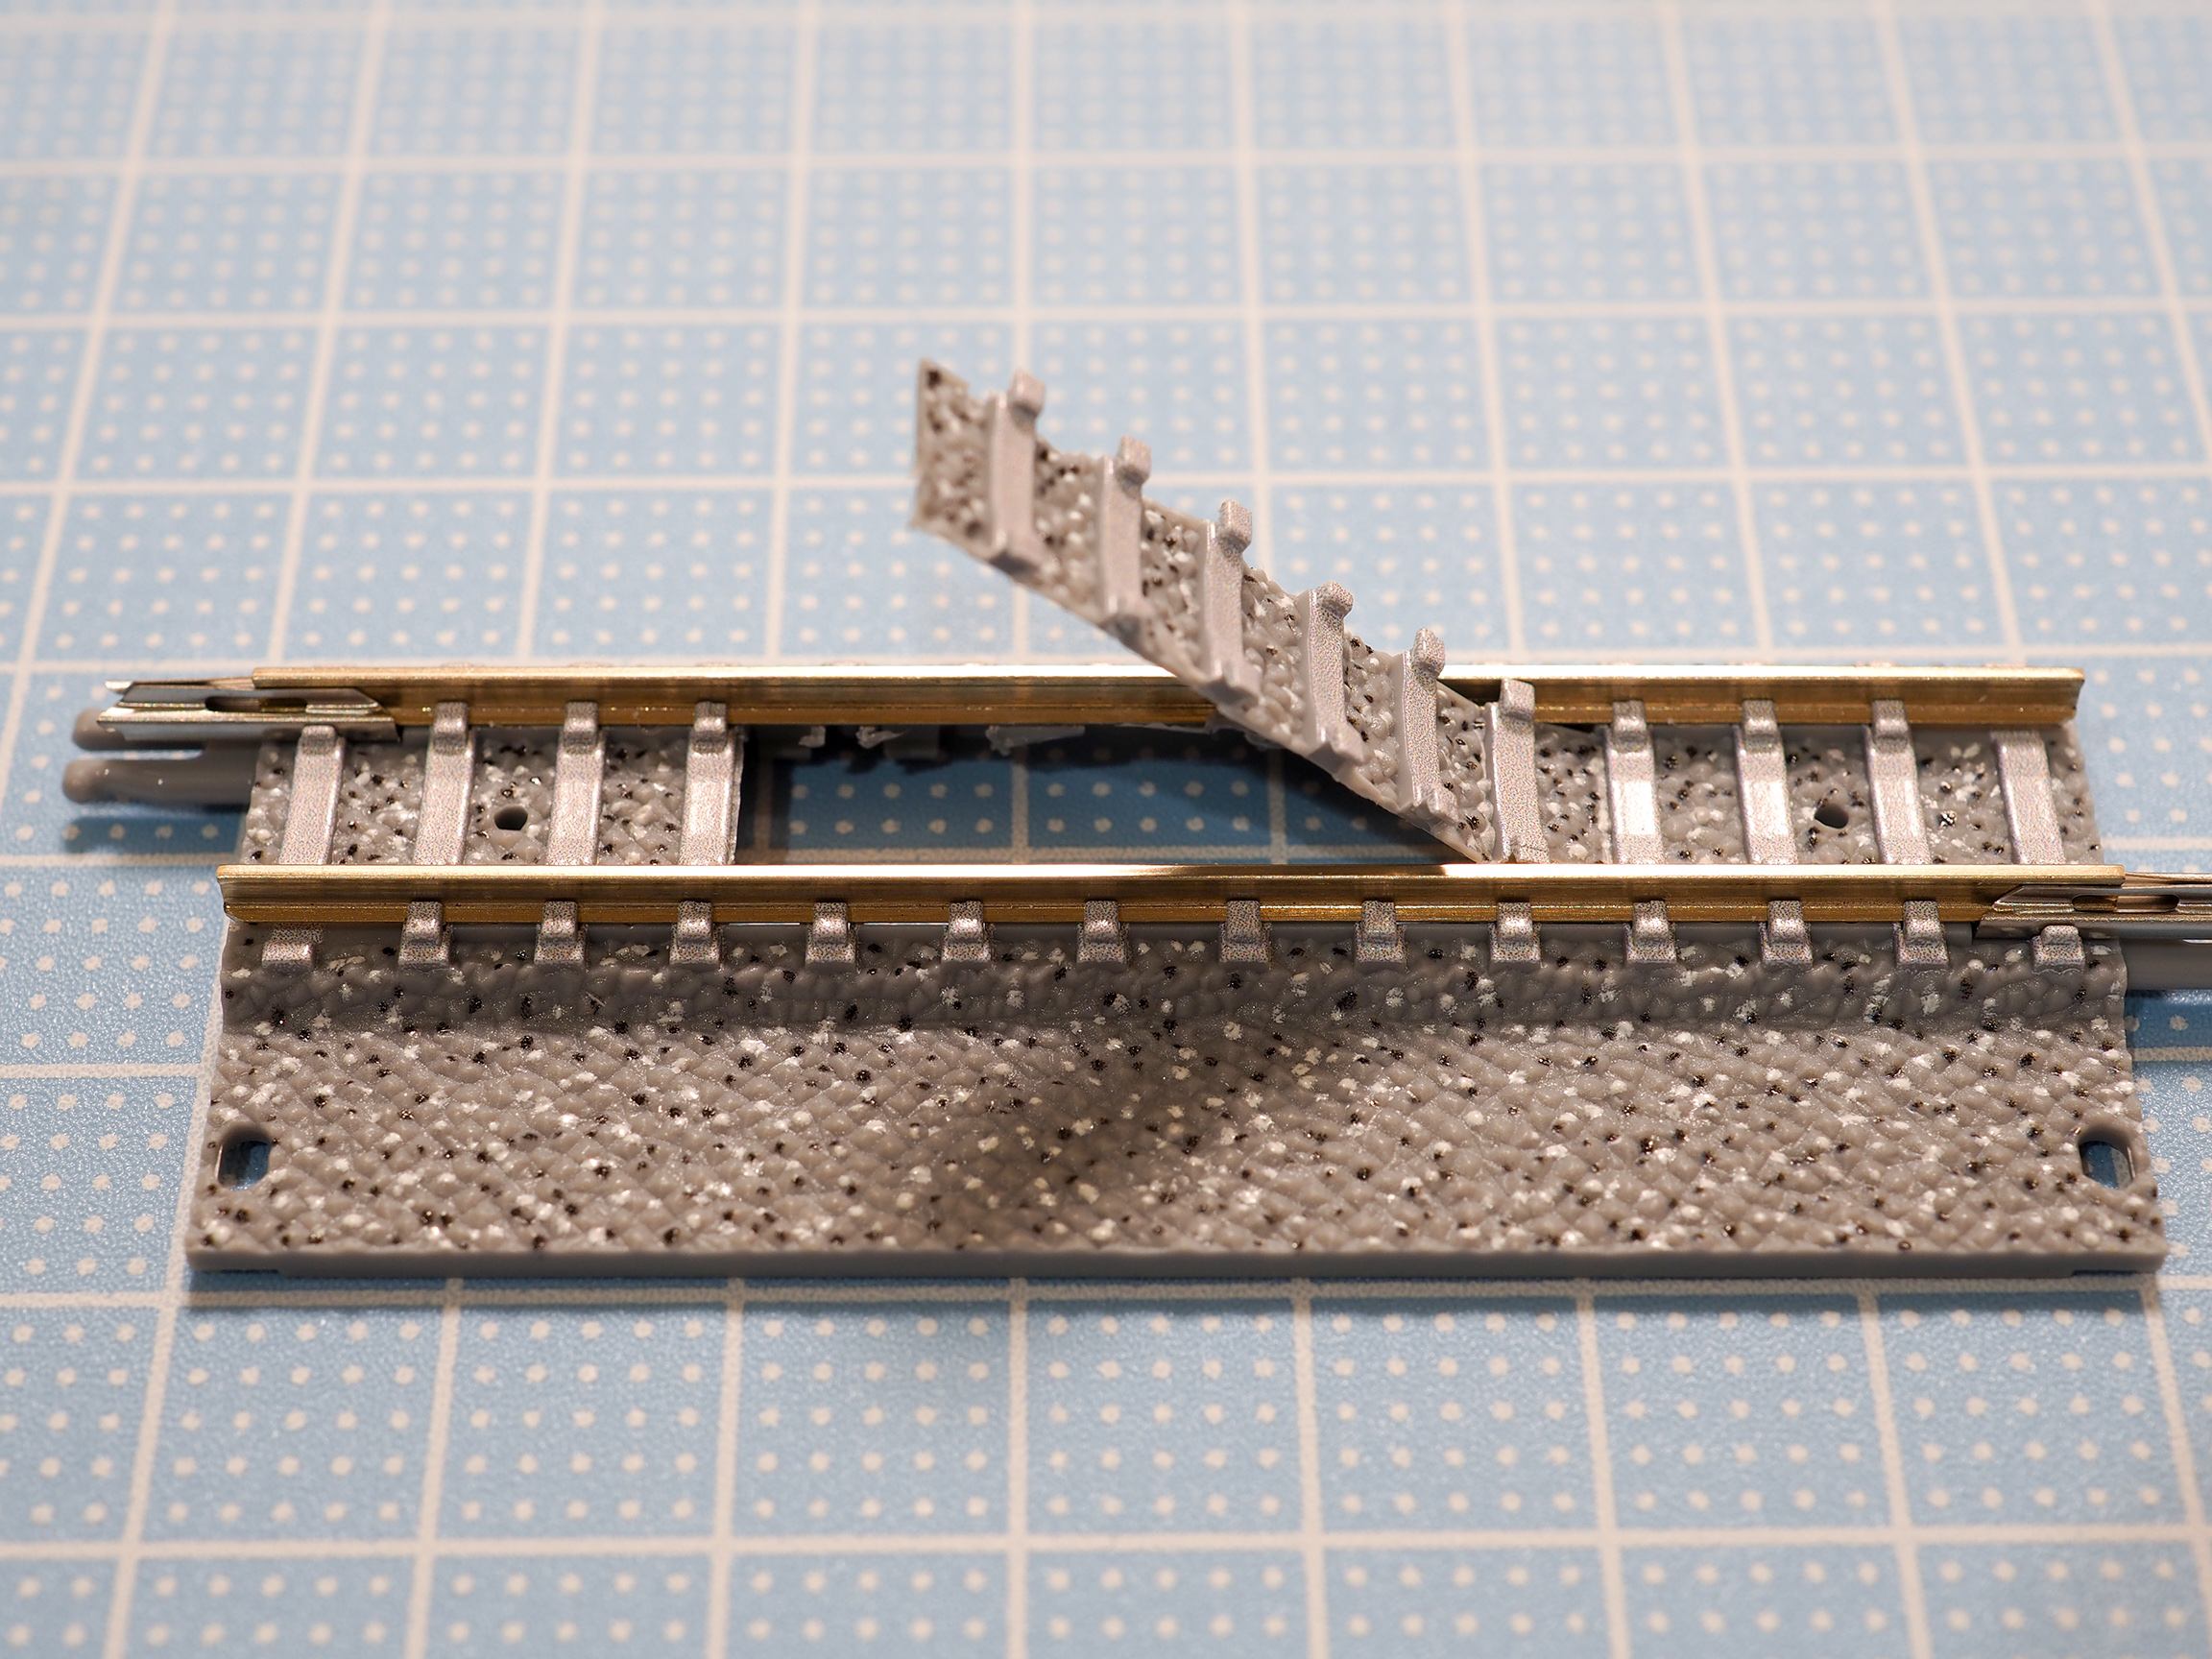
I used S70s, so the Wide PC track needs to be prepared as
follows to receive the sensors:
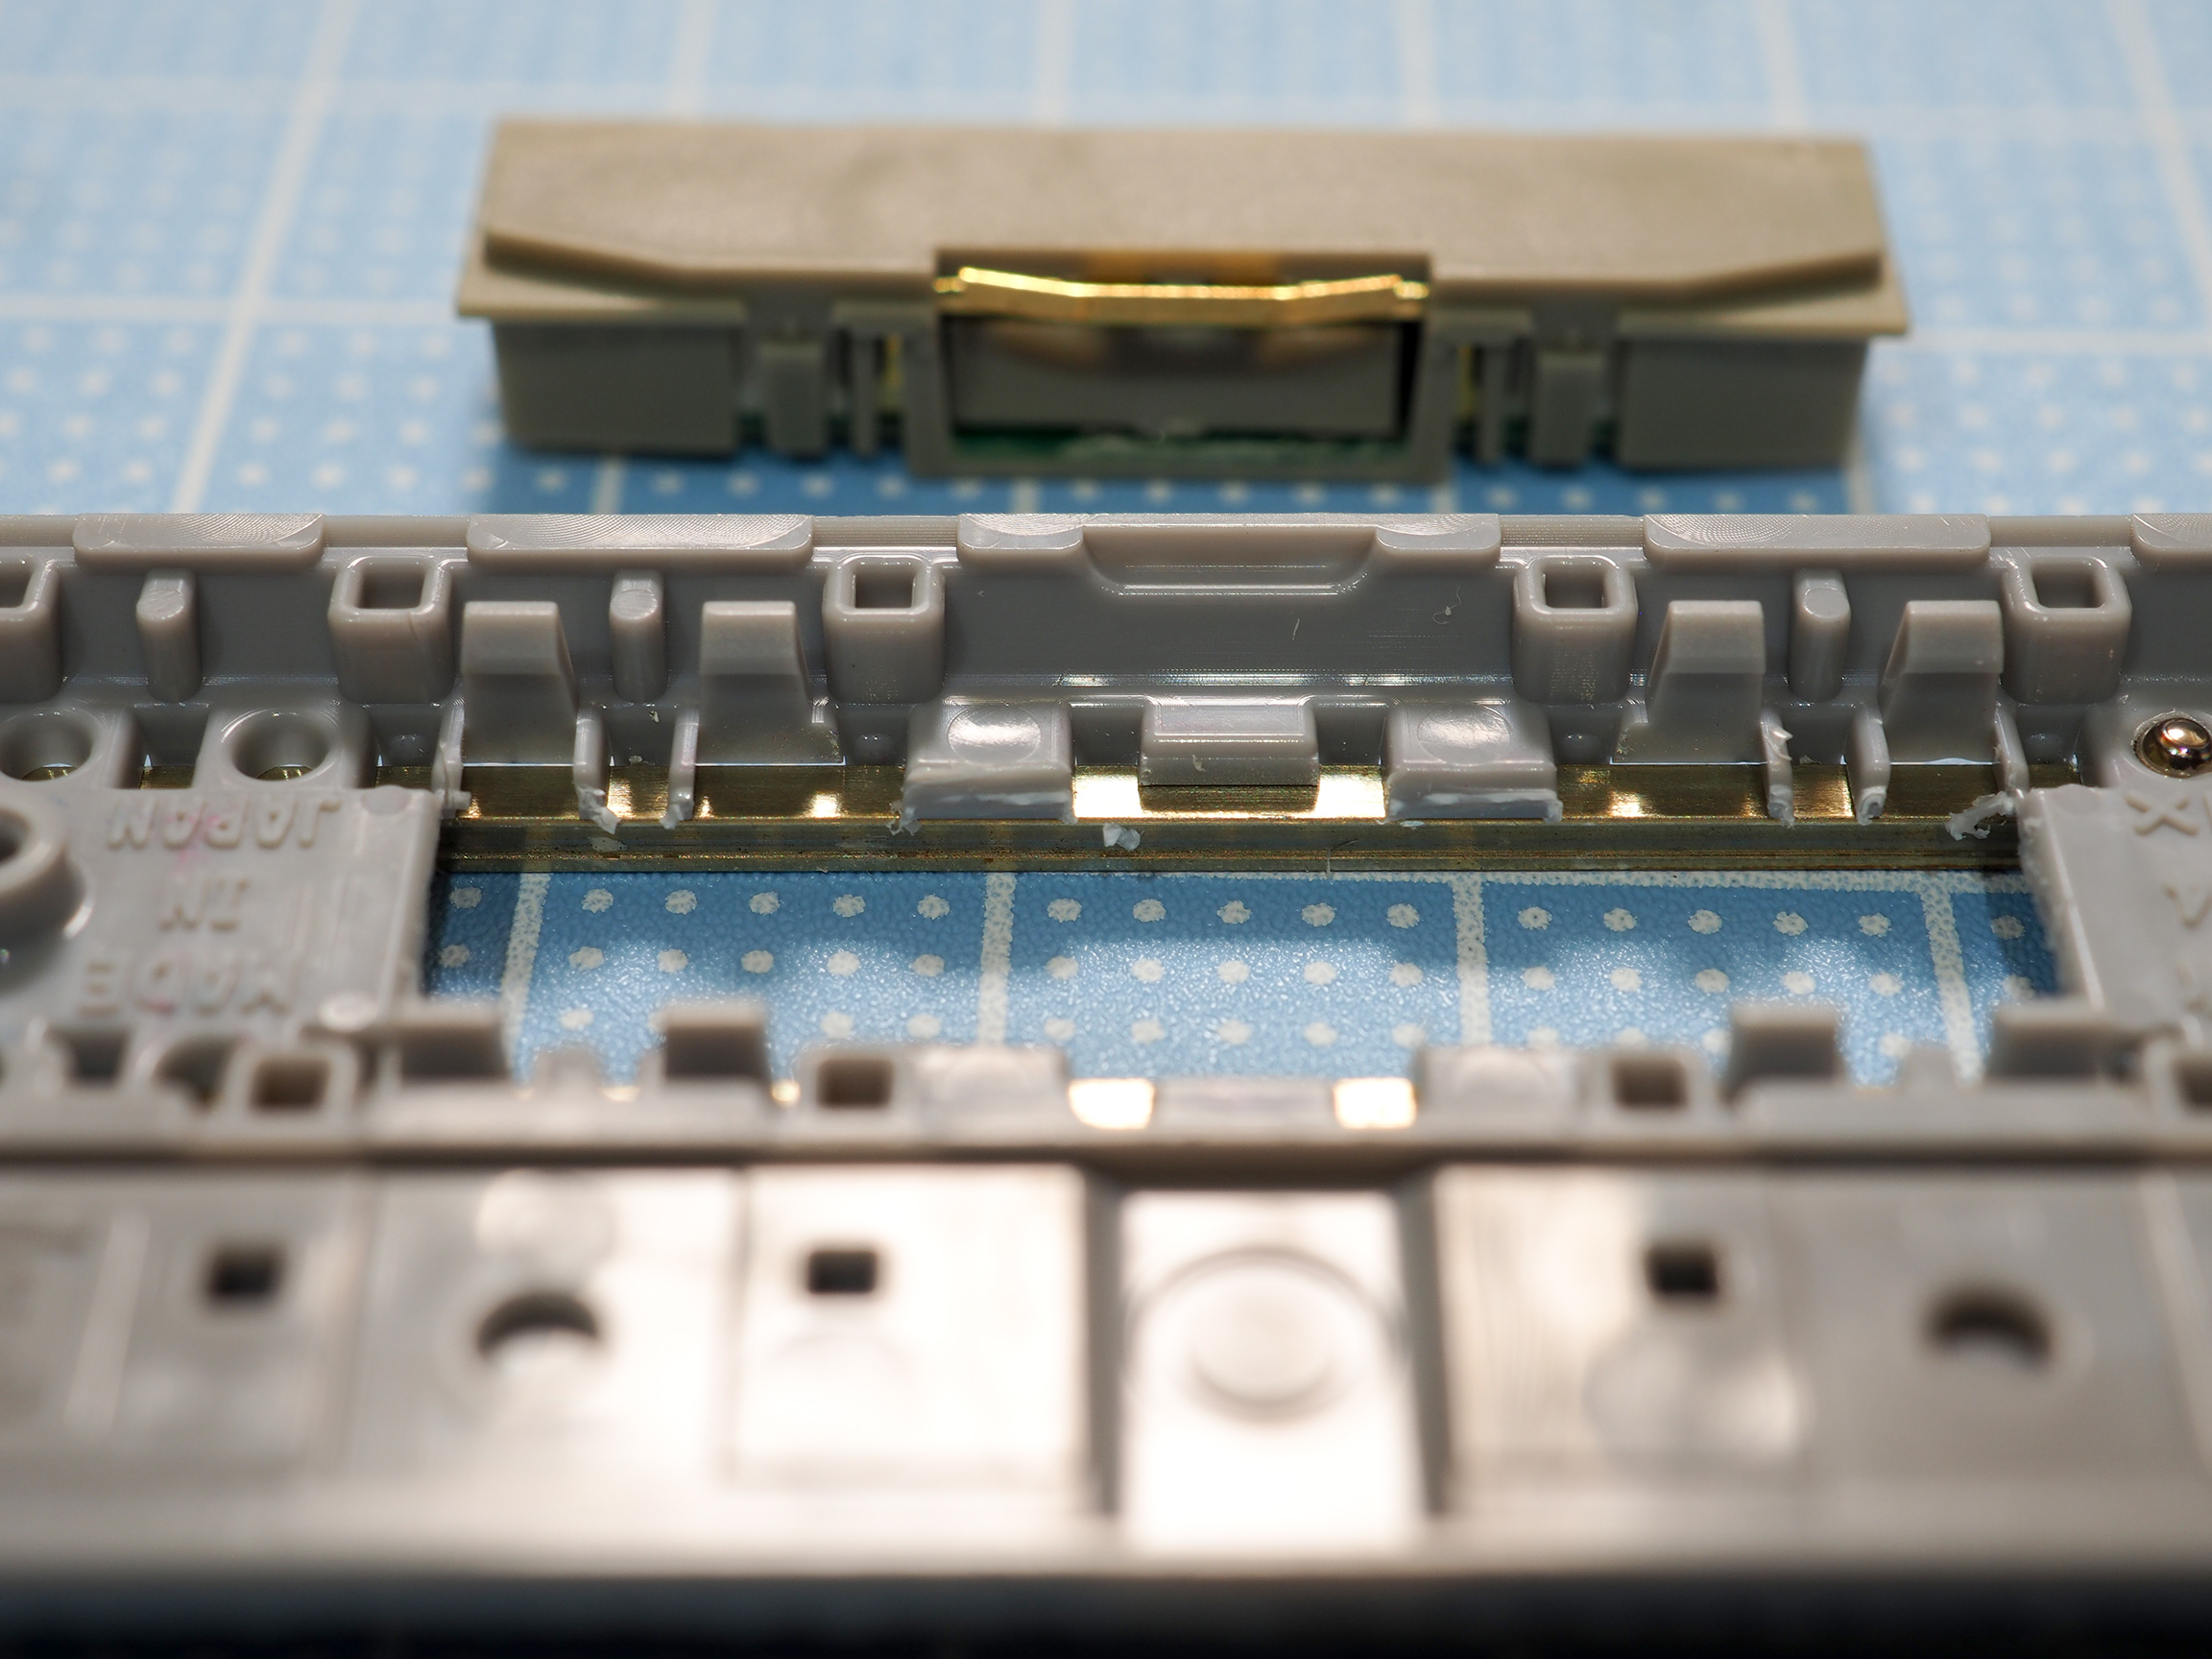
[Digging the center section of an S70 out.]
[Upside down. In the background is the 5567 sensor.]
[Sensor and wire installed.]
Appendix
[This section is still being built and will be undergoing, hopefully,
regular updates.]
My Kyoto friend introduced me to Volks Kyoto. The ground floor is
dedicated to model trains. In the foyer, this is the N-gauge layout:
Then we have the wonderfully large HO-gauge layout:
Yeah, that's a pretty impressive foyer for a hobby shop. Notice
also how both Volks Kyoto and Osaka (Nipponbashi) buildings are
represented in this layout:
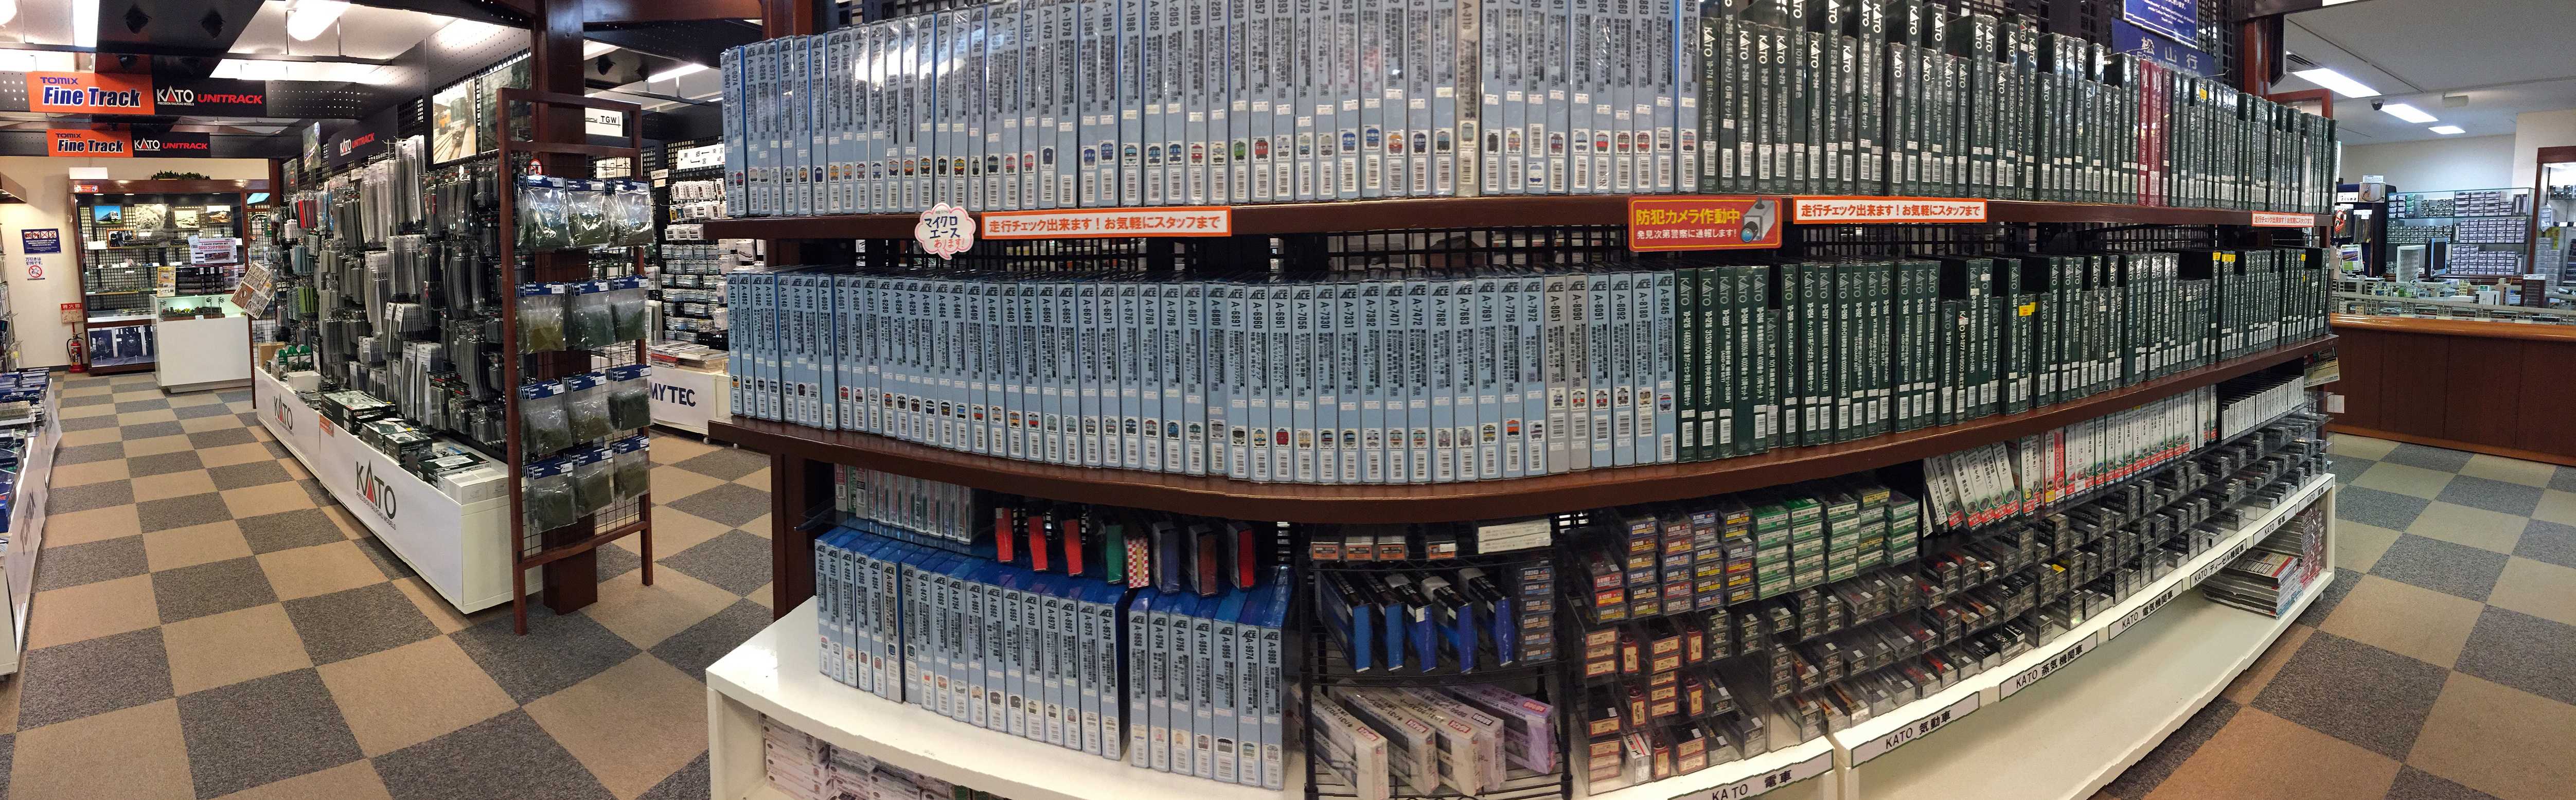
Prices seem higher but there is a membership card available with
varying levels of points. As you can see below, they stock a lot of
rolling stock:
And I got truly awesome service from one particularly nice dude. He
was not only happy to take everything out of the box to make sure it
runs properly, but he also looked up stuff for me. He answered my
inquiries despite my 90% English plus very limited Japanese. He
cleaned, oiled, and fixed my Keihan 3000系 that I'd messed up trying
to get dust off, see below:
[The thingymajig popped out. I was trying to
un-dust it.]
[Supposed to look like this. Well, with a
little bit less dust.]
[Horrible dustballs. Always dusty apartment.]
[He used surgical tweezers to patiently pull out the
dust. I ended up buying not only those tweezers but a powered Japanese
gizmo that sits on top of the track (powered by the track) to clean
the wheels.]
As a result, I love this store and don't mind buying stuff from him
despite knowing sometimes I could get it cheaper 10 mins away down the
road.
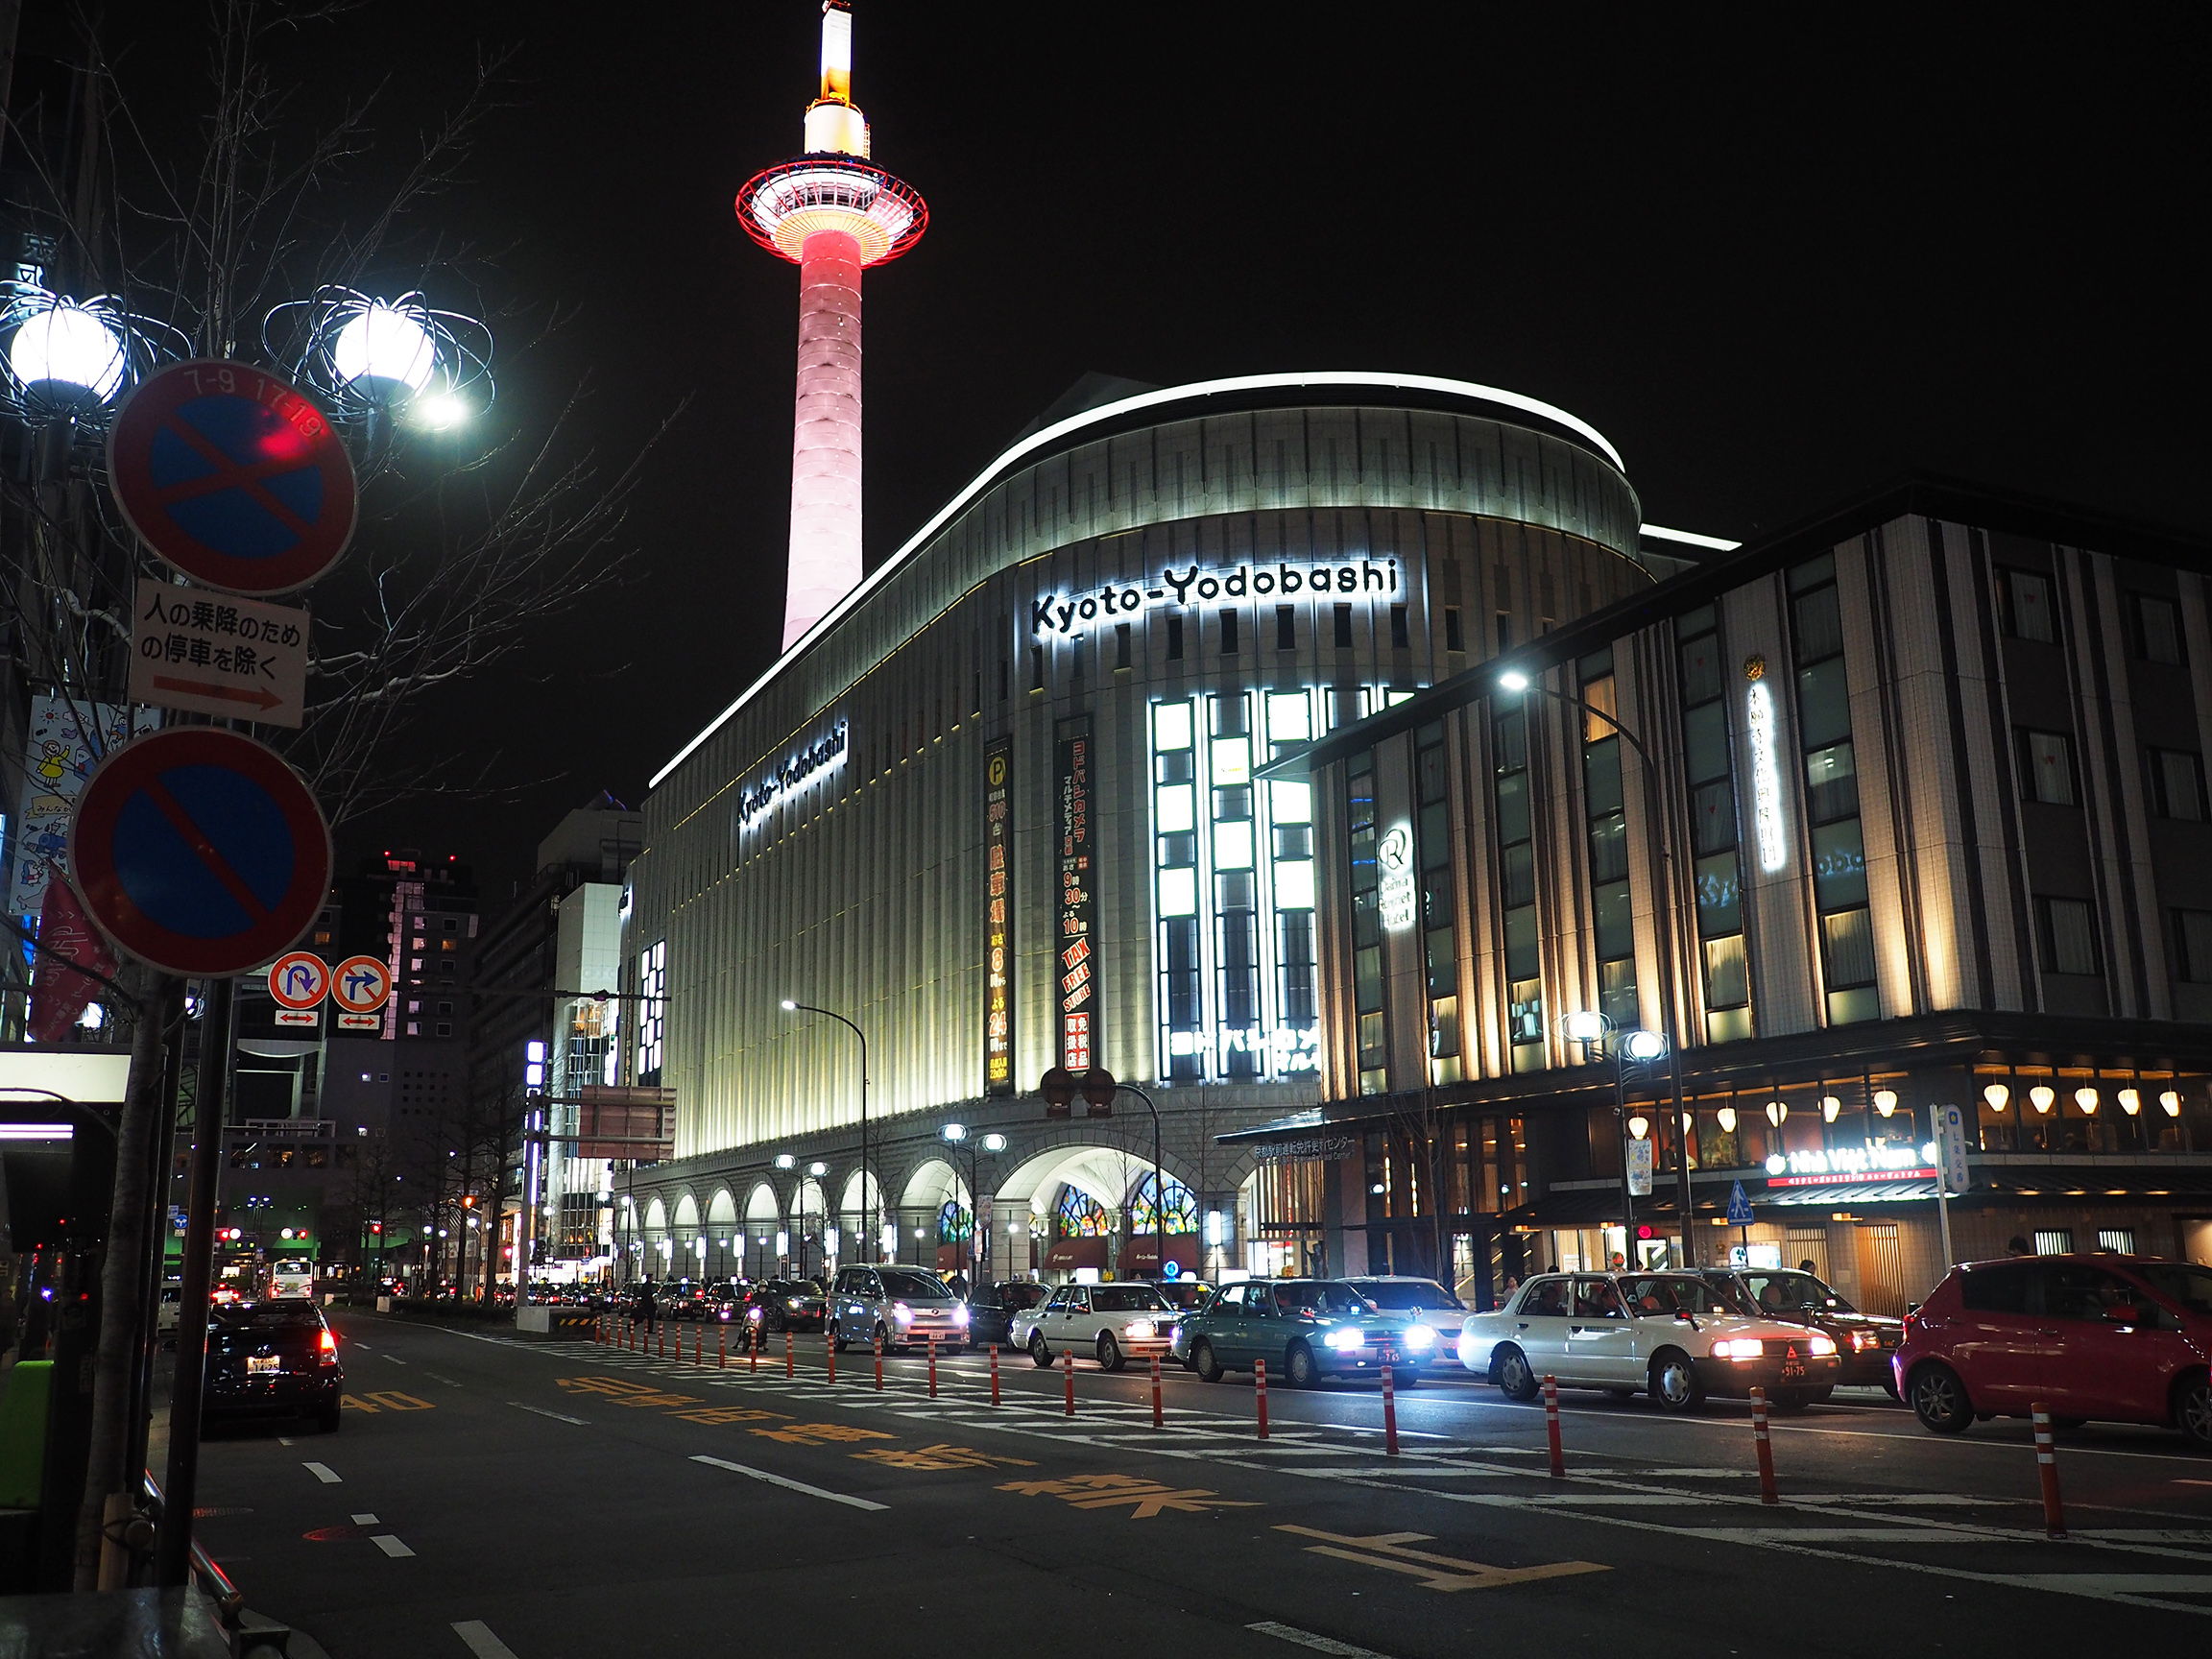
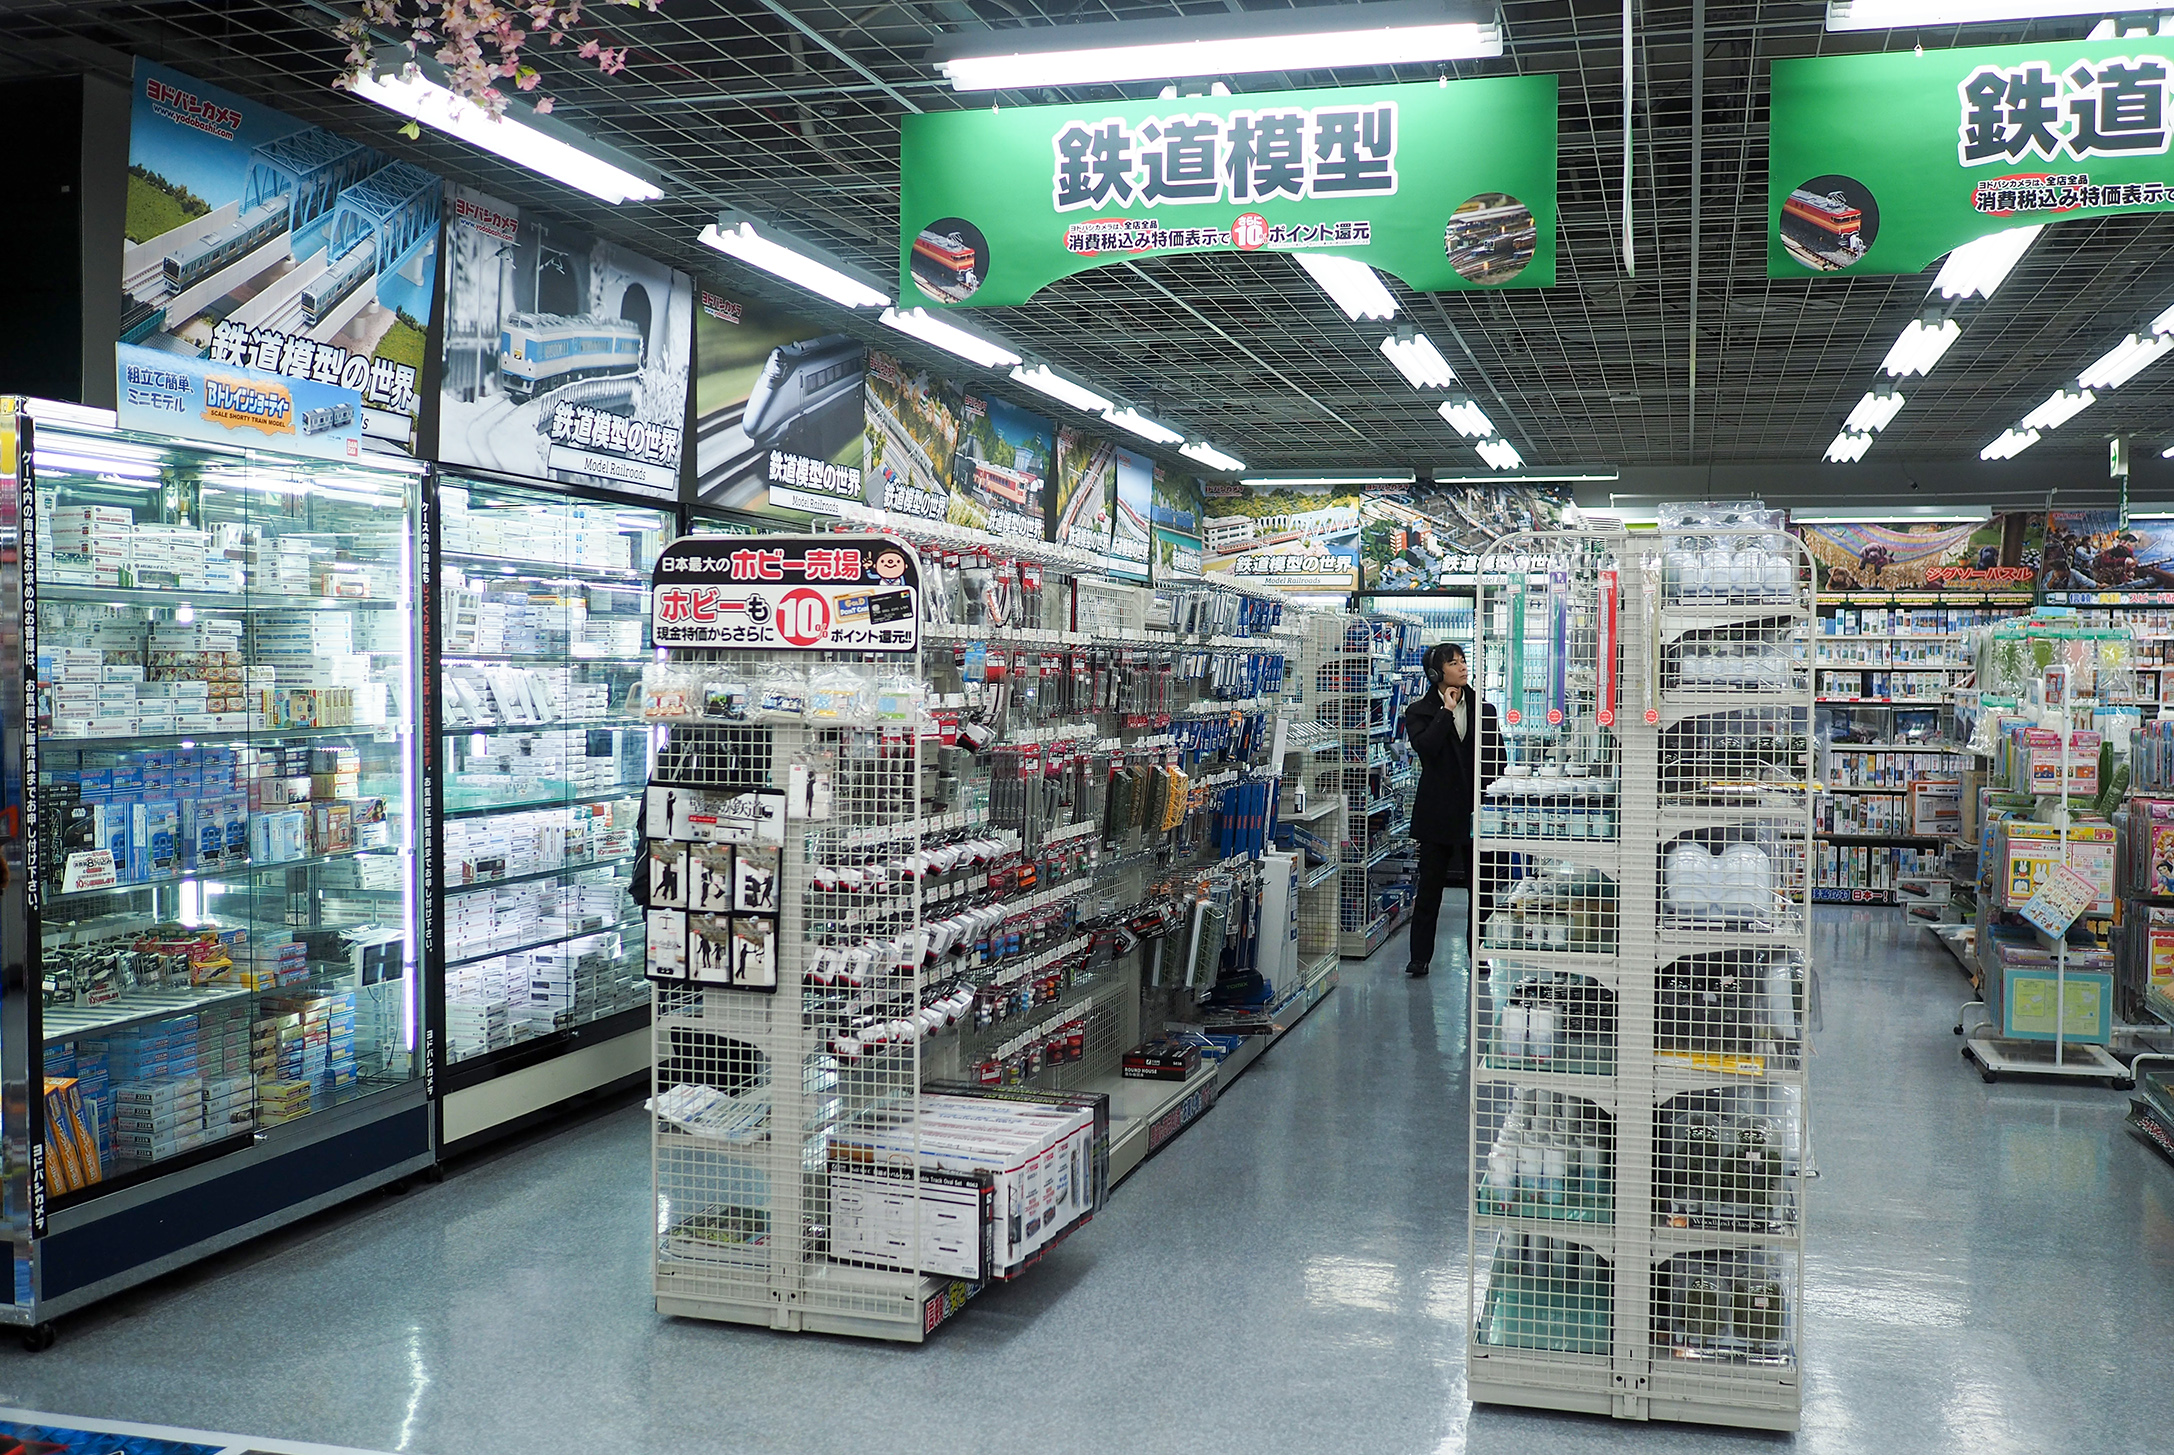
Yodobashi Camera
About 10 mins down the road from Volks, we have Yodobashi Camera
Multimedia Kyoto next to Kyoto Tower (and JR Kyoto station). One of my
hobbies is photography, so I'm very familiar with their huge camera
department in several of their locations. As Yodobashi-s go, the Kyoto
store is not as big as some of the others I'm familiar with,
e.g. Umeda (Osaka), Shinjuku or Akihabara (Tokyo). At Kyoto, the train
corner is not huge, perhaps it's much bigger in the other stores I
just mentioned.
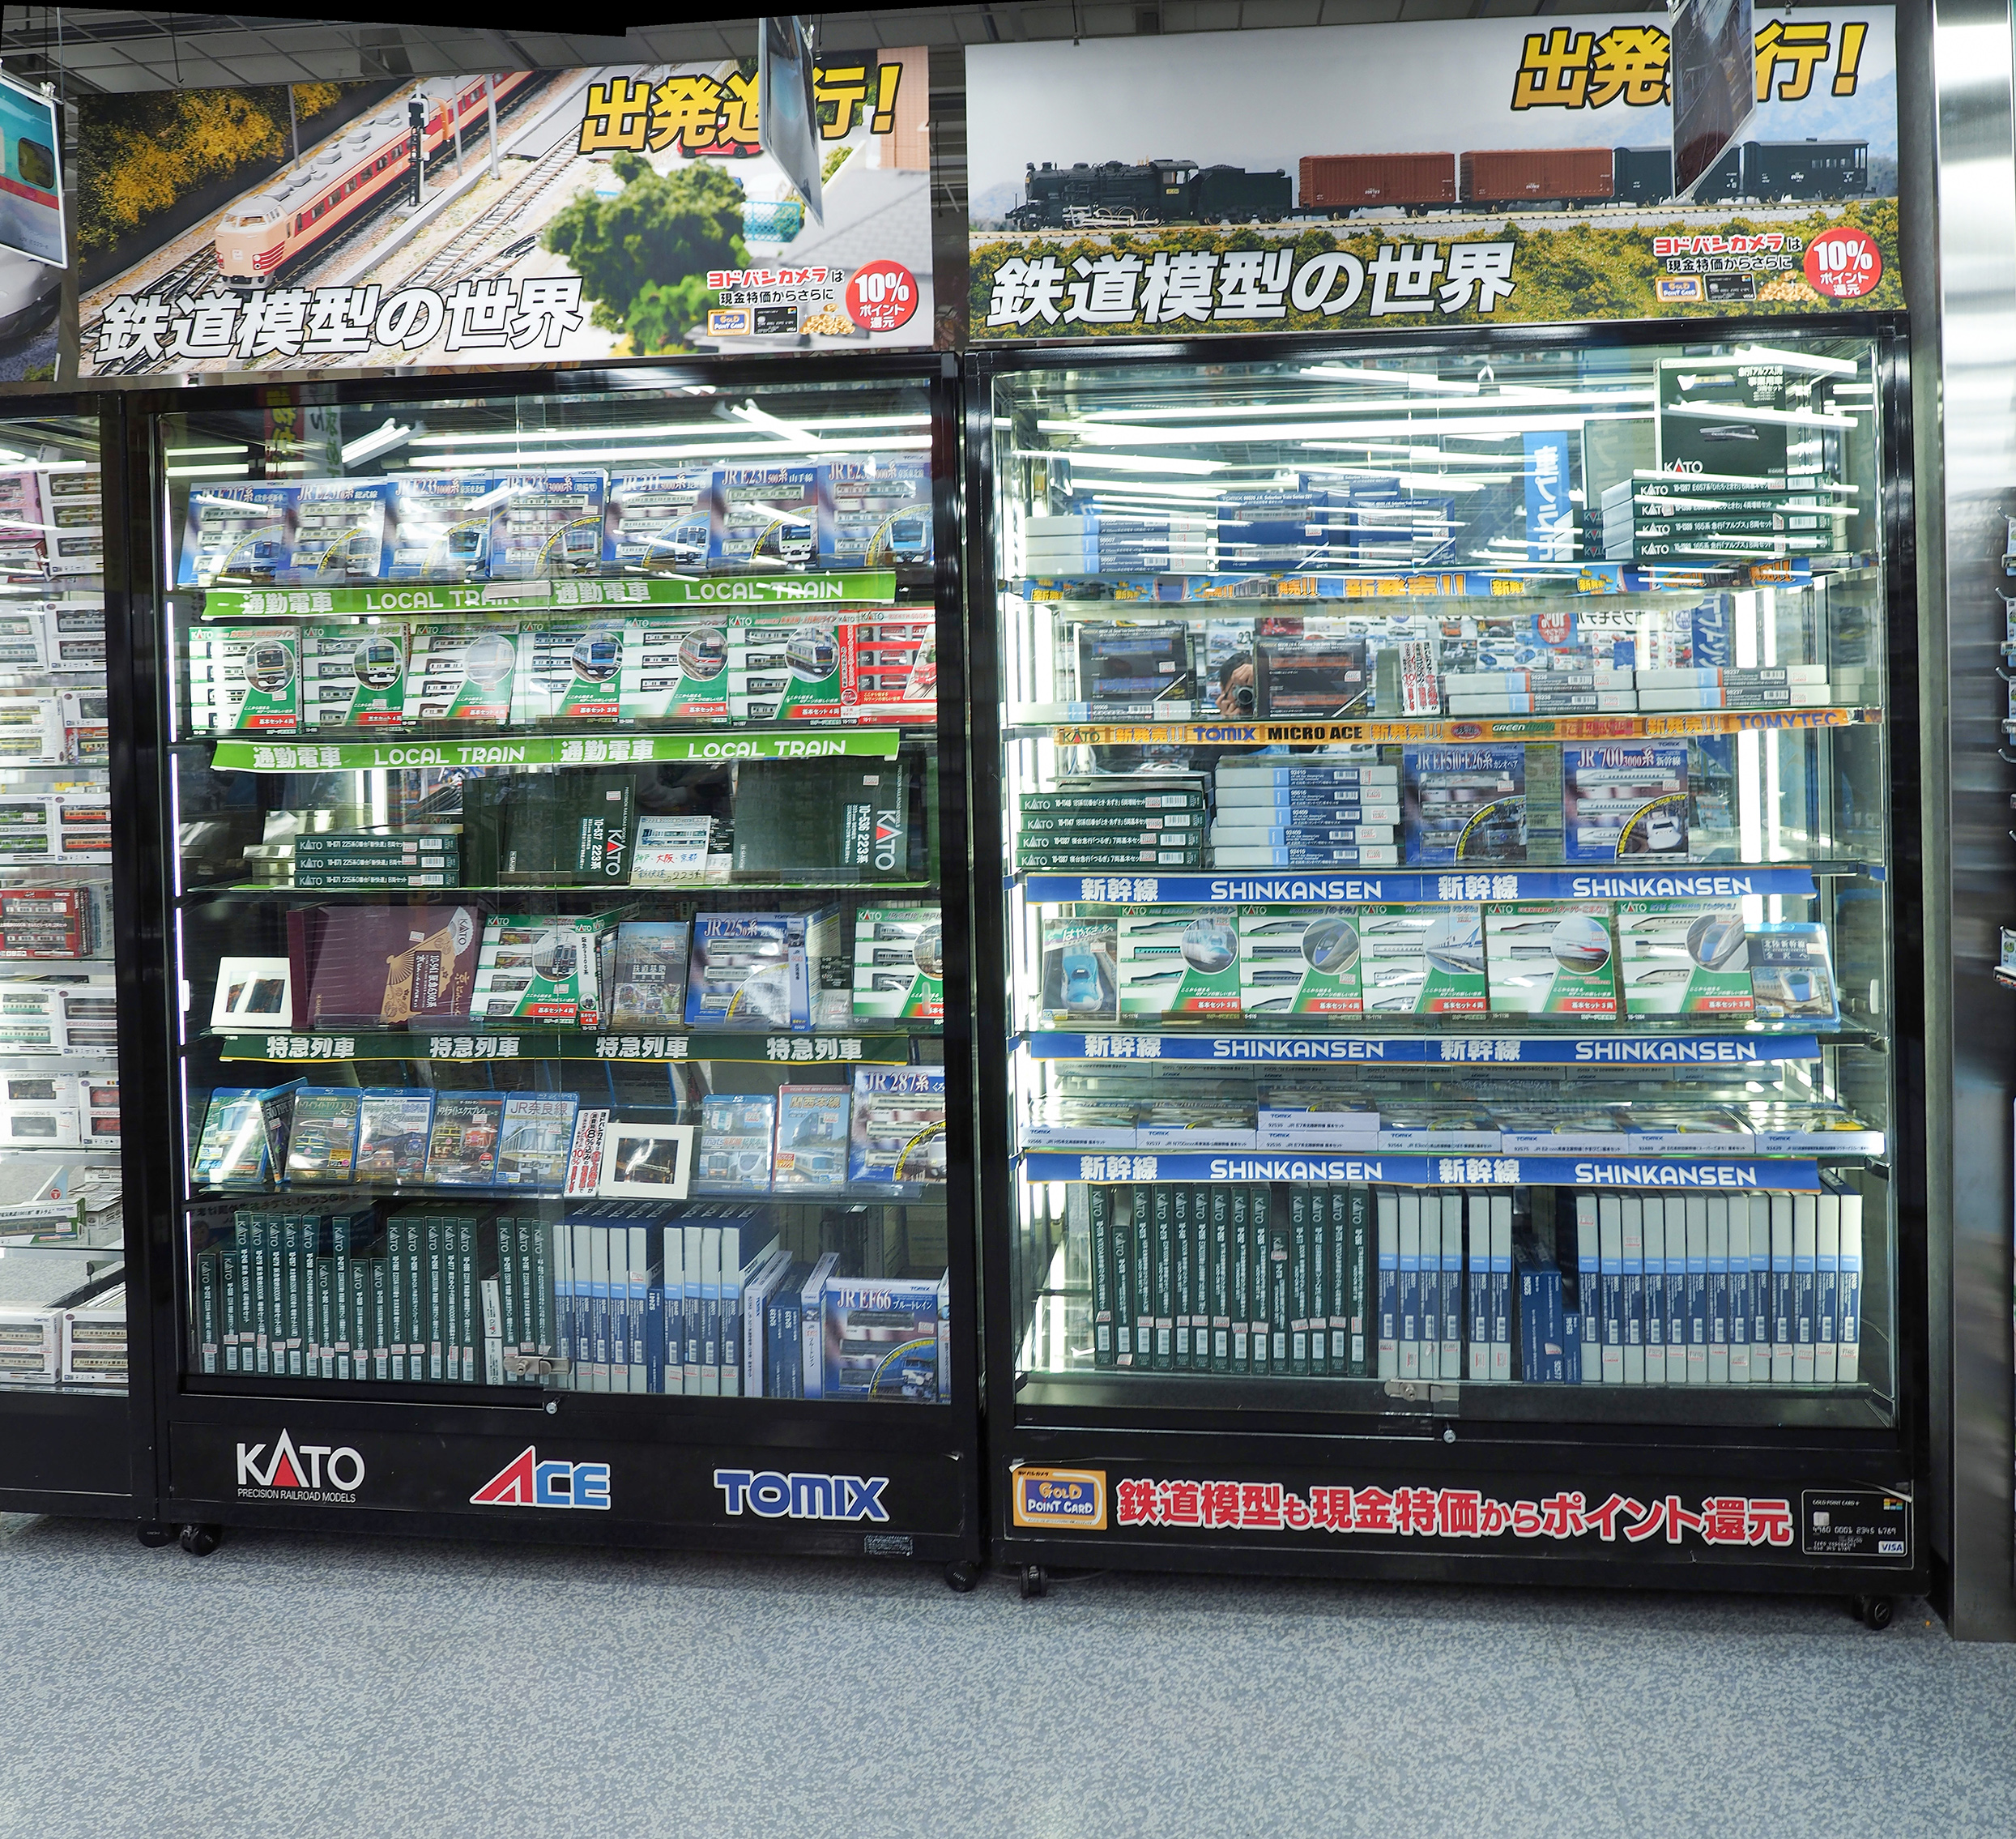
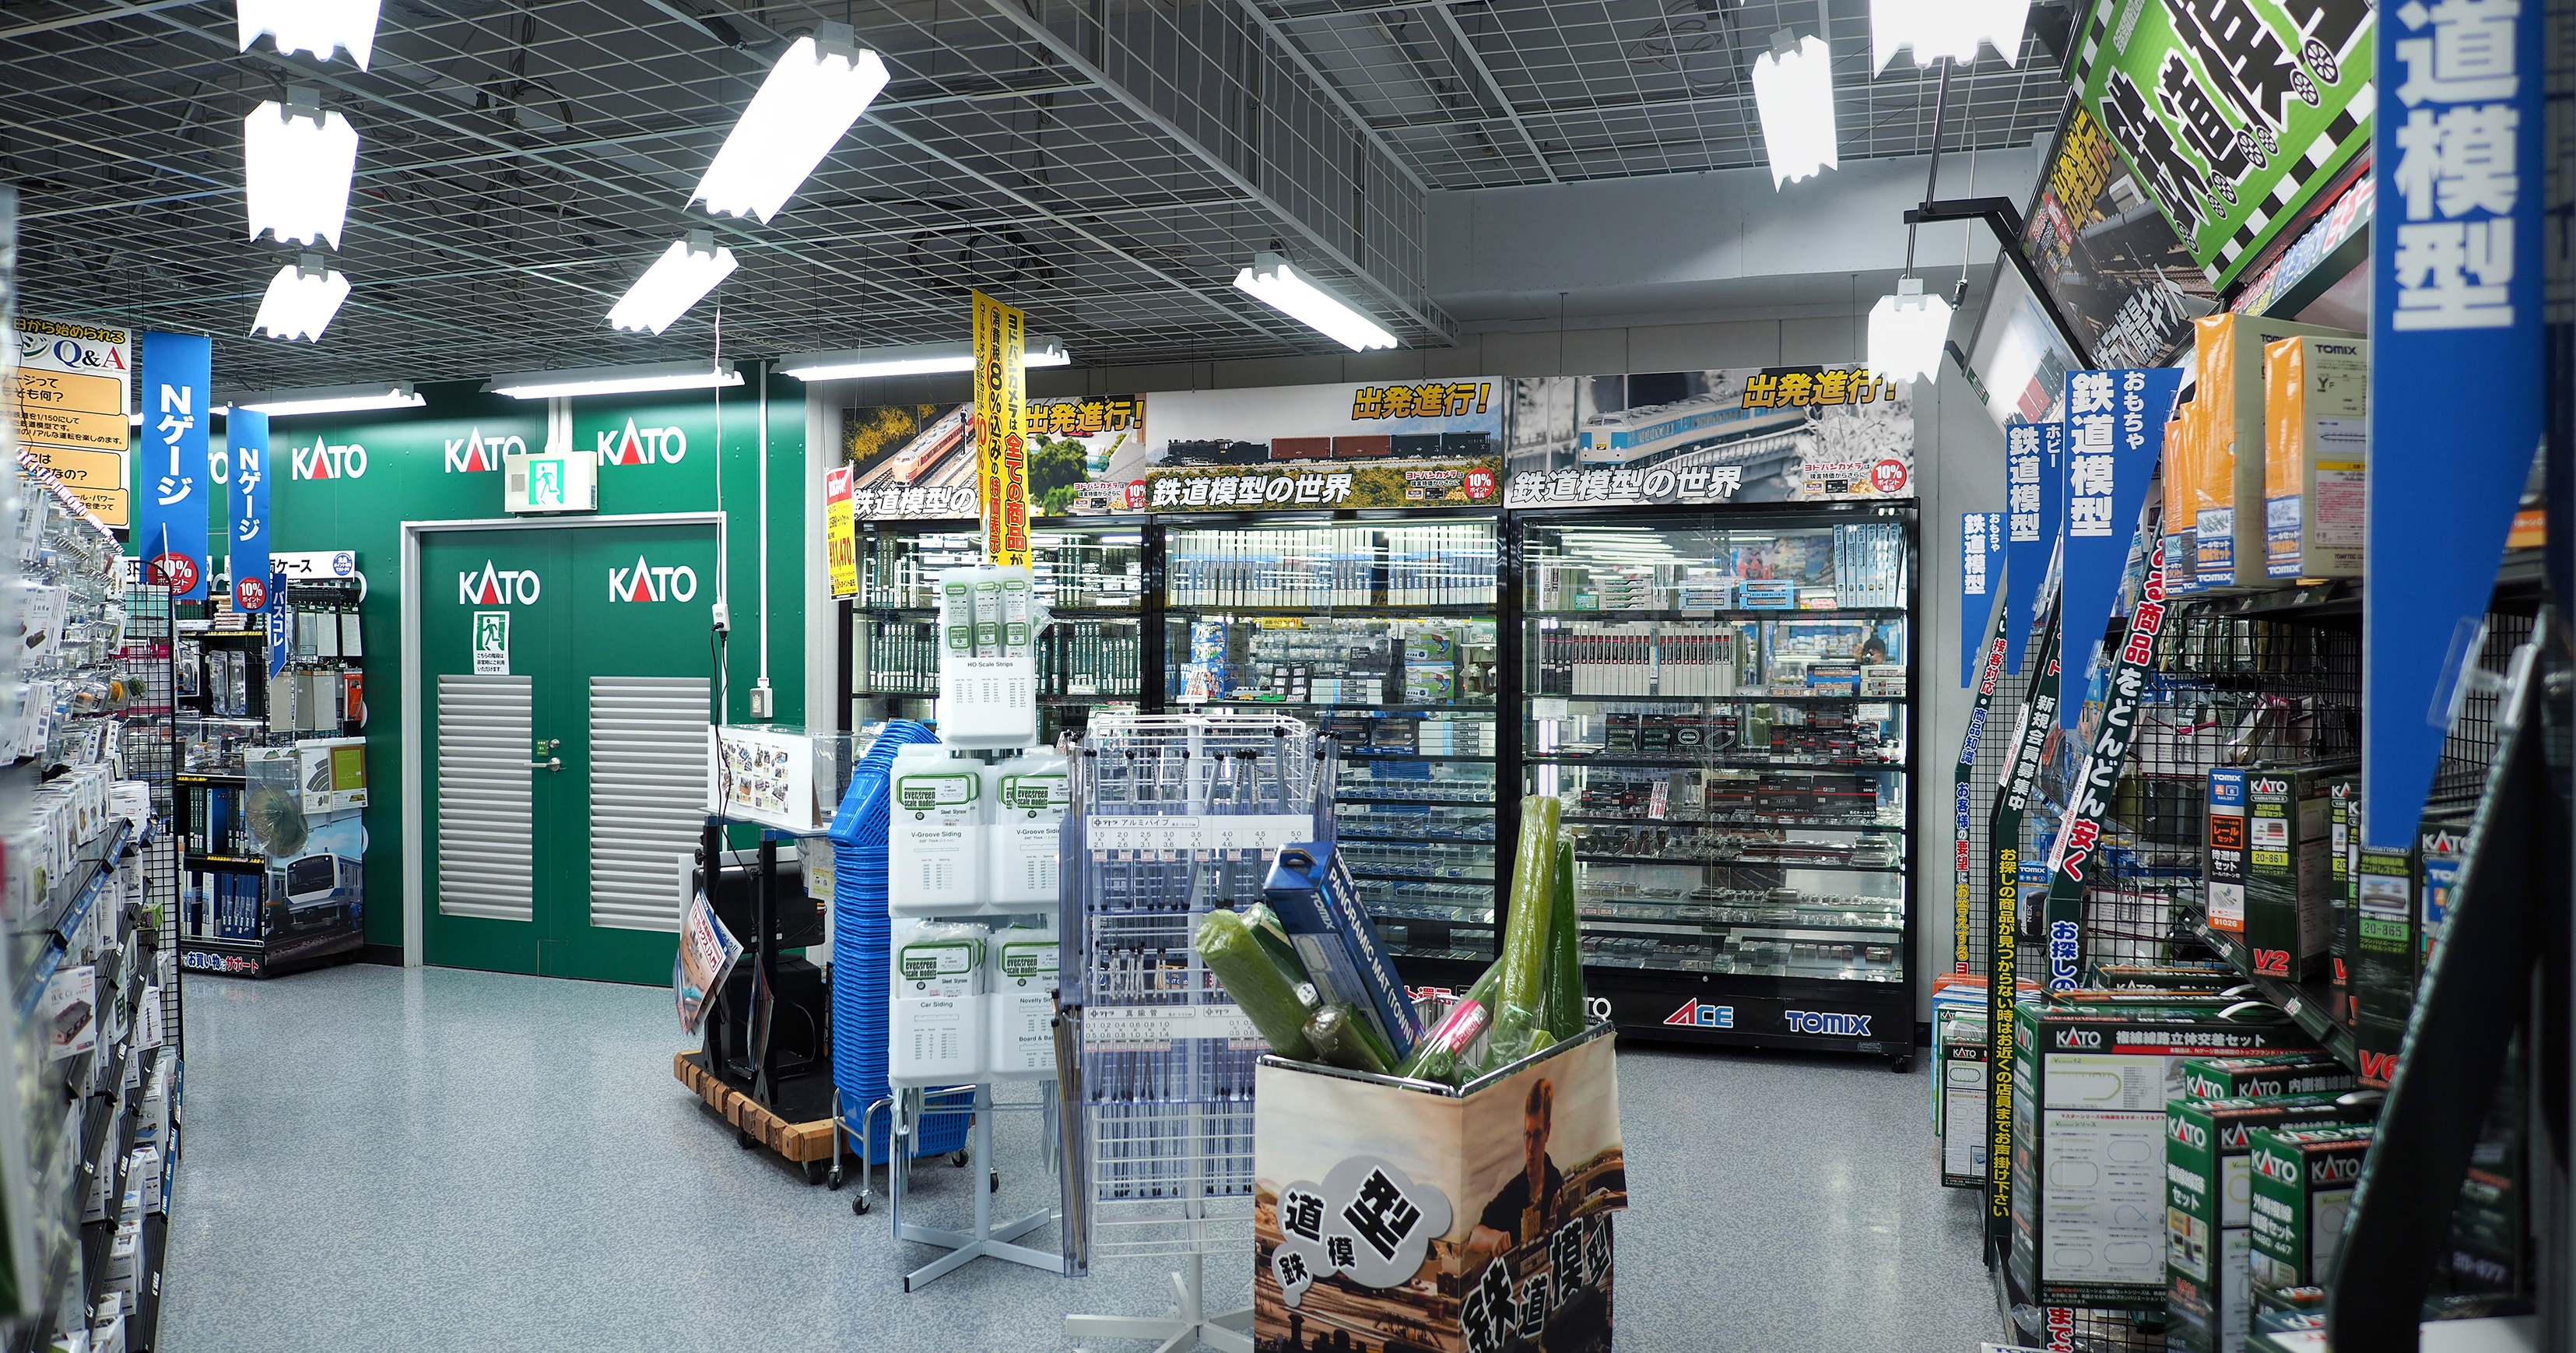
[The back wall. Tomix and Kato.]
[The back wall to the right: more Kato and
Tomix plus Micro Ace. Tomix structures stocked on the left aisle.]
But the Tomix stuff I'm interested in seems well discounted. Plus
of course, with the Yodobashi Gold Point card you get 10% in points as
well. As a result, plus the fact that it is 15 mins away by bicycle,
this is my first port of call for parts and track etc. Unfortunately,
they don't stock all the parts I need.
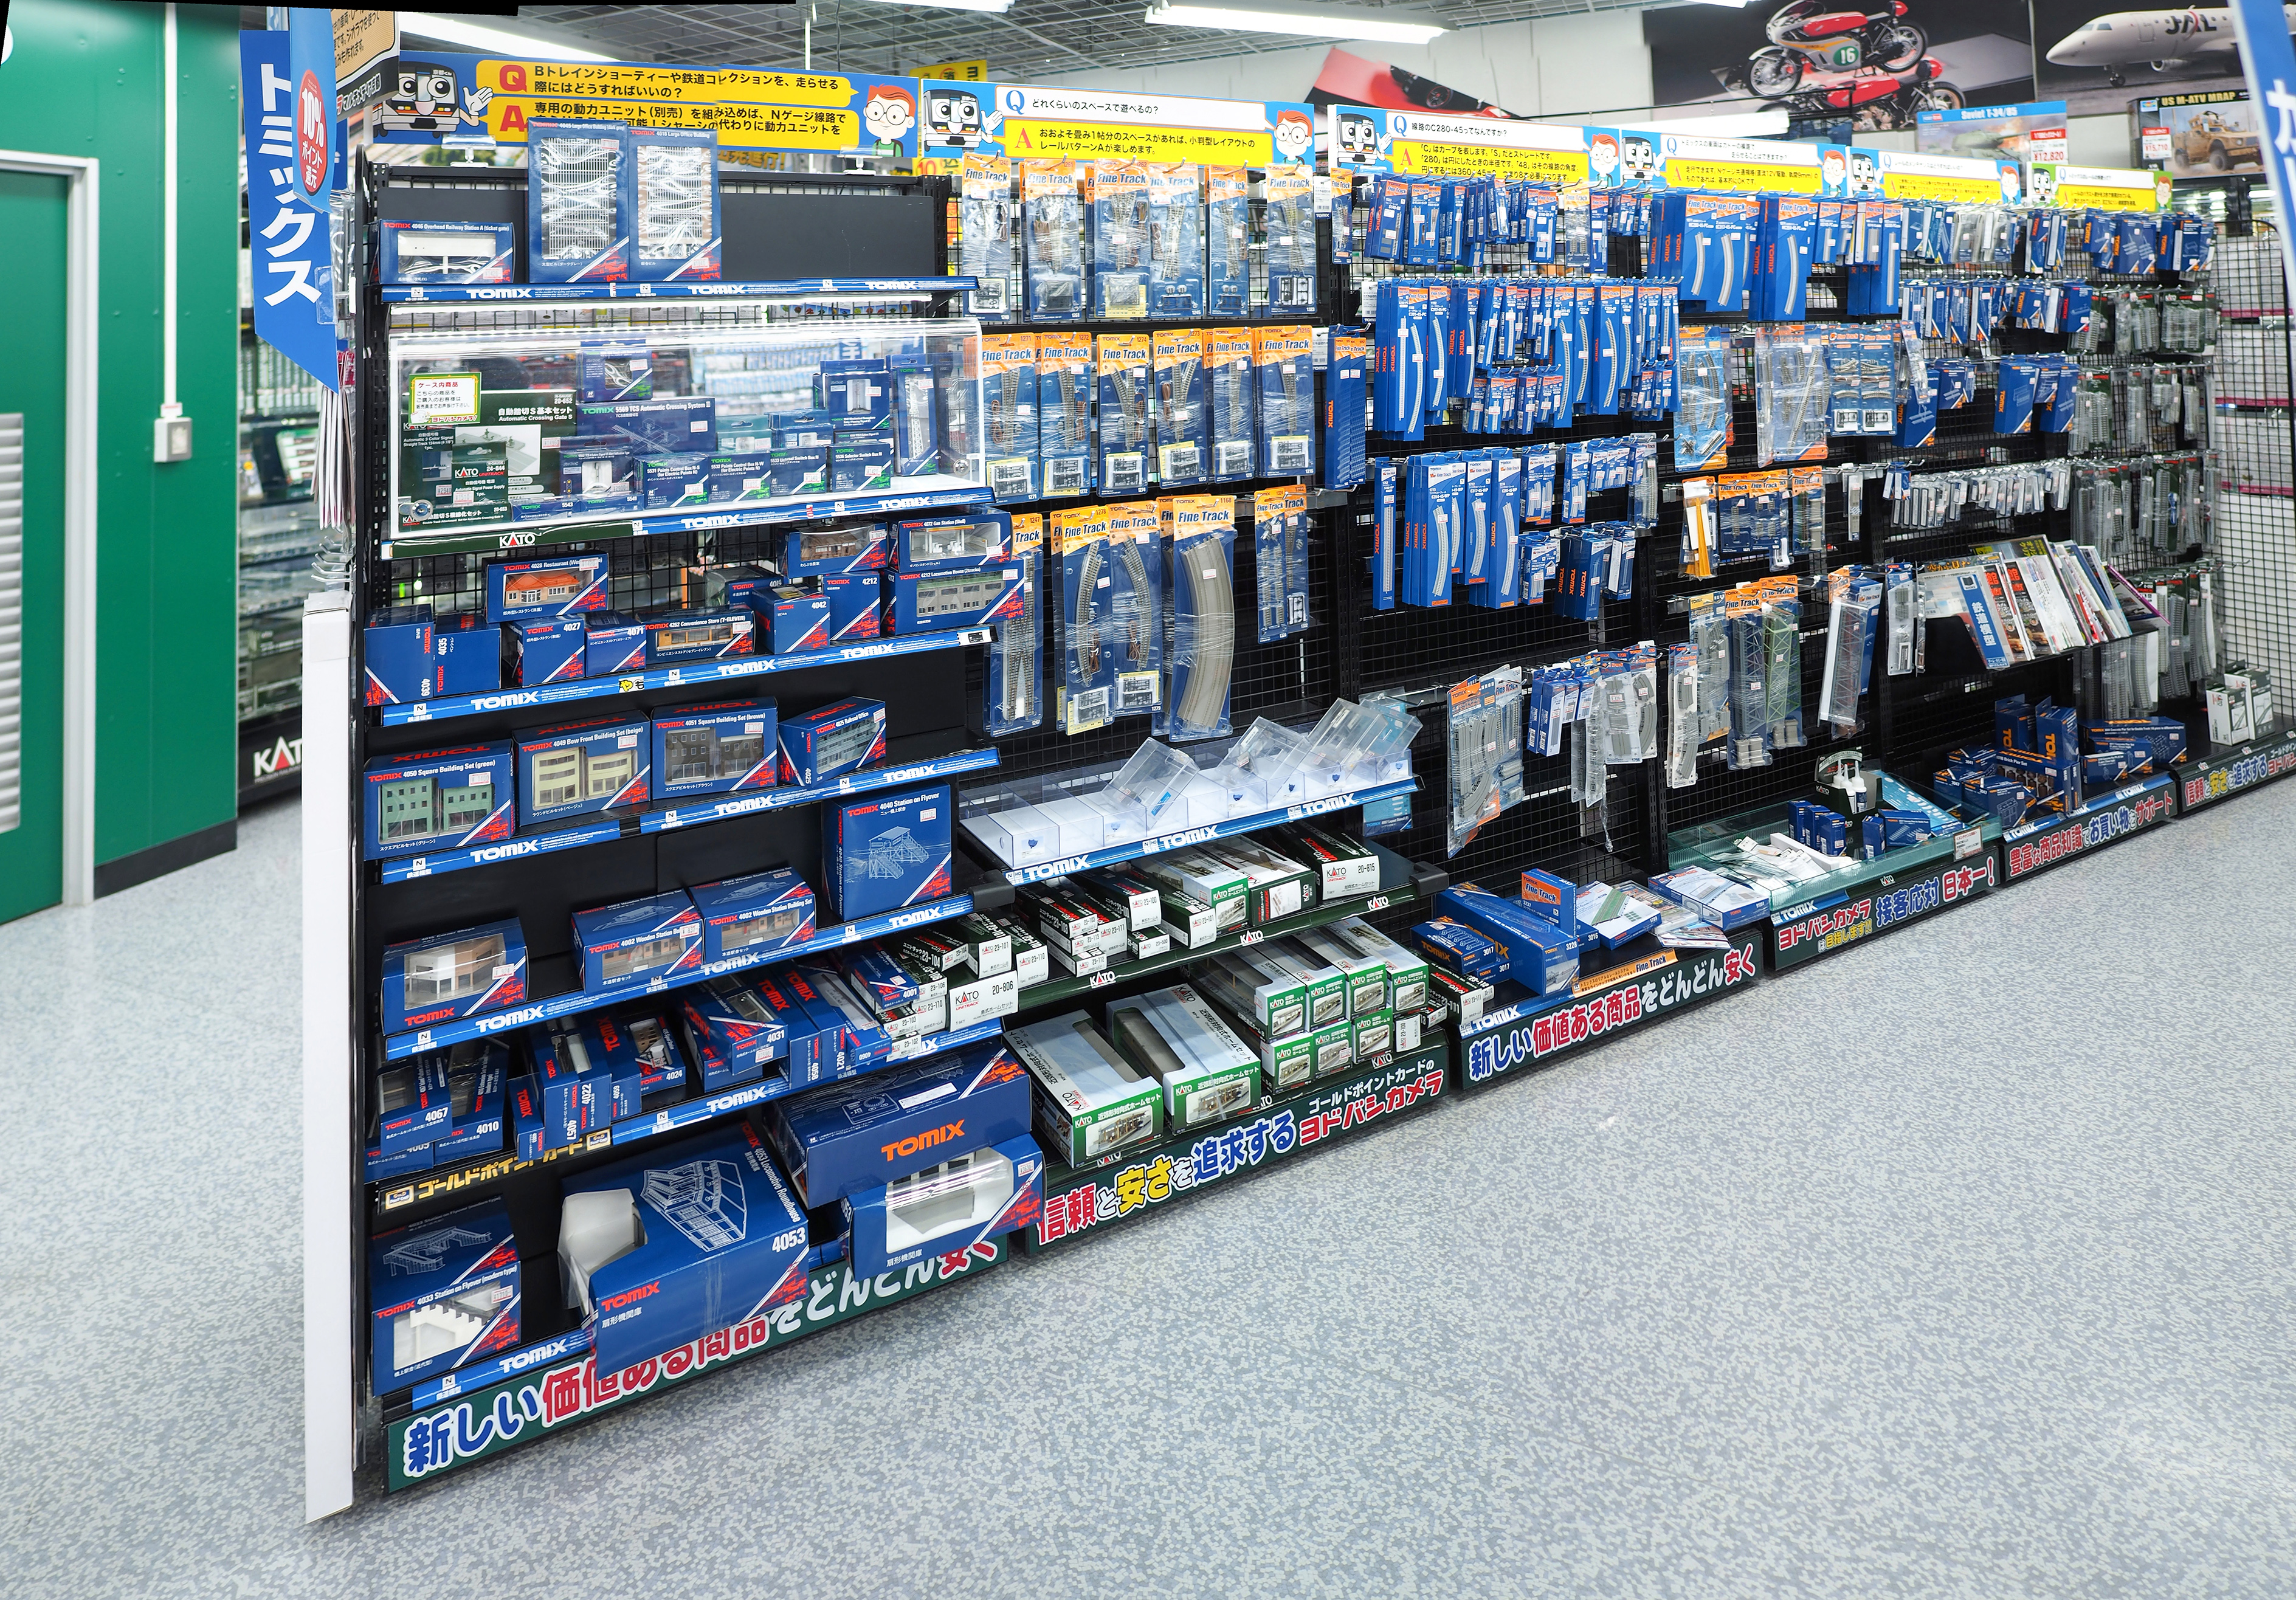
[The Tomix track section. Frustratingly, not everything is stocked.]
One time I bought the wrong package, item 1193 which contains
C541-15-PC(F) x4, at Yodobashi Umeda the day before. I managed to
return it for the right package, item 1740 which contains
C541-15-WP(F) x2, at Yodobashi Kyoto the next day. It took some
head-scratching by several salespersons, a good 30 minutes, and some
monetary gymnastics as I'd already spent the points on something
else. But I'm glad it did get sorted, as I don't need regular Fine
Track.
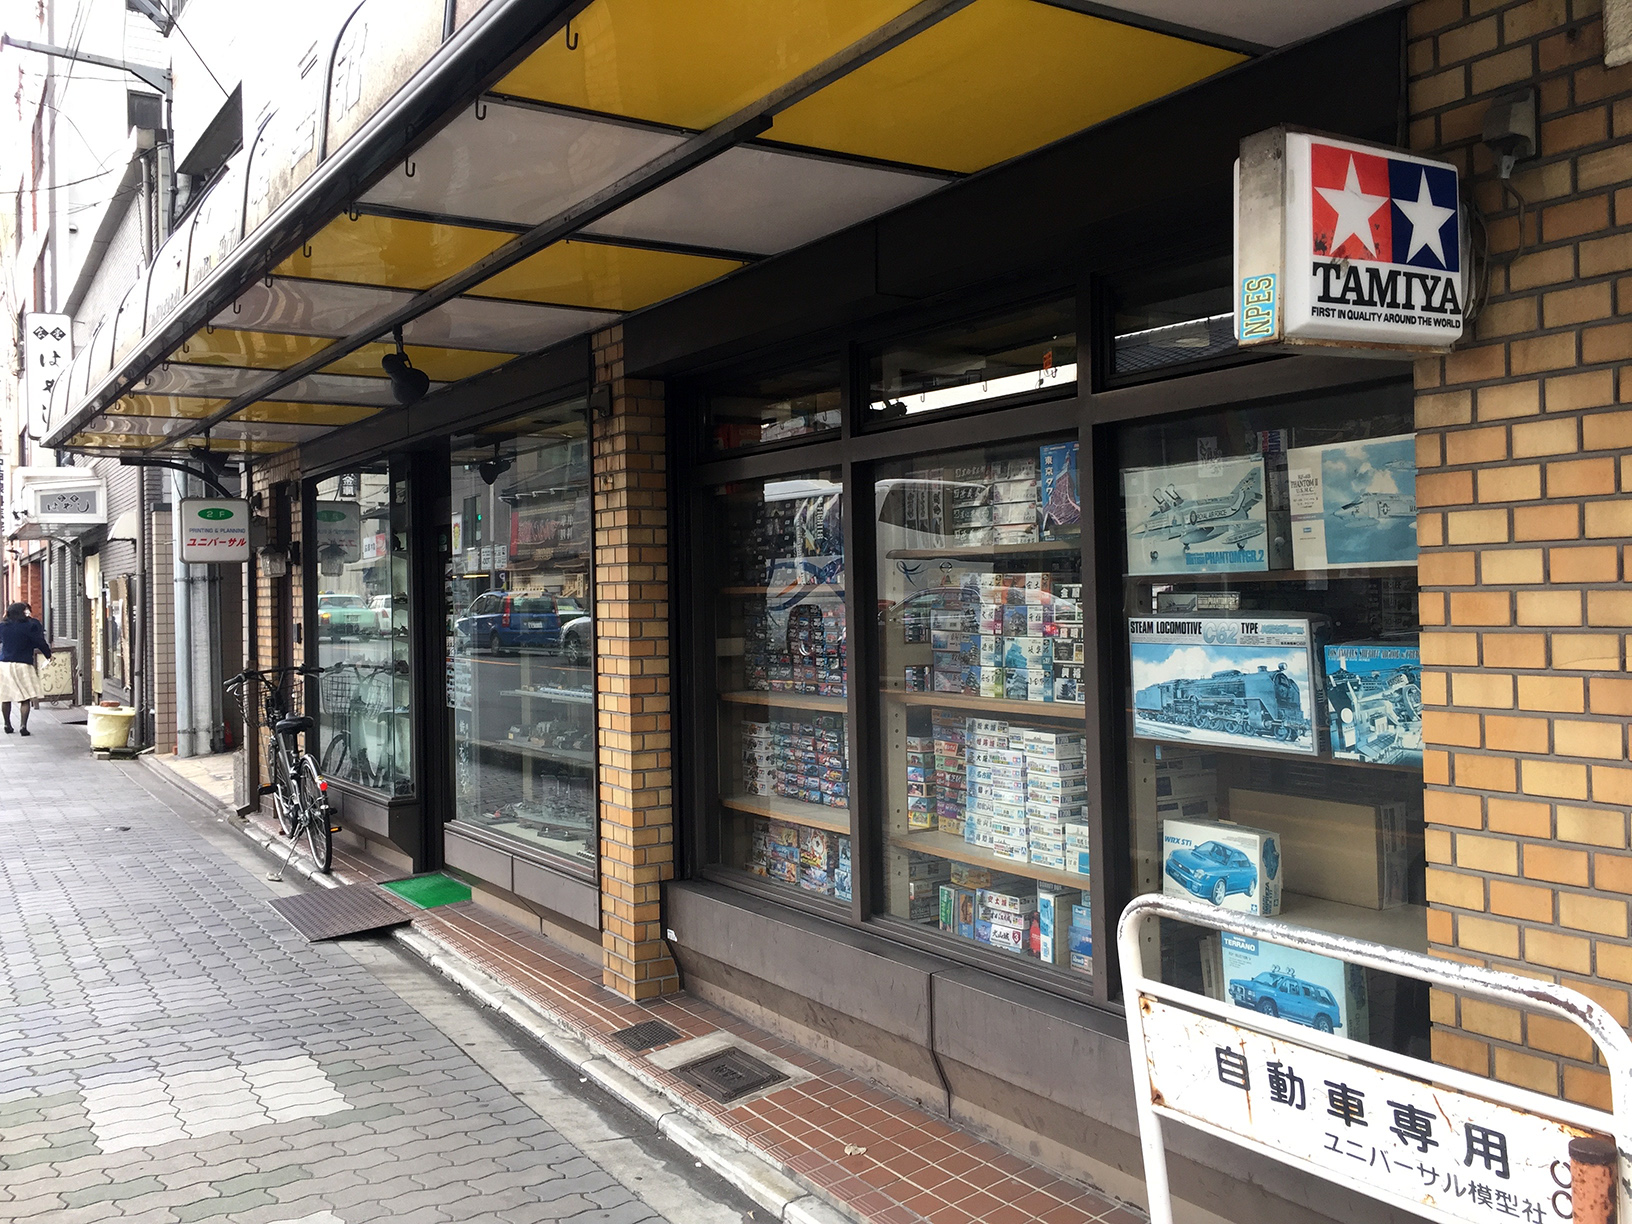
Universal Model Company
My Kyoto friend also told me about an old shop called Universal
Model Company (ユニバーサル模型社) not far from downtown Kyoto and
just a couple of km down Higashi Oji-dori (東大路通) from me at the
University. They have some NOS stuff. The lady there knew everything
about the trains I was searching for.
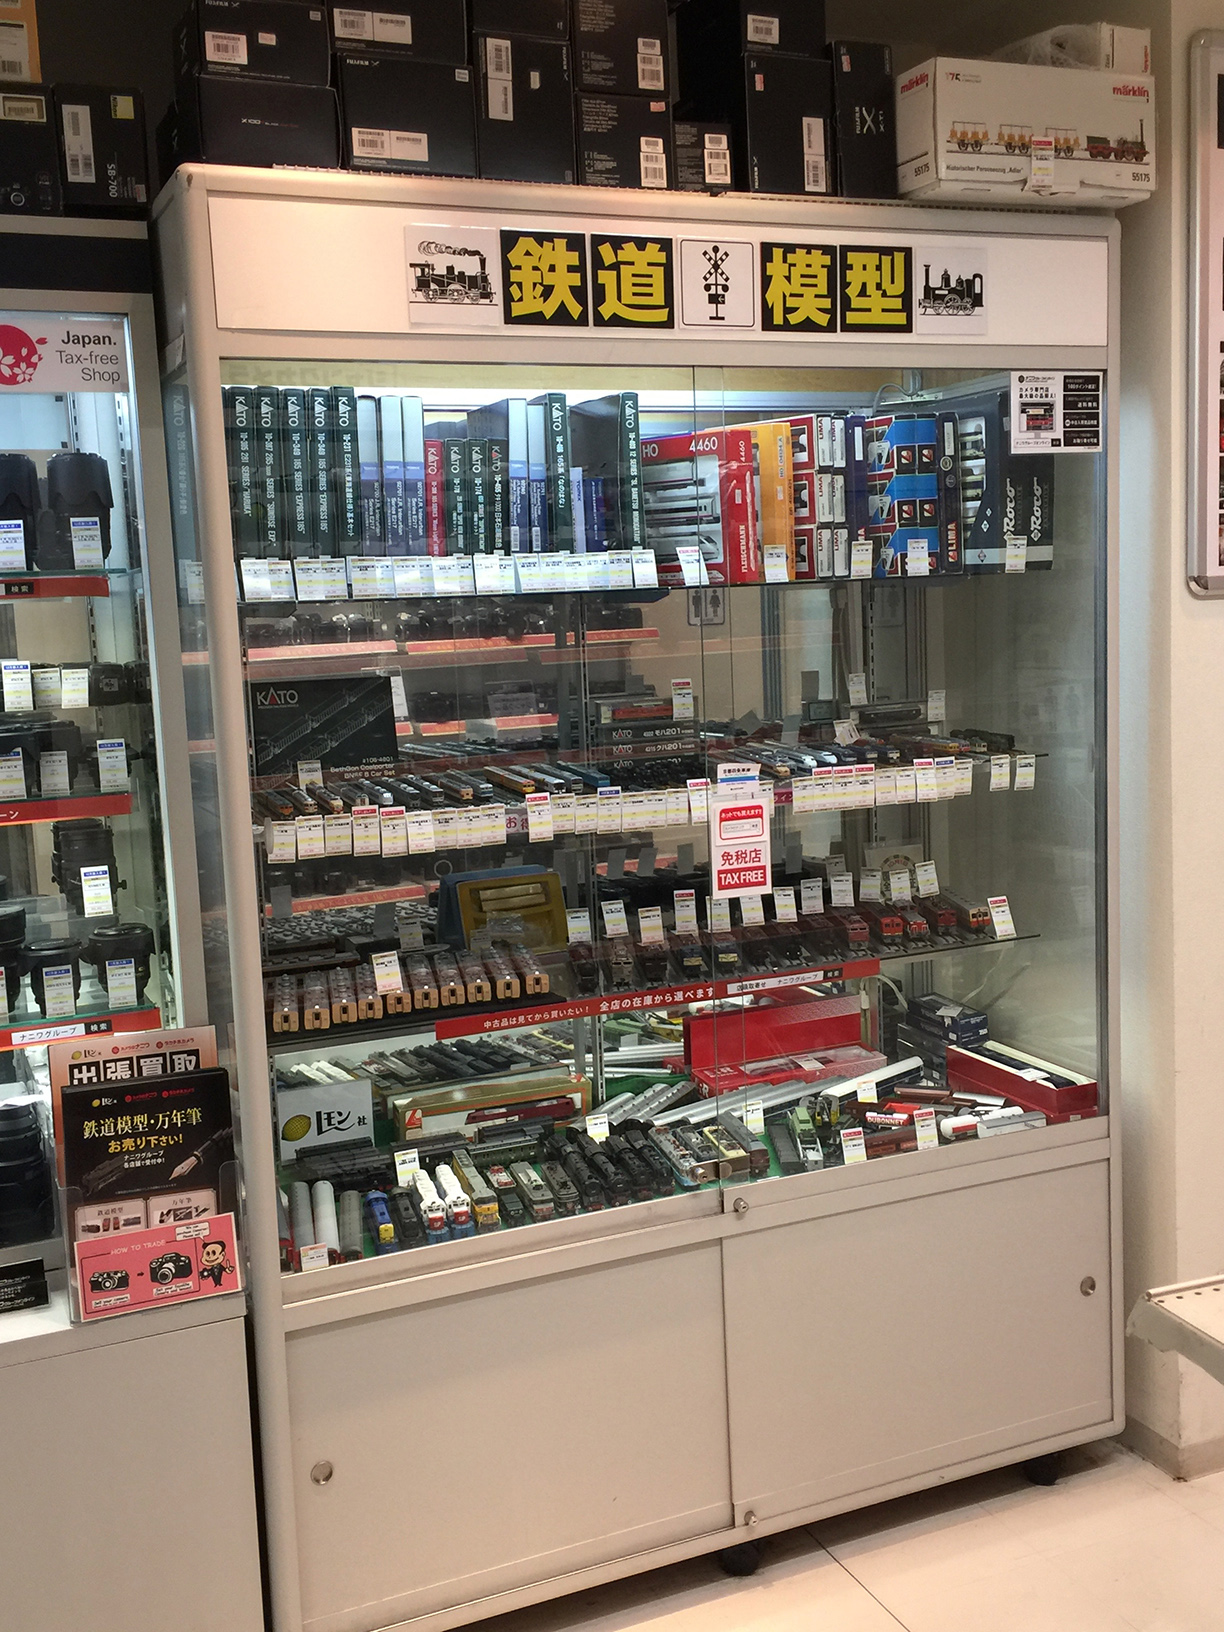
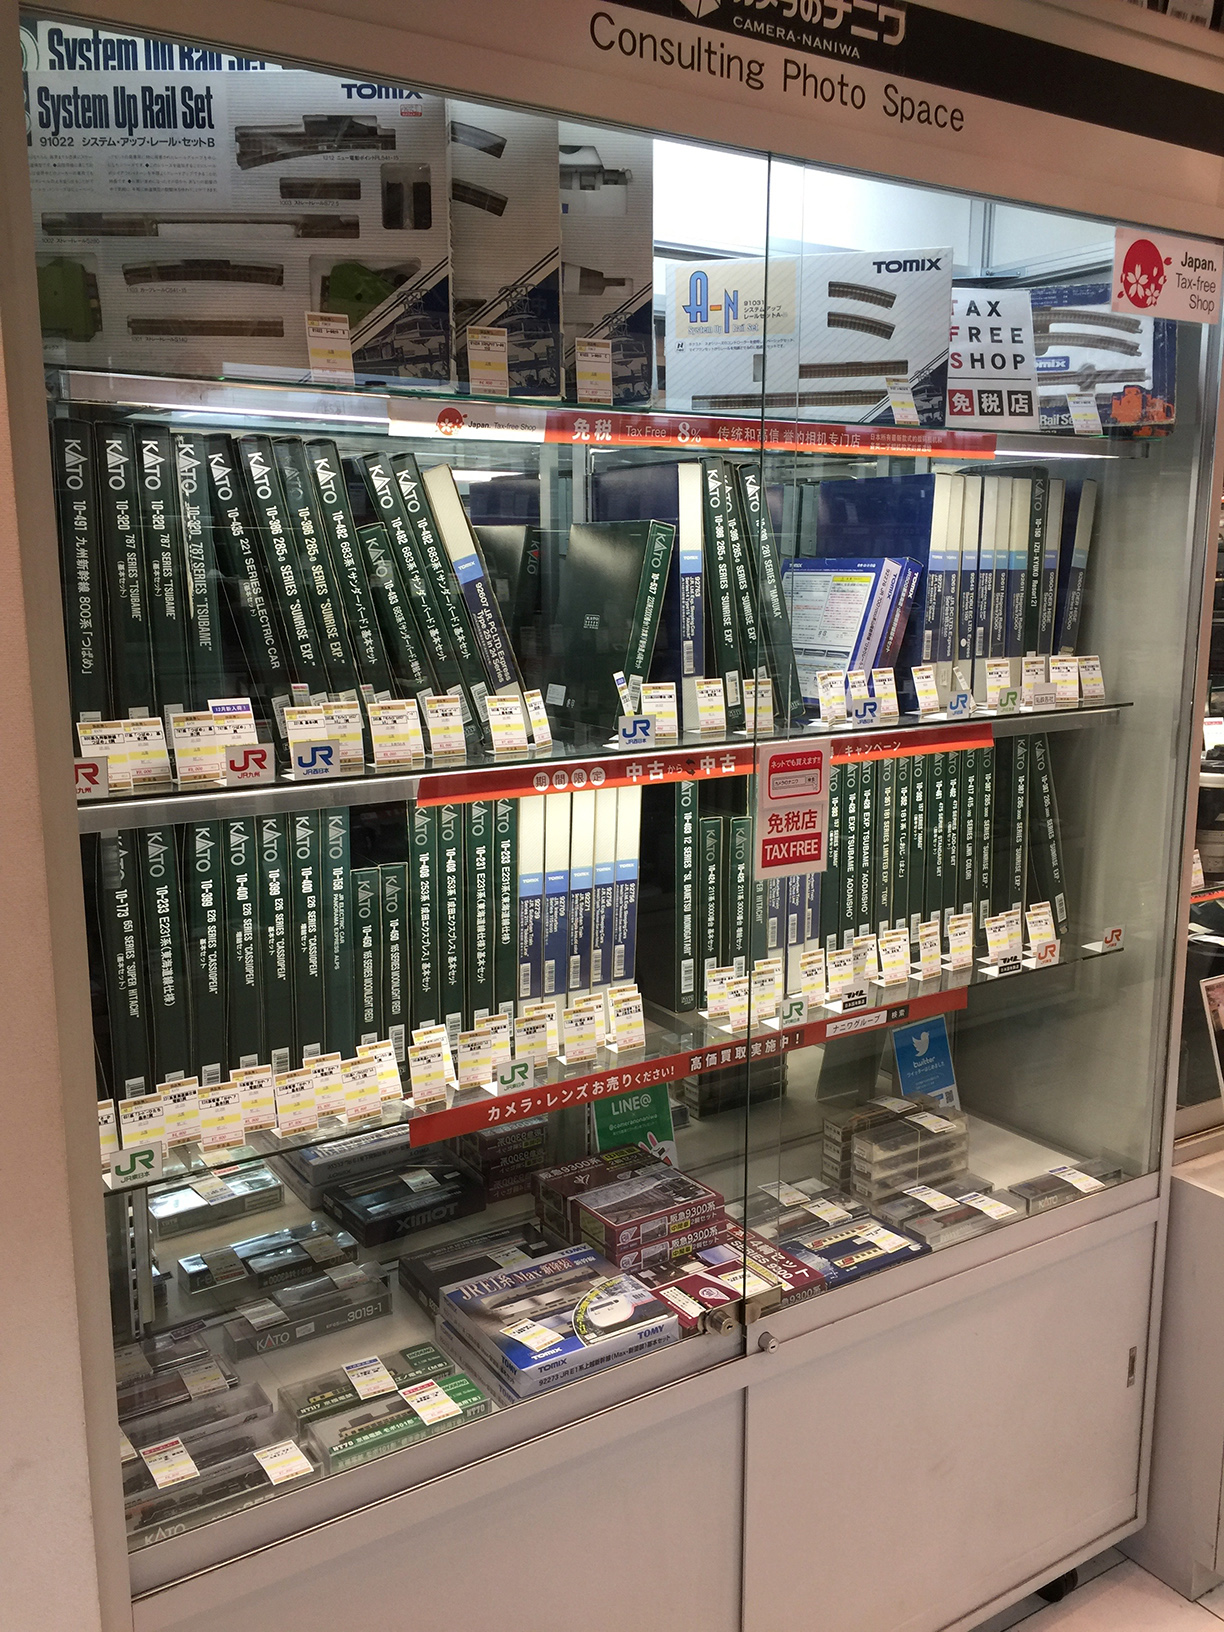
Camera-no Naniwa
Camera-no Naniwa (カメラのナニワ) is a well-known Osaka-based chain
of camera shops with new and used gear (link here). Again, I'm familiar
with them from my photography hobby. As it happens, they have a small
store on Shijo ((四条) smack in the middle of downtown Kyoto (address:
〒600-8004 京都府京都市下京区 四条通御幸町西入奈良物町372番). They
have two cases of used model train gear, pictured above.
Kato in Isetan JR Kyoto
On the 9th floor of the Isetan department store at JR Kyoto station,
there is a very small Kato company store. (See the plan of the 9th floor here.)
I first encountered this place by accident, before I had even the
first glimmer of the idea of behind my project.
I oogle the pricier Hankyu (阪急) brown trains here. My mind marvels at
the number of different ways there are to spend money on the brown
Hankyu. There is a windowsill layout at the back with a view of the
tracks at the station.
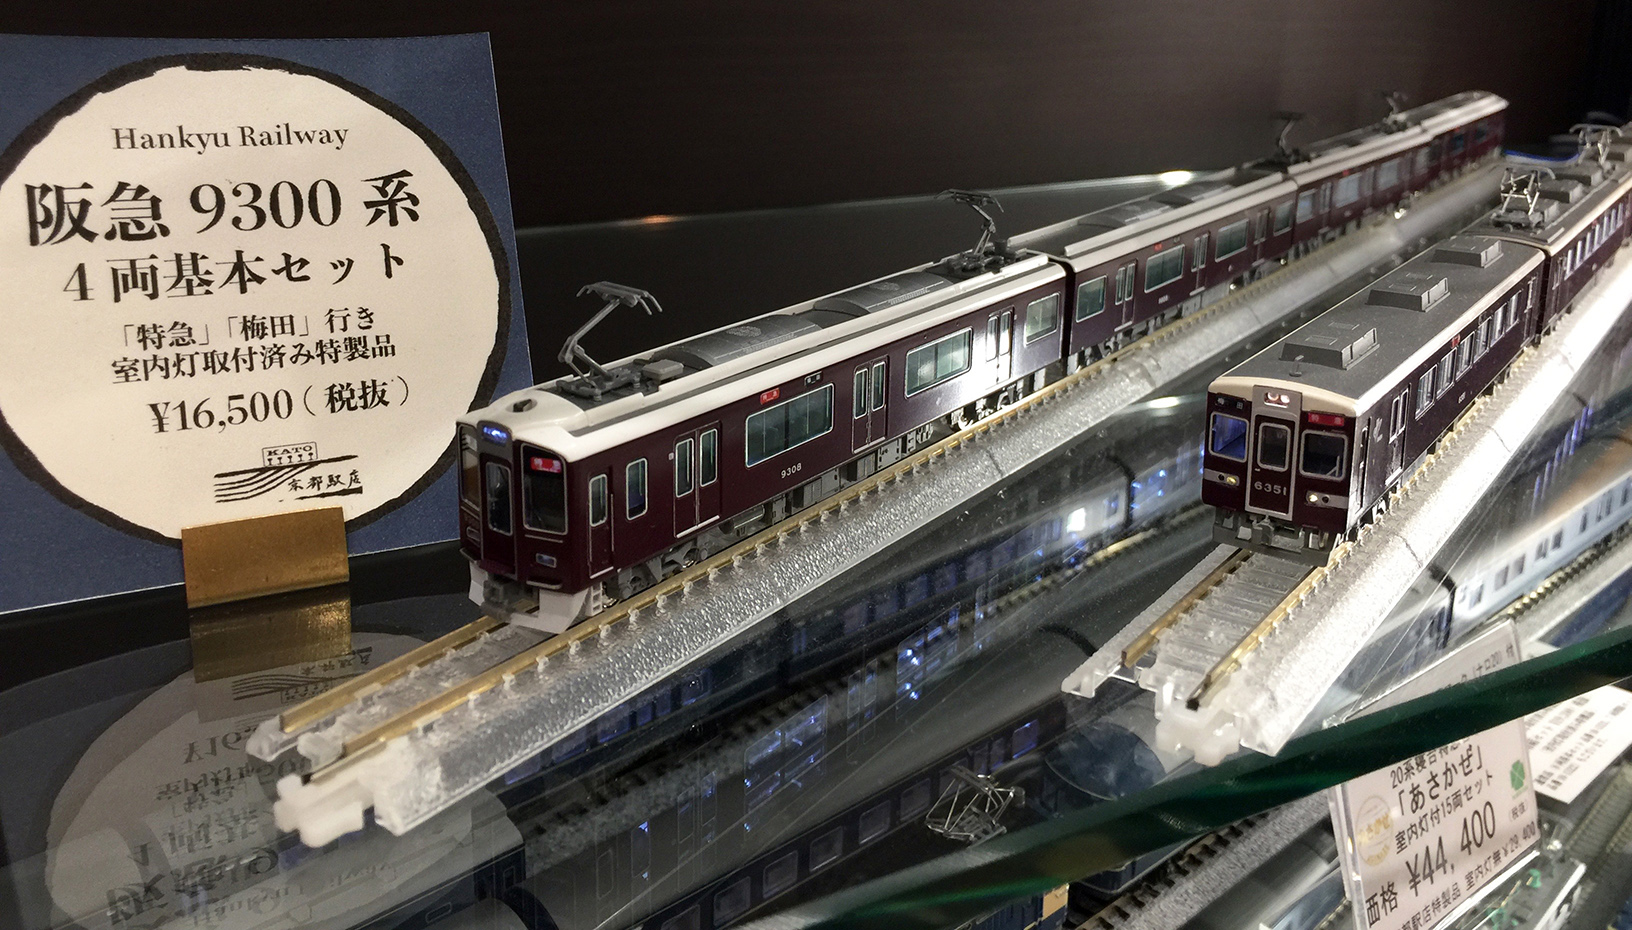
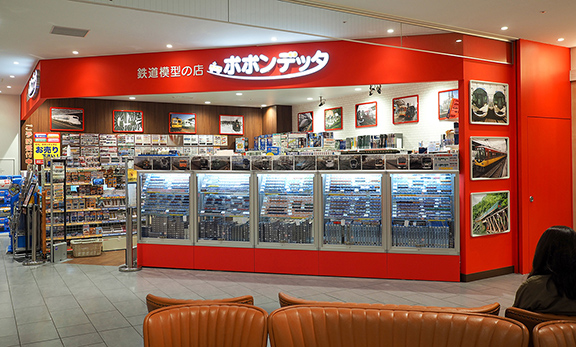
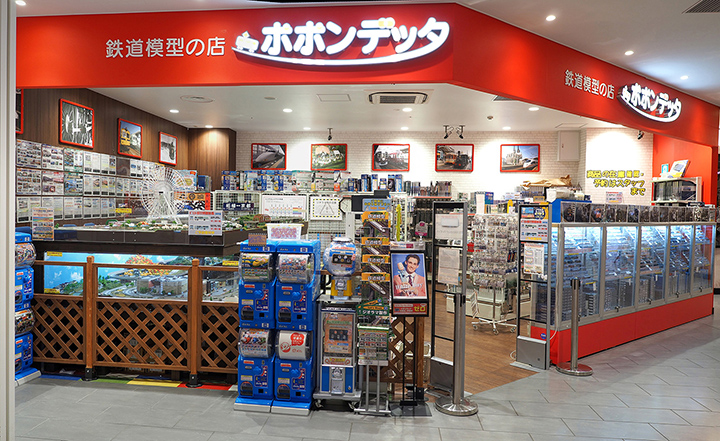
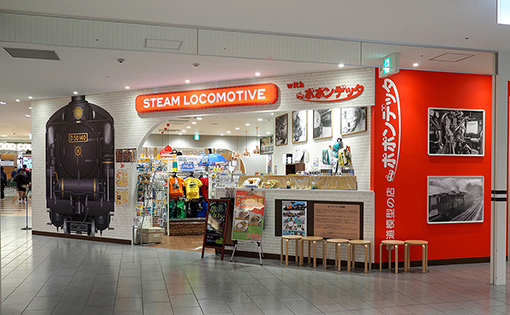
Popondetta (ポポンデッタ)
Popondetta is a big chain with stores across Japan.
This one is on the 4th floor near the restaurant area of the Aeon Mall,
a short walk from the south side of Kyoto station. This Popondetta (ホポンデッタ) is much smaller than the Nipponbashi one; more
importantly (unlike Nipponbashi), there is no room and the secondhand
selection is rather meagre here. There are two stacked layouts inside, see
above right picture. I think they should delete them and make room for
more equipment. Another reason is that just across from the entrance is
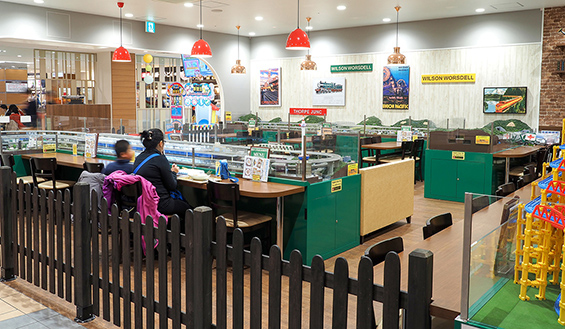
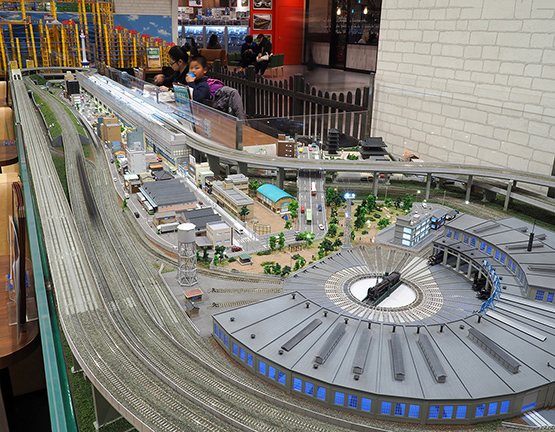
their Steam Locomotive restaurant, which has two big layouts.
[Youngster and his mom getting dinner while watching
the trains.]
Below we have Shinkansens running at full tilt on the long outer
(elevated) track. They look good at max speed if they're given
substantial room to run. Down below are a few other trains running
but are overshadowed (literally) by the Shinkansen. But actually, the
thing that caught my eye is the model of Kyoto Tower at the far
end. I've never seen a model in any of the shops, and I've always
wanted one.
Joshin is a big general electrical/electronics chain. But in Namba,
more precisely Nipponbashi (日本橋), they have a store called Super Kids
Land link.
As you can see, the 5th floor is dedicated to model trains. I got
my 50% off Modemo NT142 here.
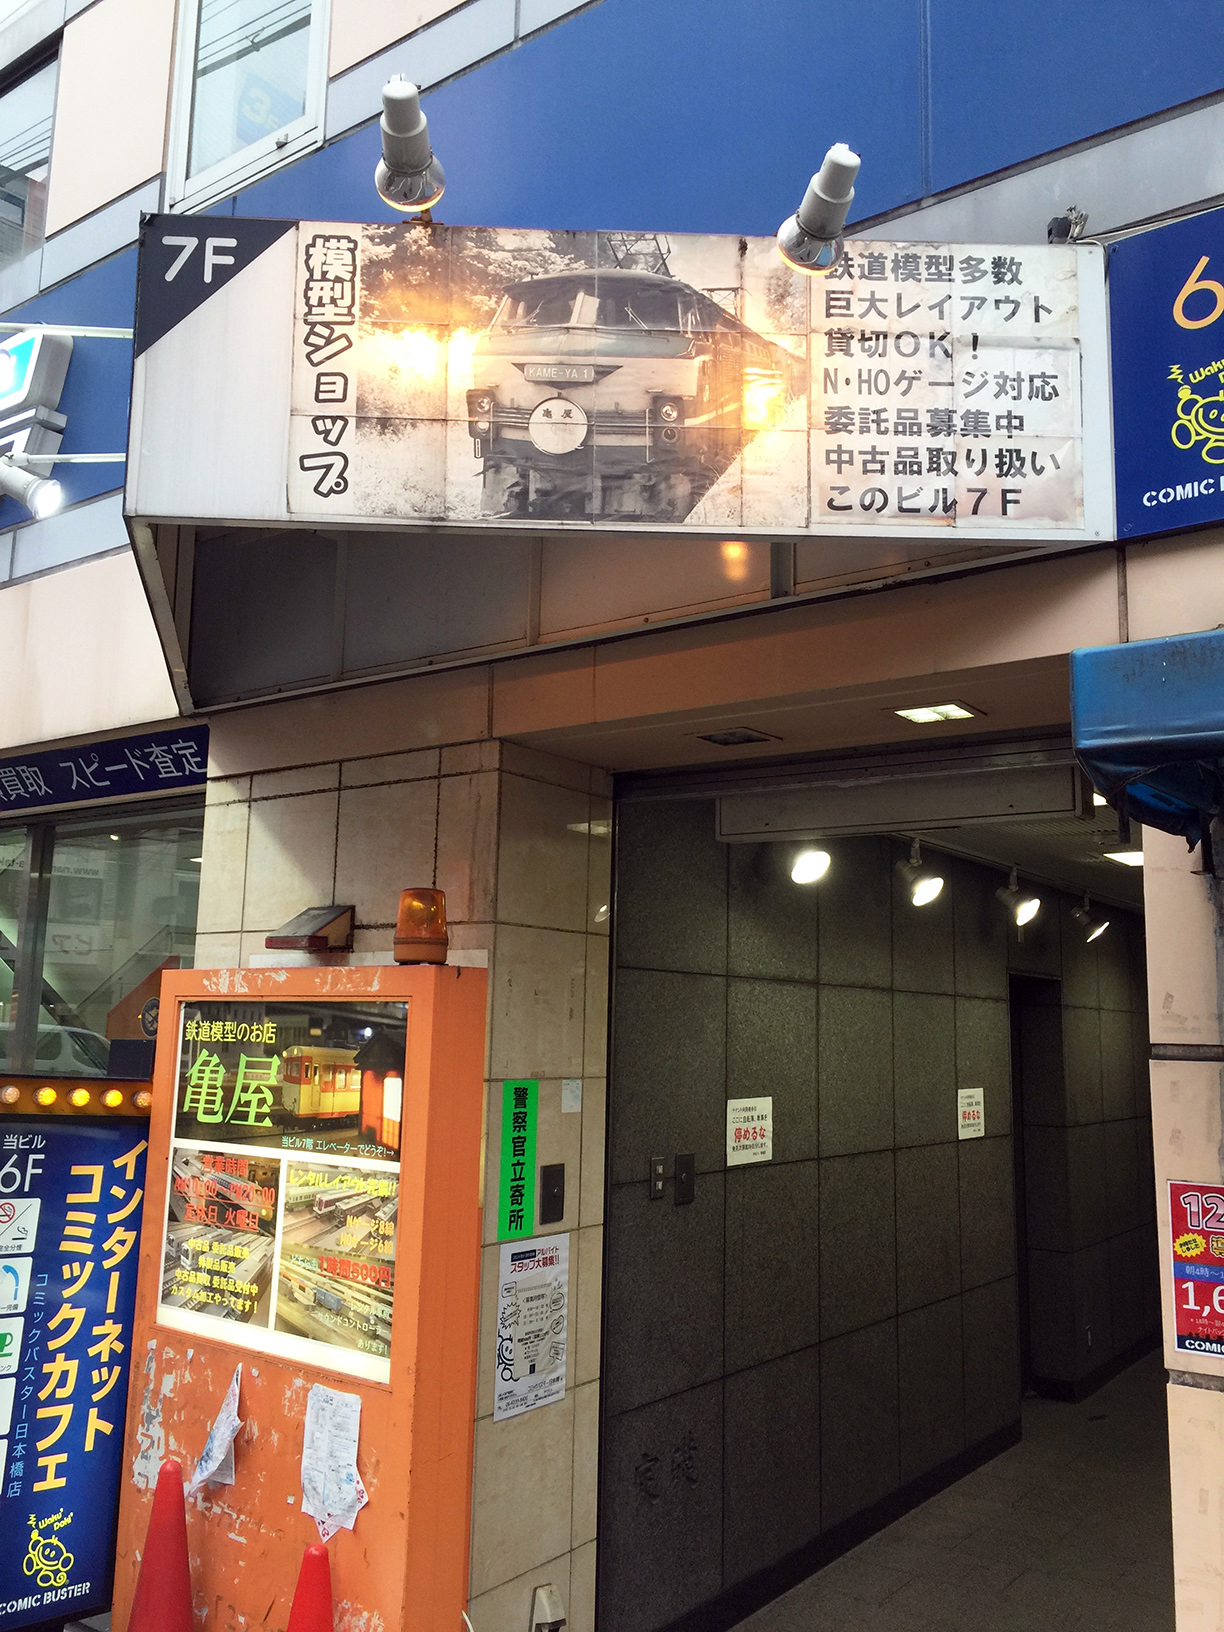
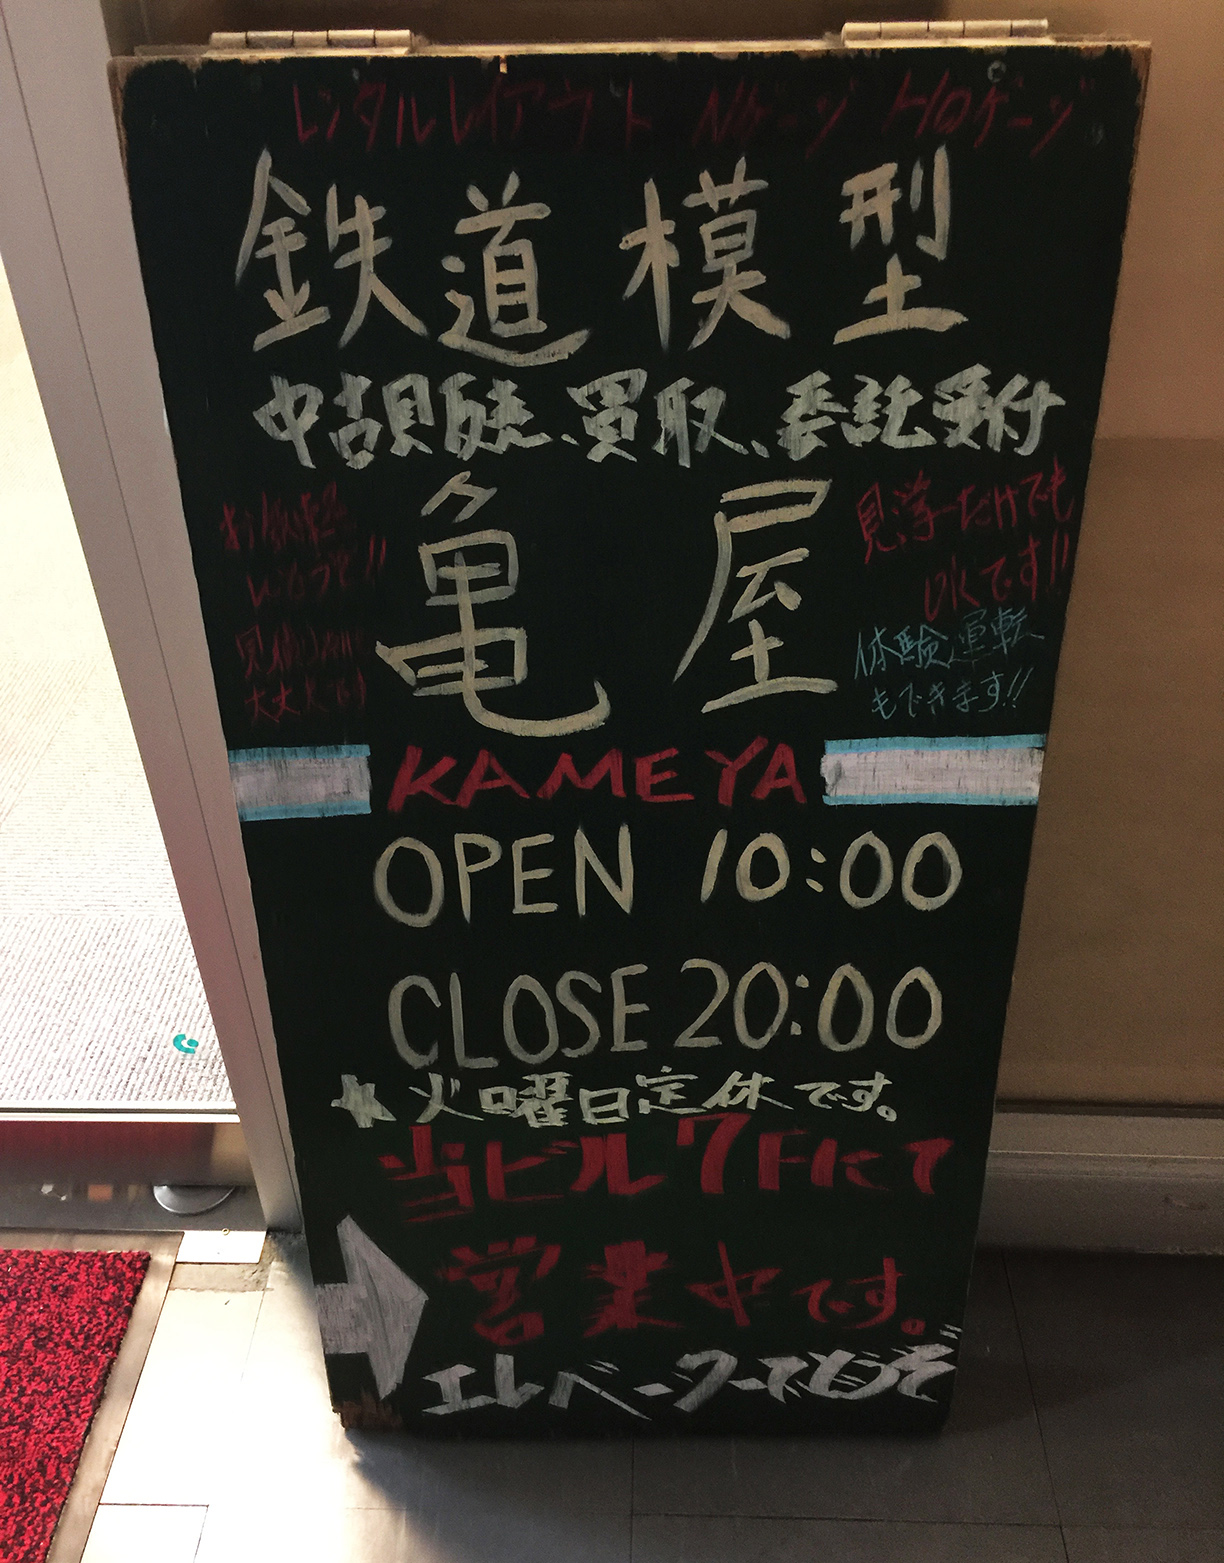
Kameya
Kameya (亀屋) is a place I happened upon by accident after visiting
Joshin on my way to Takashimaya (Namba). They're on the 7th floor of
the building through this small entrance.
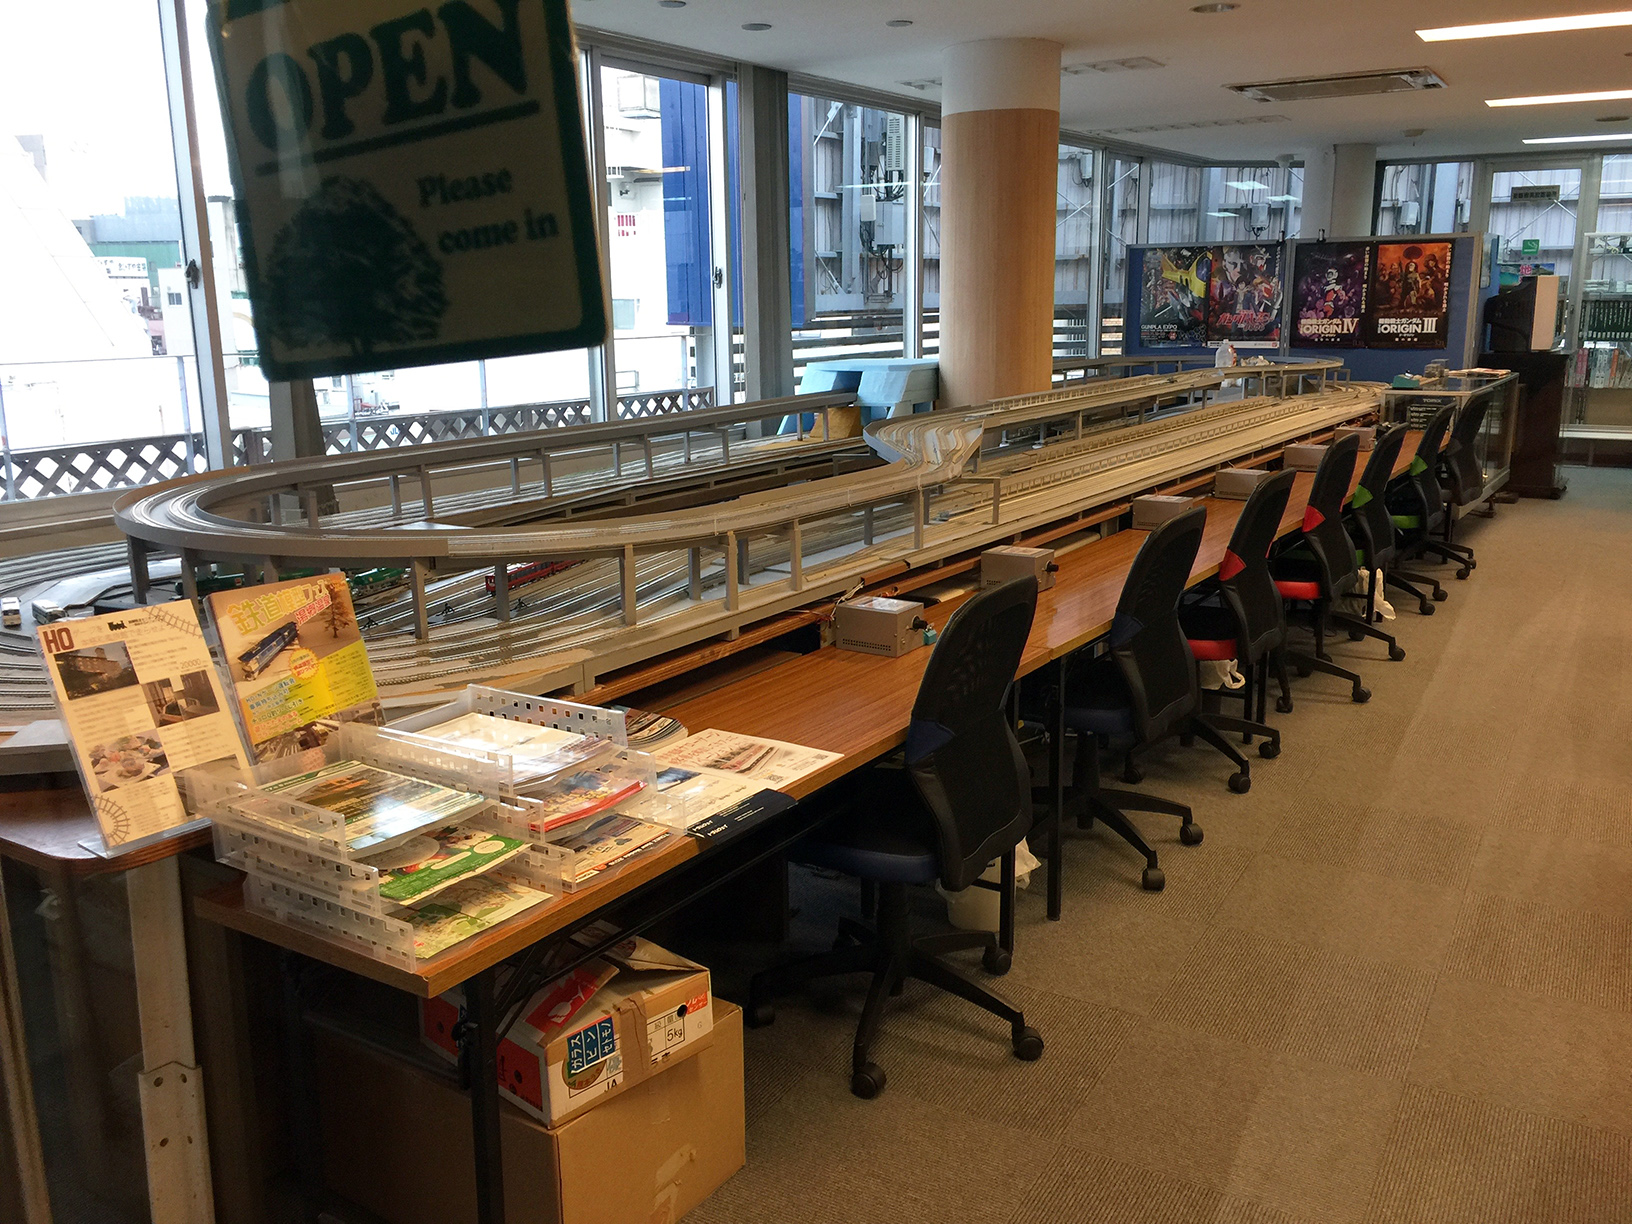
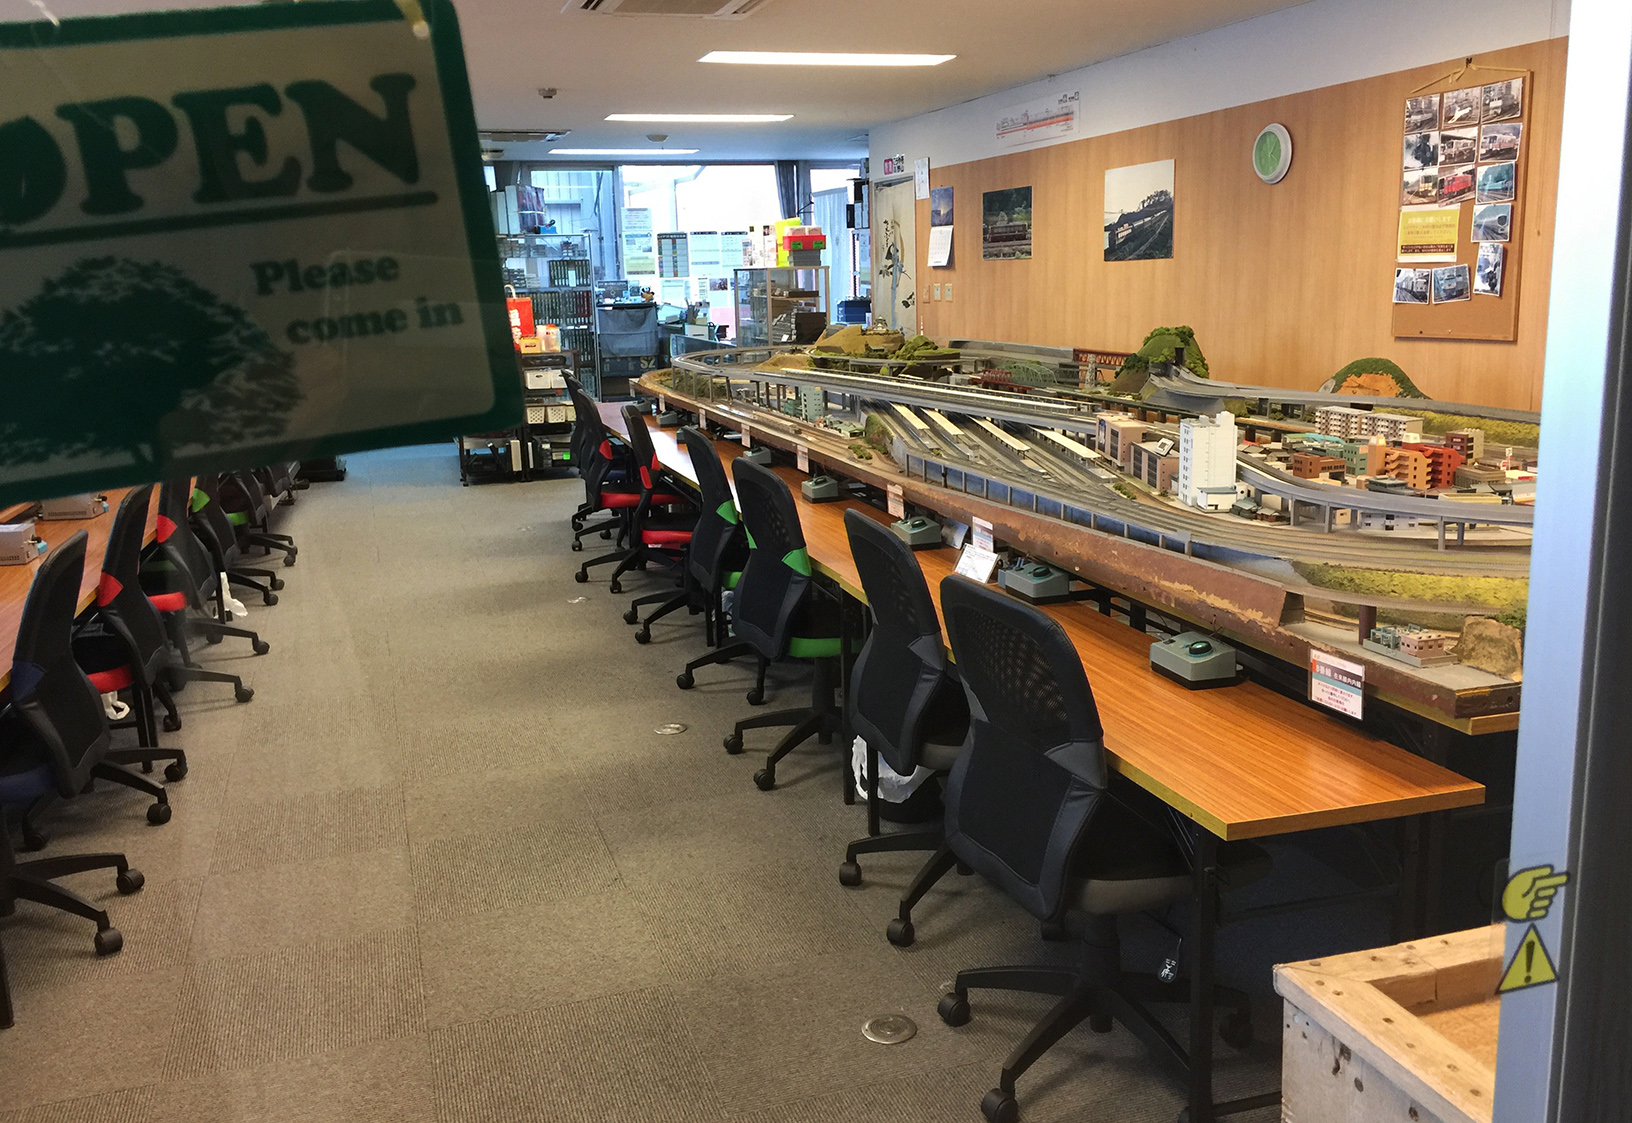
They have big layouts (HO and N) on either side of the room, see
below, and stuff to sell.
[HO left side.]
[N right side.]
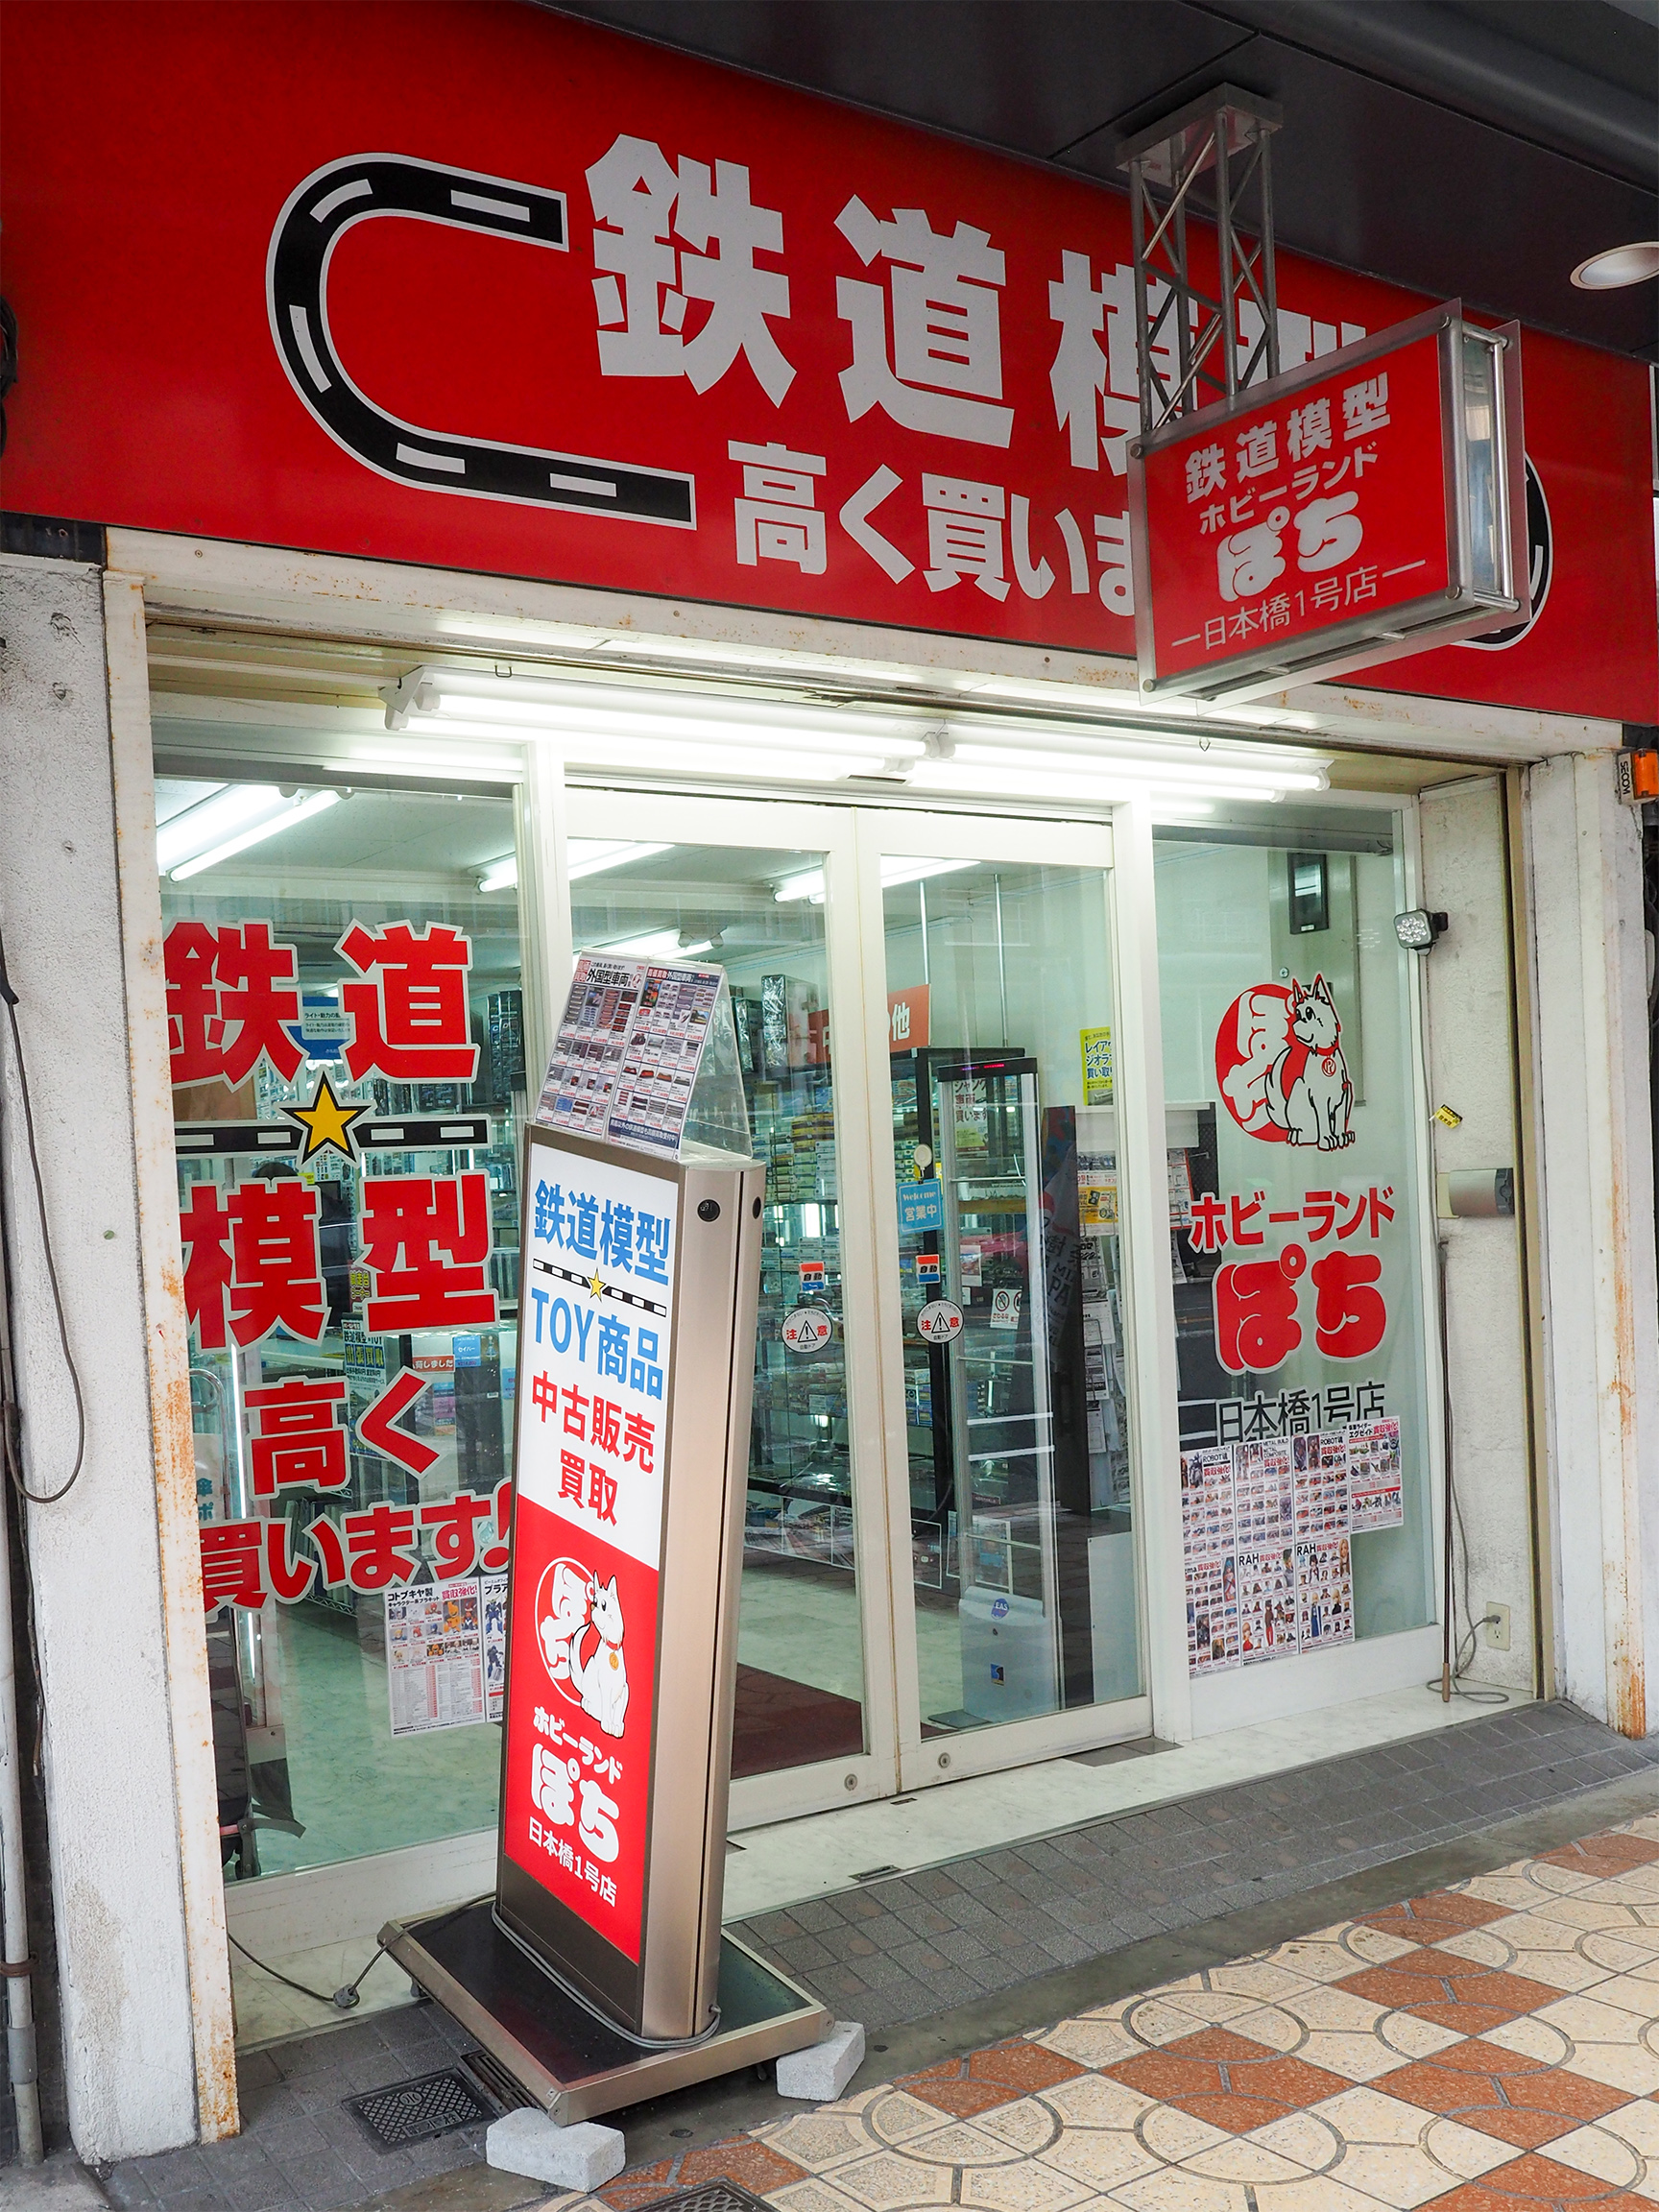
Hobbyland Pochi (ホビーランドぽち)
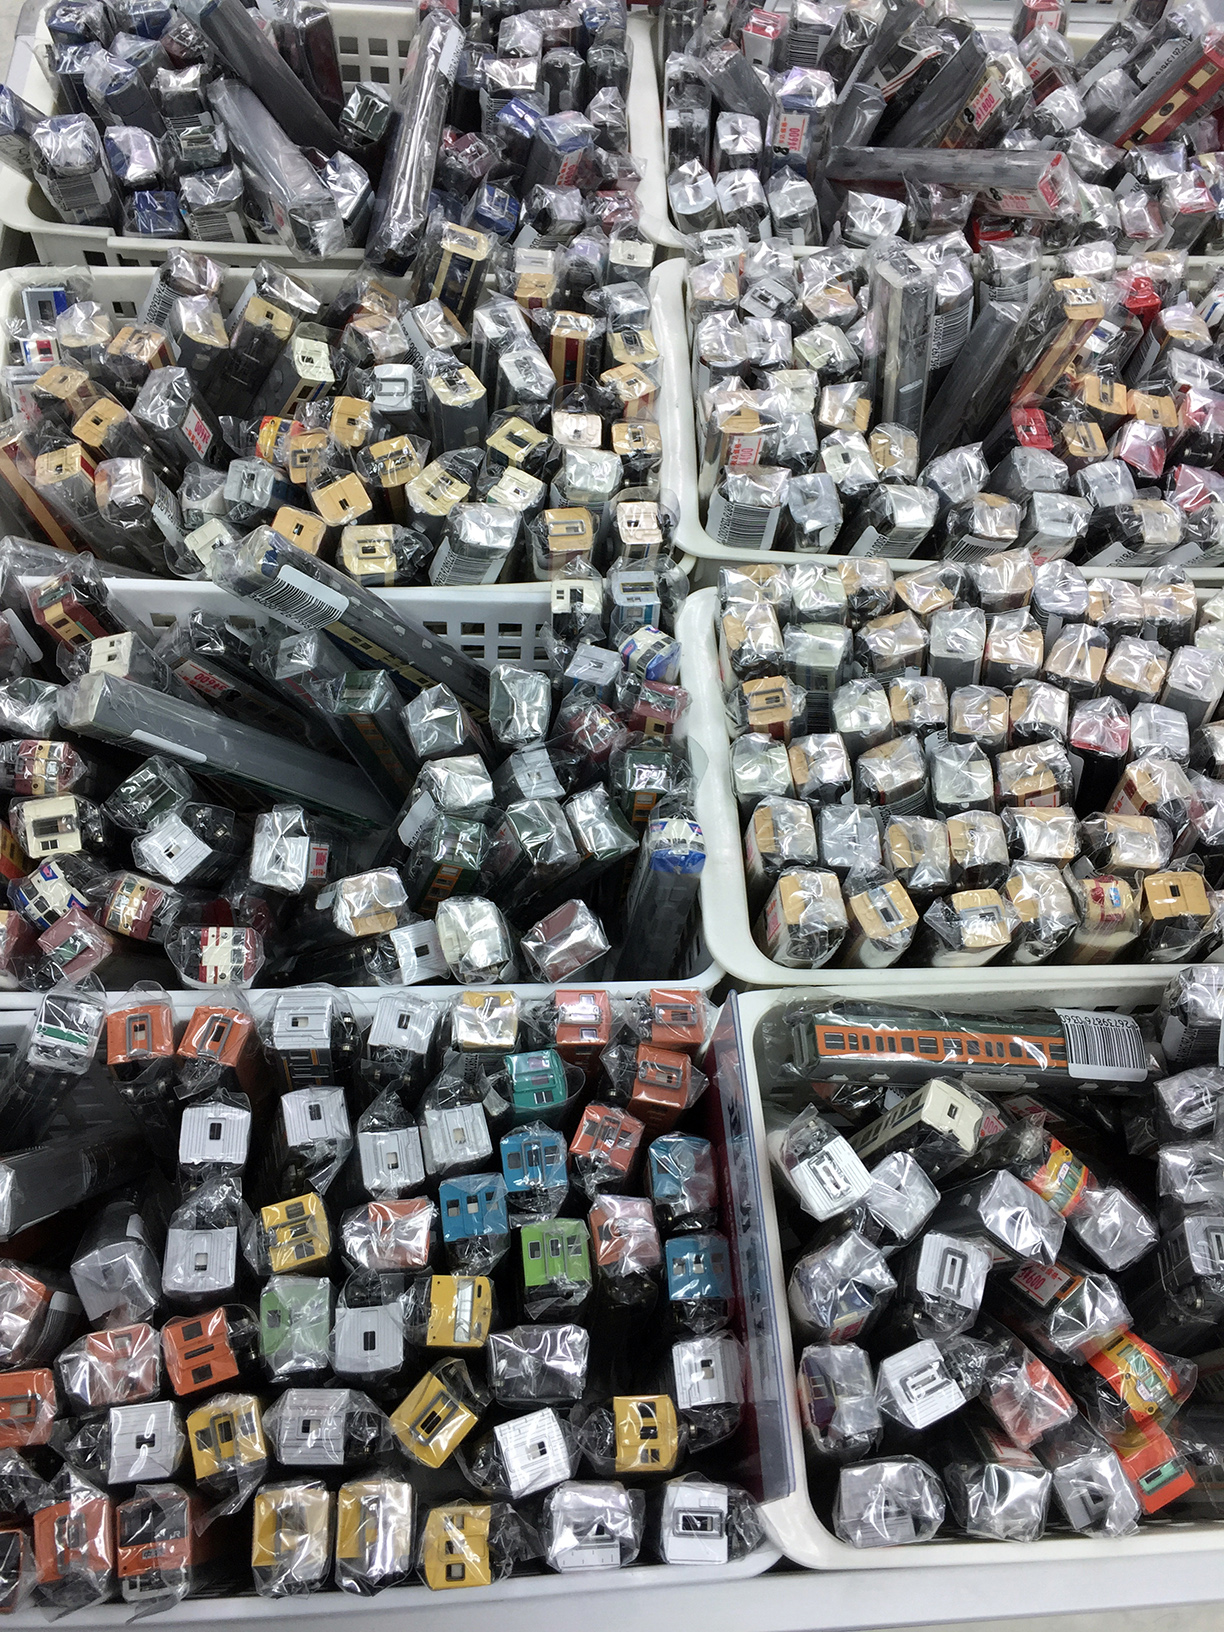
A small but impressive store with lots of used trains (link here).
[Individually wrapped and priced.
Try looking through these?]
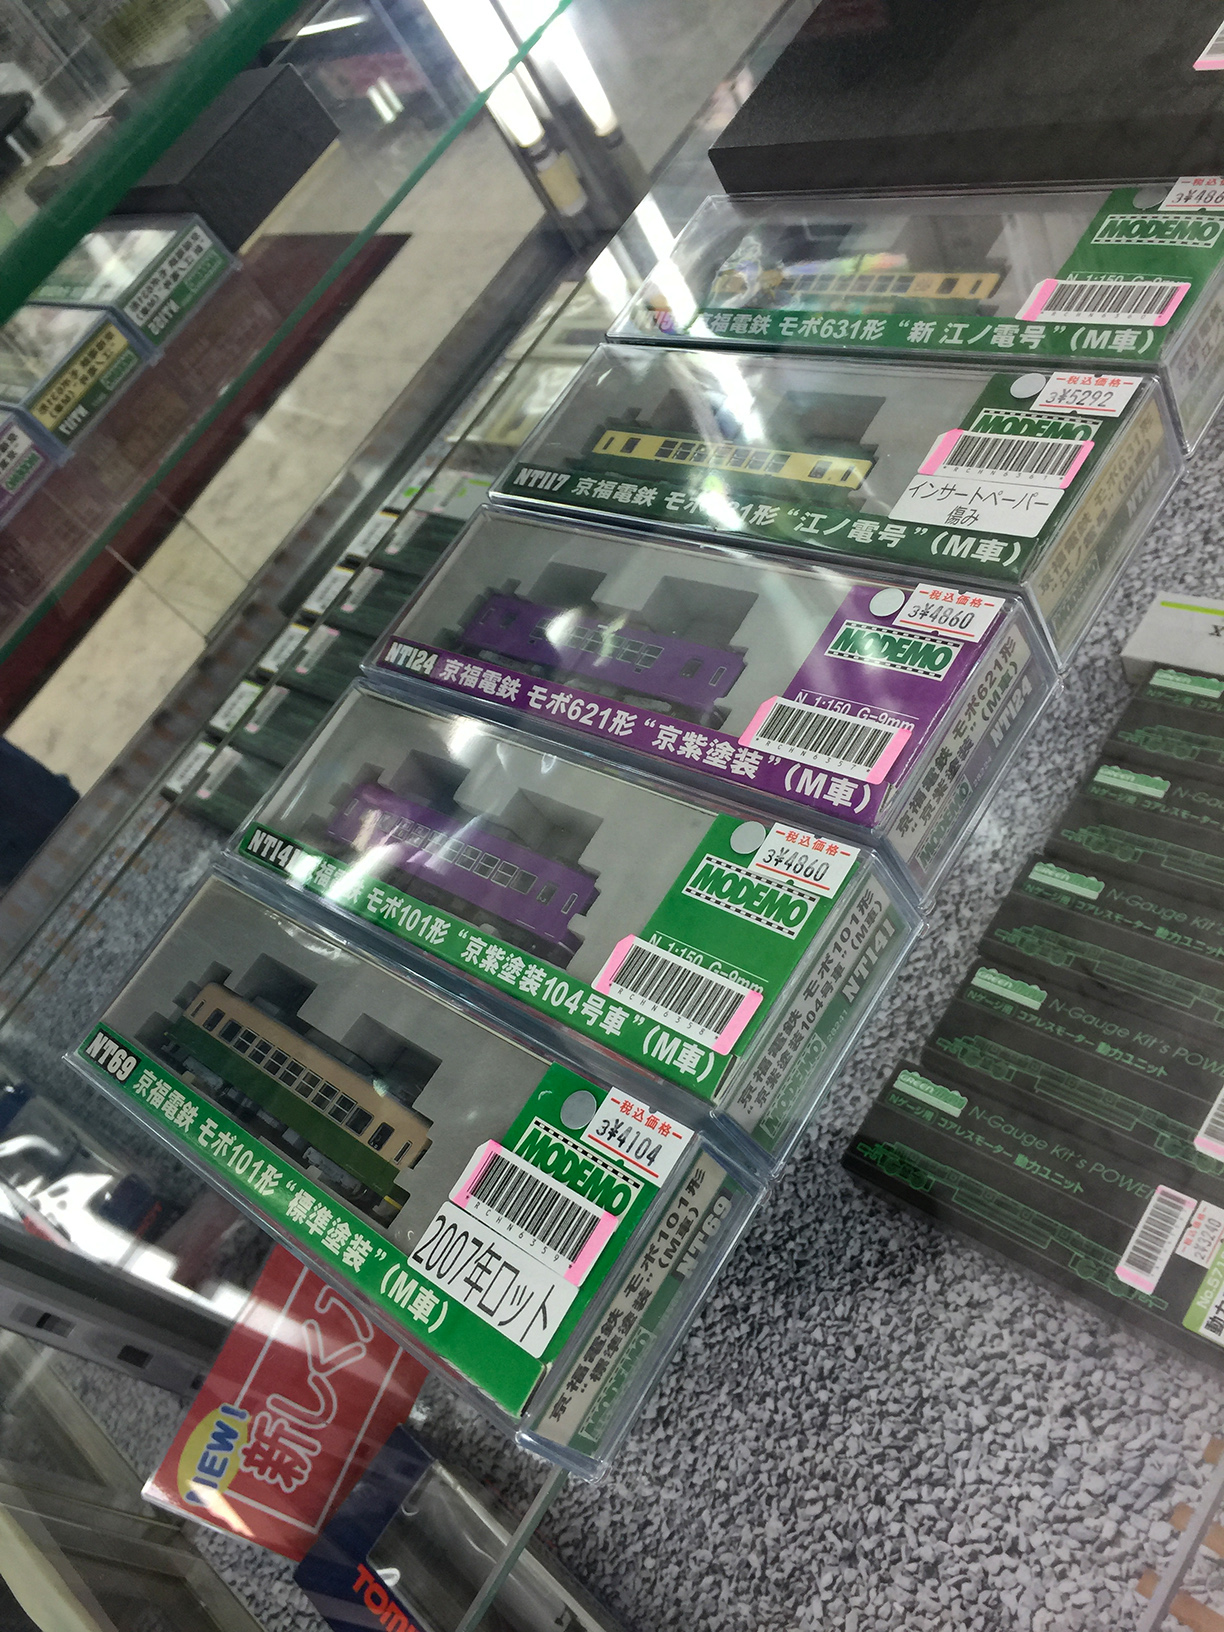
[2007 Keifuku モボ101形]
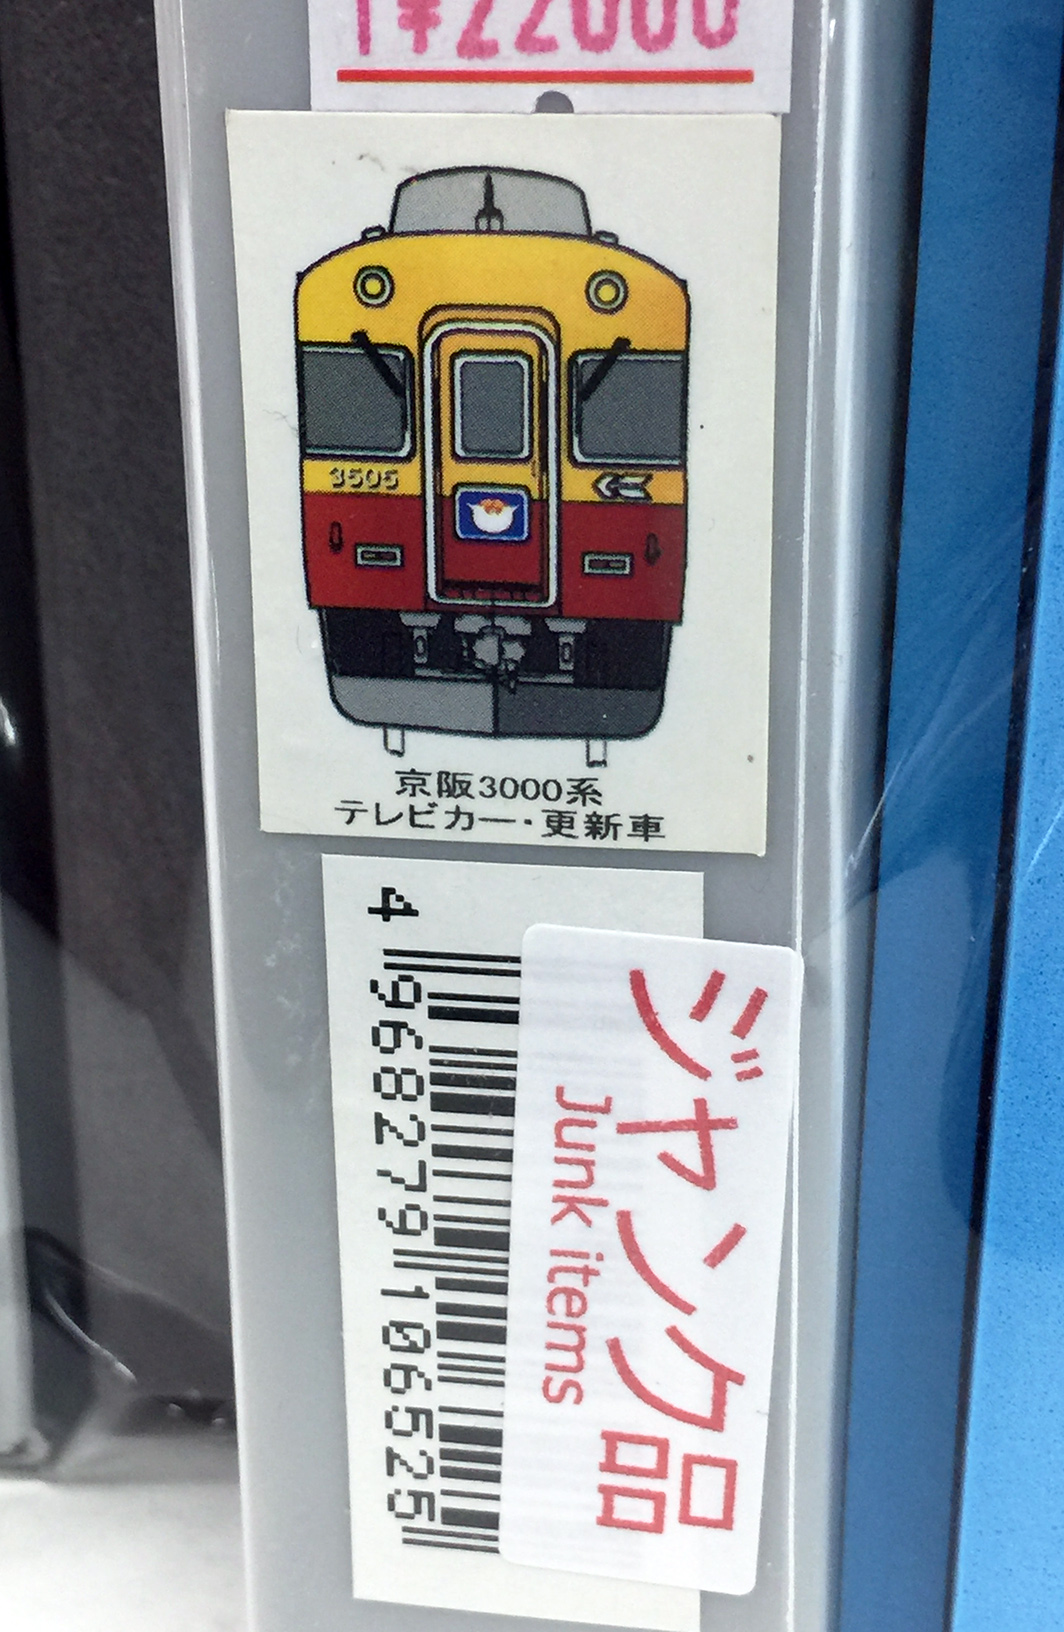
[At 22,000 yen, junk item?]
[There's a Keihan 3000 double decker in there?]
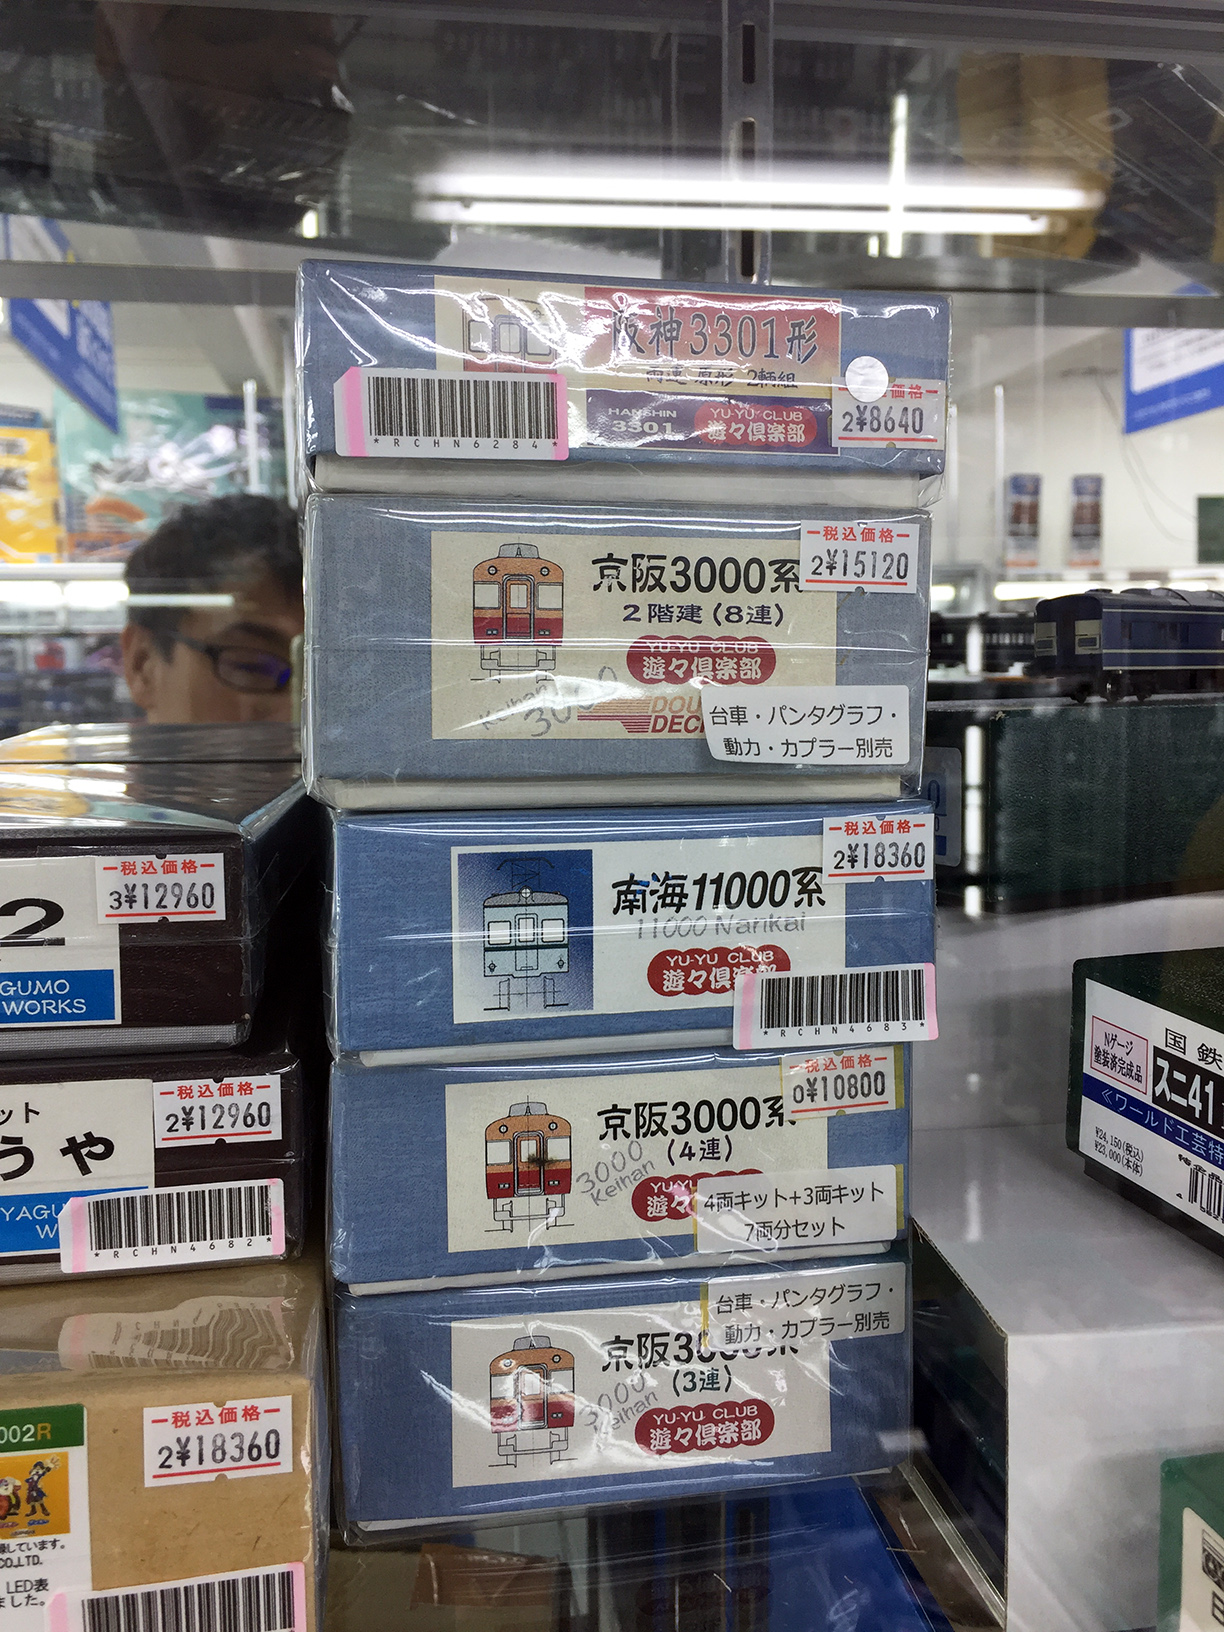
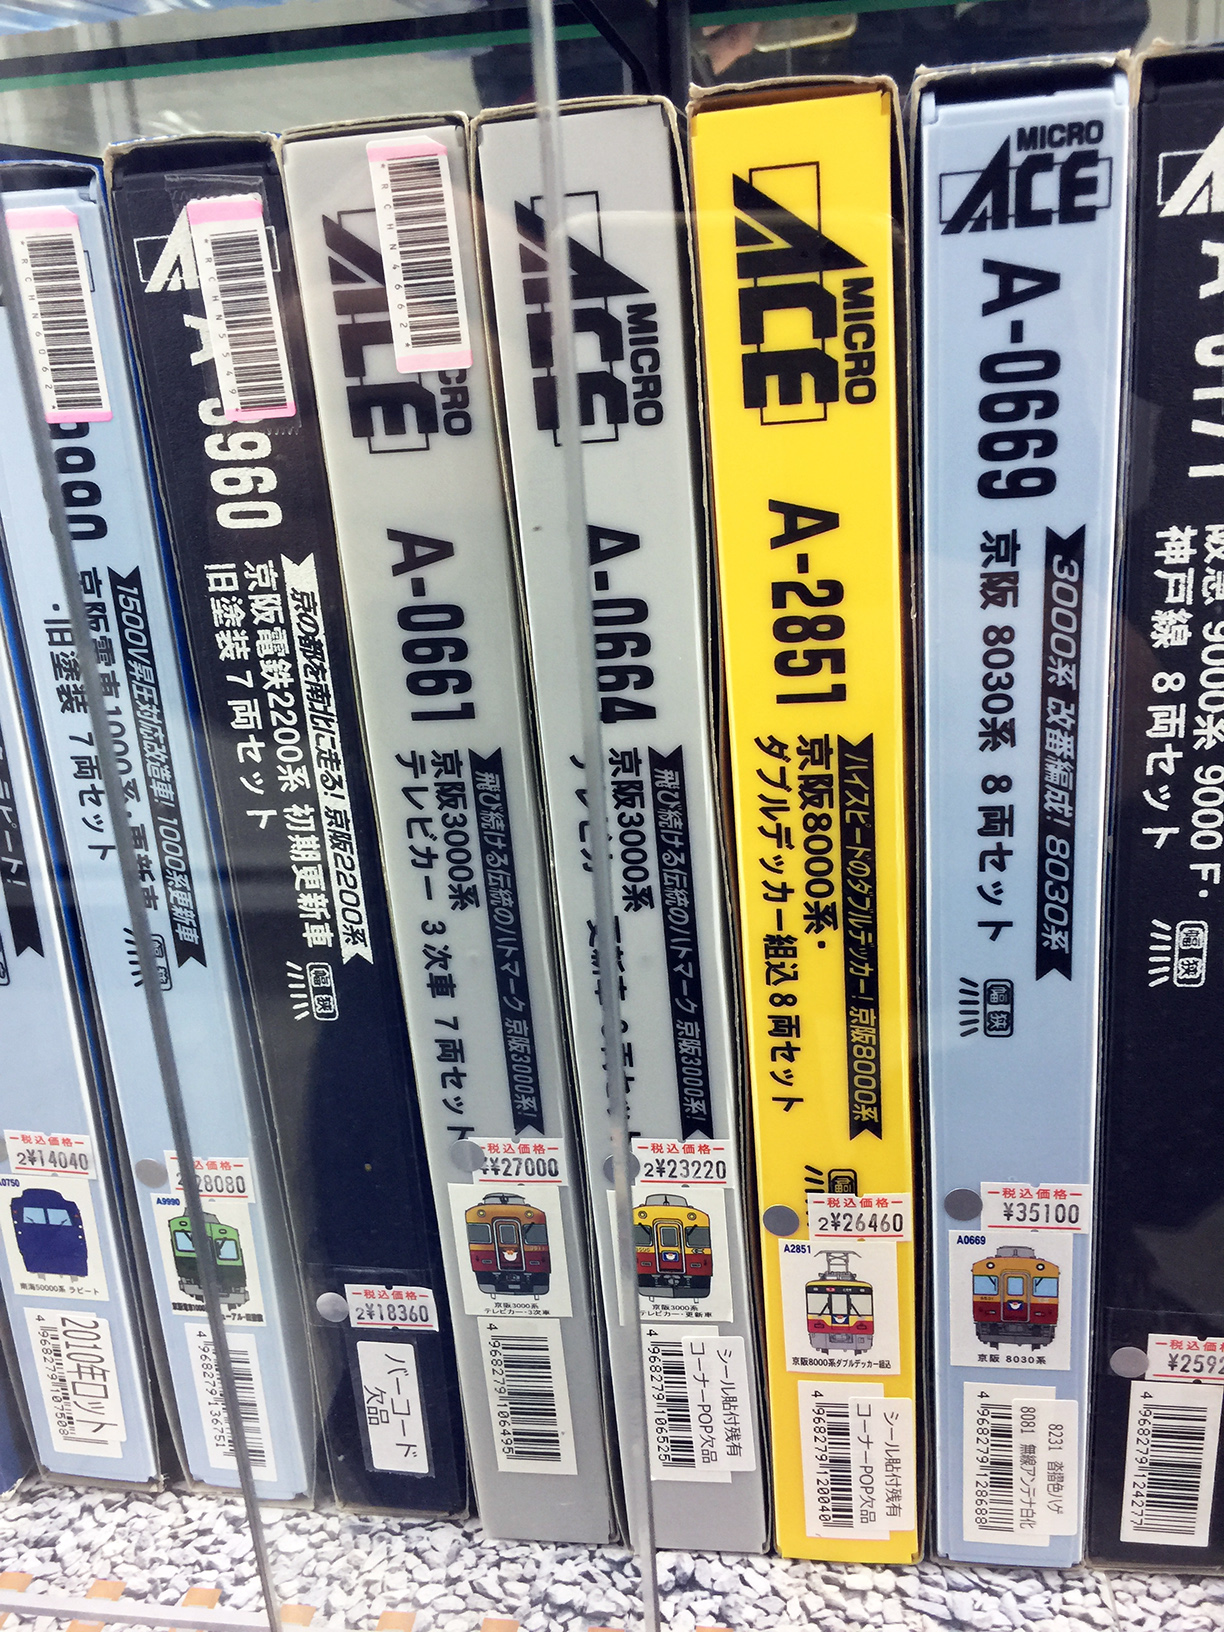
[Micro Ace Keihans.]
How much can Hankyu brown cost? Let's see.
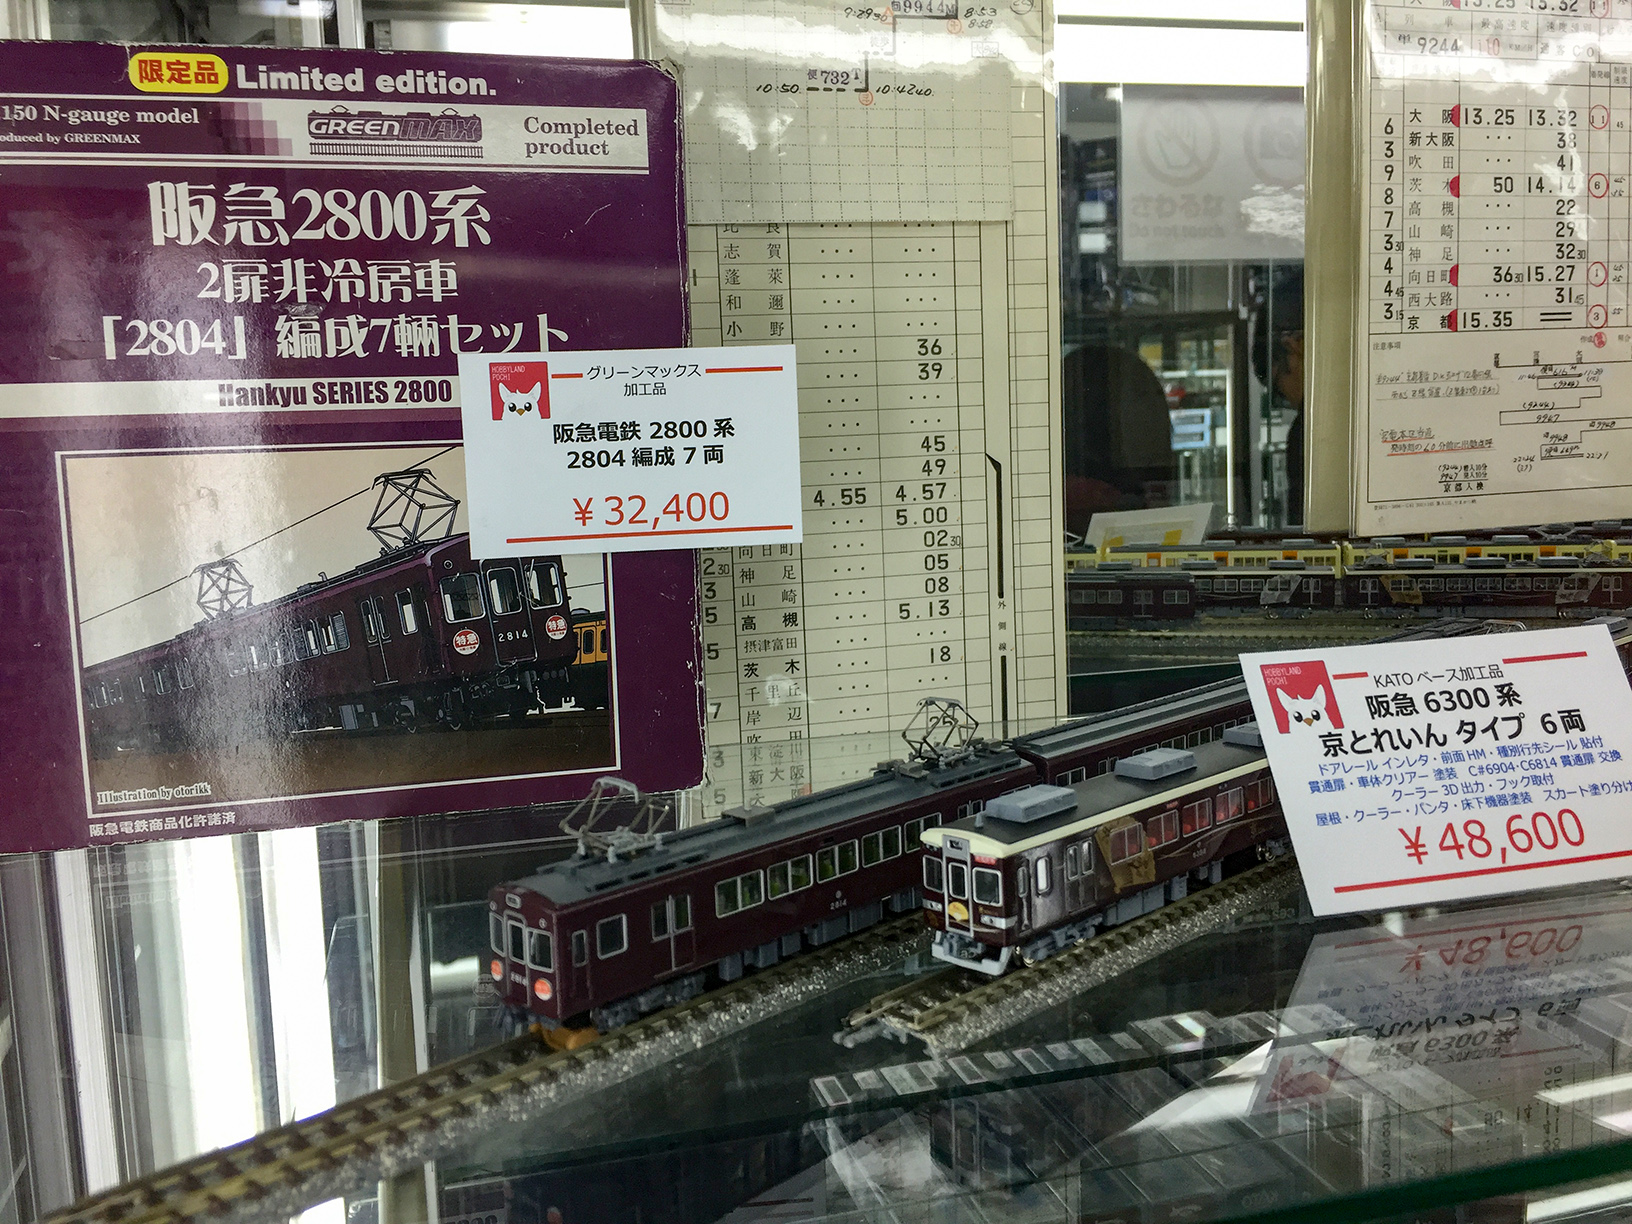
[A Hankyu 2800系 for 32,400 and a 6300系 for 48,600 yen.]
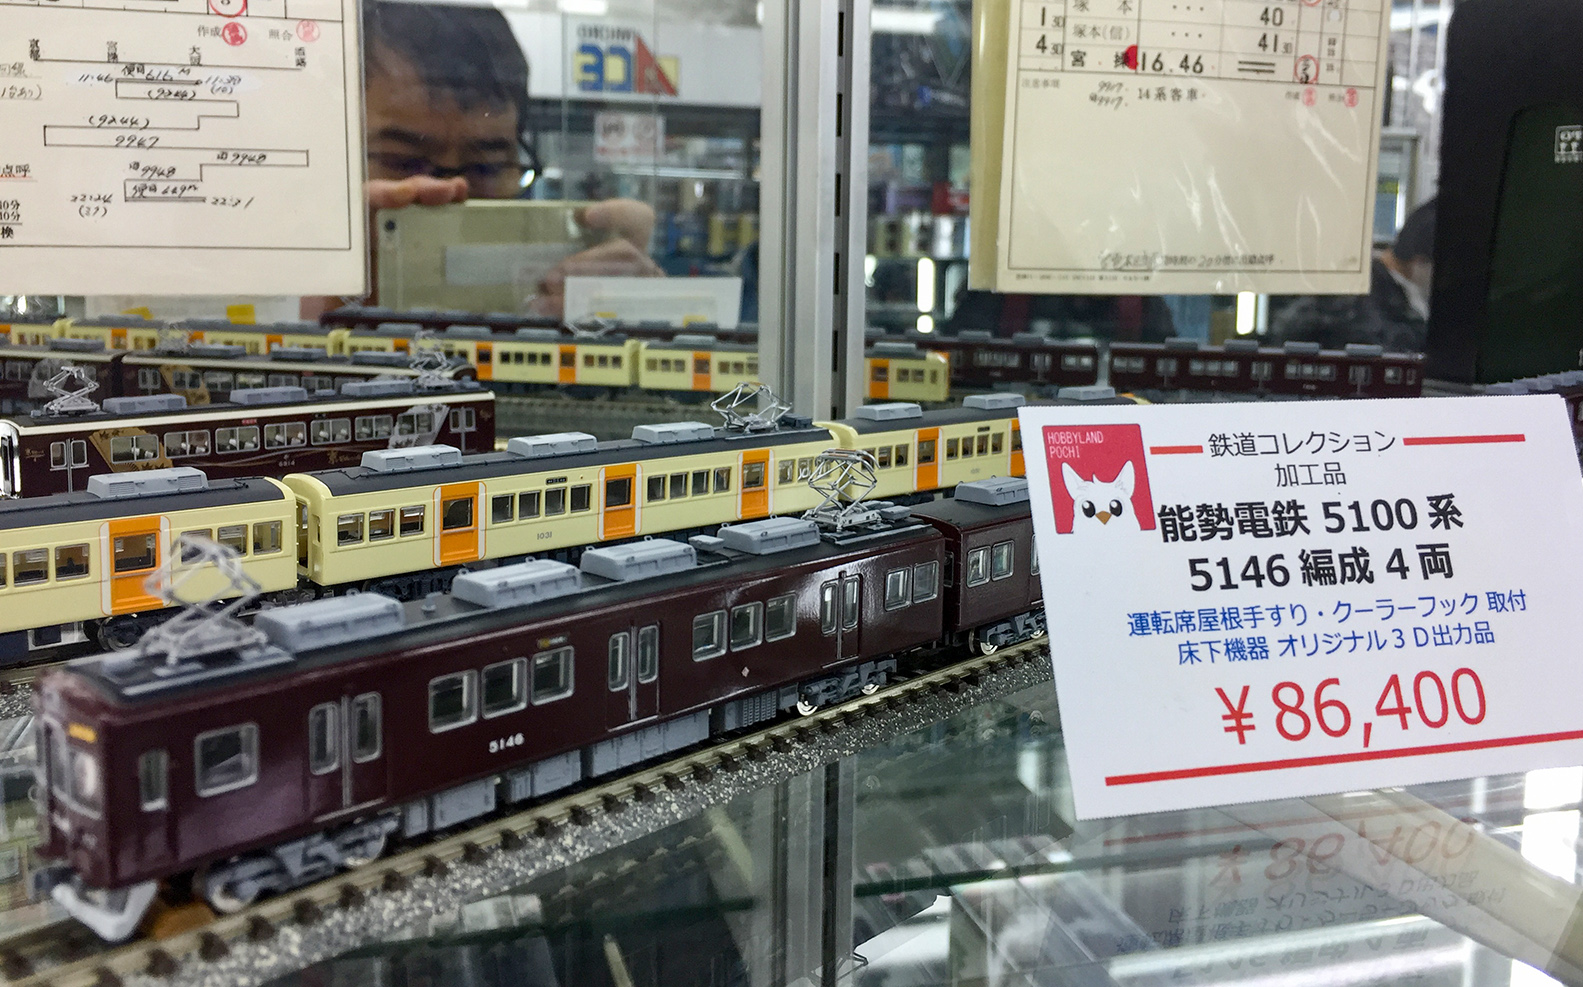
[The Nose Electric Railway (能勢電鉄) 5146 for 86,400 yen?]
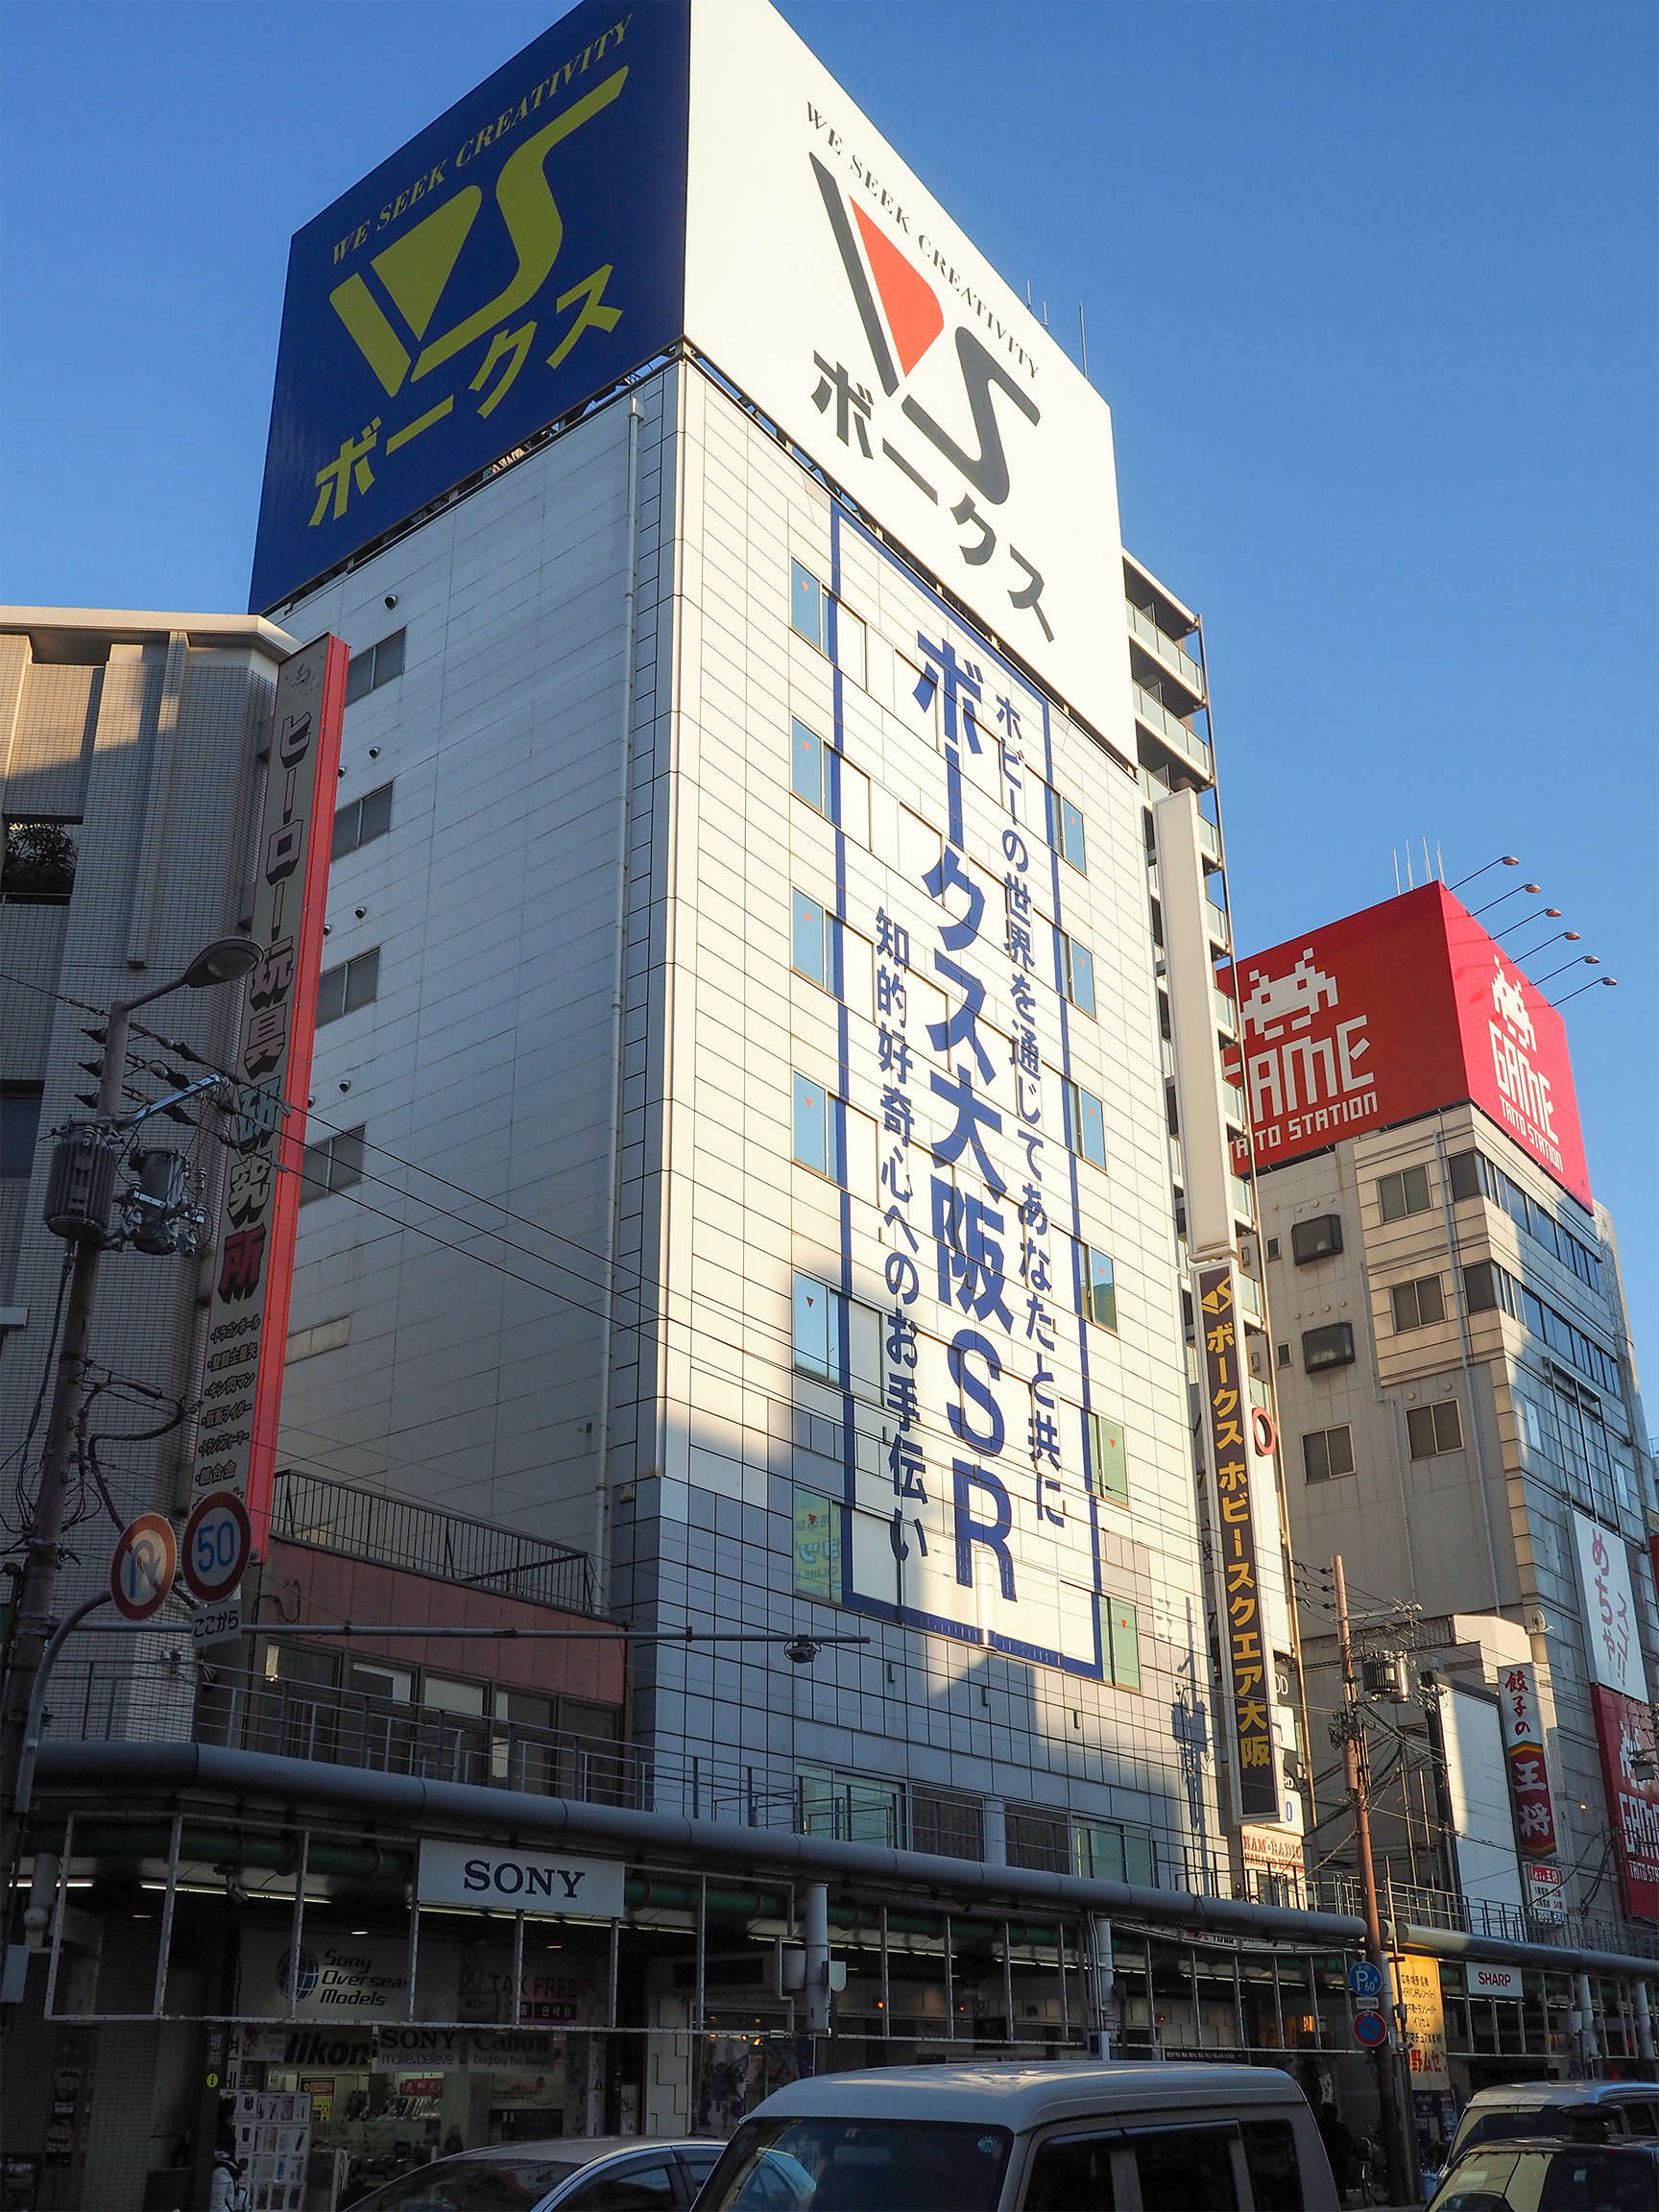
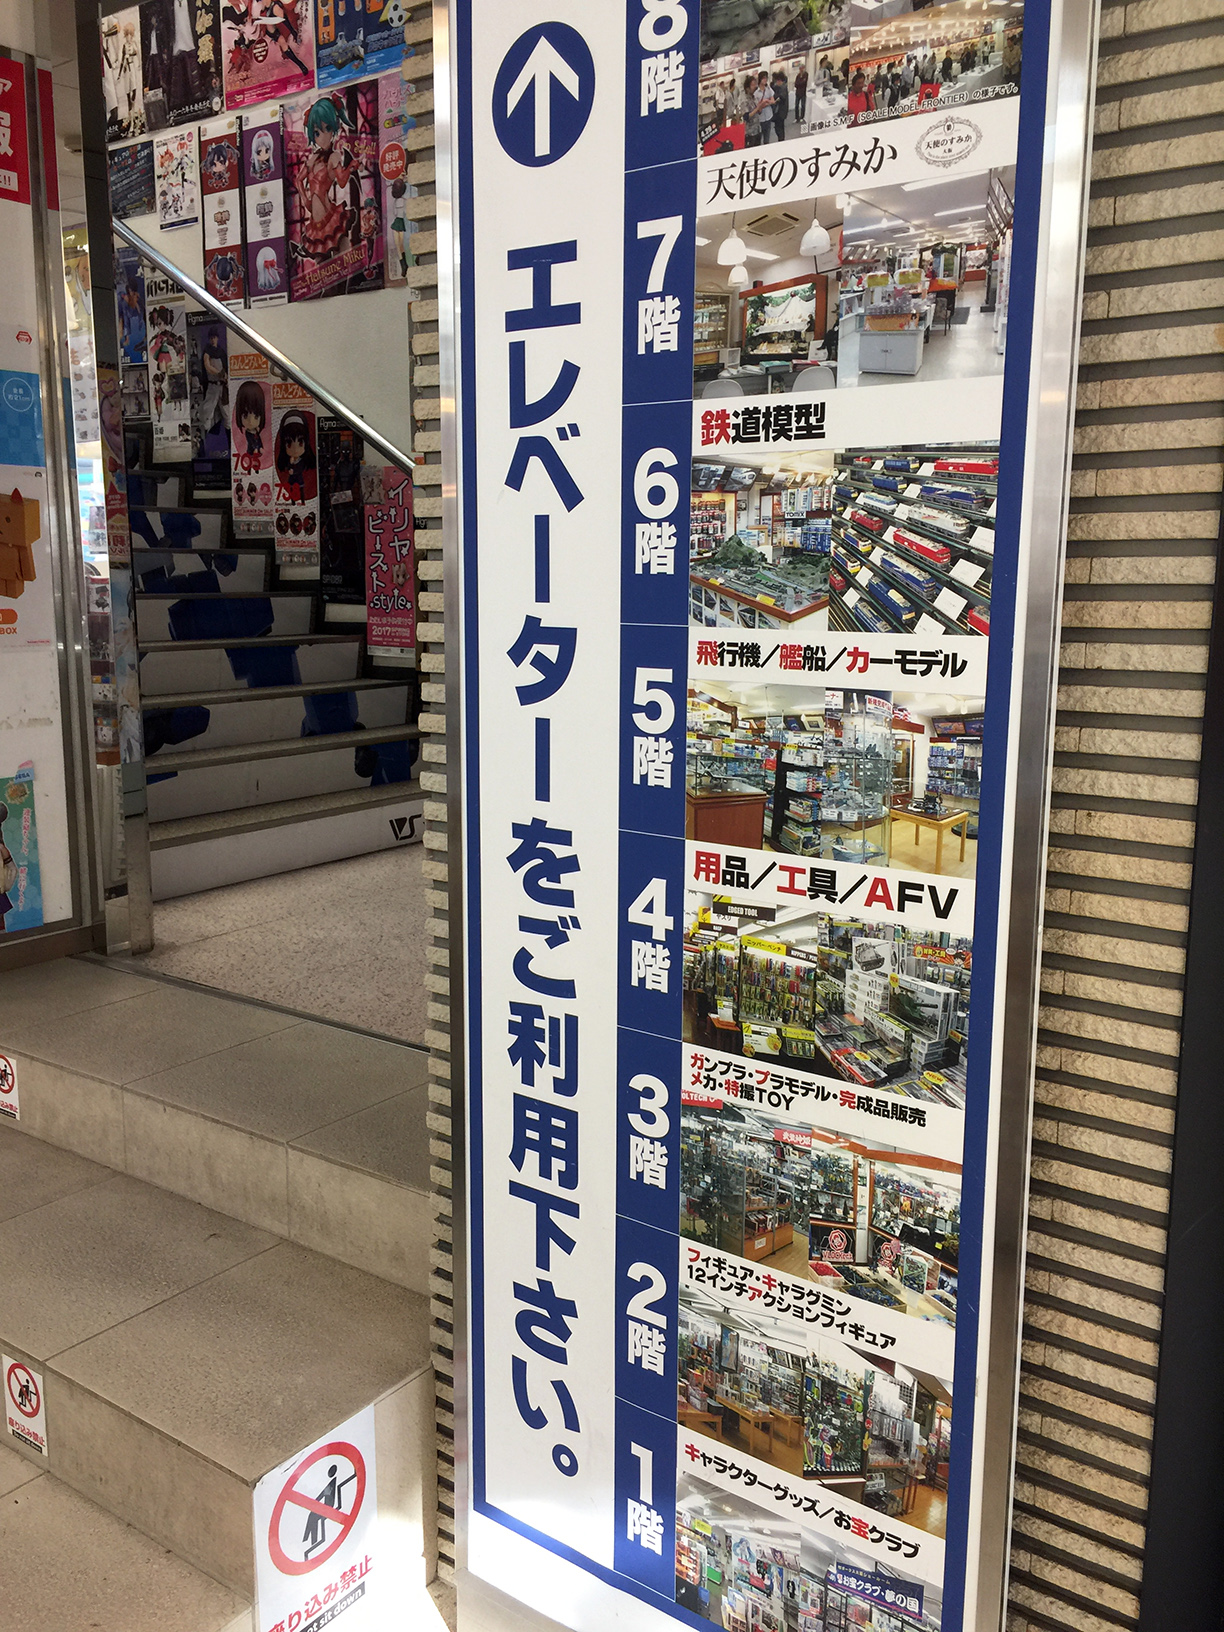
Volks
[The whole building has 7 floors.]
[6th floor is the one we want.]
It's not only bigger than Volks Kyoto but it has something not present
in the Kyoto branch: secondhand train gear.
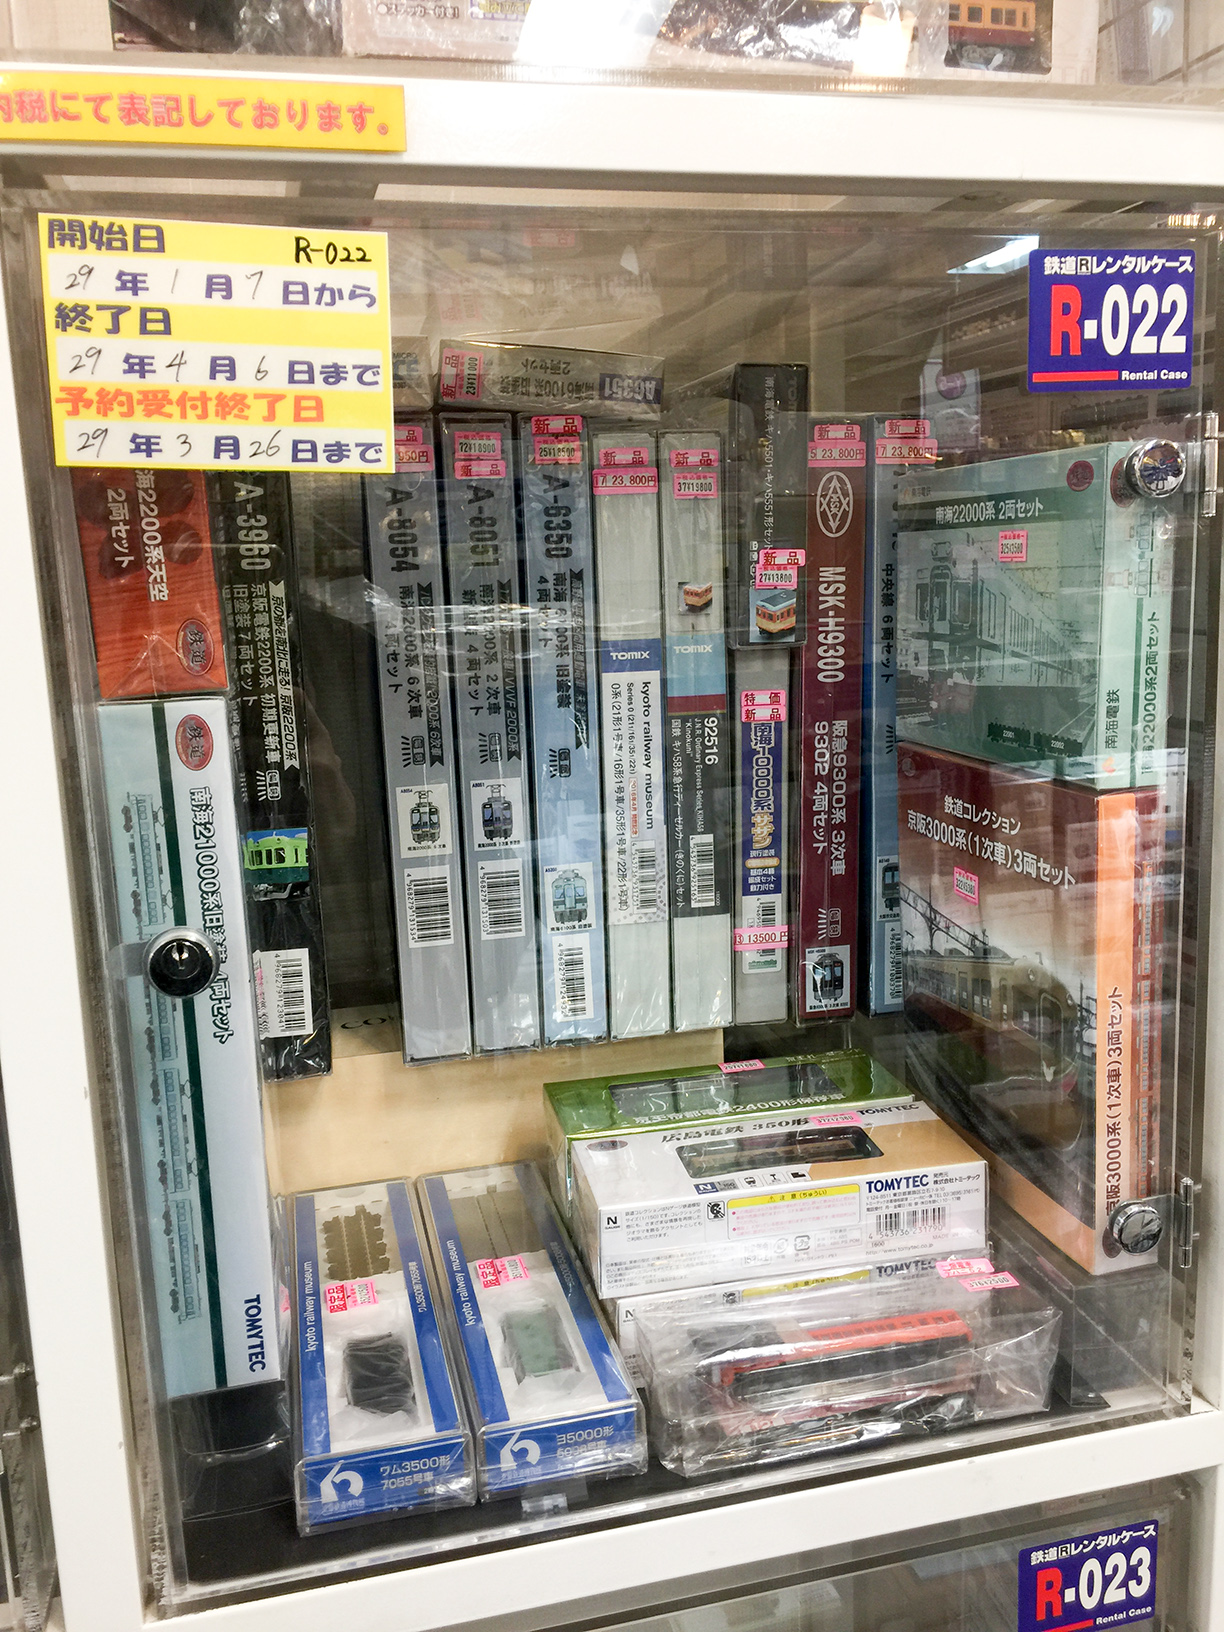
Sellers can rent a box like this:
[A typical rental box; this is R-022.]
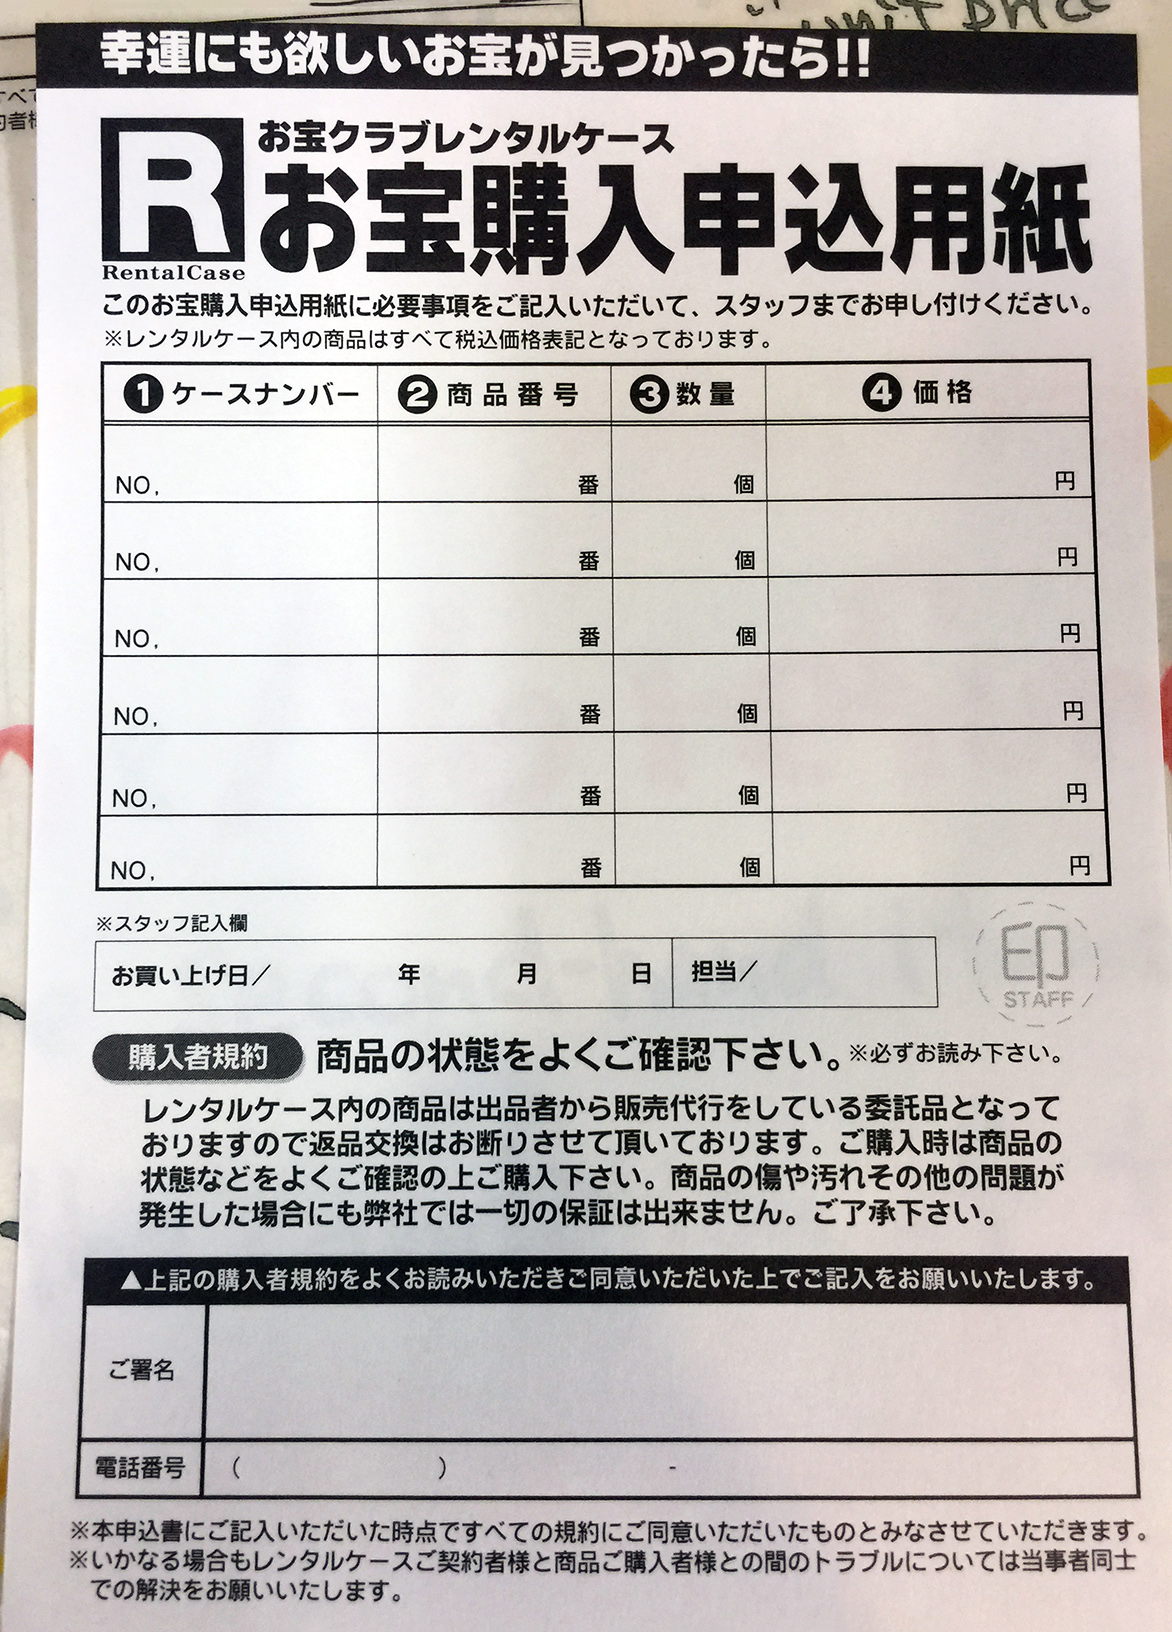
[Form for buyer: rental case number, item number
(and quantity), and price.]
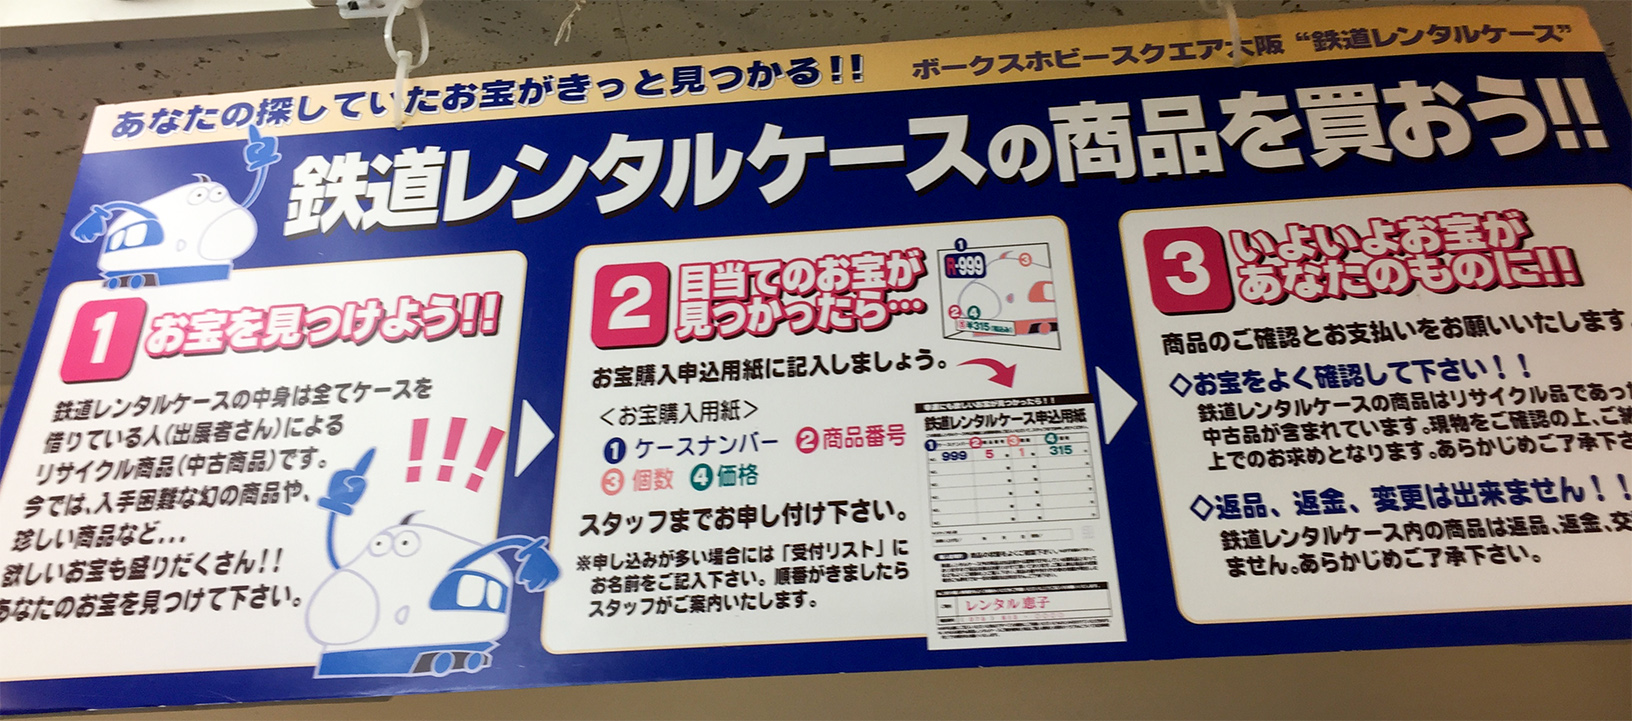
How to rent:
And instructions for buyers:
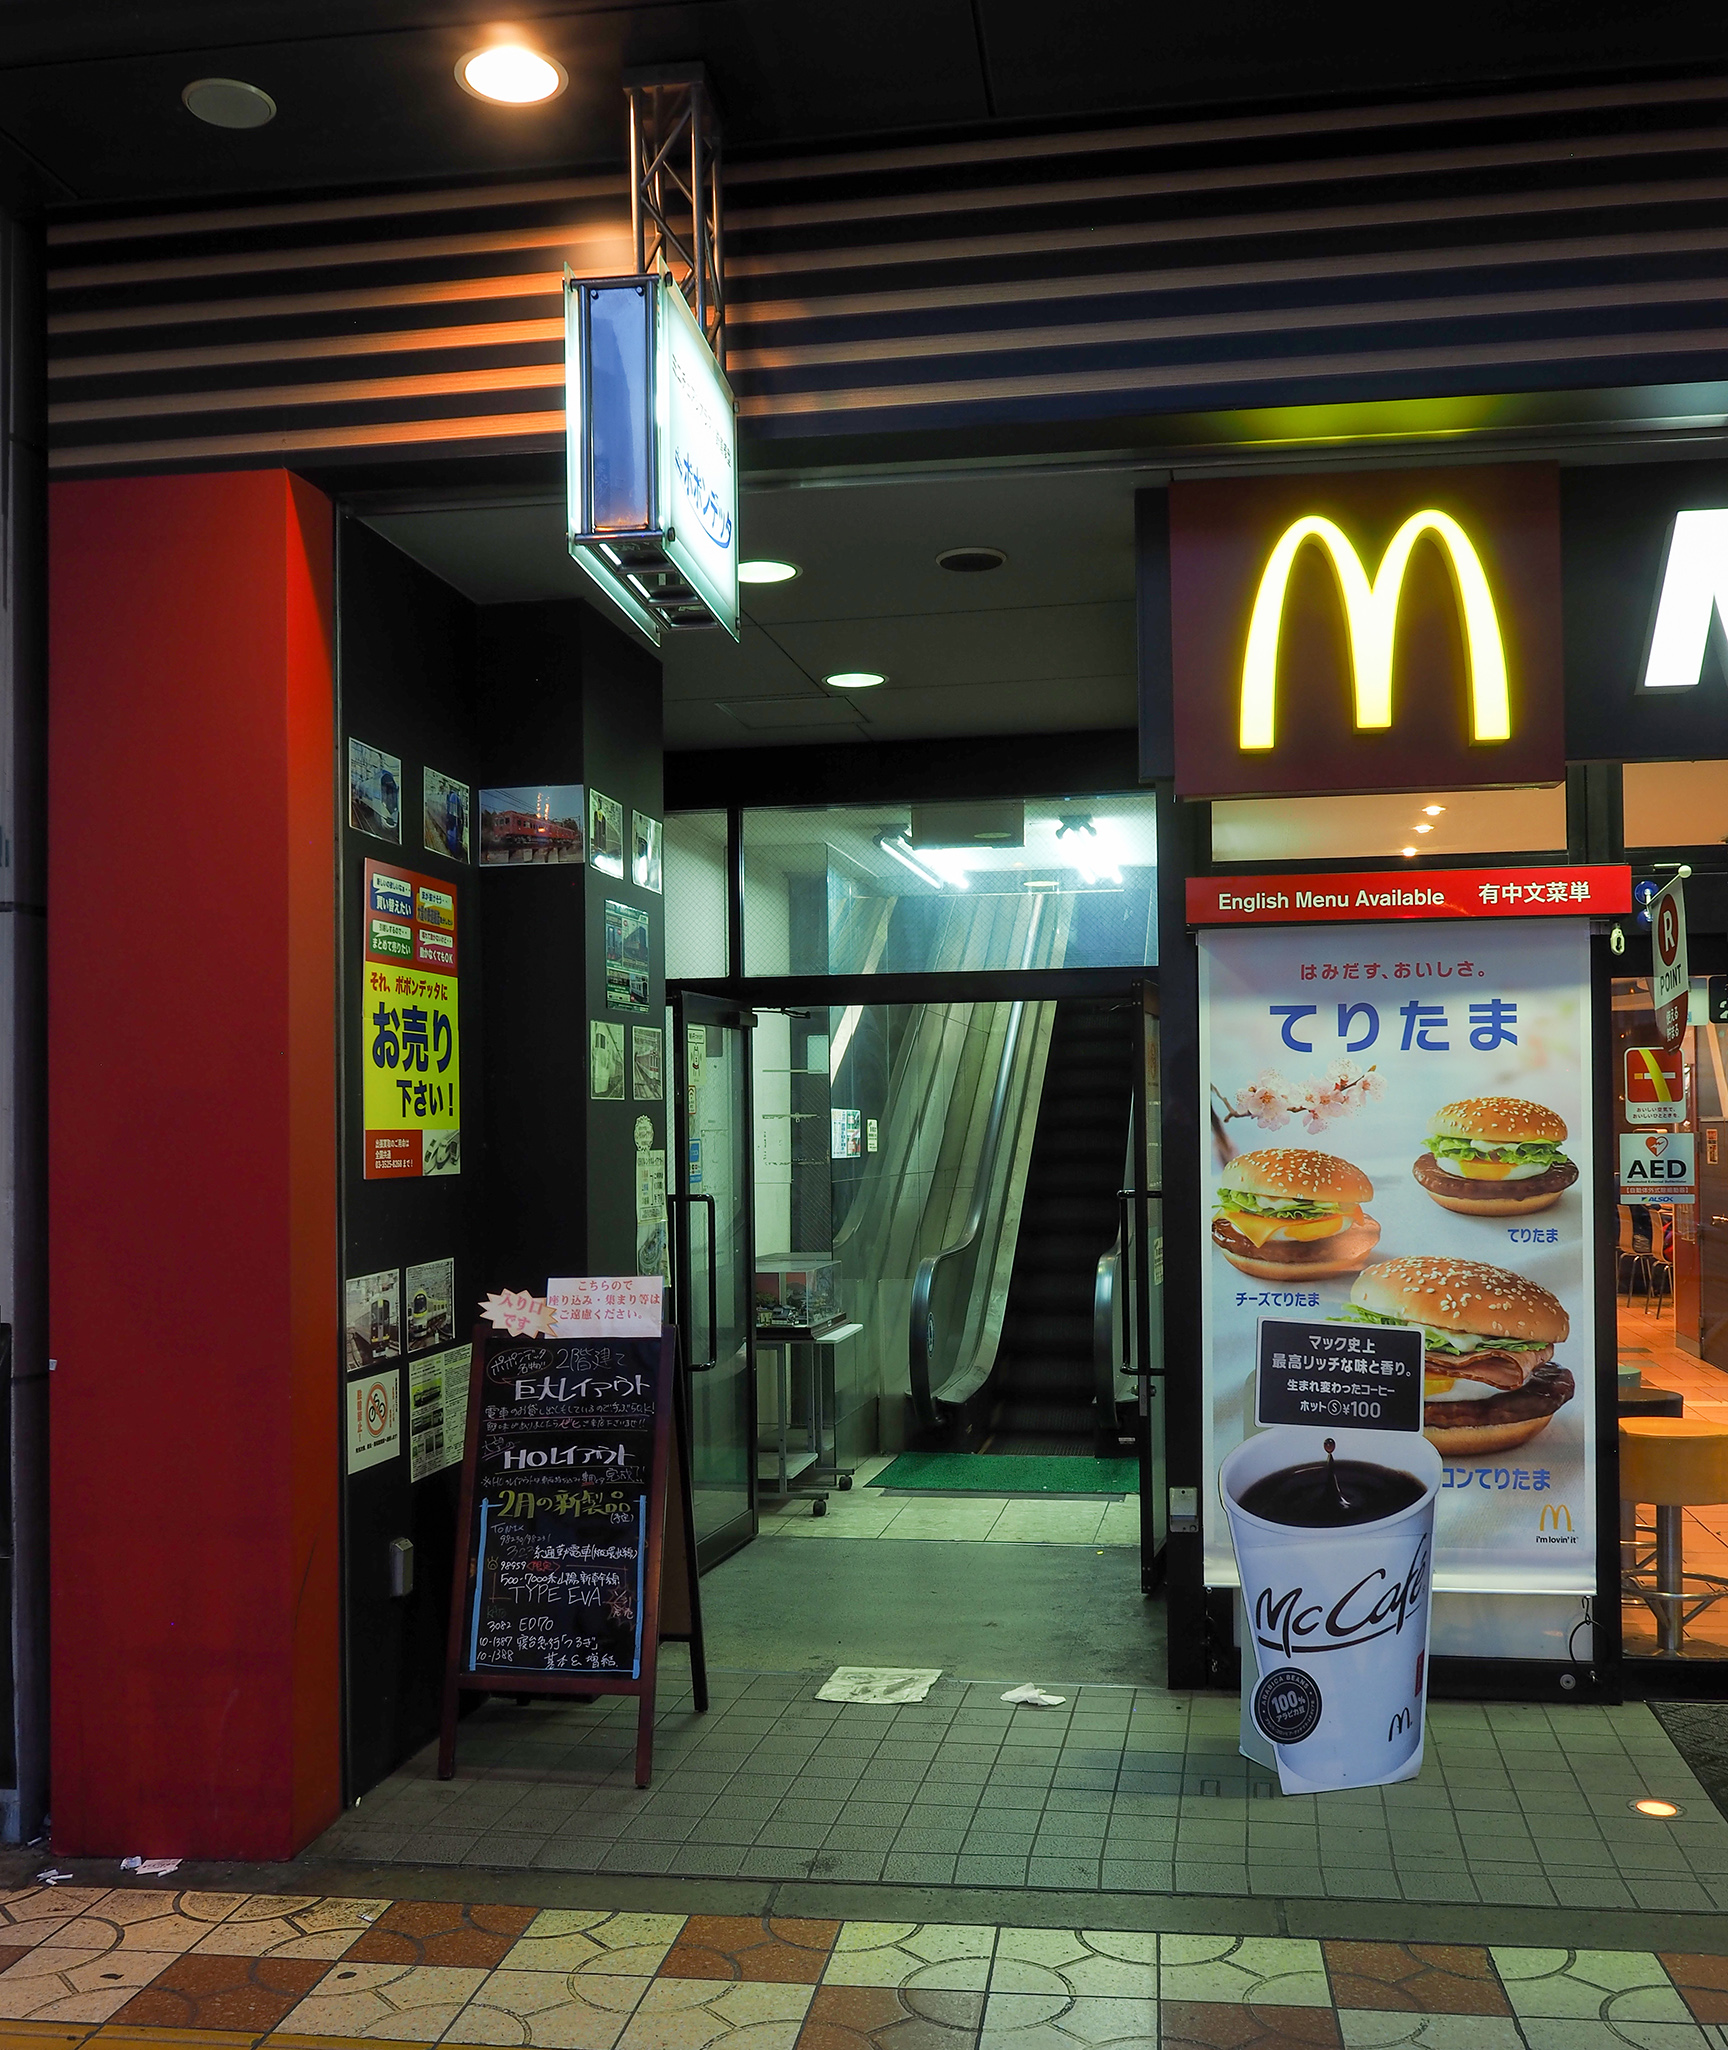
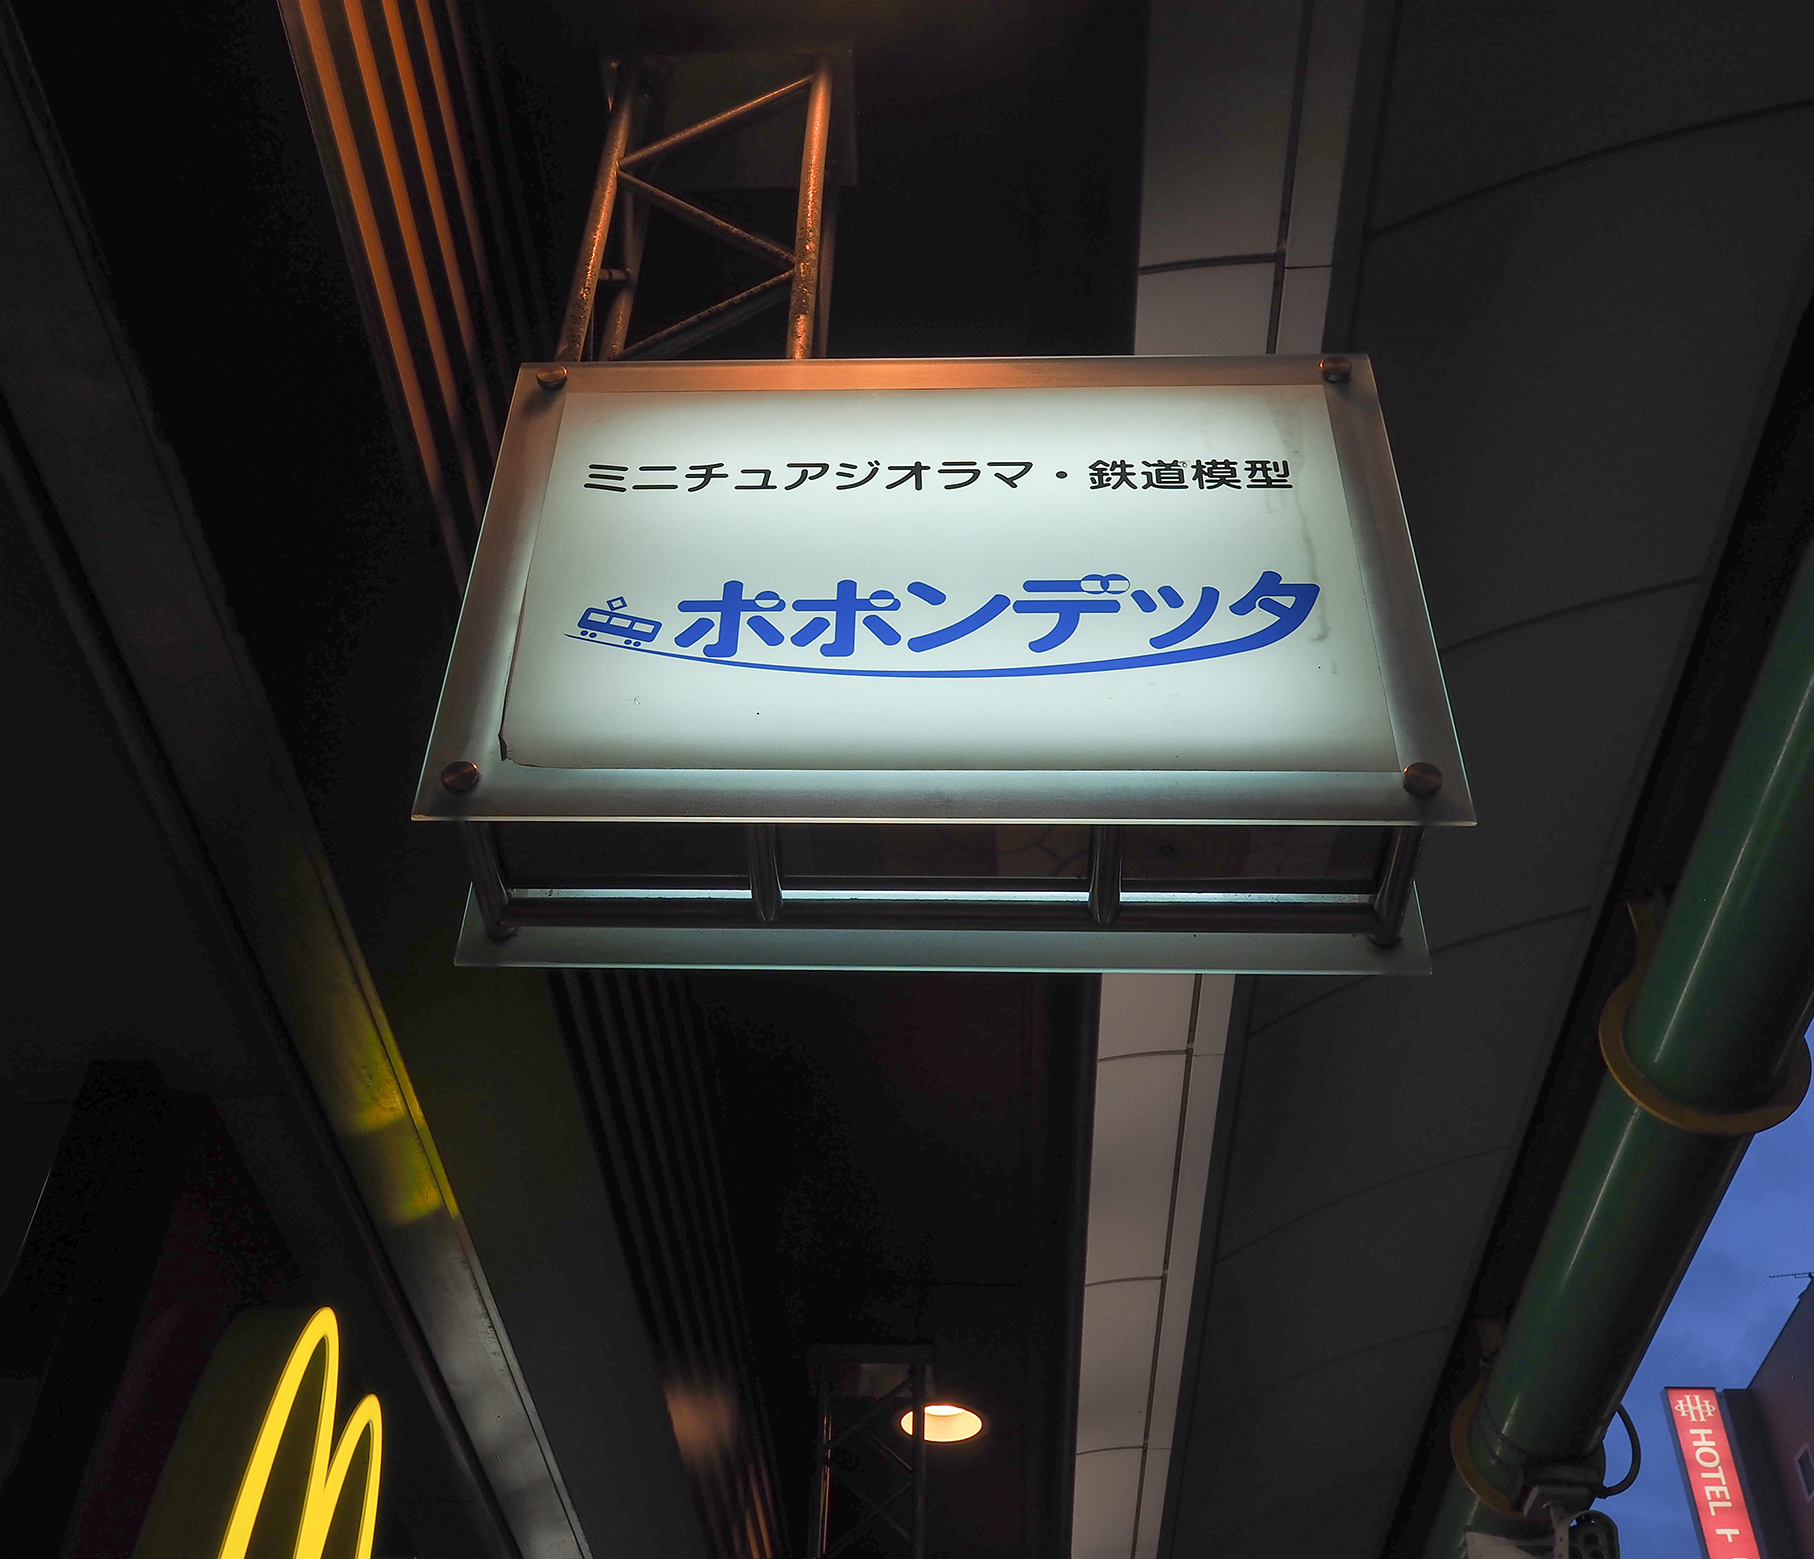
Popondetta (ホポンデッタ)
This shop is diagonally across the road from Volks. It's upstairs and
can be access through an escalator to the left of McDonald's, see
above left photo. Unlike the Kyoto store (see above), this one is big
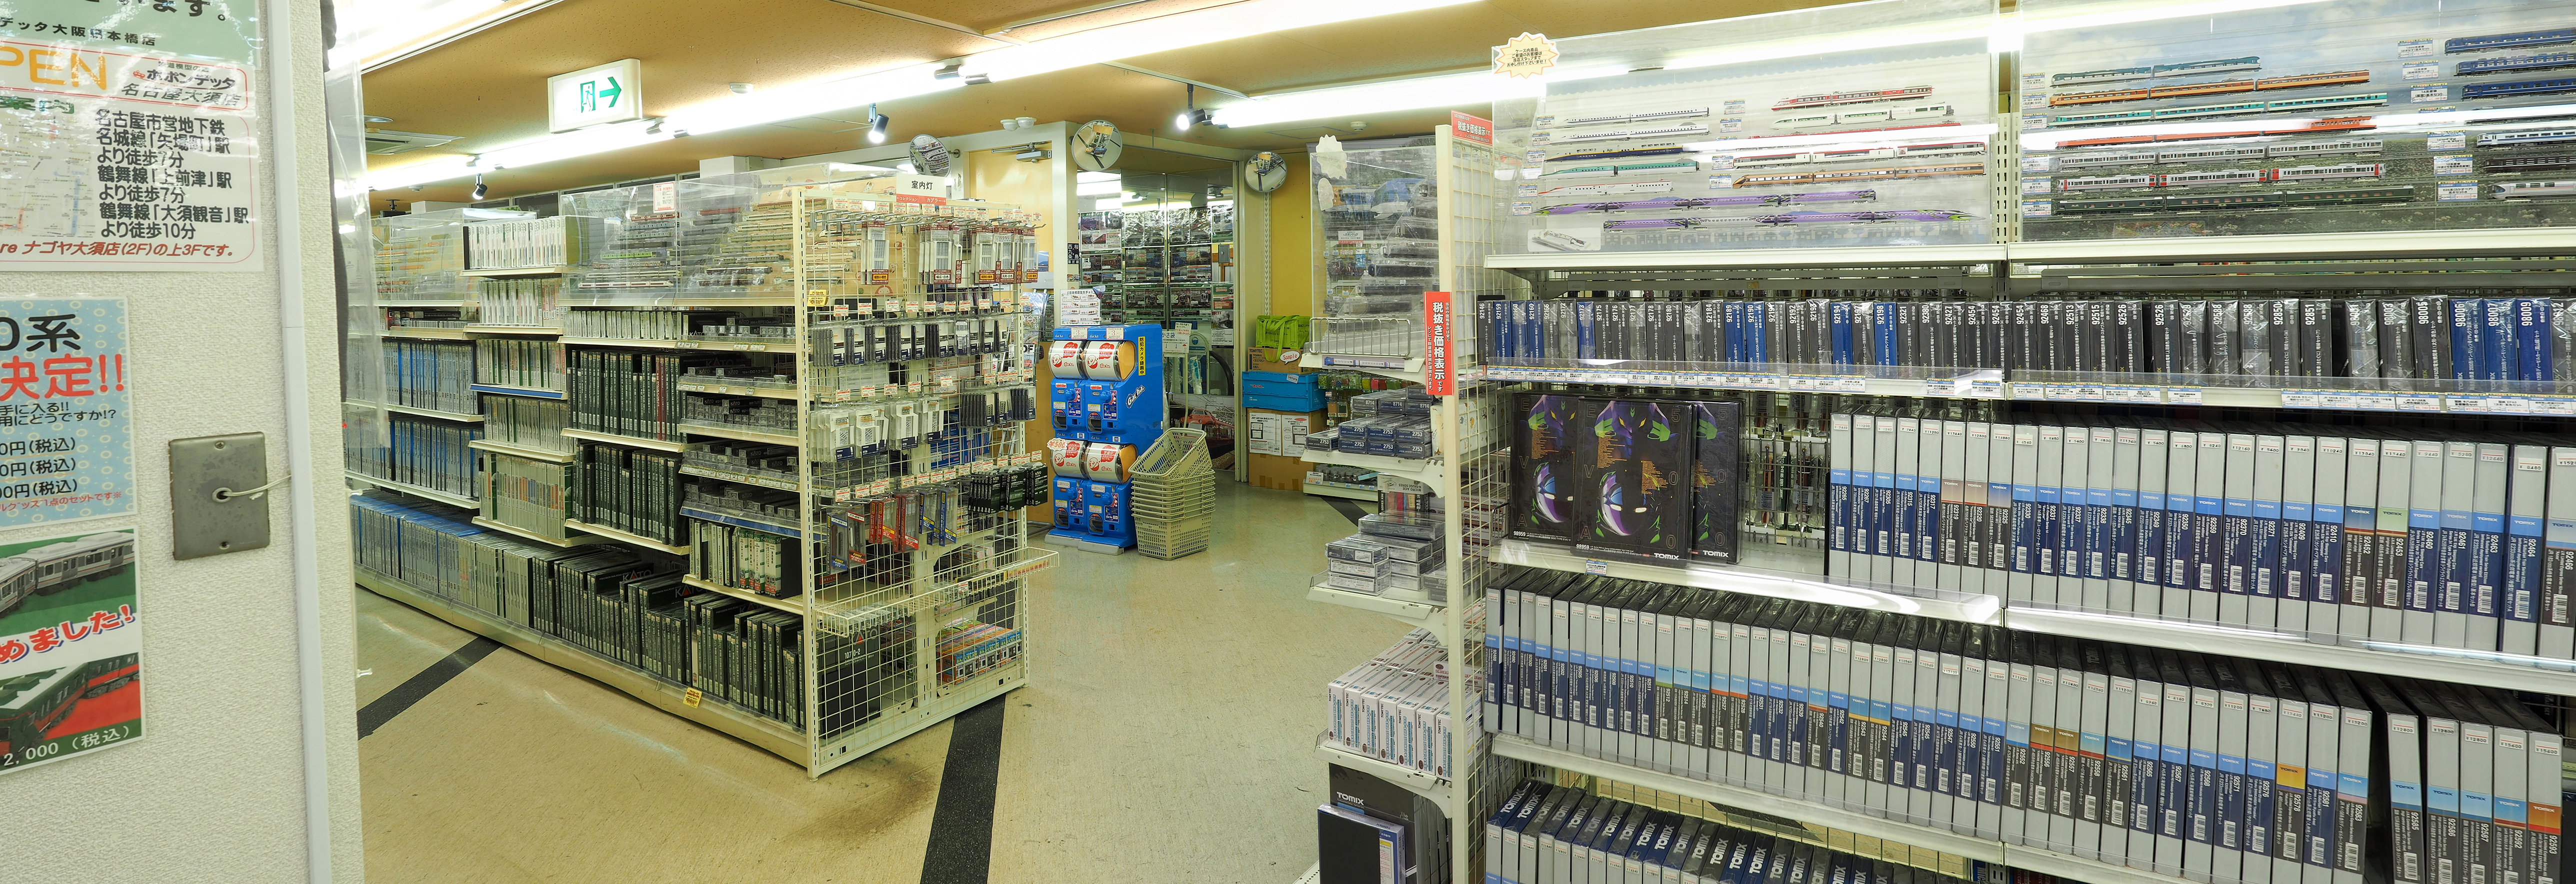
and full of new and secondhand gear.
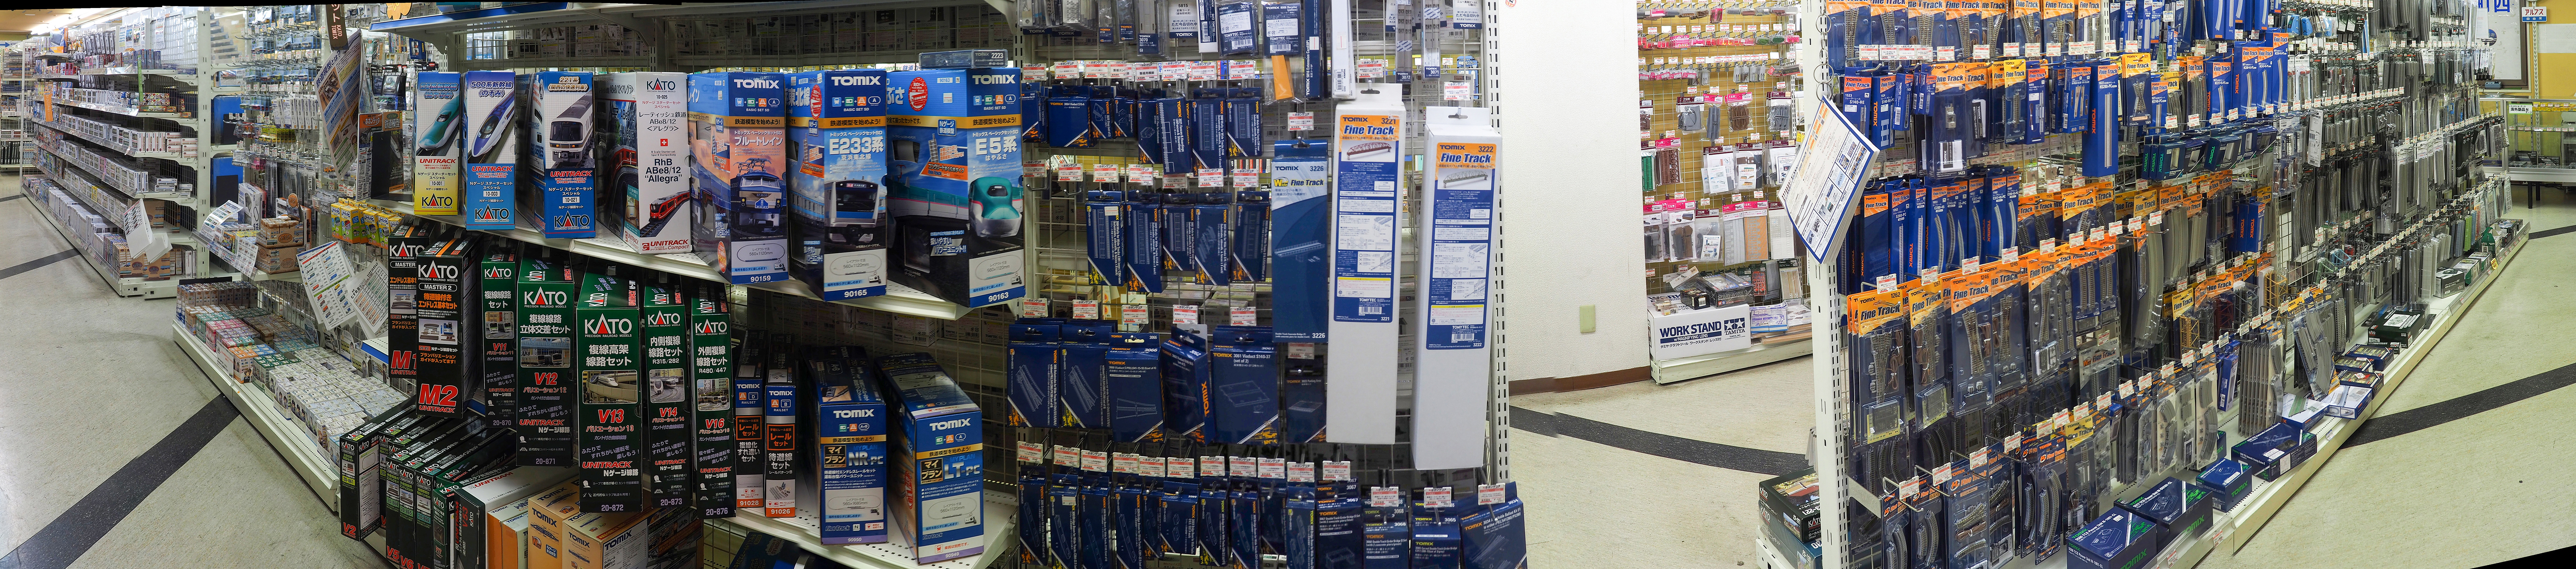
A very complete aisle with Tomix track and sets below:
The next floor up has HO gear. The exit is down via stairs and
dumps you at the back of the building.
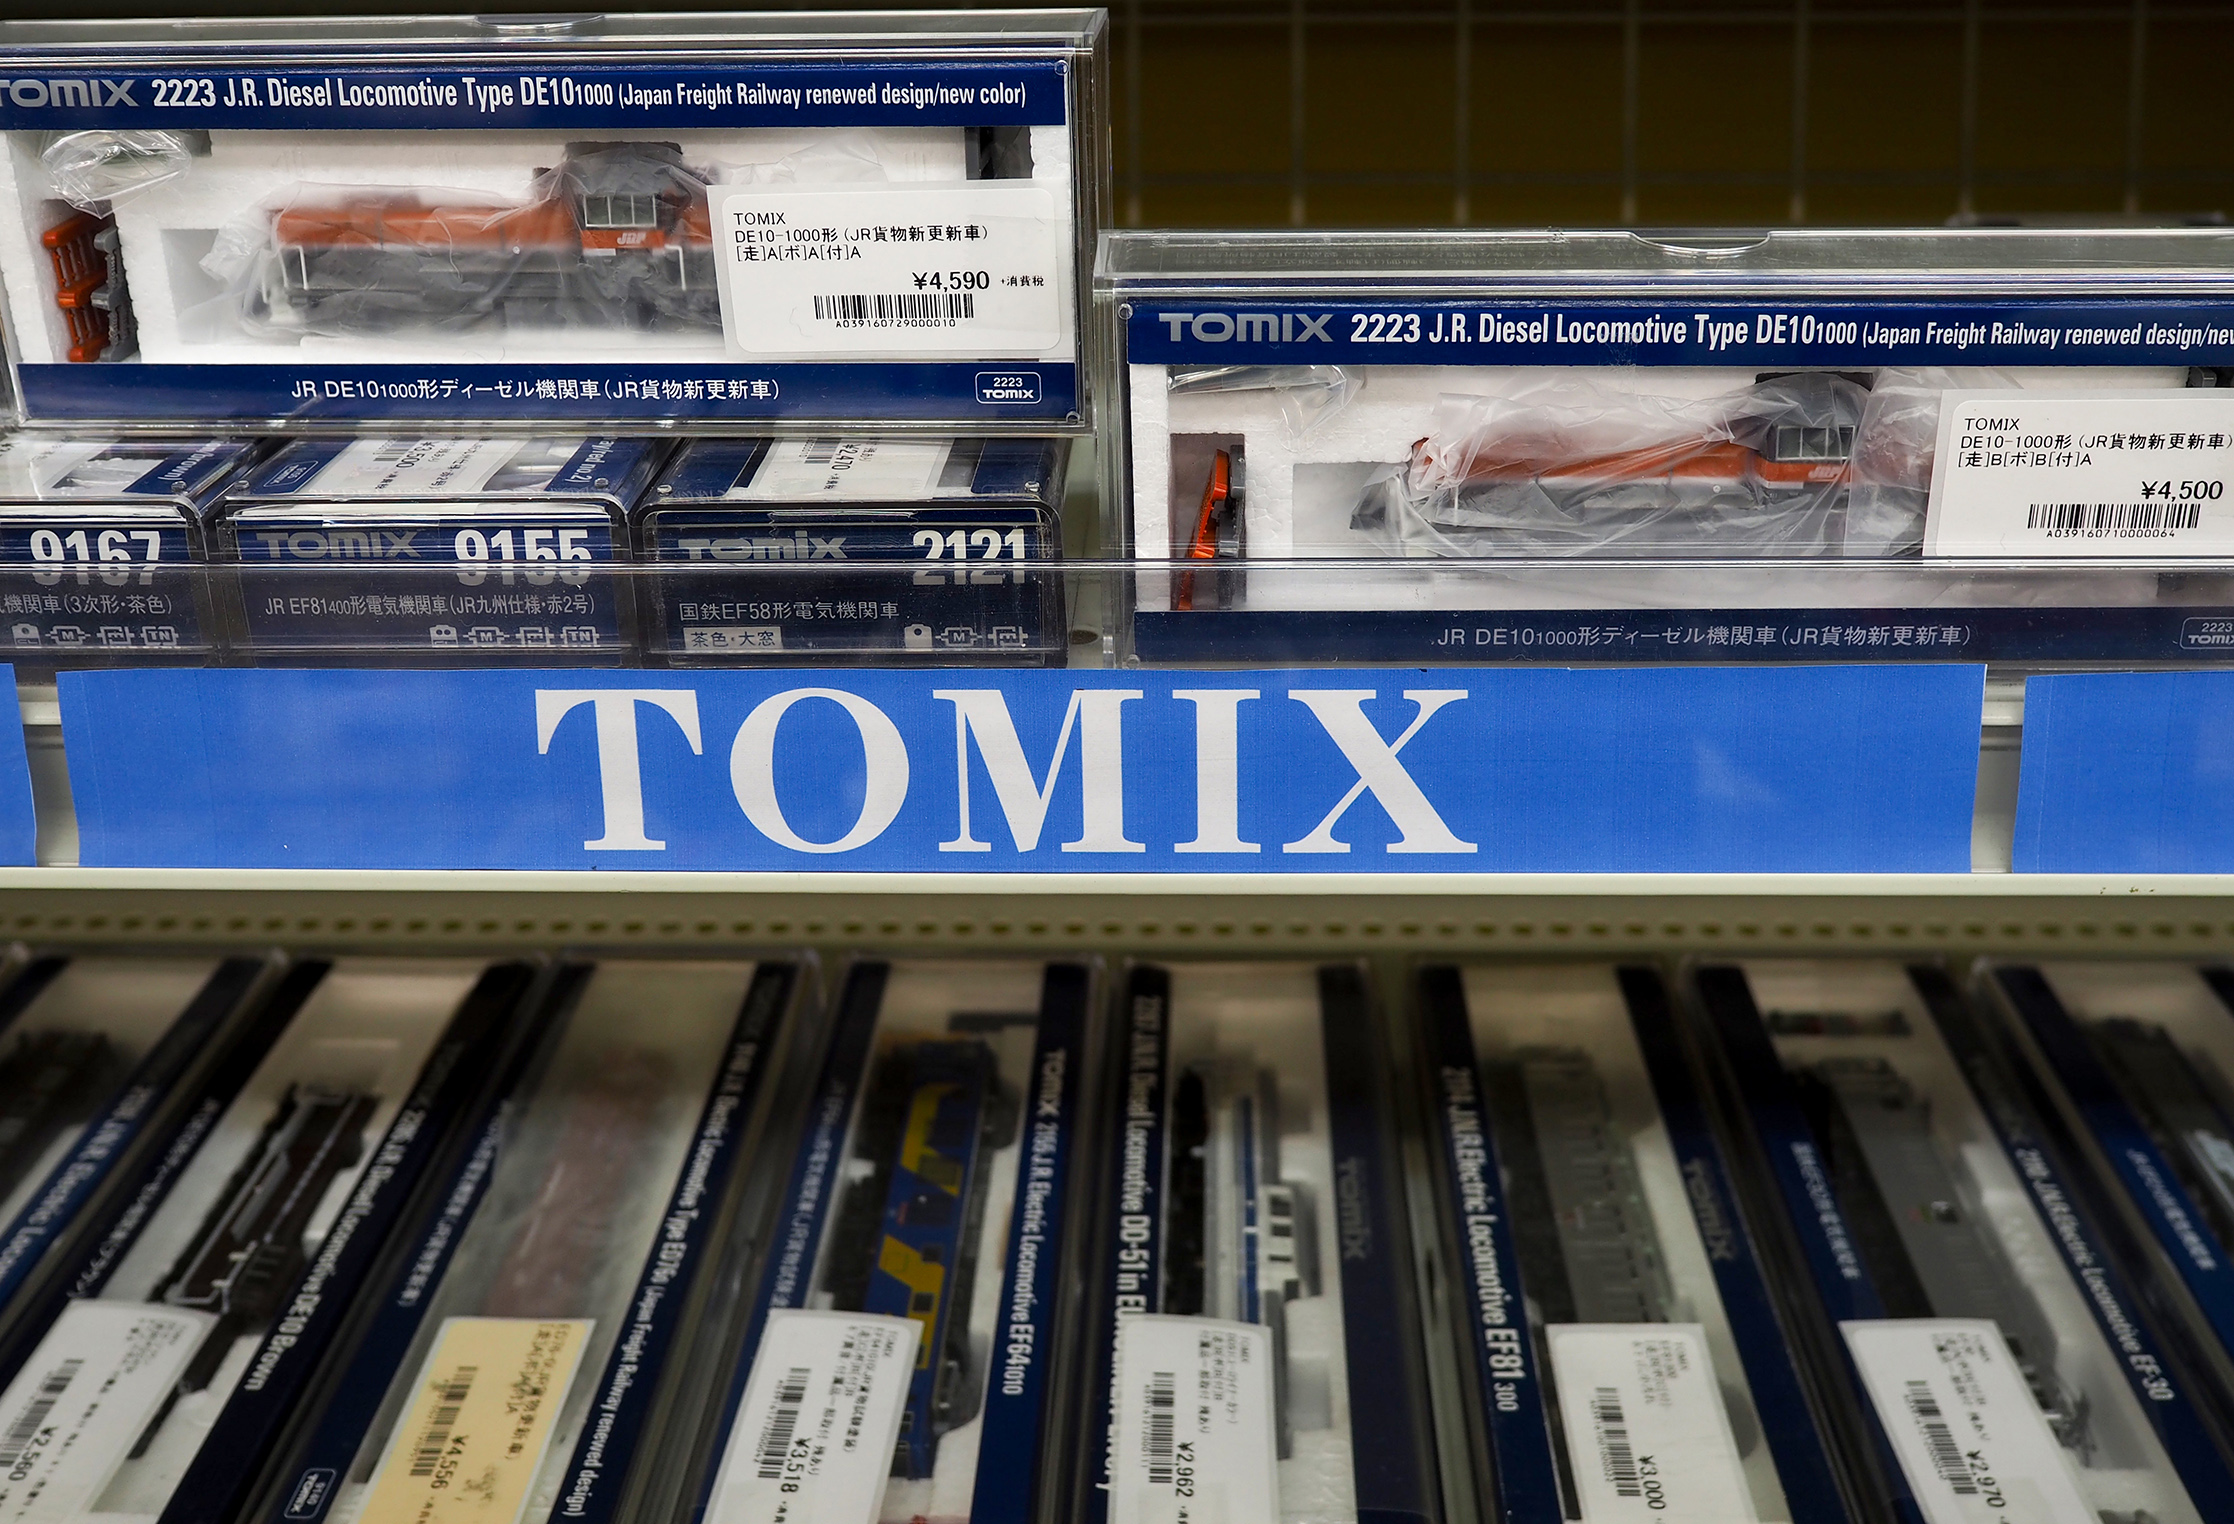
Note that secondhand rolling stock is graded: see the Tomix DE10s I
was considering below. A triple-A grade, i.e. (走 = run) A (ボ = body) A
(付 = accessories), is almost the same price as brand-new. And anything
lower than a B seems pretty tired to me.
[Left JR Diesel Type DE10 is rated at [走]A[ボ]A[付]A, right one at
[走]B[ボ]B[付]A. Full discloure: I bought a new DE10, not those two.]
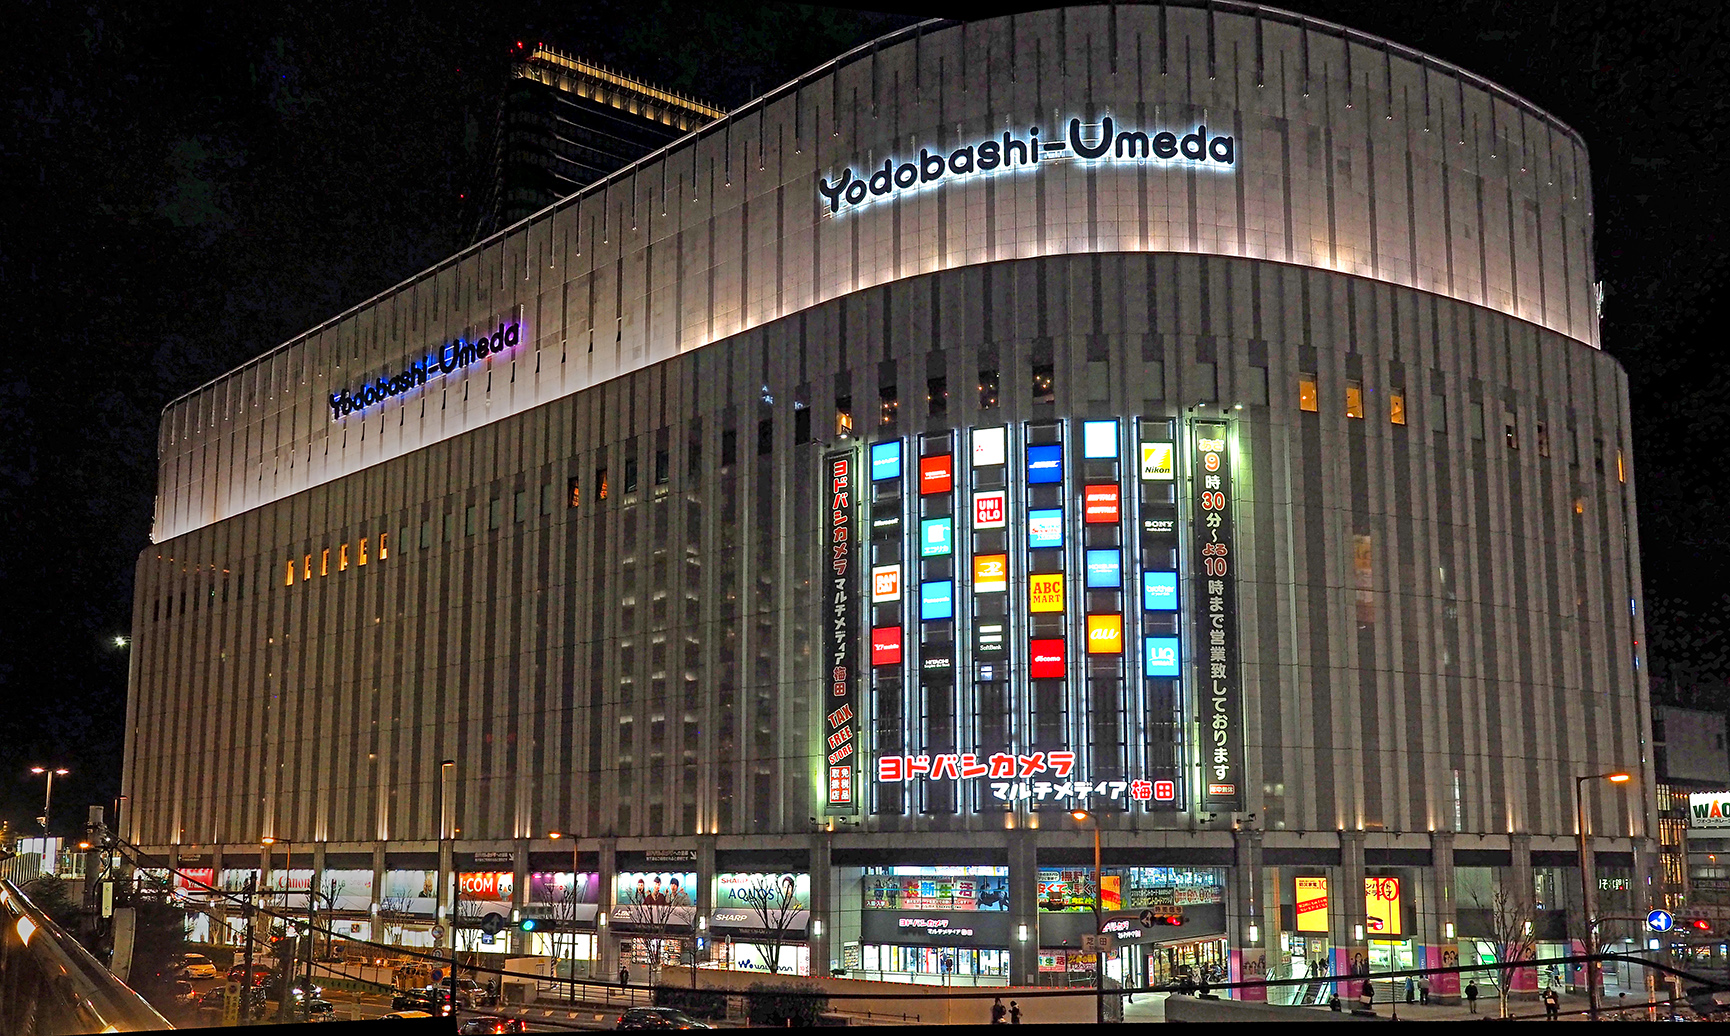
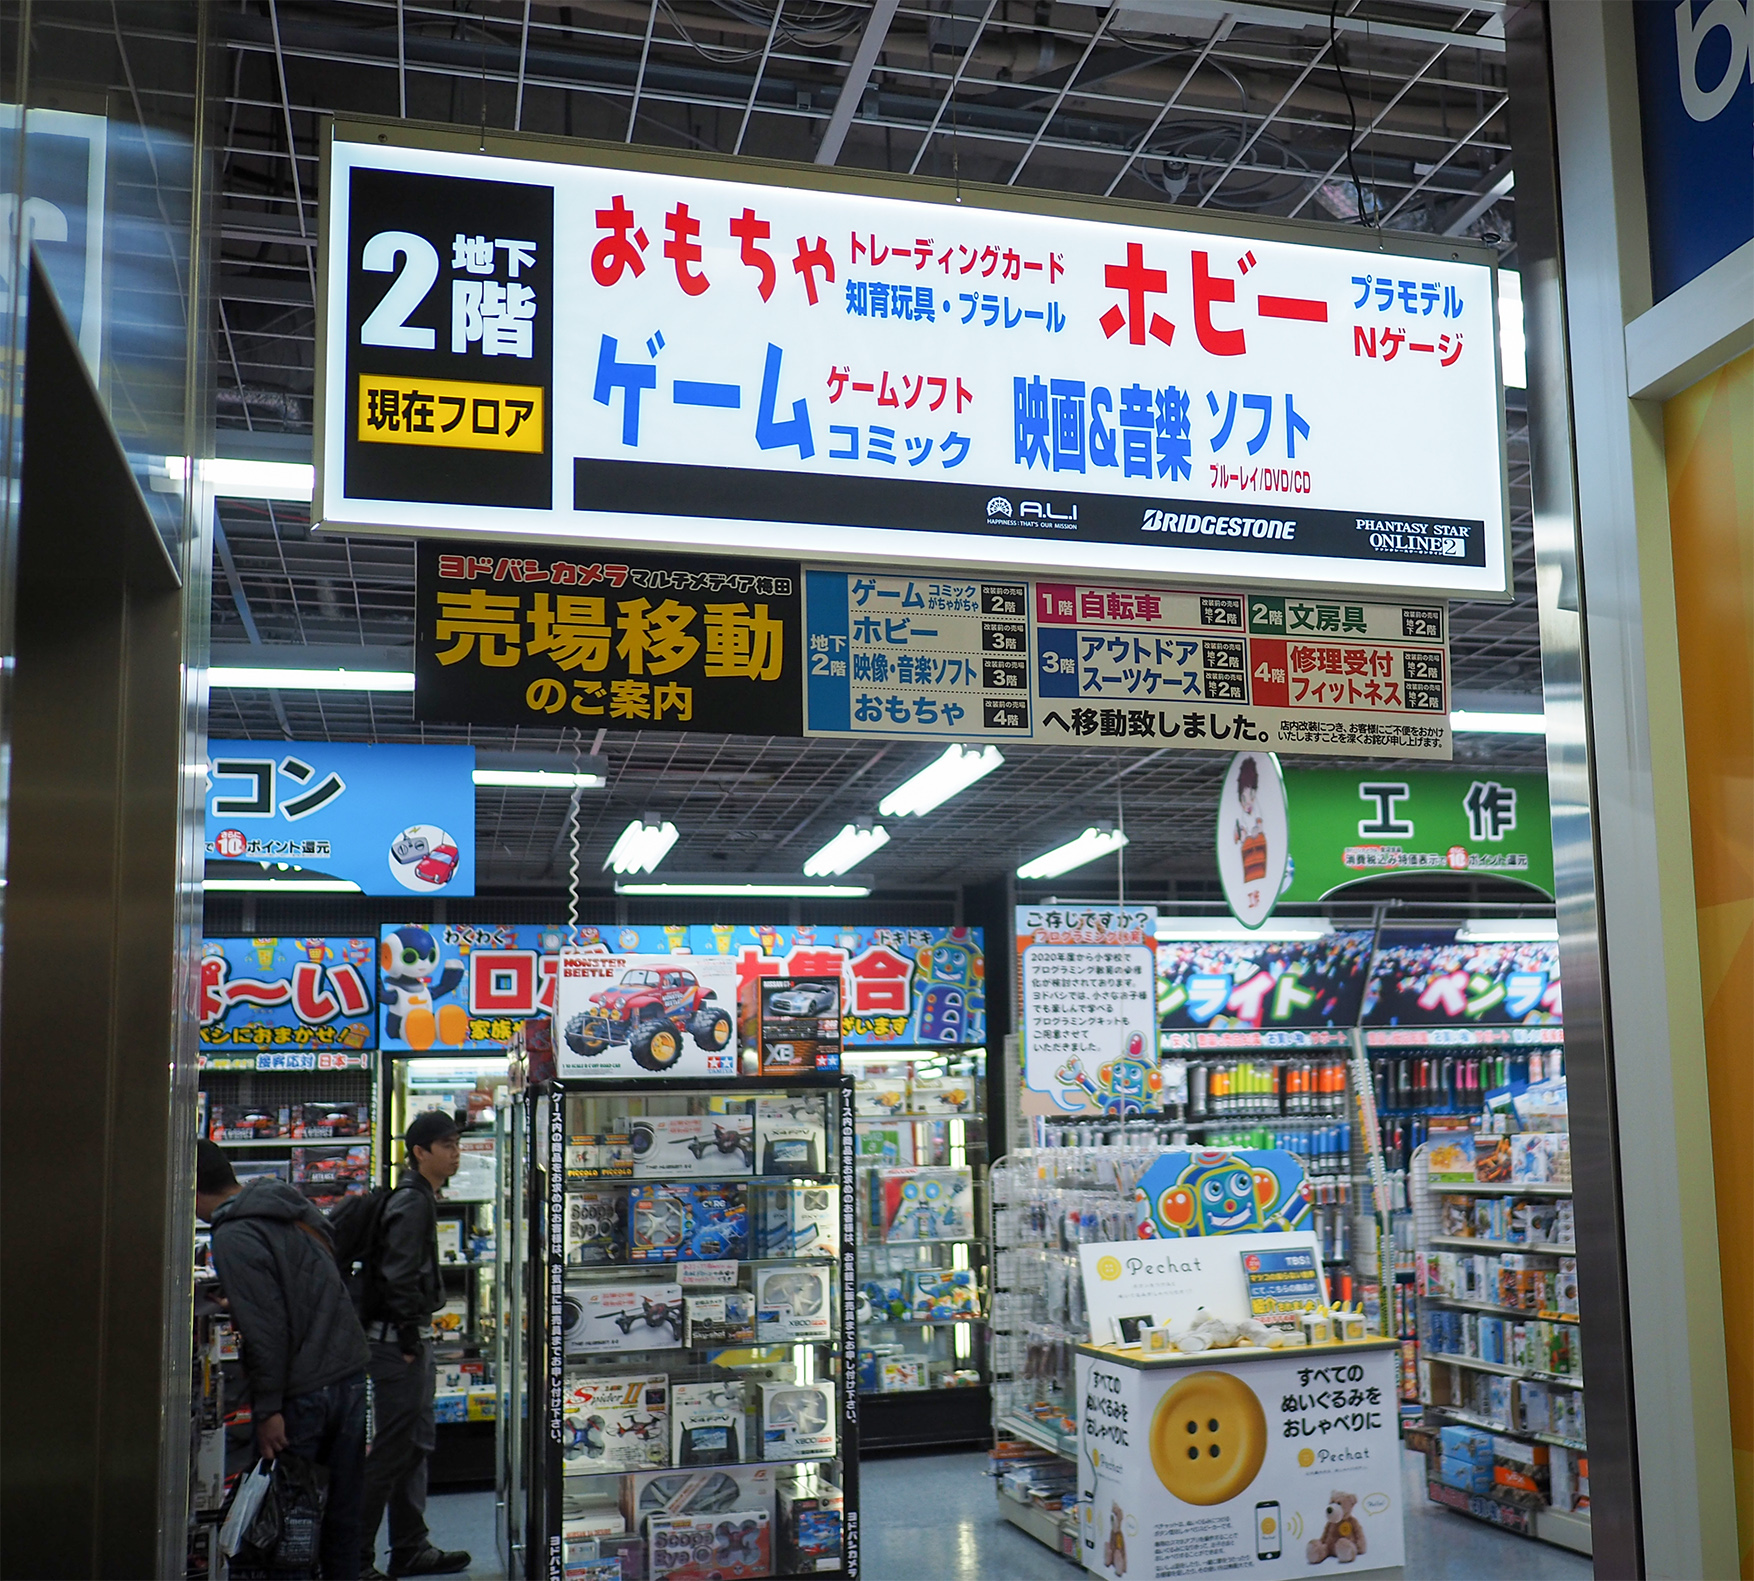
Yodobashi Camera
This one is larger than the store in Kyoto, and more importantly,
the train section is larger, meaning: (unlike in Kyoto) you are
probably going to find the parts you need. B2 is the level you want,
see sign below left (in Kyoto it'd be 3F).
To the right of the wall shown above right (next to the restrooms),
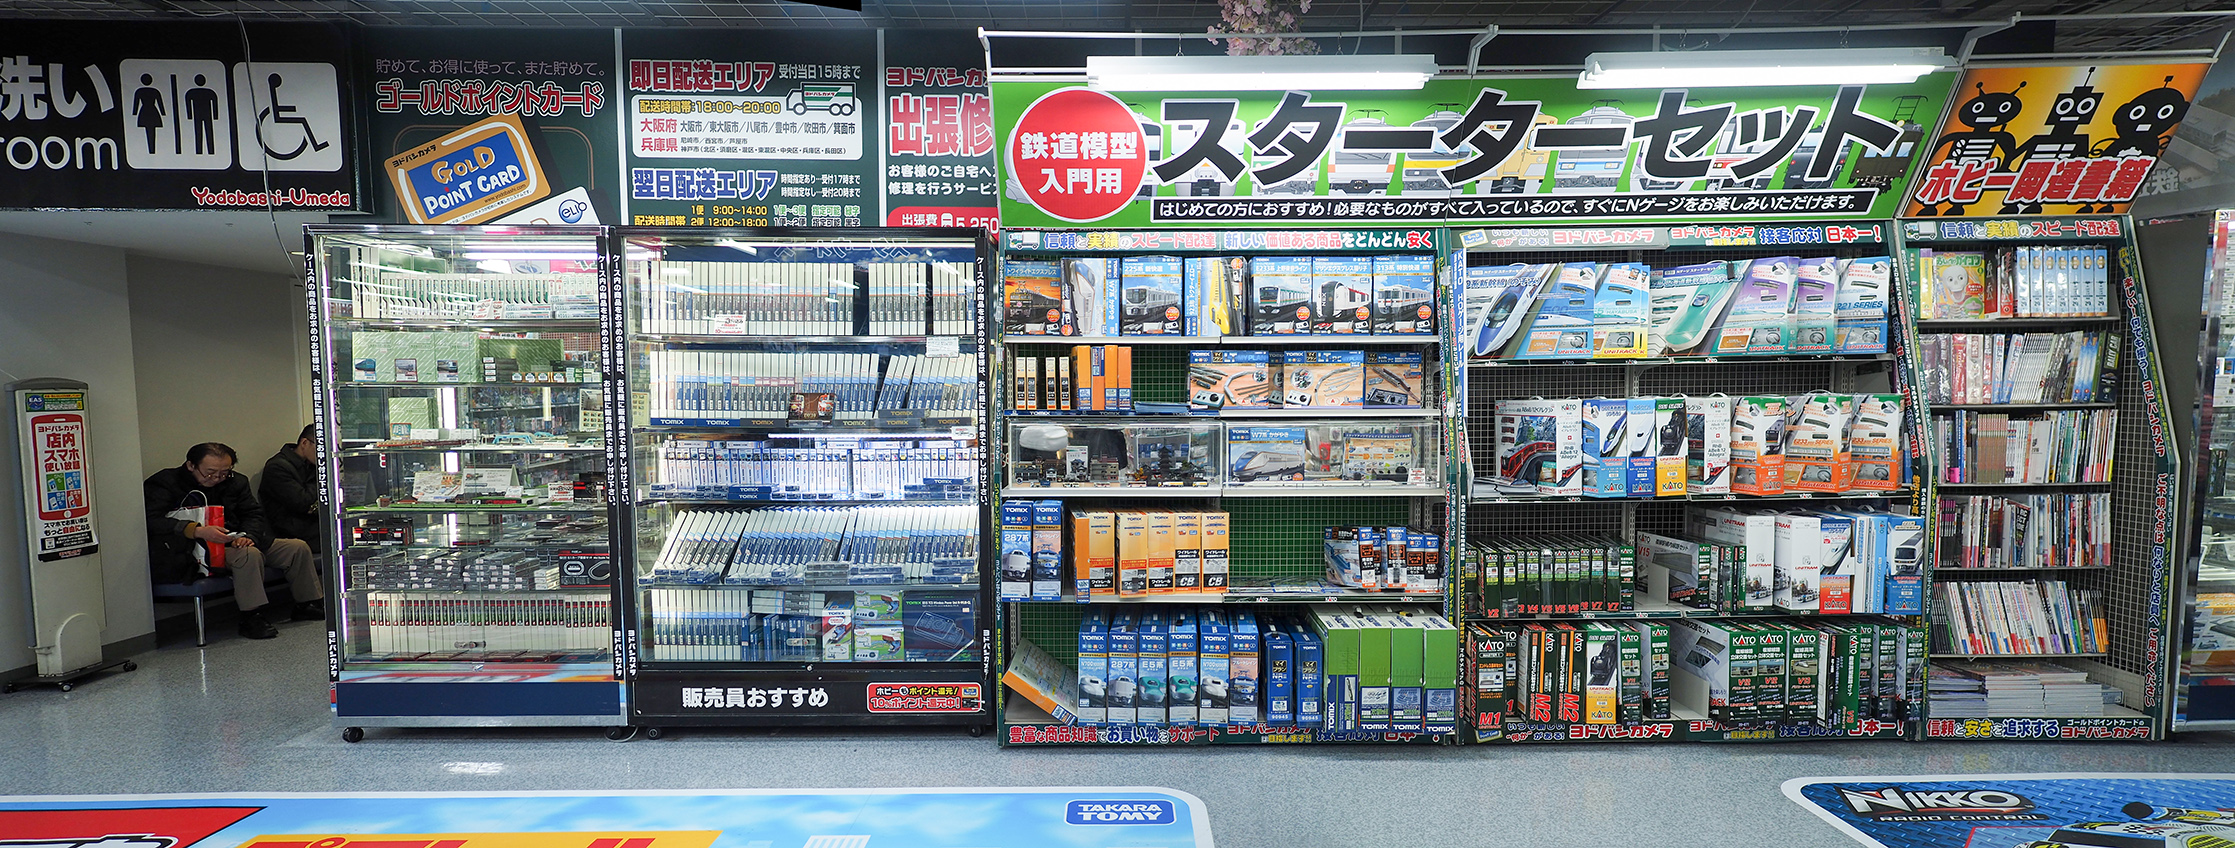
and around the corner are two aisles with track parts you probably want:
Prices here are generally good so it's my preferred location. Don't
expect great service or knowledge; the people will open the the glass
case and grab the kits you want, but don't expect to open them up and
test the trains for you, or answer detailed questions.